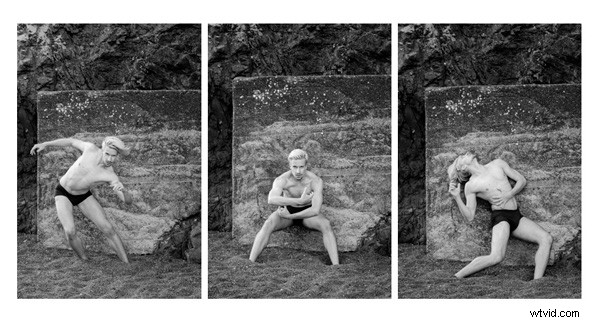
It seems that the majority of photos we see online or in print are presented individually. But if you have several strong images on a related theme, you may be able to create a stronger presentation by placing them together.
The triptych – three images laid out side by side – is a traditional way of doing this. While there is no way of creating a triptych in Lightroom’s Develop module, it’s easy to do in the Print module. It’s a simple procedure and saves you having to leave Lightroom to create the triptych in Photoshop. Then you can either print it directly from Lightroom, or export it as JPEG file to use in a photo book or upload to a photo sharing website like Flickr.
Here’s how to make a triptych in Lightroom
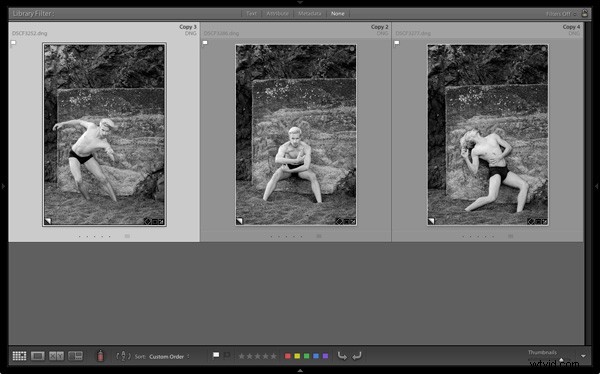
Step #1 – Create a collection of the photos for the triptych
Go to the Grid View in the Library module and create a new Collection containing the photos you want to use in the triptych. The photos should be the same orientation and aspect ratio. Click and drag to arrange them in the desired order.
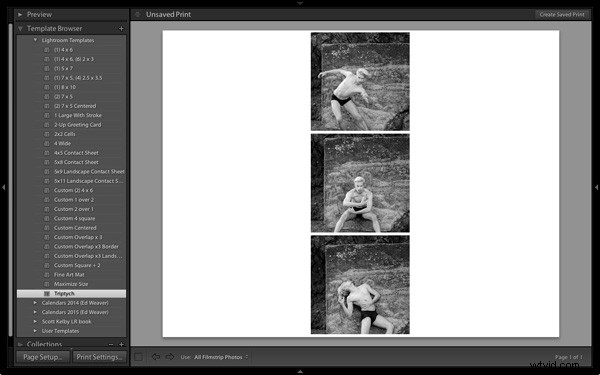
Step #2 – Setup in the Print module
Go to the Print module, click the Page Setup button and make sure the paper orientation is set to landscape. Then go to the Template Browser panel and select the Triptych template from the Lightroom Templates list.
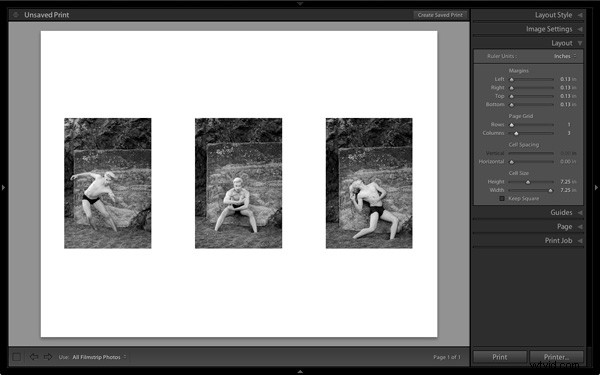
Step #3 – Crop images correctly
For some reason Lightroom crops the photos to square format and arranges them vertically, so you need to change that. Go to the Image Settings panel and uncheck the Zoom to Fill box. Then go to the Layout panel and, under Page Grid, set Rows to 1 and Columns to 3, and untick the Keep Square box. It will look something like this:
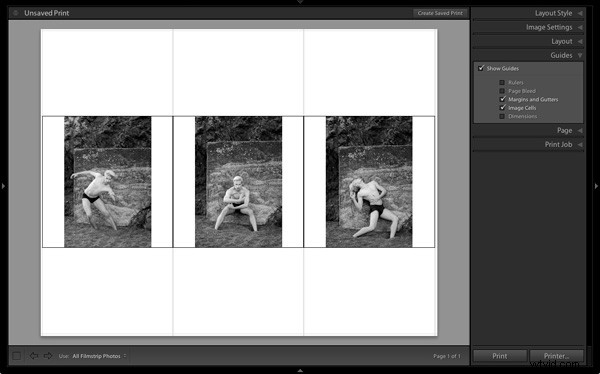
Step #4 – Show guides
To see how the layout is created, go to the Guides panel and tick the Show Guides box. The screen shot below shows the Margins and Gutters (light grey, indicating the three column and one row layout) and the Image Cells (black).
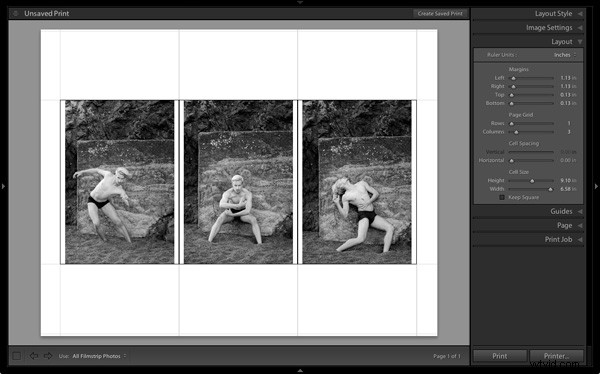
Step #5 – Size images
Return to the Layout panel and move the Height slider under Cell Size right to increase the size of the Image Cells. All three are adjusted together – you cannot make adjust them individually. You can also adjust the left and right margins to increase the space around the three photos.
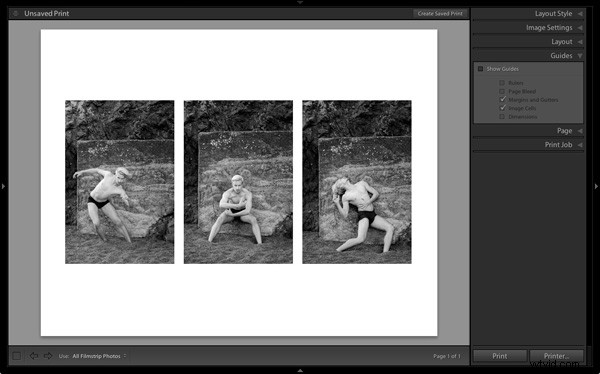
Step #6 – View without guides
Return to the Guides panel and uncheck the Show Guides box to view the photos without any guides. This makes it easier to see whether you have the right amount of spacing between images.
Step #7 – Save your print layout
 Click the Create Saved Print button at the top of the Content window and give the print a name in the Create Print window that appears. The print is saved inside the Collection of your choice, and marked by a printer icon. Now you can leave the print and come back to it later without losing any of your work. To export the triptych as a JPEG file simply click the Print to File button under the right-hand panels.
Other options
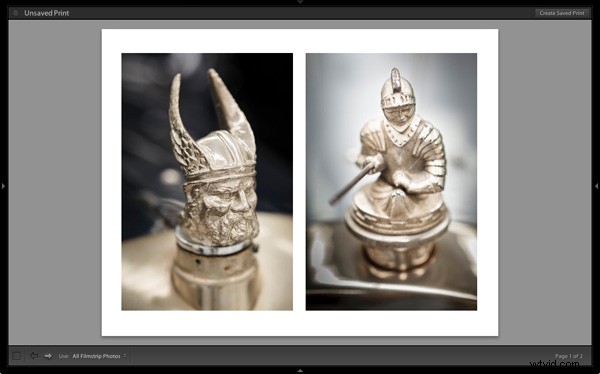
You can use the same template to create a diptych by setting Rows to 1 and Columns to 2, like so:
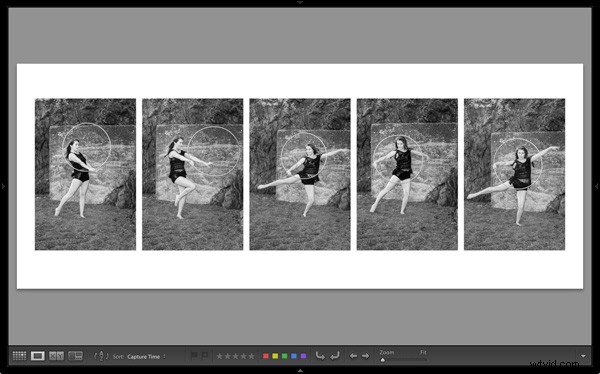
If you set Rows to 1 and Columns to 5 you can lay out five images side by side like this:
You can also explore the other templates in the Print module for alternative layouts. How do you use the Print module for laying out your photos? Please let us know in the comments.
The Mastering Lightroom Collection
 My Mastering Lightroom ebooks will help you get the most out of Lightroom 4 and Lightroom 5. They cover every aspect of the software from the Library module through to creating beautiful images in the Develop module. Please click the link to learn more or buy.