Your photos contain a range of tones from the light to dark. In this post-processing tutorial I will show you how to get the best out of the darker parts.
Let’s see how to use Lightroom to edit shadows and blacks.
What’s the Difference Between Blacks and Shadows
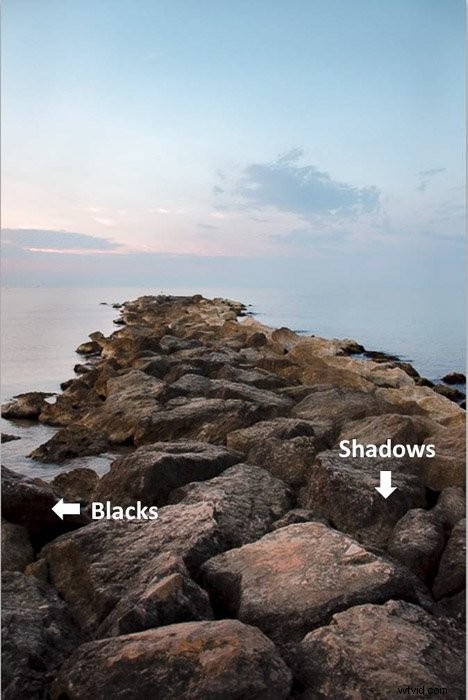
Blacks and shadows might seem similar to each other. But it is important to understand the difference between them. The blacks of your images are the areas with zero brightness. They are so dark that the details in those areas are lost. The viewer sees nothing in them.
On the other hand, shadows are the areas in the photo that are dark, but still retain some details. Moreover, shadows do not have to be black or grey, they can come in any color.
It might be a bit hard to get the shadows and blacks you want straight from the camera. Luckily, you can edit them in Lightroom!
Controlling blacks and shadow will allow you to make better use of the tonal range of the image. For example, you can modify shadows and blacks in post-processing to increase the contrast. Or you can make your image look faded instead.
You can even remove shadows that hide important parts of your photo.
Read Blacks and Shadows With the Lightroom Histogram
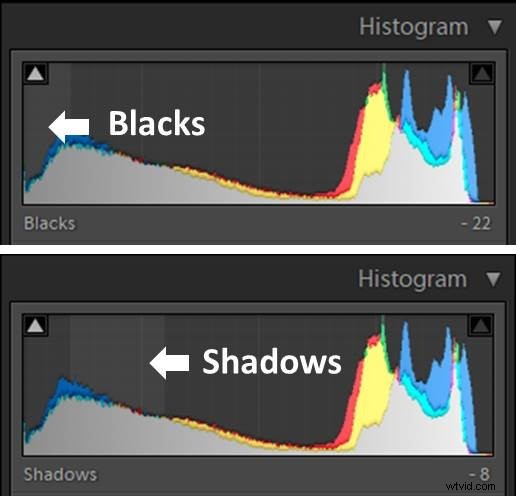
Before you start editing Lightroom shadows and blacks, it is good to identify them. A great way to do this is using the Lightroom Histogram. This is a graph that shows the shadows, highlights and mid-tones in your image.
The horizontal axis represents the tonal range. The 0 on the left side of the axis corresponds to the pure black. Blacks and shadows are displayed on the left side of the Histogram.
The 255 on the right side is the maximum value and it is the pure white. If you hover your cursor over the histogram, Lightroom will identify the tone area and mark it with a shadowed area.
You might encounter different Histogram shapes. A histogram with most of the tones in the middle and not too many shadows or highlights is considered well exposed.
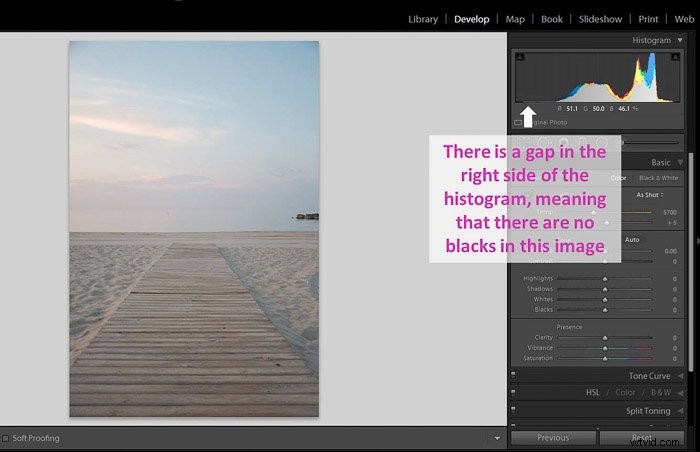
If the histogram has a gap in the side of the blacks (bars don’t get to 0), this means that it has no true blacks and few or no shadows. You will find this in overexposed photos.
If the histogram is mainly on the left, it means that there are a lot of shadows and blacks. This is typical of underexposed images.

Does it mean that these images are wrong or bad? If you were looking for an overexposed or underexposed photo for creative purposes, they are totally fine.
But if this was not your intention, you will need to fix the blacks and shadows in post-processing.
Enable the Shadow Clipping Option to Control Your Blacks
Clipping happens when you have no information in the shadows and no details at all. In clipped areas you can’t recover details because they lost the data.
You want to avoid large areas in the image with shadow clipping. That’s why Lightroom has a system that warns you.
This is how it works.
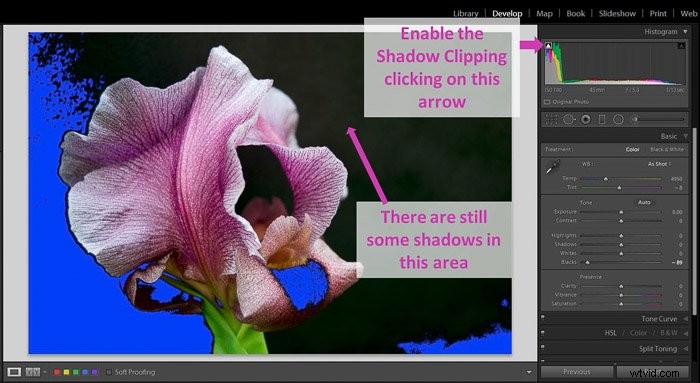
Activate Shadow clipping by clicking on the arrow icon in the upper left corner of the Histogram. Lightroom will show you the clipped blacks by marking them in blue.

But is clipping really that bad?
It depends on where the clipping is. If it is not in a key area of the image, it won’t be so relevant. Moreover, you might want to increase clipping for artistic purposes.
Control the Tonal Range of Your Image With the Exposure Slider
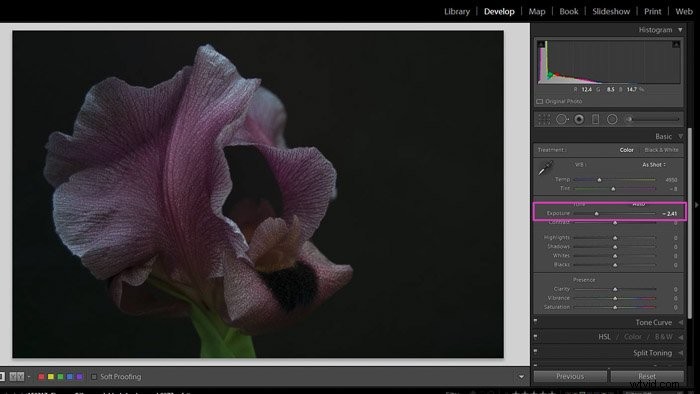
If your blacks are too black, you can increase the exposure to recover some details in the blacks.
This is also true in the opposite situation: if your blacks are not truly black (and more of a grey), you can decrease the exposure.
Keep in mind that changes in the exposure affect the overall image.
What if you want to adjust only (or mostly) the blacks and the shadows?
You can edit the Blacks and the Shadows in a more specific way using their sliders in the Basic Panel of the Develop Module. Another way to edit them is using the tone curve.
We will start with the sliders because they are easier to handle and we will look at the tone curve option later on.
How to Use Lightroom’s Shadows and Black Sliders for Better Control
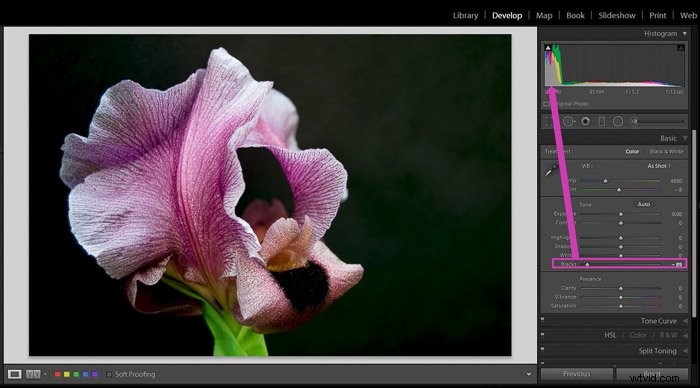
With the Black slider you can set the blackest points in the image. This slider allows you to set where the left edge of the histogram falls.
The closer to the edge, the blacker the blacks will be. If you have a big gap, your blacks will be more “grey”. If you go over the edge, you will clip the blacks.
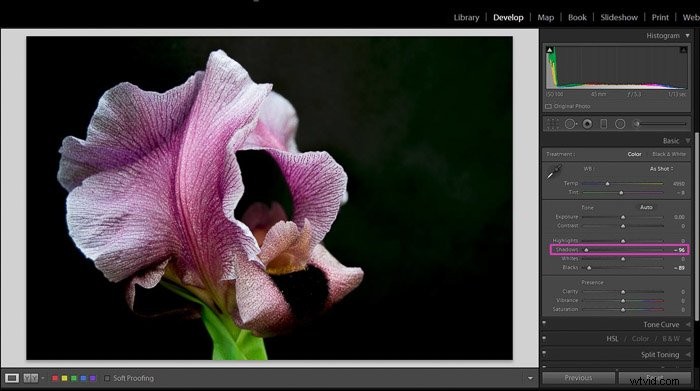
With the shadow slider you can either add or take out details in the dark areas of your image (aka Shadows).
With this slider you don’t move the edge of the Histogram.
I suggest you first set the black point and then work on the shadows. With the black slider, you set the limit of the Histogram.
Shadows are between the limits of the Histogram, so it makes more sense to set the black edge first.
Remove Local Shadows With Lightroom Basic Tools
How do you remove shadows in Lightroom that affect just one area of the image?
You can do it using either the brush tool or the radial filter.
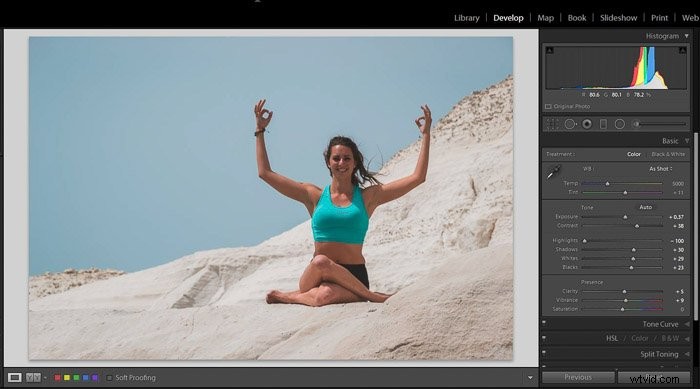
I will show you how to do it with this portrait. It was taken at midday and the model has a lot of shadows, especially on her face.
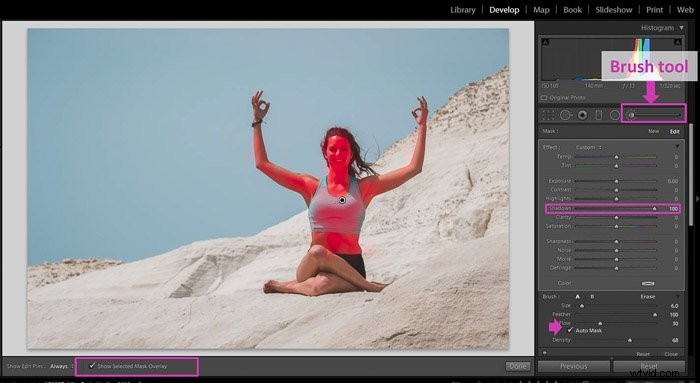
Removing the shadows with the Lightroom brush tool is easy. First you need to select the tool in the Develop module. It is right under the Histogram.
Brush the area you want to edit. In this example that is the model’s body. It is handy to check the box “Show selected mask overlay”. Lightroom will mark the area you’re brushing. Selecting “Auto Mask” will also make your life easier because Lightroom will confine the selected area to just similar ones.
Once you are happy with the brushed area, uncheck the “Show selected mask overlay” box to be able to see the photo clearly and adjust the shadow slider as you need.
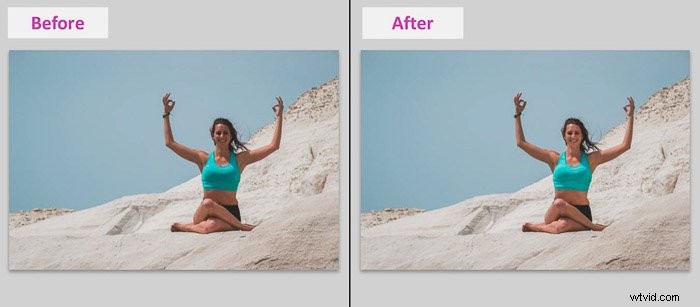
Here is a before and after comparison using the brush tool to remove the shadows on the model.
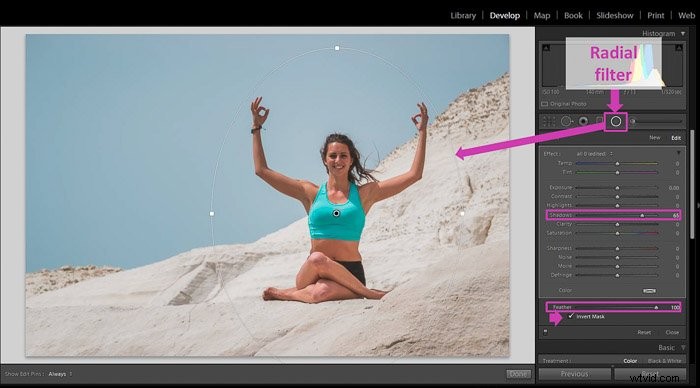
You can also remove shadows using a radial filter. Select it in the Develop module. You’ll find it right next to the Brush tool.
Draw a circle around the area you want to remove the shadows from. Now any change you make using the slider will affect the outside of the radial filter. Since we want to adjust the inside of the filter, check the “Invert Mask” box.
To remove the shadows, just adjust the shadows slider moving it towards the right. To make the edits more natural looking, it is good to feather the filter using the “Feather” slider.
I usually feather it to 100 (the maximum), but you can experiment with it.
Local adjustments in the shadows might cause a loss of contrast in the edited area. If this is your case, try to add a bit of contrast or clarity to compensate by moving their sliders towards the right.
Make Your Blacks Matte to Give Images a Faded Look
If you want a faded look for your image (like film), make your blacks matte. This is easy to do using the Tone curve tool in Lightroom.
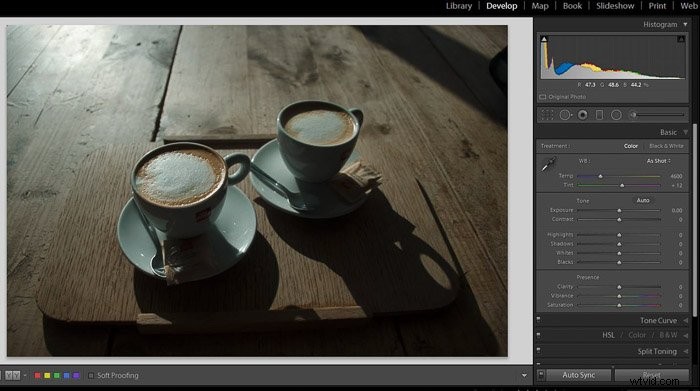
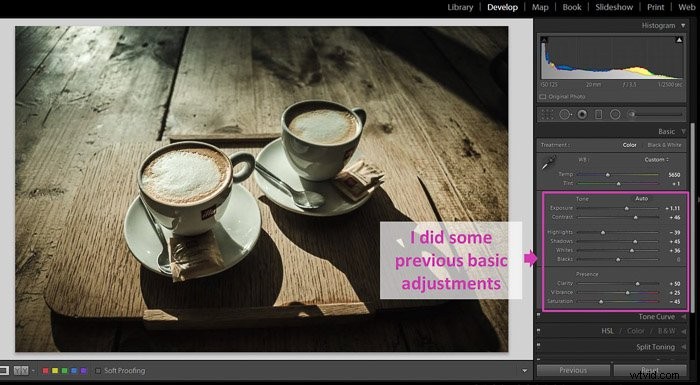
1. First, do all the basic adjustments you need for the image.
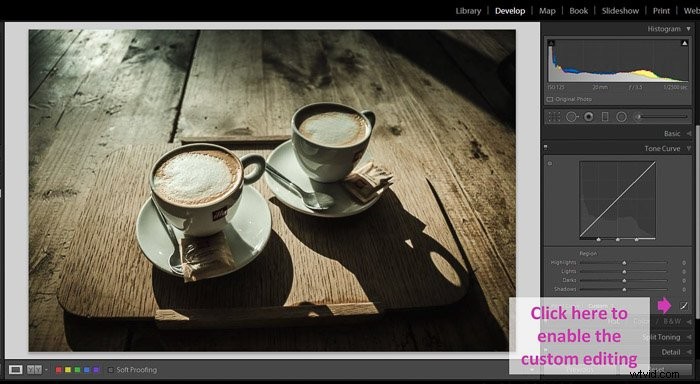
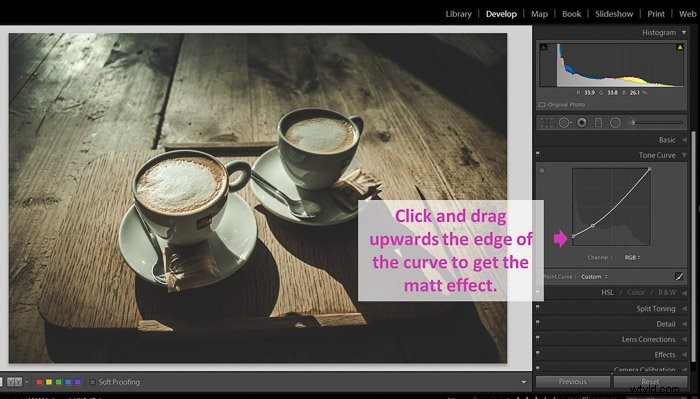
2. The Tone Curve is right under the Basic panel. You need to enable the custom edit option by clicking on the little curve icon at the bottom right corner of the panel.
The adjustment sliders will disappear.
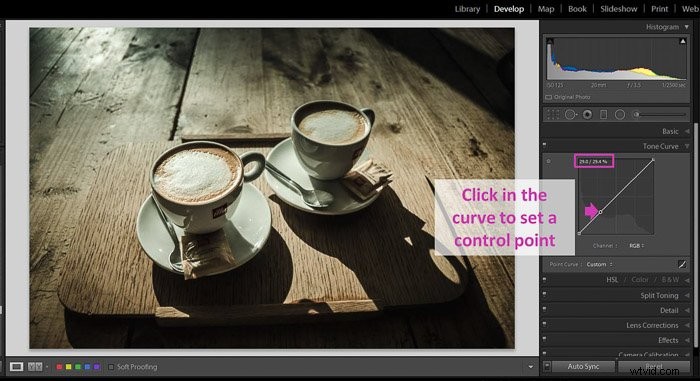
3. Place a control point by clicking on the curve. I usually place it at around 25-35%. You can see the percentage numbers when you click with the mouse over the curve.
If you make a mistake and you want to remove the point, double-click on it.
4. Click and drag up the edge of the curve. The higher the edge, the more faded the blacks will be. How much you put the curve up will depend on your personal taste and the effect you want to achieve. Experiment a little.
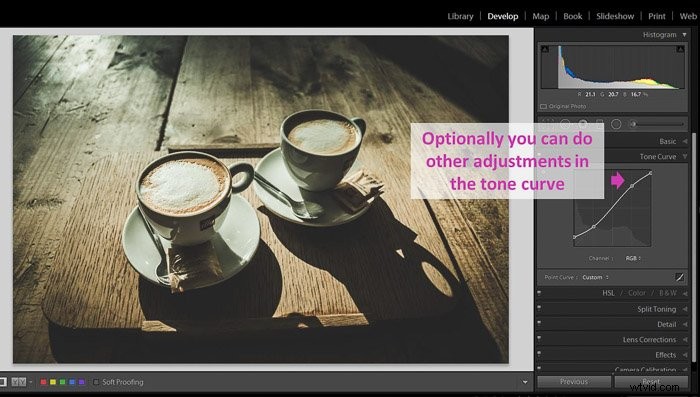
5. Do any additional adjustments to the curve, such as fading the highlights a bit by decreasing the other side of the curve.
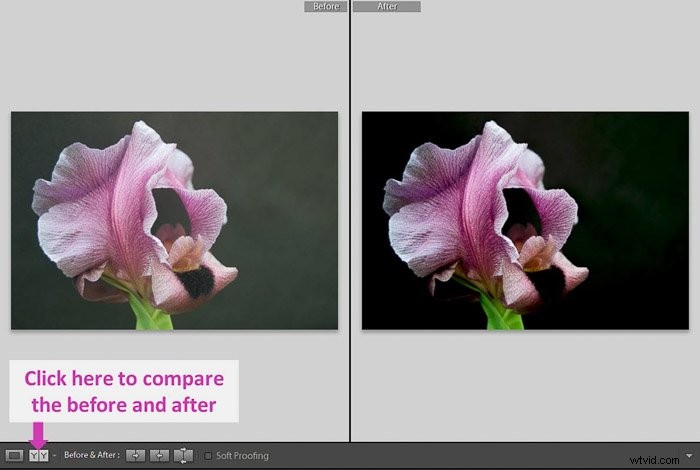
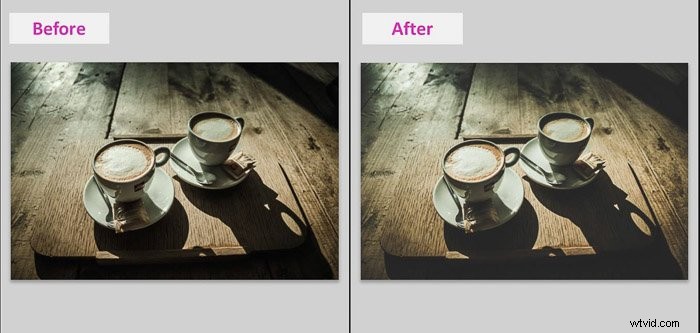
This is the before and after result.
Conclusion
Understanding the important role that blacks and shadows have in your images will change your whole editing workflow. You will be able to modify the tonal range of your images just by setting the black point, or remove shadows and give your images a matte effect.
There is a lot of information in the dark parts of an image, so don’t forget them when you’re editing.