One of the really handy features of Lightroom is its ability to create web slideshows quickly and easily. There are various options you can use and I’ll show you how to use the SimpleViewer slideshow which is good looking and very functional.
Step 1
To get started, prepare all your images and save them as a collection. Use a Collection rather than a Smart Collection so you can arrange the images in the order that you want to see them in the slideshow by dragging them into position using either the grid or the filmstrip.
To create a collection, select the images to use, click the (+) plus symbol to the left of the Collections panel and choose Create Collection. Type a name for it, enable the Include Selected Photos checkbox and click Ok. You can then drag and drop additional images into the collection and order them as desired.
Step 2
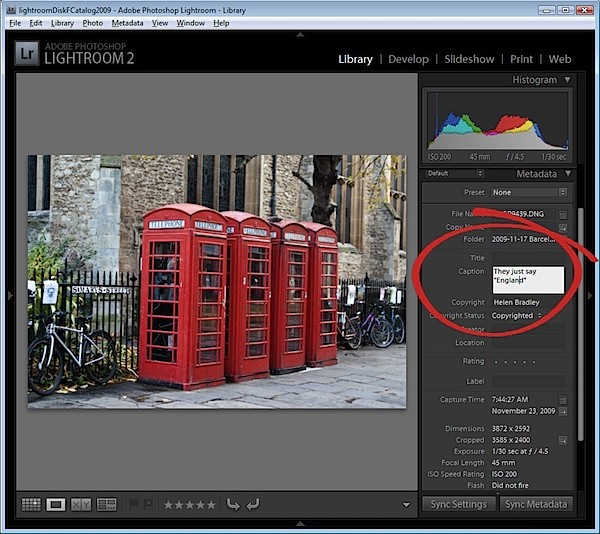
In Library view add a caption to each image so you can include the caption in the SimpleViewer slide show. To do this, open the Metadata panel and locate the Caption box. Type a caption for the first image, move to the next image and type a caption for it and so on.
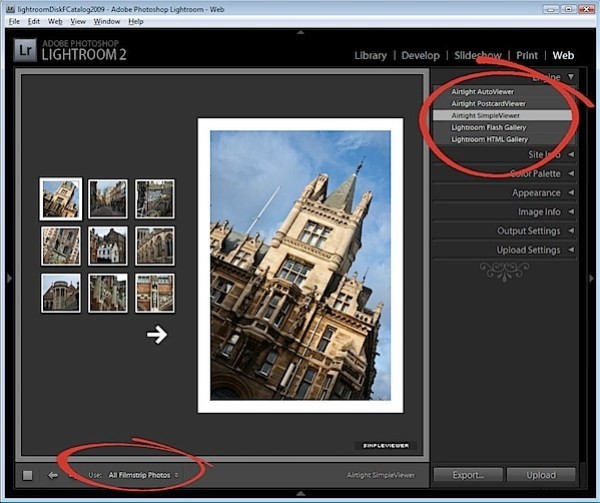
Step 3
Click to open the Web module and, from the Engine options in the top right of the screen, choose Airtight SimpleViewer. This is an attractive and functional slideshow tool. From the options across the bottom of the screen choose All Filmstrip Photos.
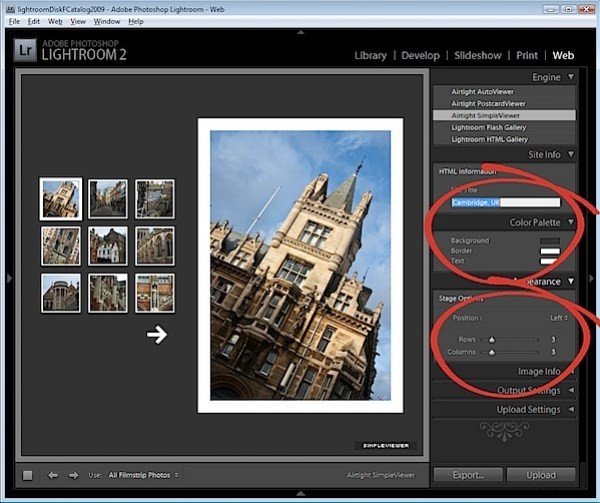
Step 4
In the Site Info area type the title to use for your slideshow, this is the page title and it appears in the browser title bar. In the Color Palette options, set a background color and border color for your images and a text color. In the Appearance Options select the position of the thumbnails and the number of rows and columns of thumbnail images. You may find that by increasing the number of rows beyond 3 you will lose the captions so it is best to use a smaller number of rows so you have the benefit of including captions.
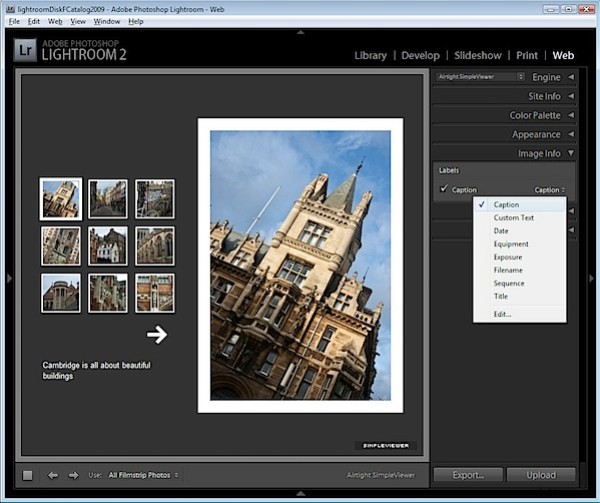
Step 5
In the Image Info panel select the Caption checkbox and then from the dropdown list, select what you will use as captions. If you followed step 2 and typed caption information in the Metadata then chose Caption for this option.
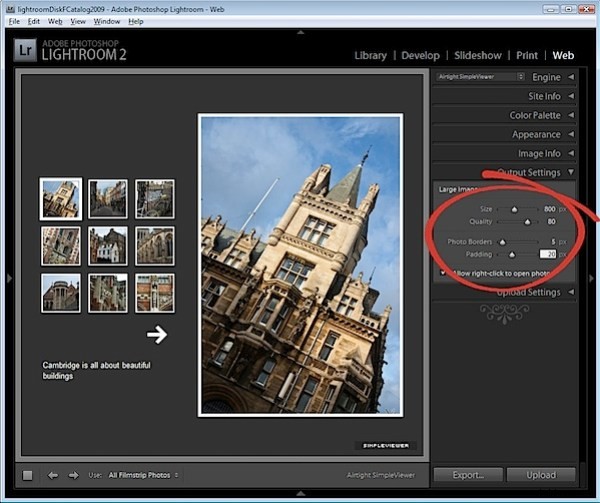
Step 6
In the Output Settings panel, specify the size of the larger images which is the size of the selected image in the slideshow. You can also specify the quality of that image. The Photo Borders option controls the size of the border around the images, which by default is set to 20, but which you can increase or decrease as desired. The Padding Value controls the offset of the image from the remainder of the page. You can enable or disable the option to allow the viewer to right click to view a photo.
Step 7
In the Upload Settings area select the FTP server dropdown list click Custom Settings > Edit and enter the details for the ftp account for your website. You must type your server name, your user name and password – you can, if desired, include the password in the preset so that you won’t have to type it each time. Include the server path for storing the files and, if necessary, adjust the protocol port and the mode used for data transfer although these defaults should work in most circumstances.
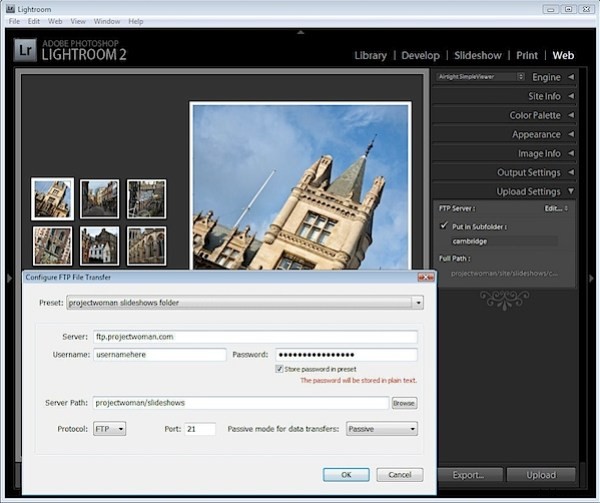
Once you have created your settings, from the Preset dropdown list, select Save current settings as new preset so that these will be available next time you use the program.
Step 8
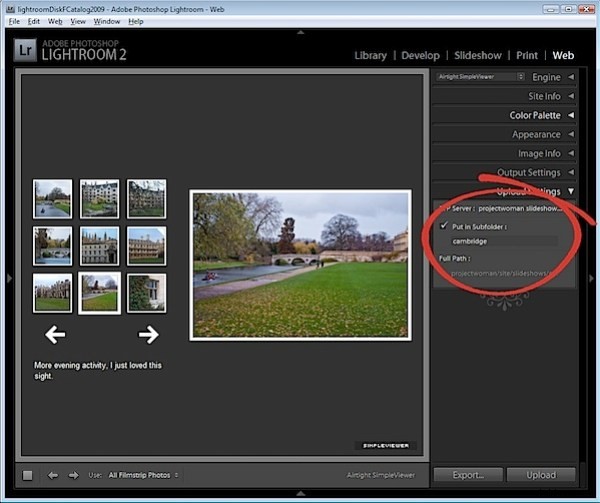
By selecting a subfolder, you can separate the slideshow and its files from other files on your server. This is a good idea as it will eliminate any possibility that files that you upload will overwrite or conflict with files used elsewhere on your website.
Step 9
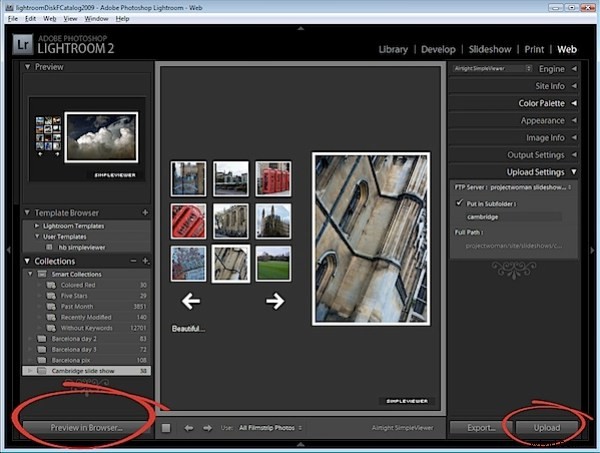
Click Preview in Browser in the bottom left of the screen to preview the slideshow or simply click the Upload button and upload the files to your server.
Step 10
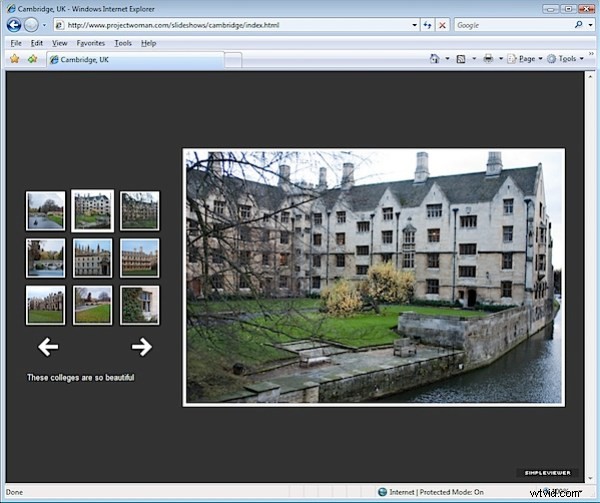
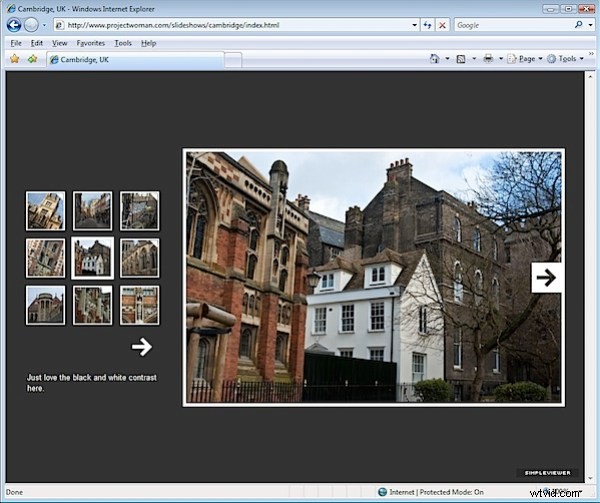
When the upload is complete, launch the slideshow by pointing your browser to your website to the folder that you created and to the file index.html.
Step 11
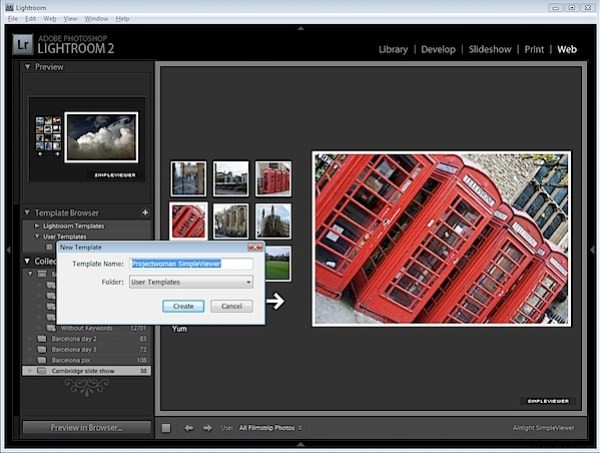
Once you have checked your slideshow and if it is all working correctly you can save the template by clicking the plus sign opposite the Template Browser and create a new template in your User Templates folder. This will automatically give you access to your preferred slideshow setup at any time in the future. All you will need to do is to change the Slide Title and the Folder in which the images should be saved on your server.