 Selective coloring is a post-processing technique where you convert an image to black and white, but leave part of it in color. It has a bad reputation because it can be used to create some truly horrendous images where the only thing on display is the photographer’s lack of ability.
But the good news is that you can use selective coloring in a far more sophisticated way to create some interesting images. The key is to keep it subtle and to use it only on suitable photos. I like to make selective color portraits, but of course you are free to experiment with other subjects as well (but please, no flowers).
I prefer to keep my workflow within Lightroom whenever possible as it saves hard drive space and makes the entire photography workflow much simpler. The first two techniques below are for Lightroom, the third uses Silver Efex Pro 2, a free plug-in you can download from Google.
1. Selective color in Lightroom using the Adjustment Brush
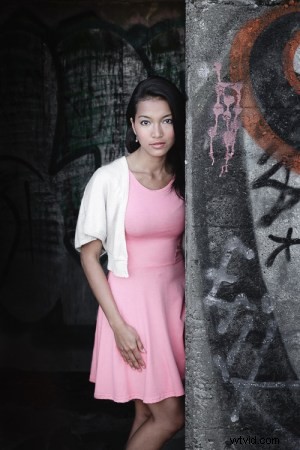
The first example, below, shows what you can do in Lightroom. This is the portrait that I am going to work with for this technique.
The simple background means it’s ideal to use for a selective color portrait.
Start by going to the Develop module and activating the Adjustment Brush tool. Paint in the background to create a mask (as shown below).
The mask is shown here in red.
It may help to zoom in and use a smaller brush around the model for a more accurate mask.
View zoomed in so you can mask more accurately around the model.
Go to the Adjustment Brush sliders and set the saturation to zero.

That removes all color from the background, giving this effect. Don’t forget you don’t have to move Saturation all the way to zero – you can simply lower it to reduce the color intensity of the background. Play around and see what works best for your image.
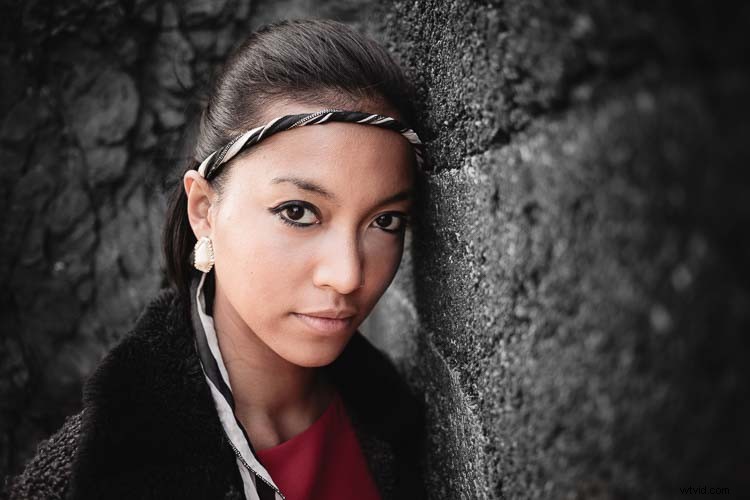
It’s important that you chose the correct image for this technique to get the best effect. There are several reasons it works well with this portrait.
- The background is monochromatic. It wouldn’t work as well with a colorful background.
- The rocks in the background have plenty of texture, which looks good in black and white.
- Some of the model’s clothes are black or charcoal gray, so introducing this color into the background fits with the overall aesthetic of the image.
2. Selective coloring in Lightroom using the HSL
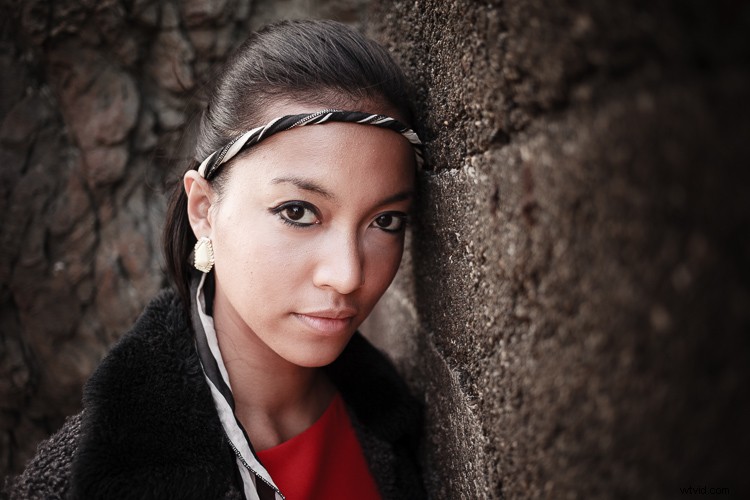
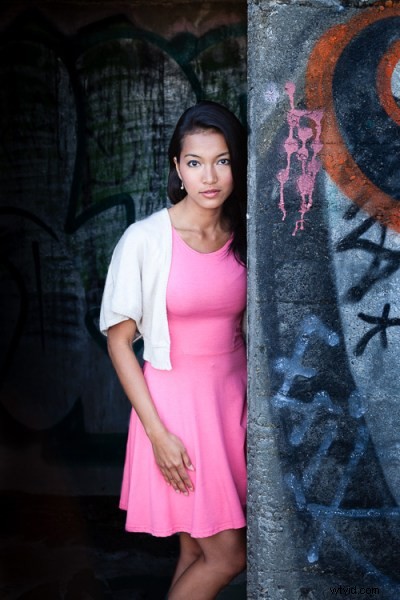
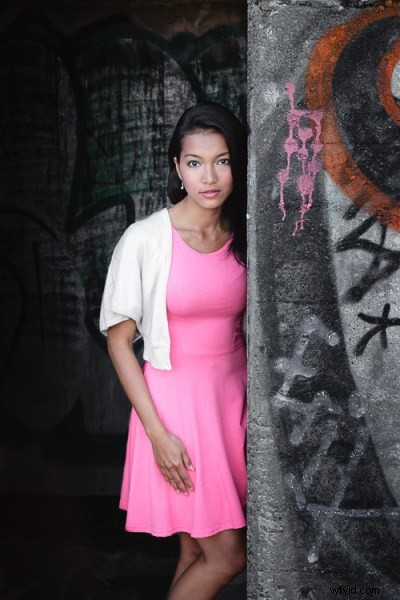
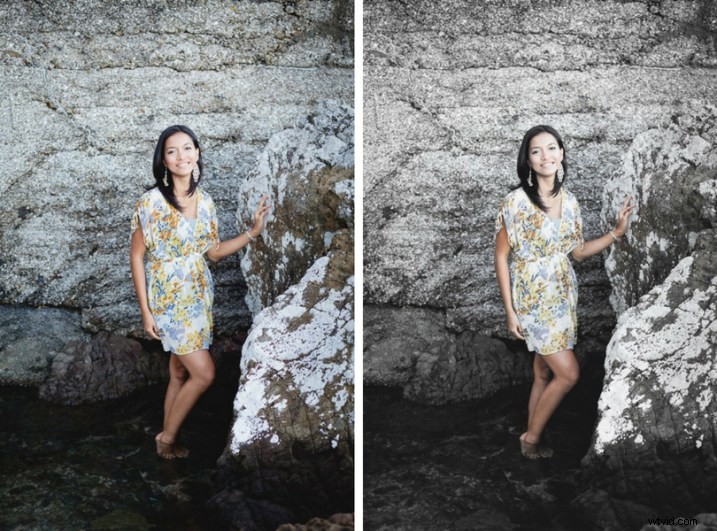
The next portrait (below) has a more colorful foreground. I’m not going to remove the color completely, but I would like to make it more monochromatic. That will help the subtle colors in the model’s dress and skin to stand out.
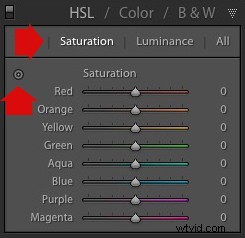
Go to the HSL / Color / B&W panel in the Develop module. Click the Saturation tab, then the Targeted Adjustment tool (marked below) to activate it.
Move the cursor over part of the image that you want to desaturate. In this case, the foreground has a blue cast that I want to remove, so I chose this spot (marked by the small cross circled in red below).
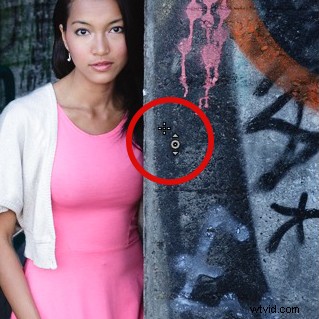
Click and hold the button as you move the mouse downward. Lightroom reads the pixels under the cross representing the Targeted Adjustment tool and reduces the saturation of those colors across the entire image. The matching color sliders in the HSL panel move to the left. When I did this, Lightroom set Blue to -80 and Purple to -10.
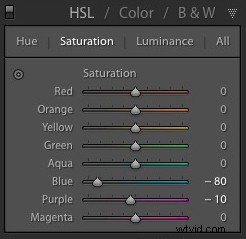
This is the result.
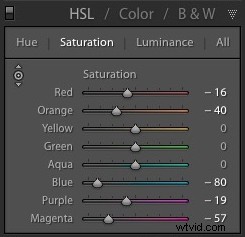
I took it further by repeating the technique. This time using the Targeted Adjustment tool on the pink and orange paintwork on the wall, resulted in the following saturation settings.
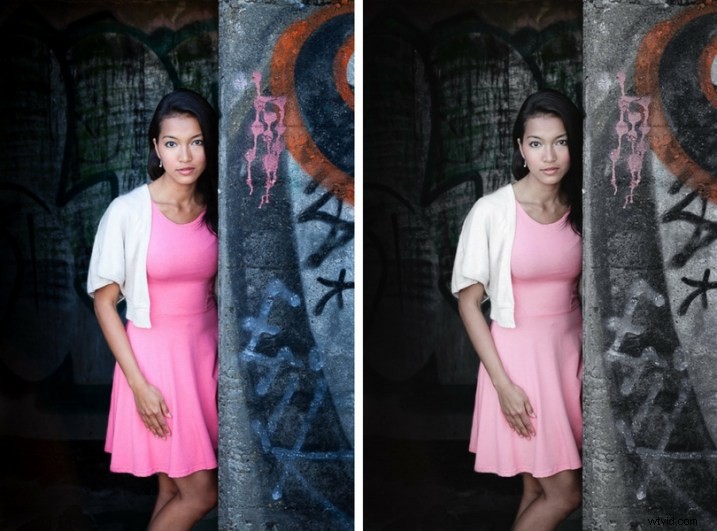
This is a before and after of the final portrait showing these extra adjustments.
Notes:
One key thing to be aware of is how the colors in your photo are related. In the photo above reducing the saturation of the pink paint affected the model’s dress, which is also pink.
Reducing the saturation of the orange paint also affected the model’s skin. In this case, it worked out okay, but you should always zoom in and double check, especially when changing the color settings of Red, Orange or Yellow hues, as this can have some strange effects on skin tones.
3. Selective coloring using Silver Efex Pro 2
Silver Efex Pro 2 is one of my favorite black and white plug-ins. I’d like to show you how to use it for making a selective color portrait with a subtle effect that almost looks like an old style hand-tinted black and white print.
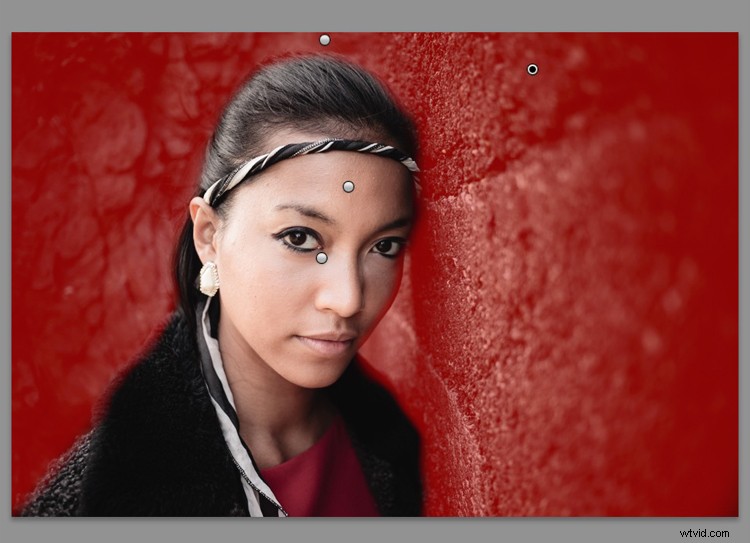
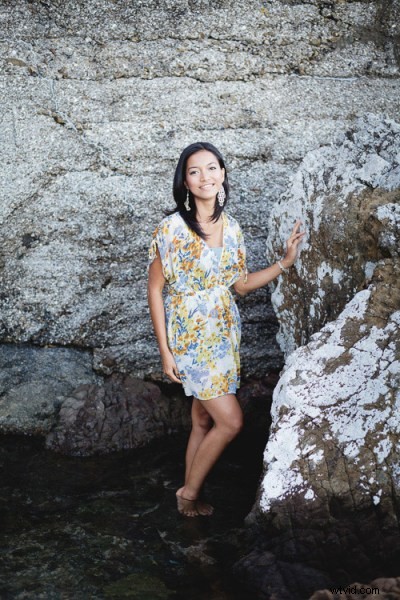
This is the portrait I’m going to use. It’s a good photo to use as the colors are subtle.
If you don’t have Silver Efex Pro 2 already, you can download it for free from the official Nik Collection website.
Once it’s installed go to Lightroom’s Library module and select the photo you want to edit. Go to File > Edit In > Silver Efex Pro 2 (you can also find this option by right-clicking the photo).
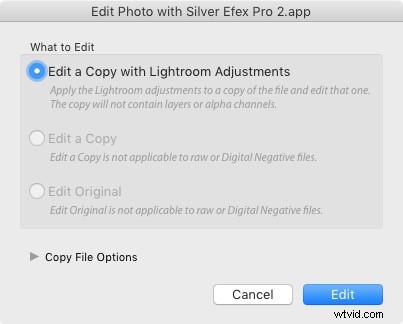
Select the option that says “Edit a Copy with Lightroom Adjustments” in the next window (it will probably be the only one you can select) and click Edit. Lightroom converts the Raw file to a TIFF file and opens it in Silver Efex Pro 2.
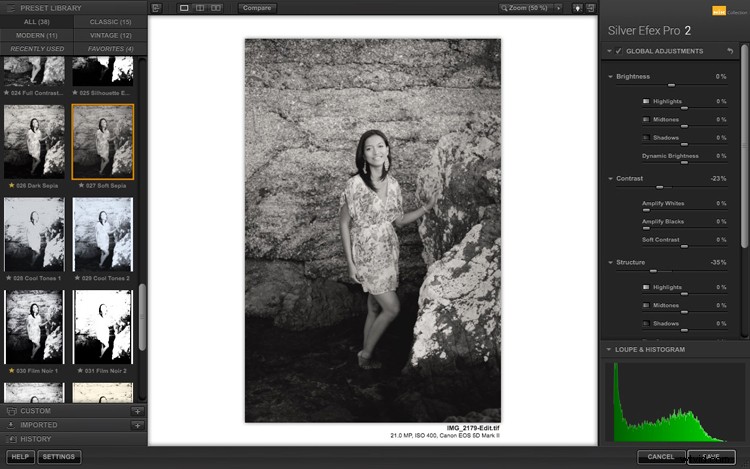
Your first task in Silver Efex Pro 2 is to decide whether you want to stay with the default neutral black and white conversion or use one of the built-in presets. I selected the Soft Sepia preset (below), then made some adjustments to the tonal values until I was ready to apply selective coloring.
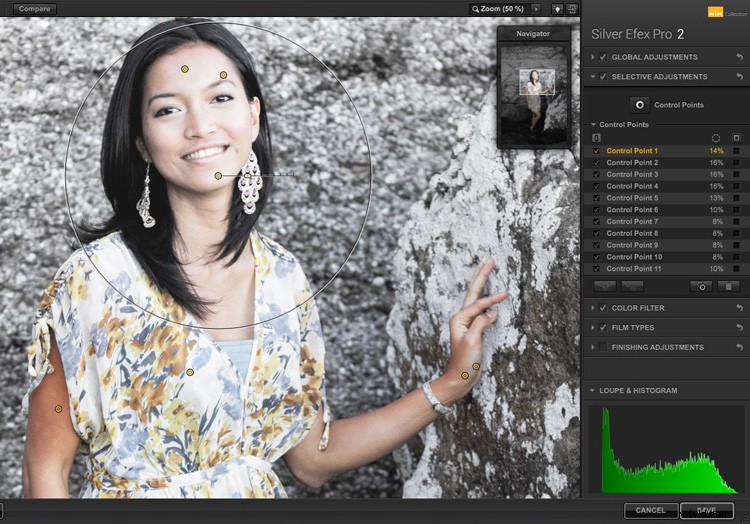
In Silver Efex Pro 2 you make local adjustments by going to the Selective Adjustments panel and adding Control Points. This screenshot shows seven of the Control Points that I added to this photo. Each one is depicted by a yellow dot.

Using Control Points
Control Points work by analyzing the color and brightness of the pixels underneath them, then applying the selected effect to the pixels within the circle. In this photo, I moved the Selective Coloring slider (SC) to the right to bring the colors back to the model, but not the background.
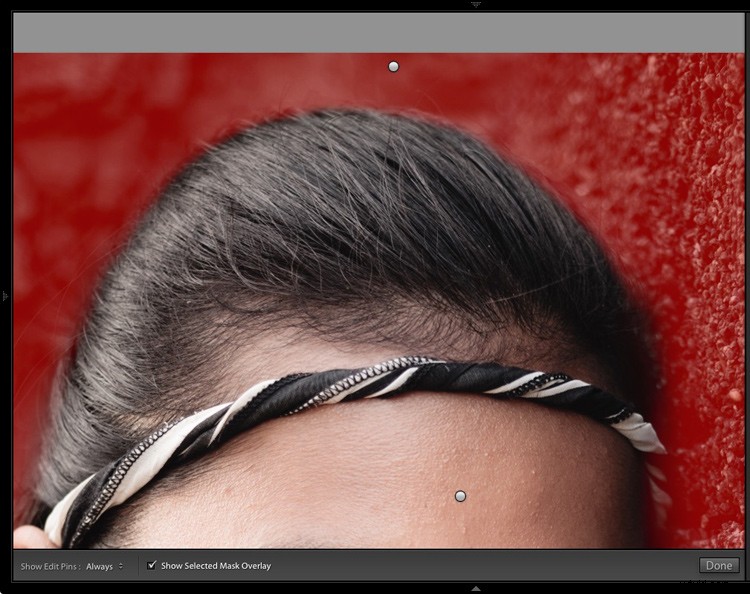
You control the size of the circle by moving the top slider. Silver Efex Pro 2 displays a circle to show you the area affected by the Control Point.
Add multiple Control Points with circles that cover the model but as little of the background as possible. When you are finished, click the Save button. Silver Efex Pro 2 closes, saving the new TIFF file in the same folder as the original file and adding it to the same Collection in Lightroom.
Here’s the before and after with portrait after selective coloring in Silver Efex Pro 2. Notice it’s very subtle.
Conclusion
Hopefully, this article has shown you how to use selective color in a subtle and sophisticated way that moves on from the garish examples you have probably seen online. Do you have any questions about these techniques? Let me know in the comments below.
If you’d like to learn more about Lightroom, then please check out my popular Mastering Lightroom ebooks.