One of the nice things about Lightroom is that it lets you view before and after versions of your image. Lightroom can do this so easily because it does not make permanent changes to your image as you work on it. Instead, Lightroom keeps a log of the edits that you have made and only applies them to the image when you export the image.

Use the Before/After options in Lightroom to check that the changes you have made to your image to make sure that you’re headed in the right direction.
Here are some ways to harness the comparative Before/After power of Lightroom:
Step 1
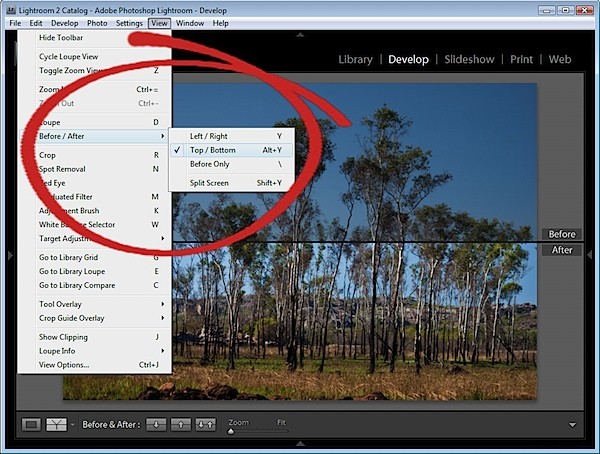
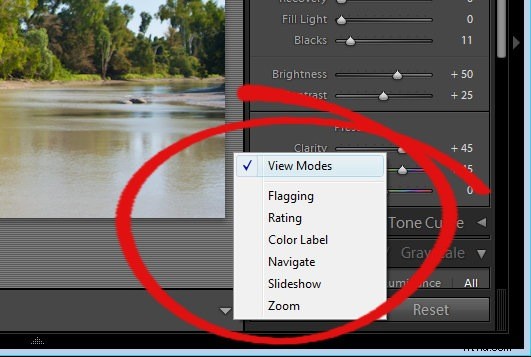
If you are in the Develop module you’ll need to make sure that View Modes are enabled so that you can see the necessary icons. To do this, click the small triangle under the image to the right in the Develop module and choose View Modes.
Step 2
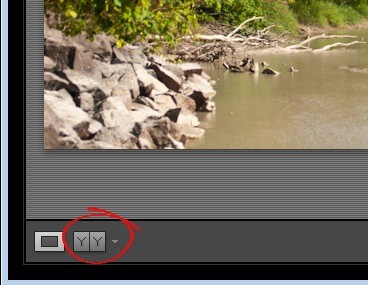
You will now see a button which has Y|Y on it. Click this to see the before and after views of your image.
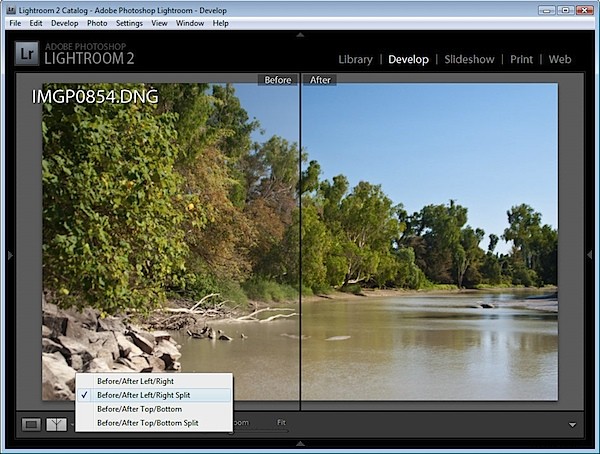
Step 3
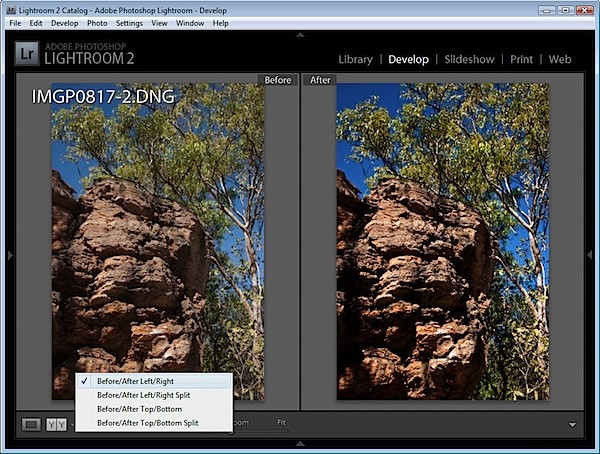
From the dropdown list you can choose from multiple ways to see the before and after views. Before/After Left/Right shows the before and after views side by side – this works well for portrait orientation images.
Step 4
The Before/After Left/Right Split shows a single version of the image split so that the left side of the image is the before view and the right side is the after view.
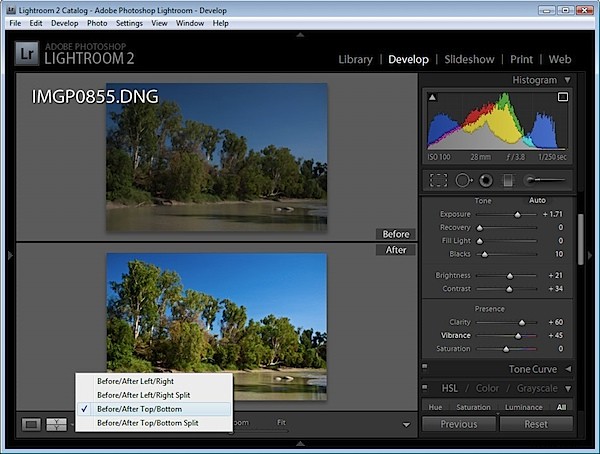
Step 5
The Before/After Top/Bottom option shows the before image at the top and the after image at the bottom – this works well for landscape orientation images.
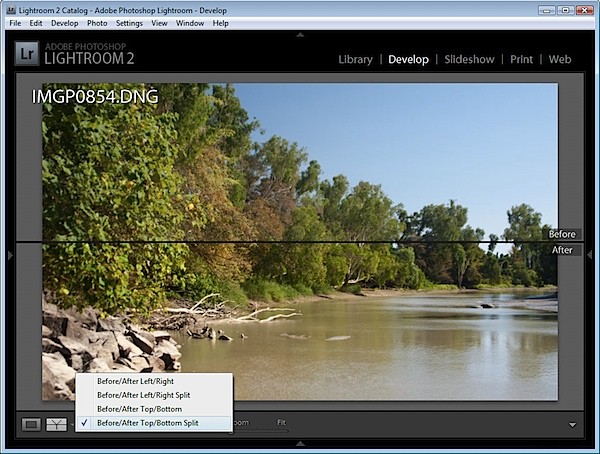
Step 6
The Before/After Top/Bottom Split view shows a single version of the image split so that the top half is the before version and the bottom half is the after version.
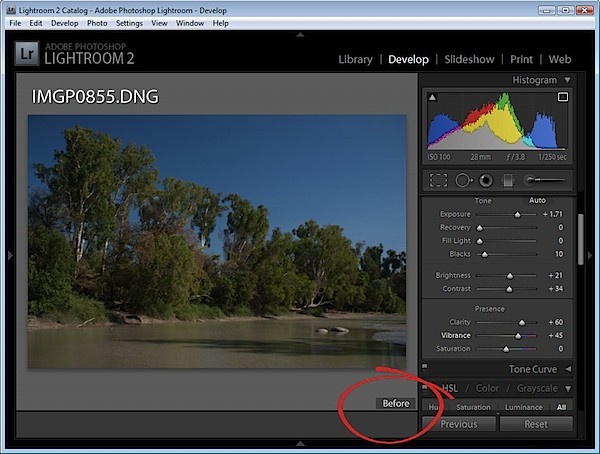
Step 7
You don’t have to use the buttons, however, and any time as you’re working on an image you can switch between before and after view by pressing the backslash (\) key. The image displays an indicator in the bottom right corner if you are seeing the Before version – no indicator appears for the After version.
Step 8
Sometimes you’ll want a “somewhere between before and after”/after comparison – such as when you are sharpening an image. In this case you may want to compare the image before sharpening and after sharpening but the before/after options won’t allow for this. ?
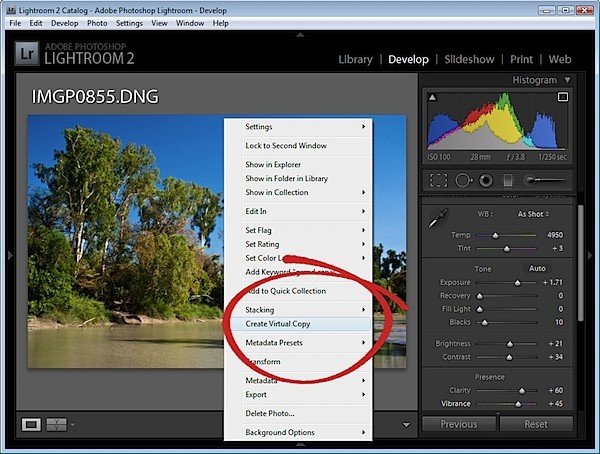
There are two workarounds. One is to create a Virtual Copy before you apply the sharpening to the image. Right click the image and choose Create Virtual Copy. This is your new “before” image and you can now apply the sharpening to it. When you perform a Before/After comparison you will now see just the result of the sharpening and not the entire image correction.
Step 9
The second works well when you’ve already applied the changes and want to compare the after with a previous history state. Locate the history state in the History list that you want to compare the final version with. Right click it and choose Copy History Step Settings to Before. This changes the ‘Before’ view of the image so it looks like the current image on the screen. Click in the History to return to the adjustment you want to compare and now, when you compare before and after you’re really comparing after with something more meaningful.
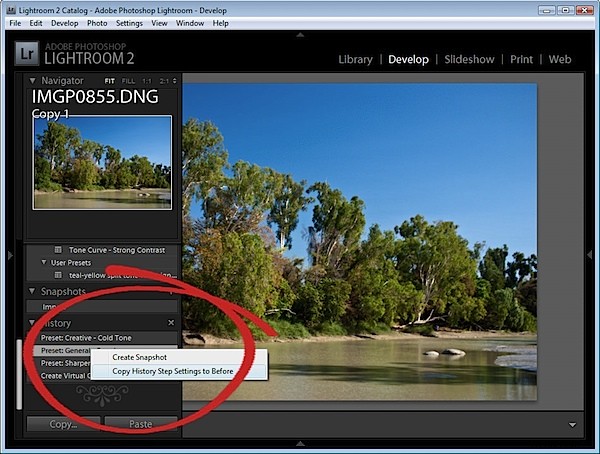
When you copy the settings like this you’re not removing any history so you can still revert the image to an earlier version using the history list.
Step 10
The Before/After view options are also selectable via shortcut keys and from the View menu.