Lightroom is a powerful and complex program. It’s great to have shortcuts and fast ways to do things you do often. Here are ten Lightroom tips to help you out:
Note: if you don’t yet have Lightroom check out this special deal Adobe currently have for dPS readers.
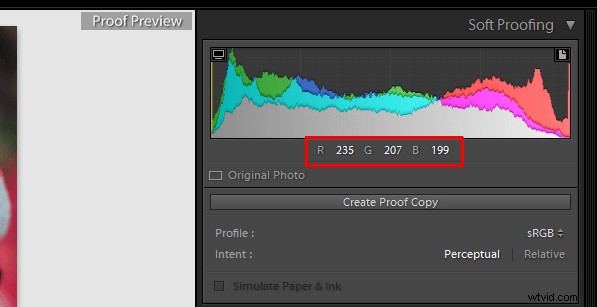
#1 Check RBG values
Did you know that you can check the RGB value of the pixels for an selected image in Lightroom? When you are working in the Develop module press S on the keyboard which will show you the soft proofing for the image. Hover the cursor over the image area, and it will display the RGB values (not percentages) of the pixel where your mouse is being located, look just below the histogram. (See the screenshot below)
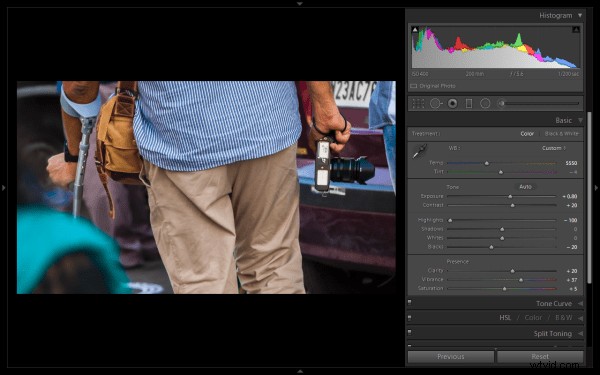
#2 Full screen mode
2. Making a clutter free workspace will not only provide you more working area but it will be distraction free as well. To enable full screen (without even the menu bar and the window frame )- press Shift+F (in LR4 and earlier just hit F). Pressing that combination repeatedly will give you another two options. Try it out for yourself. I use this all the time.
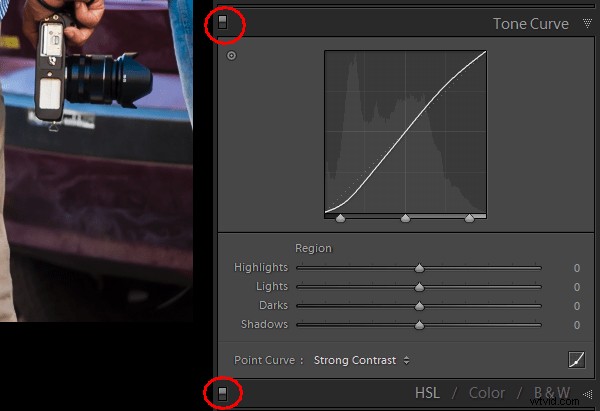
#3 Preview effects by panel
You can turn off one particular sub-panel’s effect on the image. Click that little button to see the effect of that particular panel on the image toggle off and on.
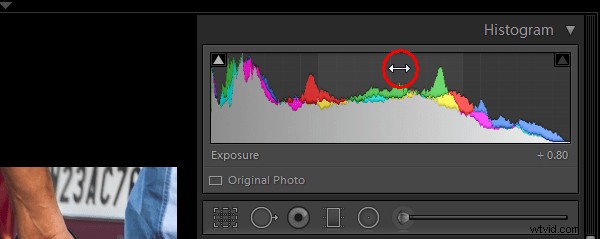
#4 Work with the histogram
4. If you are person who works based on the histogram, you can work directly on the image’s histogram itself inside Lightroom. Once hover your cursor over on the histogram, it will change into a double-sided arrow on specific areas. Then you only have to click and drag to the right or left, as you wish based on what values you want to change (Black, Shadows, Exposure or mid tones, Highlights, or Whites).
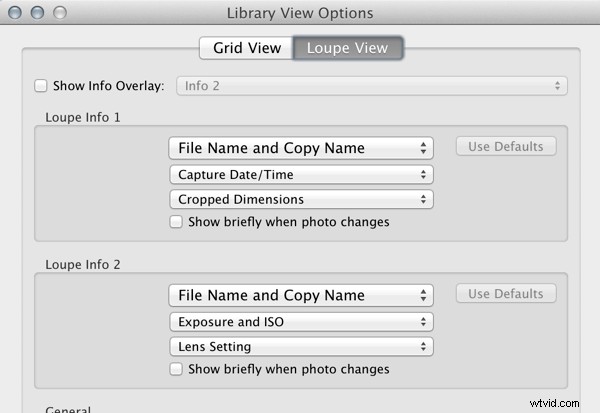
#5 View file properties
If, while working on your photograph, for whatever reason you want to check the image’s properties including size, format, you can do so by pressing I (it will display the size of the file, file type, date taken, lens model). Pressing I one more time will provide you another set of properties, clicking I again will remove all the details from displaying.
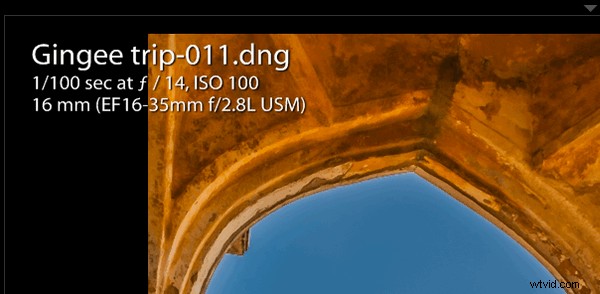
If you do not see all of those options go to View > View Options (Cmd+J) where you can customize what is displayed in the Louse overlay mode using this pop-up dialog box.
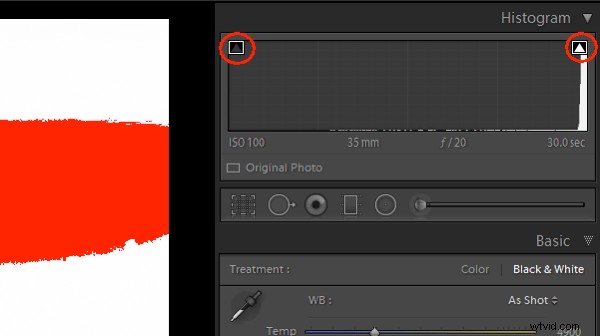
#6 Clipping warnings
To avoid processing outside of your image’s dynamic range, while working in develop module clicking J (keyboard shortcut) will activate the clipping warnings for highlights and shadows. If you push exposure towards the right far more, a red colour warning will be displayed on the region of the photograph where it is overexposed, Conversely if you bring down the exposure (for whatsoever reason) a blue colour warning will be displayed on the region of the photograph where it is underexposed. (Below screenshot is an example of overexposure)
#7 Unflagging
In Library module, when you are flagging photographs for sorting purposes, if you mistakenly press pick (p) instead of rejecting (x), stay calm and press (u) for unpick or unflag. It will remove the flag, now you can mark it as you originally wished.
#8 Lesser known Develop keyboard shortcuts
If you are in the habit of using your keyboard, in Develop module the complete basic panel can be controlled by keyboard. Press period (.) or comma (,) for selecting a slider (e.g., Exposure) and then press plus (+) to increase the value and press minus (-) to decrease the value of the same. Now press period (.) to go the next. Repeat, enjoy.
#9 Shift key to lock
While applying a graduated filter, if you want to make it straight – press and hold Shift the key to make the filter locked into perfectly horizontal or vertical position. You can also hold Shift when applying the crop tool on your image (if required), to avoid changing the image proportions.
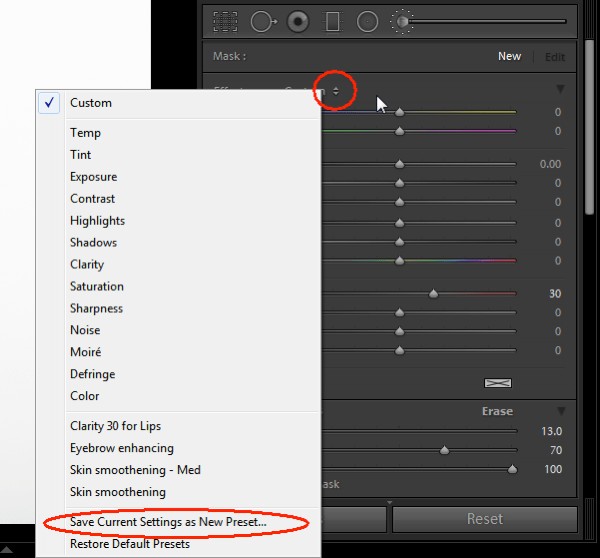
#10 Saving local adjustment tool presets
You can save any of the local adjustment tool settings as a preset which can be used for any of the tools. For example, if you are a portrait retoucher, you may want to save your favorite skin-softening settinsg as a preset. You can do that by clicking save as a preset at the bottom of the local correction tool set. Likewise you can save any kind of settings which you may use often.
Do you have any others you’d like to add to this list of Lightroom quick tips?