Andrew’s ebook Mastering Lightroom: Book Four – The Photos is available now at a special price of 40% off for a limited time from Snapndeals. It’s an advanced guide to processing photos in Lightroom’s Develop module, explaining how to use Lightroom’s powerful processing engine plus Develop Presets and plug-ins to create beautiful images.
The Story
A few years ago I passed through Bolivia, South America’s poorest and, in some ways, least developed country. I spent a few days in Potosí, a small, largely forgotten city whose history had a central role in shaping the modern world. Built at the foot of the Cerro Rico (Rich Hill), the silver mined in Potosí flowed across the continent, through the cities of Cartagena and Havana, and across the ocean to Sevilla and Madrid in Spain, where it powered the rise of European nations as the wealthiest and most developed of the era.
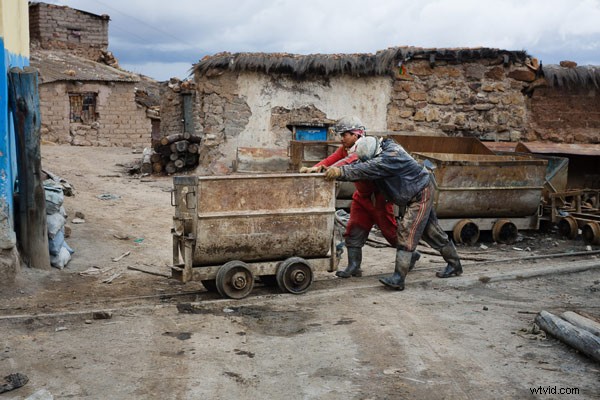
The silver no longer flows from Potosí, although the mines are still open. The city seems to exist on a mixture of mining output and tourism. It’s one of the world’s highest cities, sitting a little over 4,000 metres above sea level in the Bolivian Andes. It’s a cold place, even in the summer. Sleet or snow can strike at any time of the year.
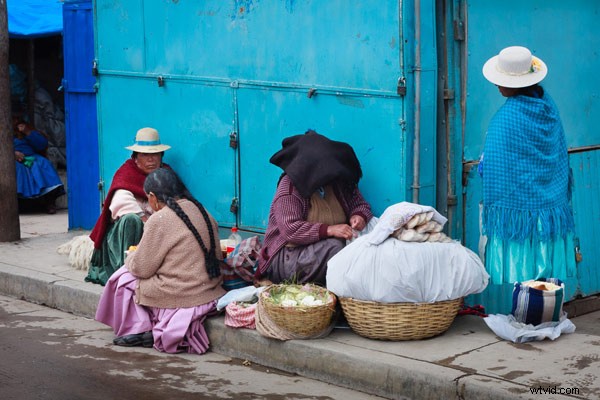
I liked wandering the streets as dusk fell, watching the local people as they went about their daily activities. It was a busy time, with kids out of school, shops closing and people leaving work. Potosí is a city of contrasts: the poverty of some of the local inhabitants against the relative affluence of foreign travellers; the fading grandeur of the magnificent old colonial architecture against the newer mud brick houses at the edges of the city; the tragedy and scope of the city’s history against the snippets of modern daily life. The feeling that, even after hundreds of years, this is still a place where the traditions of the people who lived here before the Spanish came intersect with the ways of modern, European descended South Americans.
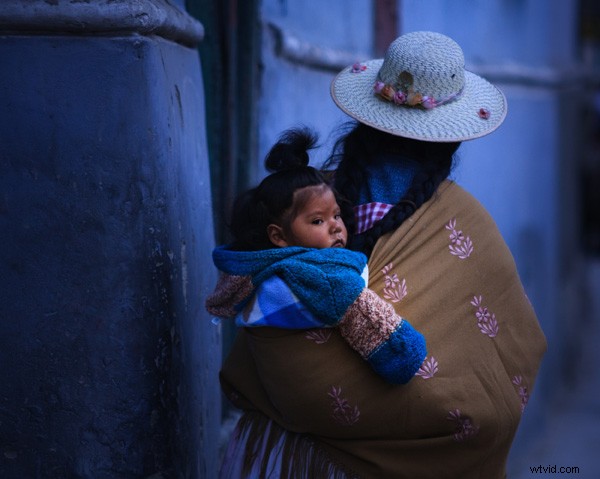
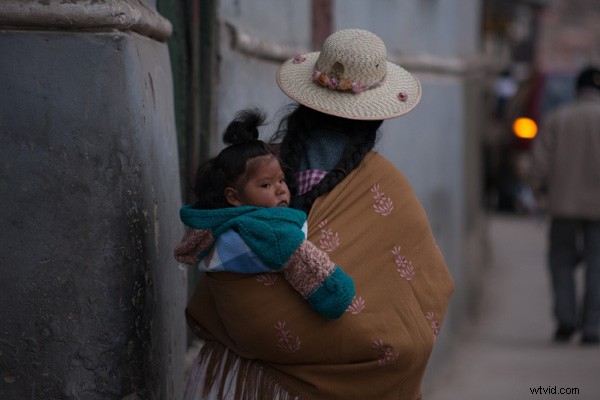
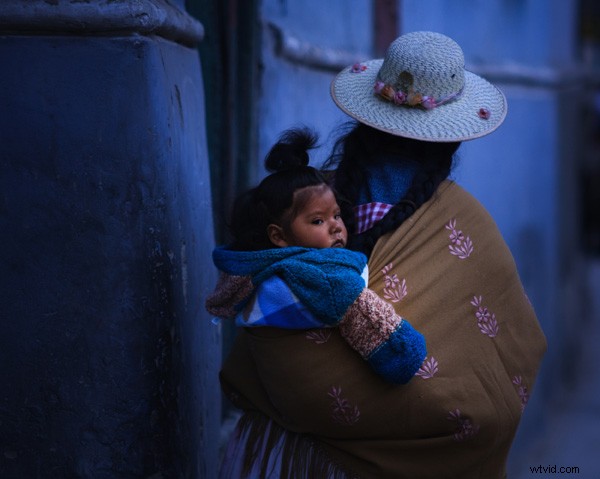
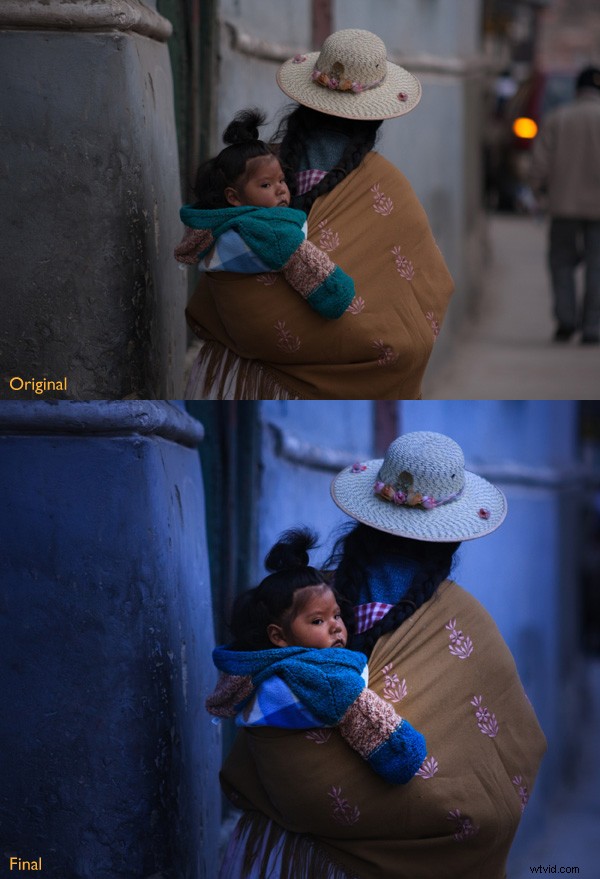
As I wandered around the streets, dusk falling, a Bolivian lady walked around the corner. She had tied her hair in two long plaits, and wore a Bolivian style sun hat on her head. There was a blanket slung around her shoulders, inside which sat a baby, hair styled in a topknot, looking behind it as his mother walked onwards. I had time to raise the camera and take a single photo before a second child walked around the corner and blocked my view.
This photo isn’t perfect. The baby’s face is slightly out of focus. The photo was underexposed (the moment happened so fast I didn’t have time to dial in exposure compensation). The rear light of a car and the out of focus man in the background are distractions (see the original version below). Yet that’s not important. Photography is about evoking emotion, and sometimes things happen too fast for technical perfection.
What matters is the moment. In this photo it’s the juxtaposition between the mother walking one way and her baby looking another. The atmosphere created by the fading light of another cold night in Potosí. The age of the building she is walking past. The intersection of ancient ways with the present day.
This is a photo I come back to again and again, reprocessing as my skills improve. Each time my approach is driven by my memory of that moment and how it felt. Ask yourself the same question when processing images. How did the moment feel? And how can you express that feeling with colour, light and shadow?
First steps
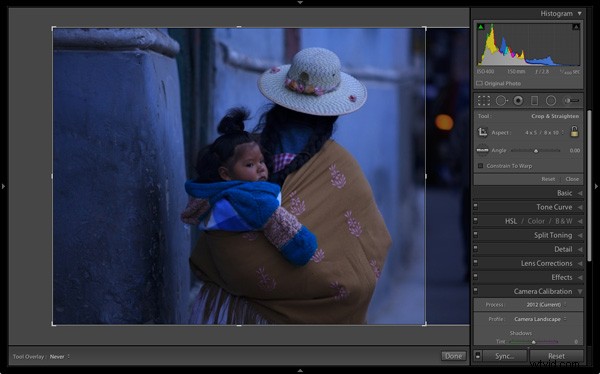
There are plenty of things wrong with the original photo (below). It’s underexposed, and needs brightening (although not too much as I want to retain the atmosphere created by the fading light). The background is distracting. The colours are muddy.
Step 1 Basic corrections
The baby is the natural focal point of the photo, and I wanted to emphasize it. I also wanted a lot of blue, the natural colour of light during dusk, in the photo. To start, I set Profile in the Camera Calibration panel to Camera Landscape. This setting is intended for use with landscape photos, but you can use it whenever you want to emphasize the colours blue or green. I also went to the Lens Corrections panel and enabled both Profile Corrections (with Vignetting set to zero) and Chromatic Aberration removal.
I went to the Basic panel and kept Exposure where it was, even though the photo was underexposed, because I liked the gloomy atmosphere. I set White Balance to auto, which gave a neutral colour, then reduced it (to 3639 Kelvin) to create a blue colour cast. This gave me a good starting point.

Two versions of the photo after the completion of step one. One has the Camera Landscape profile and the other the Camera Portrait profile. Even though it may seem logical to use the Camera Portrait profile on a photo containing people, Camera Landscape is the better option given my intention, as it gives the most appropriate colours.
Isolating the subject
My aim now is to continue the processing in a way that minimises distractions and places the emphasis on the baby.
Step 2 Crop
I used the Crop tool to cut the right-hand side of the photo, eliminating the distracting background. This makes a big difference as the eye is no longer being pulled away from the people by the blurred light.
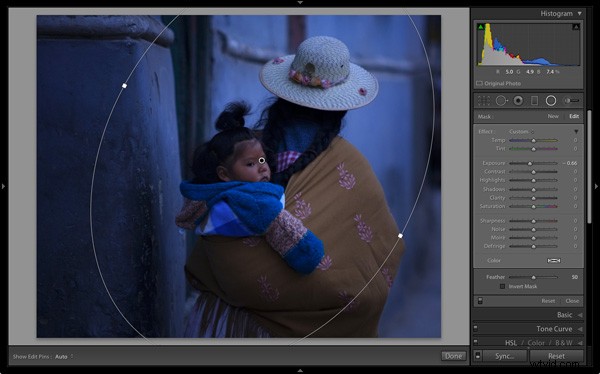
Step 3 Local adjustments
I added a Radial Filter and moved the Exposure slider left to make the background darker. The Radial Filter is new to Lightroom 5, but if you have an earlier version of Lightroom, you can do something similar with the Adjustment Brush (by painting in the area you want to darken).
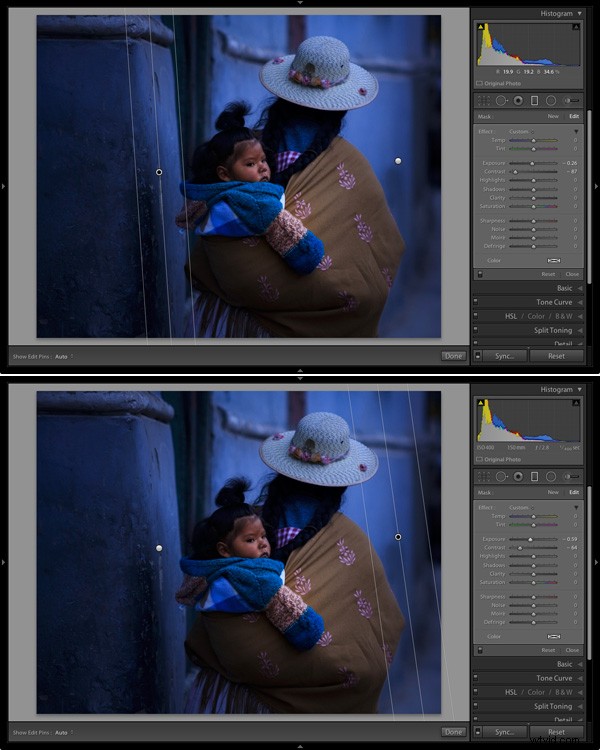
Step 4 Add some punch
The photo was quite flat so I returned to the Basic panel and increased Contrast. Then I used the Adjustment Brush to make a selection over the woman’s back and the child, and increased Clarity and Exposure. The aim was to make the baby sharper, and a little brighter, than the rest of the image, encouraging the eye to go to that part of the photo.
This screen shot shows the mask created by the Adjustment Brush.

Step 5 Make color work
Next I used the Adjustment Brush again to select a smaller area and moved the Temp slider right, making that area warmer. The idea here is to work on the natural colour contrast between the colours of orange and blue.
This image below shows the result of these adjustments. The key was to make them subtle so the image looked natural and not over-processed.
Throughout the processing I imagined that I had taken the photo on slide film and that the scene really did look like that. The fact that the scene would have come out differently than my version is incidental. The idea was just a guide to the approach I should take.
Step 6 Darken edges of the image
Next I created two Graduated Filters, one on either side of the frame. I reduced the Contrast in each one. A side effect of reducing Contrast is that the area affected also becomes lighter, so I adjusted Exposure to make them darker again.
These are subtle adjustments that reduce contrast at the edges to emphasise the area around the baby in the centre of the image, where I increased Clarity earlier.
Finally I decided the image was too dark and increased Exposure to compensate. Here’s the original and final versions together so you can compare them.
What do you think of these processing techniques and the style in which the photo was processed? Do you have any suggestions for an alternative interpretation of the original Raw file? Please let us know in the comments.
 Andrew’s ebook Mastering Lightroom: Book Four – The Photos is available now at a special price of 40% off for a limited time from Snapndeals. It’s an advanced guide to processing photos in Lightroom’s Develop module, explaining how to use Lightroom’s powerful processing engine plus Develop Presets and plug-ins to create beautiful images.