Food blogger Danny Jauregui from Food Bloggers Unite! shows us an alternative Burning and Dodging technique.
Non-destructive burning & dodging is most often done with a 50% gray fill layer. Although using this method has worked for me in the past, I’ve found it difficult to predict what sort of result I would ultimately attain when finished. Lately, I’ve been using adjustment layers with a mask to do my burning & dodging and I’ve found that I have more control over image tone and contrast.
The benefit of using this method is that once the layer mask is applied, you can easily re-open the layer adjustment dialogue box and change the amount of brightness or darkness given to particular areas.
Darkroom to Digital
Burning & Dodging is a traditional darkroom printing technique utilized to give particular areas of the print more, or less exposure. Burning areas of the print gives it more exposure therefore darkens the area, while dodging gives it less exposure therefore lightens the area. The goal of the technique is to salvage lost information usually caused by high contrast exposures.
This technique is easily done in photoshop and can help you salvage images. Ever have a print where the highlights become blown out? Or a landscape where you loose detail in the shadows? This technique is a lifesaver in these situations and can be used in over-all tonal corrections of specific areas of an image.
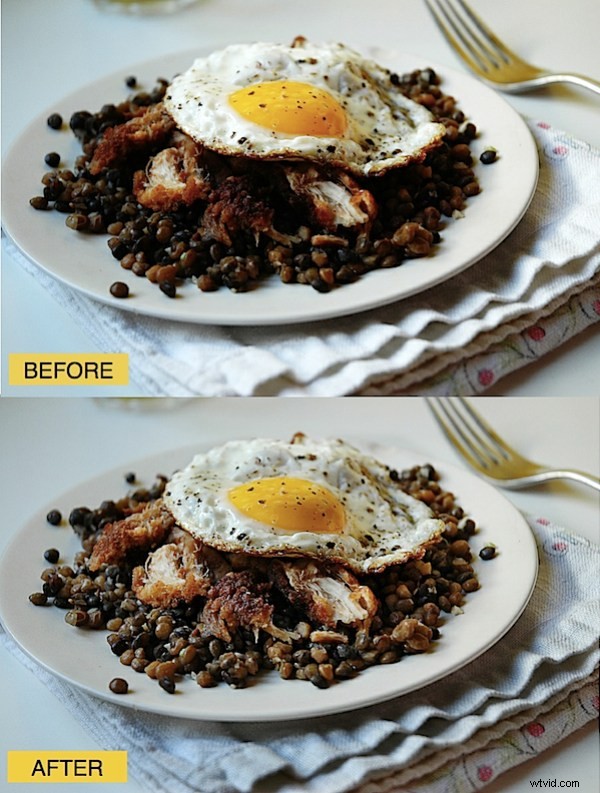
In the sample image above, the lentils and chicken underneath the fried egg were too dark and I was loosing important detail. Also, notice how the highlights on the white part of the egg and on the edge of the napkin are blown out. Burning & Dodging will help fix these two areas.
First I will Dodge the dark areas.
Step #1 – Add A Levels Adjustment Layer
Open your image and using the Adjustment Layer button at the bottom of the layers palette, add a Levels Adjustment Layer.
Step #2 – Make Tonal Adjustment
Since I’m mostly concerned with the dark area underneath the egg I’ll use the mid-tone scrubby slider in the center of the histogram to make my tonal adjustments. Slide the scrubby slider to the left to lighten the area. Notice how the entire image becomes lighter. Don’t panic. We will later use a layer mask to correct this. For now, focus on the area that you are trying to dodge. Once you are happy with the tonal degree of the area, hit ok.
Step #3 – Add Layer Mask
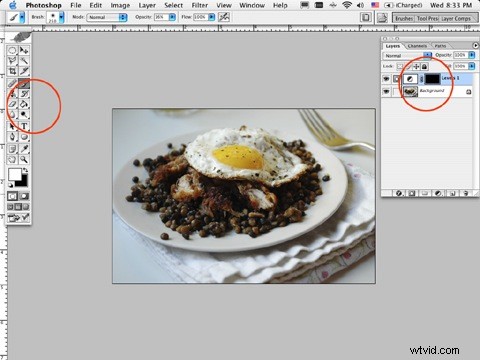
Adding an Adjustment Layer will automatically add a Layer Mask to that layer. You’ll notice that your Adjustment Layer has two small windows. The window on the right is your Layer Mask. Making sure that the window on the right is selected, click on your paint bucket tool and select the color black. Place the cursor over your image and click inside of the image. Adding the color black hides the adjustment layer. We will now use the color white to reveal the Adjustment Layer wherever we need a lighter tone.
Step #4 – Reveal Adjustment Layer
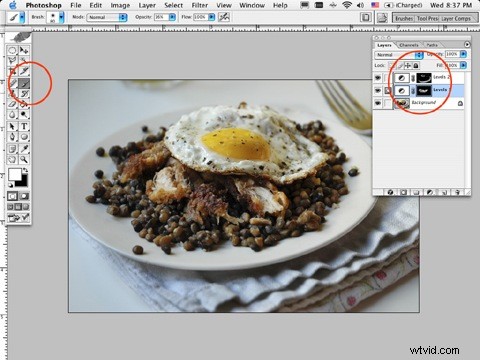
Select an appropriate size brush for the area and lower the opacity to 15%. Select the color white and begin carefully painting on the area that you are trying to lighten, in my case, it was underneath the fried egg. Continue painting until you’ve reached the desired level of dodging.
If the amount of dodging is too much, double click the Adjustment Layer and move the scrubby slider to the right to darken it. Not enough? Move the scrubby slider further to the left.
This same technique can be used to Burn. Follow the same instructions only make your adjustments in the opposite direction. Add a new Adjustment Layer and instead of moving the slider to the left, move it to the right to darken the image. Add the Layer Mask and using white, paint the areas you are trying to darken. Voila!
Danny is a Los Angeles based food blogger. You can read his recipes on Over The Hill And On A Roll