We’ve received quite a bit of feedback from Post production readers asking us to look at the issue of sharpening photos. Sharpening is one of those everyday tasks that most photos can benefit from. In this post I’ll explain what sharpening is, when you should perform it and how to do it. The information here, although it is explained using Photoshop, is relevant to all photo editing programs.
Please click images to enlarge in this tutorial – it will illustrate much better the points being made with images at full size.
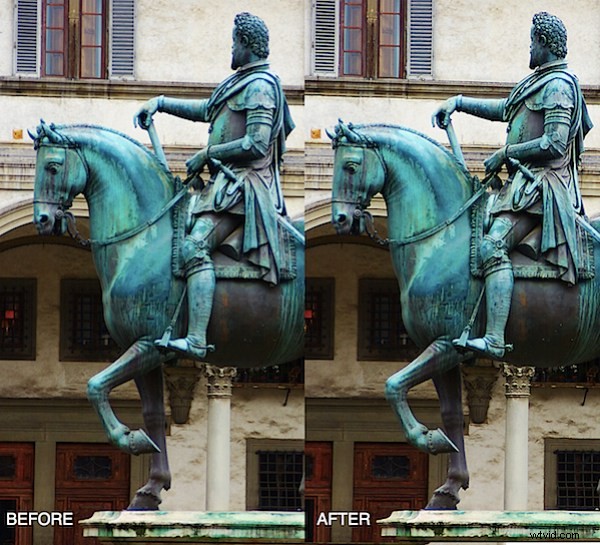
Sharpening does as its name suggests and sharpens the image making it look crisper and making the edges in the image more distinct.
In the darkroom the process is achieved by taking one negative and a slightly blurred positive image, sandwiching these together and making a very quick exposure of this sandwich. Then the exposure is completed using the negative. The resulting image has sharper and crisper edges than it would have had if the blurry (unsharp) mask image had not been used. The typical sharpening tool used in Photoshop and other graphics programs is named after this traditional darkroom process and is called the Unsharp mask.
In a graphics editor the Unsharp mask works by creating small halos along the edges in the photo. These halos enhance the contrast between the edges and the surrounding pixels making the edges look more obvious and giving the image a crisper and sharper look.
Here’s how to sharpen an image using the Unsharp mask:
Step 1
Sharpening should be done at the end of the editing process so finish doing all your edits to the image before you sharpen it.
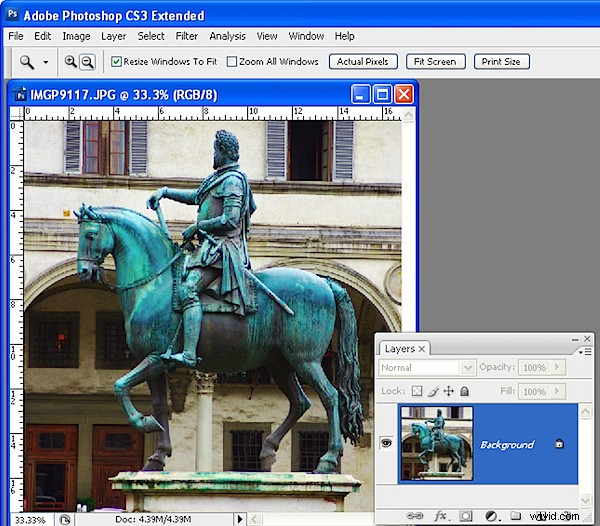
Now create a flattened version of the image either by flattening or merging all the layers or press Ctrl + Alt + Shift + E (Command + Option + Shift + E on the Mac) to create a flattened layer at the top of the image. The Unsharp mask works only on the current layer so you need to have the image on a single layer for it to do its work.
Step 2
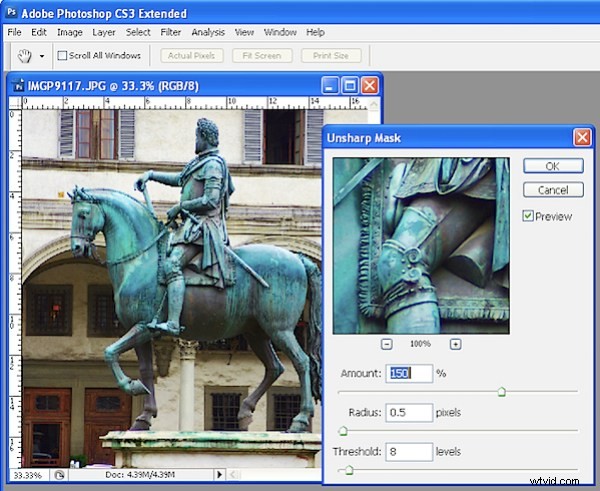
Choose Filter > Sharpen > Unsharp Mask. Set the Radius to somewhere between .5 and 1. This sets the width of the halos which are applied along the edges in the image – the smaller the radius, the smaller the halo and 0.5 – 1 is ideal – this is not always a situation where the more is better!
Set the Threshold to around 10. The Threshold value determines how edges are found – the higher the value, the more different adjacent pixels must be to be considered an edge so less of the image will be sharpened. A small value means that smaller differences in pixel values are considered an edge so more of the image is sharpened. The risk with a small Threshold value is that it can add noise to the image by enhancing edges in places where you don’t want to see them.
The Amount setting controls how much contrast is added to the edges – a higher value means more contrast and a more obvious sharpening. Start by setting this value to around 150.
Step 3
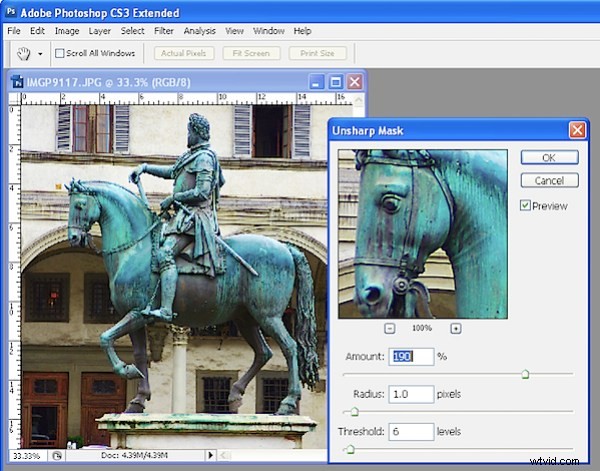
Take a look at your image and adjust the sliders from this starting point until you see more detail in the edges in the image but not so much that you see unattractive halos around the edges.
Typically, if you have an image with a lot of very fine detail you can use a very small radius value (so the halos are small) and a correspondingly high Amount value (so that the halos can be seen to sharpen the image). On the other hand, if you have an image without a lot of fine detail can use a larger radius say, 1 – 1.5 or more (which gives larger halos), and a smaller Amount setting because the halos will be bigger and more visible anyway.
Adjust the Threshold value so you get sharpening in the areas you are interested in being crisper but not so that it results in unwanted noise in the image.
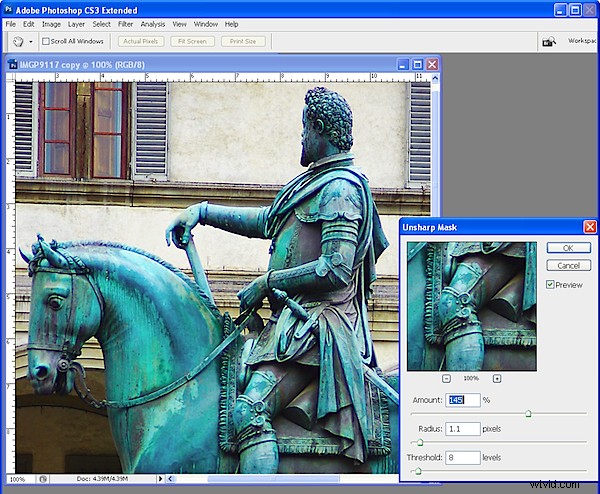
This image is nicely sharpened – you can see the crisper edges.
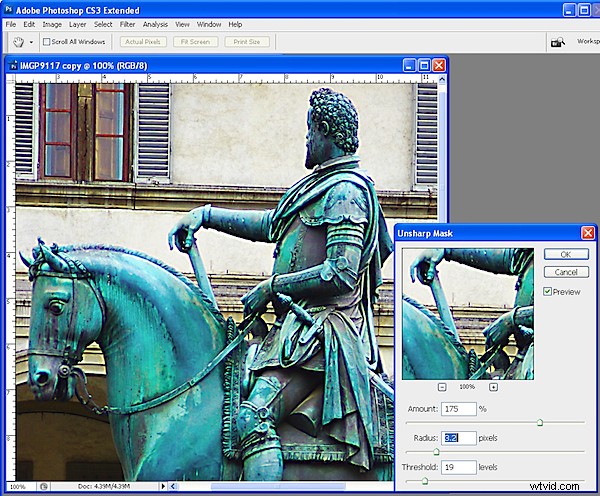
This image is over sharpened – notice the unsightly halos around the edges.
Tips
It is generally advisable to view the image at 100% when you are sharpening it so you can see the effect on the image. You can do this by sizing the image to 100% before launching the Unsharp mask tool. Alternately, use the 100% preview in the Unsharp mask dialog –click on the preview to see the unaltered image so you can compare it with the preview..
When you are sharpening for printing you can generally sharpen more heavily than you should do for onscreen viewing.
There are other sharpening tools available in Photoshop CS2 and later which do an even better job of sharpening than the Unsharp mask. I’ll look at these tools in a future post. For now, regardless of which graphics editor you use, you should have an Unsharp mask tool and it should work in a similar way to the Photoshop Unsharp mask shown here.