Image stitching is not new, neither is panoramic photography. Since almost the beginning, photographers have been intrigued with providing a wider view of a given scene. The reason is that panoramic images provide context. In a normal frame of a large expansive scene, we only see a small part of the bigger picture. A panoramic image however, gives us a broader view, and a context for that image. The word panorama is derived from two greek words, “pan” which means everything and “horama” which means that which is seen or the view. So, panorama literally means – a view of everything.
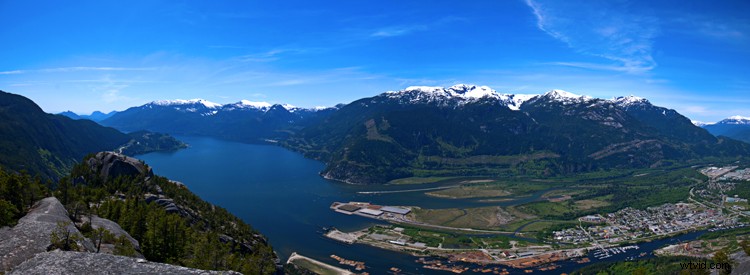
A six image pano of Howe Sound, Squamish BC
Early on, photographers would make panoramics manually, by simply panning across a scene and taking sucessive images. Once the images were printed, they would manually stitch them by overlaying one image on top of the other, or even cutting them into place. This was a new way of viewing and capturing scenes. I saw my first panoramic image as a young boy. It was a huge scene of photographs that had been stuck together and overlaid. It was in a museum in the city where I grew up. I was intrigued, it gave me a view of the city I was living in, that I had never seen before. It gave me a whole new perspective on the place that I called home. I wasted many rolls of film as a youngster trying to do the same shots, but never managed to get it right.
One solution to this challenge was the panoramic camera. These cameras revolutionized panoramic photography. They were able to capture a panoramic scene of 180 degrees in a single shot. No more cutting and sticking photographs together. These rotating cameras captured great images of scenes and did it with ease. There were also wide-angle panoramic cameras that took in much more of a scene in a single image and again, changed the way we viewed images and scenes. These cameras changed the views, and contexts of many famous places. In their day, they were the pinnacle of technology.
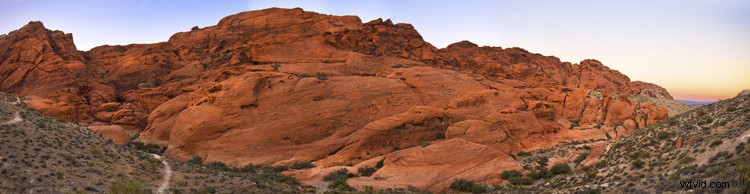
Red Rock Canyon, Las Vegas
Once again, the wheel of progress turned and all of this changed when digital panoramics became possible. The photographer only had to pan across the scene and take successive images, as in the past, but now the stitching process in the computer gave a seamless result. The photographer simply dropped these images into a photo stitching tool and voila, an amazing panoramic image magically appeared. Well, that was the idea anyway, in practical terms it was not so easy.
1. How to shoot panoramic photos
Autopano giga is a standalone software tool that stitches your images together. There are a few guidelines to follow when you do a photostitch. By following these guidelines, you will be almost guaranteed that your image will stitch properly the first time.
A. Shoot in Manual mode
Expose for your scene manually and don’t change the exposure between shots. You may have to do a light meter reading for the brightest and darkest parts of your scene. Adjust your settings to make sure that you have good exposure throughout the images and then start shooting.
B. Overlap your shots by at least 30%
Overlap each image by at least 30% if you are shooting in landscape orientation and up to 50% if shooting in portrait. By overlapping you will have duplicates of parts of your scene, this will allow the software to stitch the images together better and adjust for the perspective distortion too.
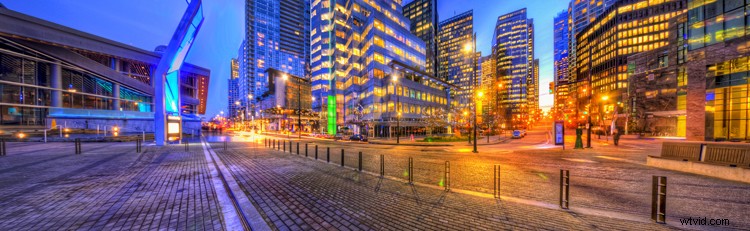
Five images stitched, Jack Poole Plaza, Vancouver
C. Use a tripod
You can shoot handheld, but using a tripod will ensure that the images will be shot along the same horizontal plane. This can also help with the stitching process too.
D. Keep your aperture between f/8 and f/11
You will want to keep everything in focus, so be sure that your aperture is set to at least f/8. At f/2.8 your focal point may change and this could cause some parts of your image to be out of focus. It may also be a good idea to set your aperture to f/8, focus your camera, then switch to manual focus. That way your camera won’t be focusing on a different part of the scene in each image. At f/8 or f/11 the whole scene should be in focus.
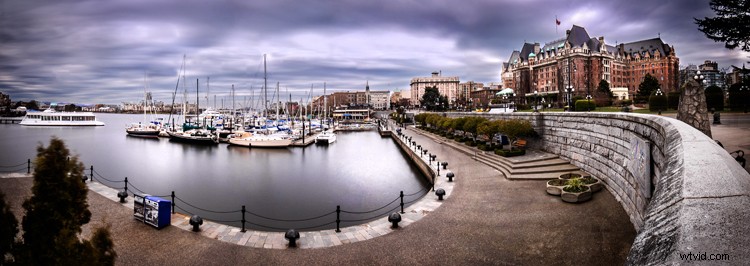
Six image Pano, Victoria Harbour on a snowy, windy day
Now the magic part, digitally stitching the images together. You can do this using Autopano Giga or Photoshop, my preference is Autopano Giga. To learn more about how to do this, take a look at these articles I wrote on image stitching: Walk Through and Review of Autopano Giga – Image Stitching Software and Step By Step How to Make Panoramic HDR Images.
Lets make this fun, upload some of your images that you have stitched, then tell us what software you used. Enjoy, happy shooting and stitching.