Have you ever been somewhere with a great view and taken a picture with your widest lens, but wished you had an even wider one that could capture the whole scene?
That is how panoramic photography was born in the 1840s when the pioneer photographers started using Daguerreotype plates pieced together to form very wide-angle scenes.

This panoramic image showing San Francisco from Rincon Hill was photographed by Martin Behrmanx in 1851. It is believed that the panorama initially had 11 plates, but the original daguerreotypes no longer exists.
An image showing a field of view greater than that of the human eye, about 160° by 75° or an aspect ratio of 2:1, or larger may be considered panoramic.
Even thou there is specialized equipment for panoramic imaging, we still find ourselves using the same simple techniques of merging images together more than 150 years later, but now using digital cameras and photo merging software to achieve similar results.
This is a simple and beginner’s approach on how to create a panoramic image like this one:
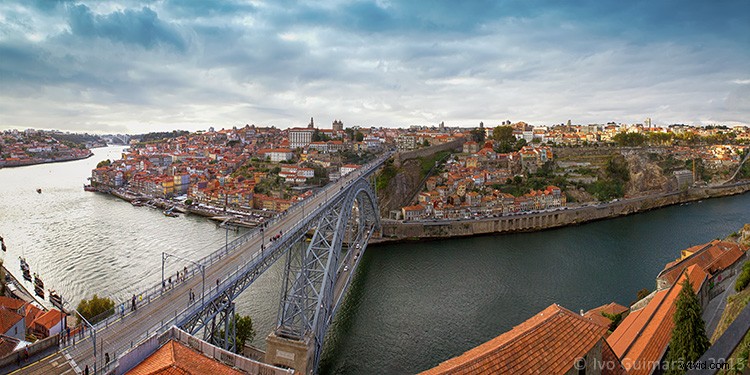
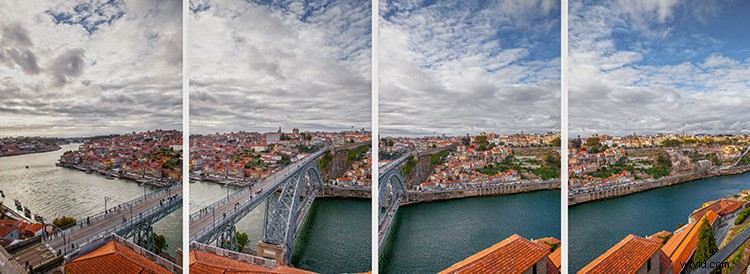
This amazing view of The Dom Luís I Bridge in my hometown Oporto, Portugal, was created by merging four vertical images into a high-resolution panorama.
Shooting your panorama
To make sure you get good results in you panorama merging, it’s important to use Manual settings in you camera and try to have similar exposure, focus and white balance in all your images.
In this particular case, the images were photographed with a 20mm lens in a full frame camera body at f/16, 1/125th and ISO100. The focus was set to infinity and the white balance was set at 5500K.
It’s also really important to have at least 30% overlapping between images so that the software can have enough pixels to merge and make the blending seamless.
The more rigorous you are during the image exposure step, the more likely you are to have better results in your final image. The use of a tripod and a bubble level are recommended tools, but on a day with good light you might get away with handheld camera images, as long as you try to follow the horizon line or some reference points for the image overlapping.
The number of images you need depends on the field of view you want to cover, but always try to photograph more area than you need so you can crop after the merging process. Portrait or vertical images are usually a better option because they give a better height and therefore higher resolution to the final image.
Stitching your panorama
As for the stitching process, here are the basic beginner steps in Adobe Photoshop, but keep in mind that there is a lot of software options for this kind of editing that can be taken further with vertical, 360º or multi-row stitching which are a lot more complicated.
- Open Photoshop
- File > Automate > Photomerge
- Browse and select the images for the panorama
- Click the “Auto” option in the Layout area
- Click the “Blend Images Together” option
- Click OK to start the stitching process
You will end up with a final stitched image like this:
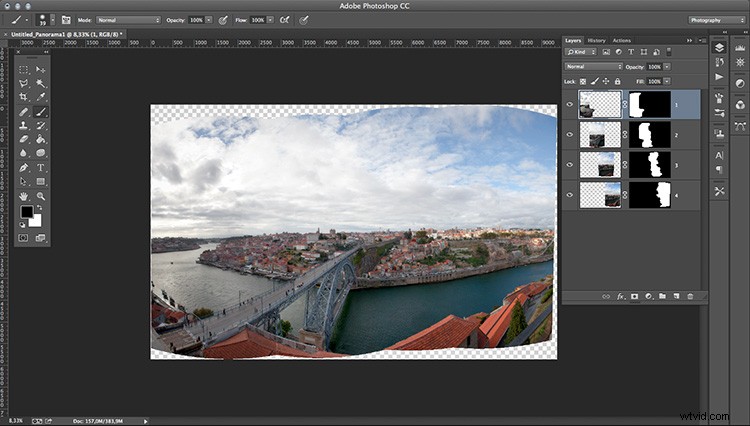
The layer masks are really helpful if you have moving objects, or difficult areas in your image that look weird after stitching and can be edited to enhance the blending.
Now you can flatten the image and just choose the best crop area for your panorama.
So, just add this technique to your bag of tricks and give it a try next time you spot a panoramic view.