Over the last decade, slow‑motion videos have become a staple of social media, capturing moments that feel both dramatic and cinematic. When Apple introduced a native slow‑motion feature in its camera, the craze exploded, prompting countless developers to embed the effect in their apps. This trend shows no sign of fading.
In this guide we dive deep into the iMovie slow motion effect, walk through every step on a Mac, and compare iMovie to a powerful alternative—Wondershare Filmora—for those seeking advanced features.
In this article
- Part 1: A Comprehensive Review of Slow‑Motion Videos
- Part 2: How to Set Slow‑Motion Settings in iMovie
- Part 3: A Great Alternative: Wondershare Filmora
- Conclusion
Slow Motion Video Maker
Slow down your footage with precise keyframe control and create unique cinematic effects!
Part 1: A Comprehensive Review of Slow‑Motion Videos
Slow‑motion footage is captured at a frame rate higher than the standard 24 fps, then played back at a reduced speed. This technique highlights rapid actions—sports, wildlife, or any fast‑moving scene—in vivid detail.
While early access to slow‑motion tools was limited, modern apps like iMovie slow‑mo have democratized the effect. Whether you edit on a desktop or use online services, the result is the same: stunning, fluid slow‑motion clips.
Part 2: How to Set Slow‑Motion Settings in iMovie
iMovie remains one of the most user‑friendly options for Apple users wanting to apply slow‑motion. The app allows you to adjust the speed of individual clips, split a clip into segments, and even freeze frames to create dramatic pauses.
Below is a step‑by‑step walkthrough for slowing down video in iMovie:
Step 1
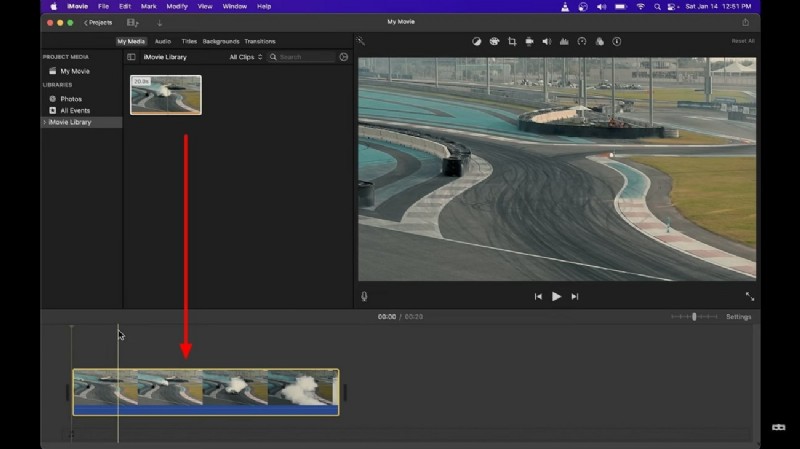
Launch iMovie, select “New Project,” and choose the “Movies” tab to import your footage. Drag the clip onto the timeline to begin editing.
Step 2
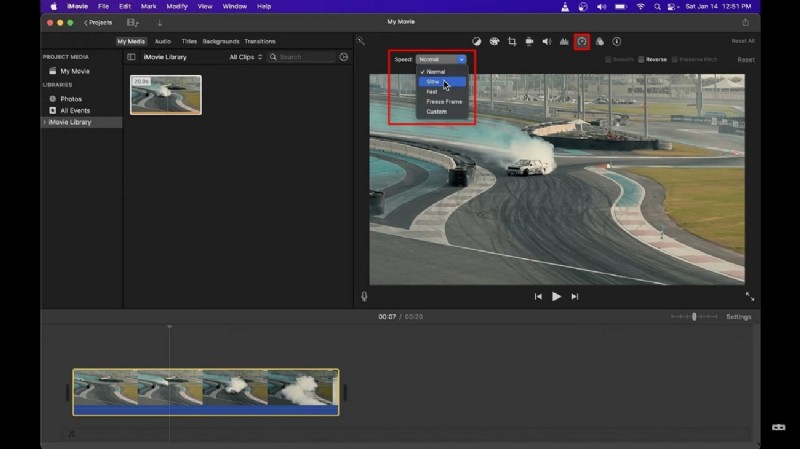
Click the clip in the timeline, then tap the speed icon (clock). From the “Speed” menu, choose “Slow” and select the desired percentage. For custom values, choose “Custom” and input the exact slowdown you want.
Part 3: A Great Alternative: Wondershare Filmora
While iMovie is excellent for quick edits, those who need richer controls may turn to Wondershare Filmora. This platform blends a simple interface with professional‑grade tools, enabling precise slow‑motion effects and much more.
Step‑by‑Step Guide to Slow‑Motion with Optical Flow
Step 1: Ensure the Latest Version & Import Media
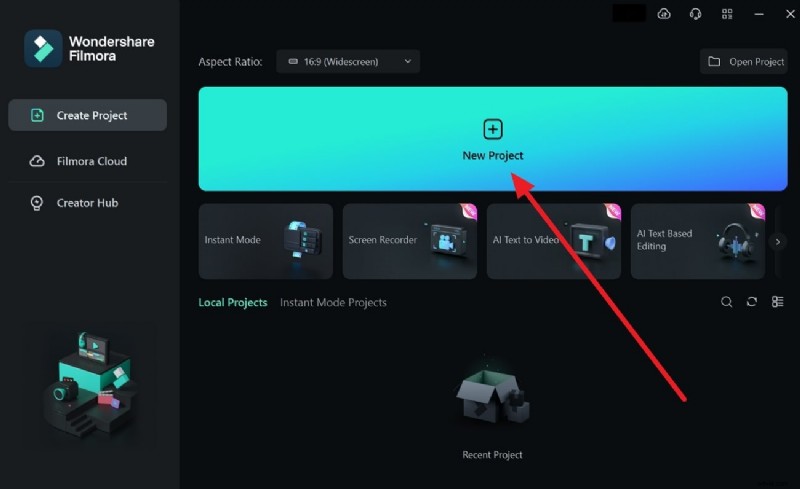
Launch Filmora and create a new project. Drag or use Ctrl + I to import your video into the timeline.
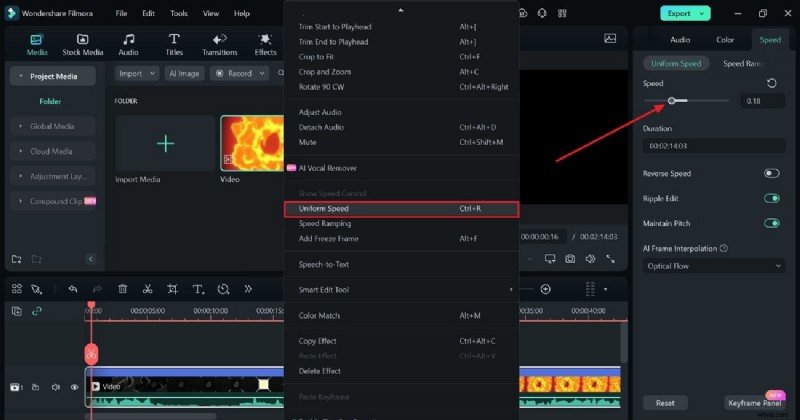
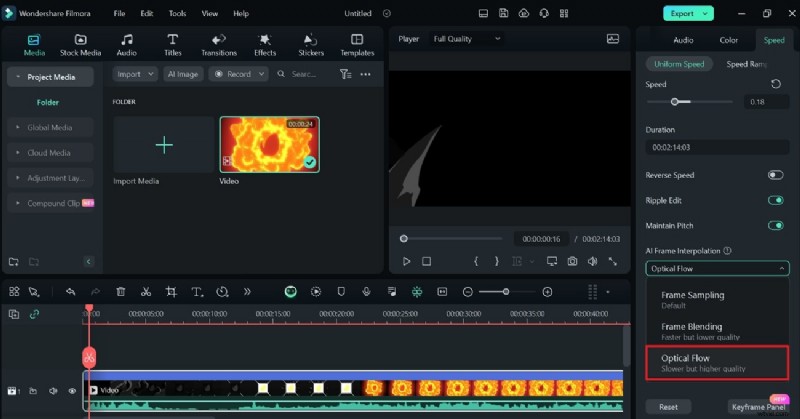
Step 2: Apply Slow‑Motion & Enable Optical Flow
Right‑click the clip, select “Uniform Speed,” and adjust the slider to lower the speed. Then enable the “AI Frame Interpolation” menu, choose “Optical Flow,” and the software will interpolate frames to preserve visual quality.
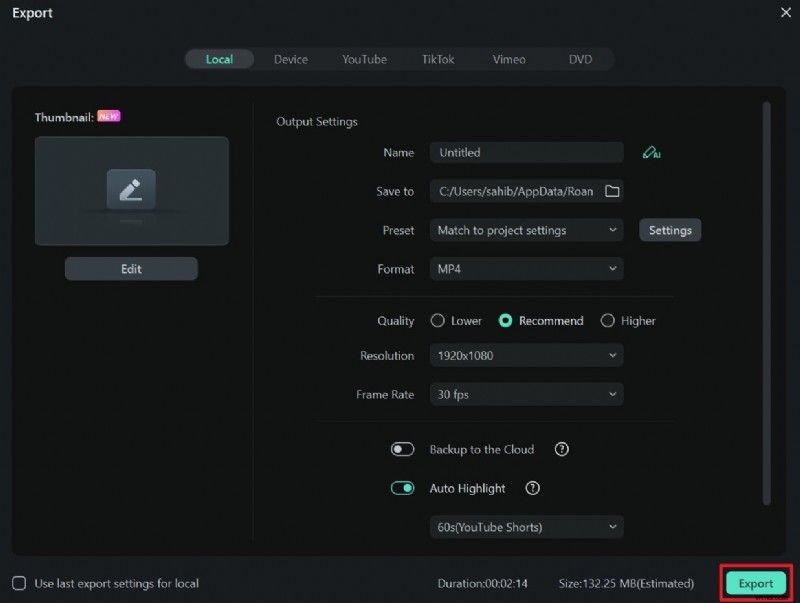
Step 3: Review & Export
Play the clip to confirm the effect. Click “Export” in the upper right corner, set your desired format and quality, and save the final product.
Key Features of Wondershare Filmora
Filmora offers a suite of tools that cater to both novices and professionals:
1. Instant Mode
Choose from over 115 ready‑made templates across categories like business, travel, and vlogs. AI‑powered rearrangement cuts editing time dramatically.
2. AI Smart Cutout
Automatically remove unwanted objects with frame‑by‑frame refinement, preserving a natural look.
3. Auto Beat Sync
Sync music and visuals automatically, ensuring your edits match the rhythm of your soundtrack.
4. AI Copywriting
Generate YouTube titles and descriptions using ChatGPT integration—just describe your video, and the AI delivers polished copy.
Conclusion
Slow‑motion remains a powerful storytelling tool in both entertainment and business videos. With iMovie you can quickly achieve professional results, and for deeper control, Filmora offers an extensive feature set. Master these tools to elevate your footage—whether you’re capturing a simple moment or crafting a cinematic masterpiece.