Finished a video but the audio feels muffled or overly sharp? Premiere Pro’s built‑in equalizer is engineered to correct those exact issues.
The parametric EQ in Premiere Pro lets you brighten dialogue, smooth background music, and give your project a polished, studio‑grade sound.
Yet many creators find learning how to equalize audio in Premiere Pro daunting—plenty of knobs, graphs, and sliders to master. This guide turns that complexity into a straightforward, stress‑free workflow, so you can shape your audio with confidence.
Part 1. Understanding the Premiere Pro Equalizer
A stunning visual can be ruined by muddy or harsh audio. With Premiere Pro’s equalizer, you sculpt the sound so every word, beat, and note sits exactly where it should.
EQ in Premiere Pro lets you tweak three primary frequency bands: the low end adds weight and depth, the midrange carries voices and instruments, and the highs reveal crisp detail and sparkle. Adjusting these ranges instantly clarifies dialogue, fades background noise, and blends music seamlessly.
Premiere Pro offers two main EQ tools: the Parametric EQ and the Graphic Equalizer. Each suits different workflows. The table below highlights their strengths.
| Feature | Parametric EQ | Graphic Equalizer |
| Control | Highly flexible, precise control over any frequency | Limited to fixed frequency bands |
| Interface | Graph with adjustable points and curves | Sliders for set frequency ranges |
| Learning Curve | Steeper, requires more practice to master | Easier for beginners to start with |
| Use Cases | Dialogue cleanup, podcast editing, music mixing | General sound improvement, casual projects |
| Best For | Detailed audio shaping, voice clarity, removing specific noise | General sound improvement, casual projects |
Part 2. How to Equalize Audio in Premiere Pro: Step‑by‑Step
With a clear grasp of Premiere Pro’s EQ, it’s time to apply it to your own project. The process is simpler than you might think, especially when following these guided steps.
We reference James Prince’s YouTube tutorials for practical insight.
Step 1
Bring Your Clip into the Timeline
Import your video or audio file and drop it onto the timeline. Select the clip you wish to edit so Premiere knows where to apply the EQ.
Step 2
Add the Parametric EQ Effect
Navigate to the Effects panel, locate Parametric Equalizer, and drag it onto your audio clip.

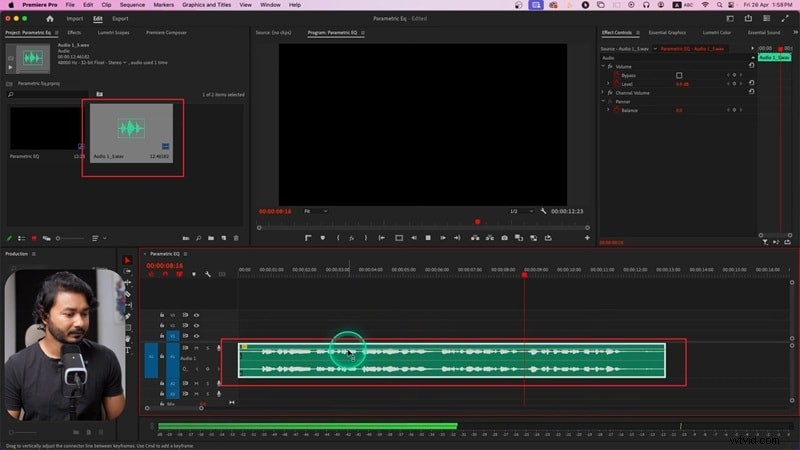
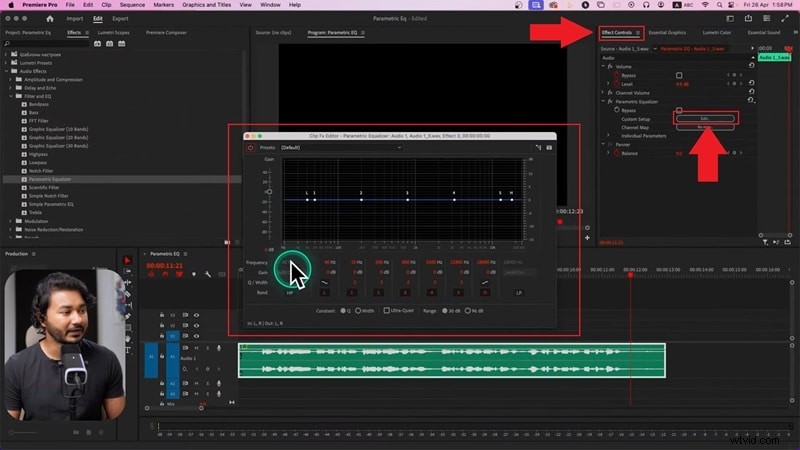
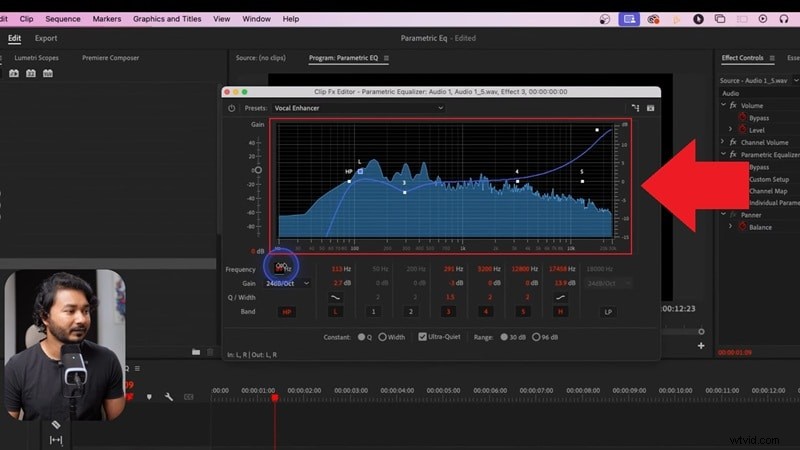
Step 3
Open the EQ Graph
In the Effect Controls panel, click Edit to launch the Parametric EQ graph, where you can shape the sound.
Step 4
Try Easy Presets
New to EQ? Start with a preset like Vocal Enhancer. The graph adjusts automatically, and you’ll hear how the parametric EQ sharpens clarity.

Step 5
Shape Frequencies Manually
Move the points on the graph and fine‑tune by ear. There’s no one‑size‑fits‑all formula—play, listen, and adjust until the audio feels clean and balanced.
Part 3. One‑Click EQ: Instantly Improve Your Audio
While Premiere Pro’s EQ is powerful, it can feel time‑consuming. If you need quicker results, consider Wondershare Filmora, which simplifies audio cleanup with instant presets and AI tools.


Why Filmora? It offers:
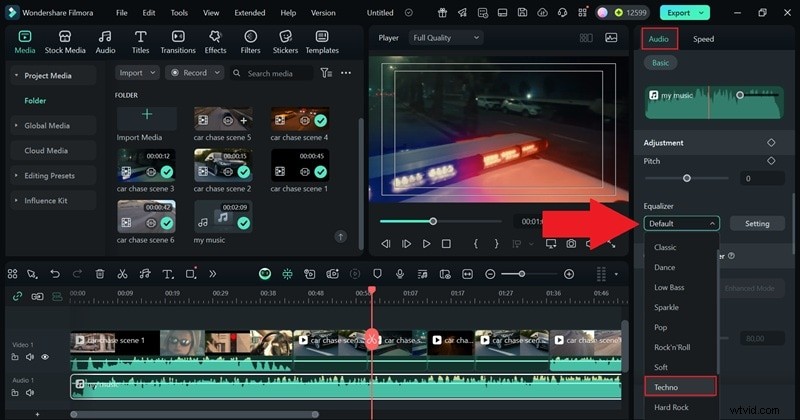
- Genre‑based presets for rock, country, techno, and more.
- Full control for advanced users.
- Easy sliders for anyone to adjust EQ in seconds.
- Automatic balancing of music and voice with one click.
- Instant voice clarity—boost vocals and cut background noise.
Filmora’s AI suite also includes denoise, ducking, stretch, silence detection, and voice cloning, making it ideal for beginners and those who want polished audio quickly.
Below is a quick Filmora workflow.
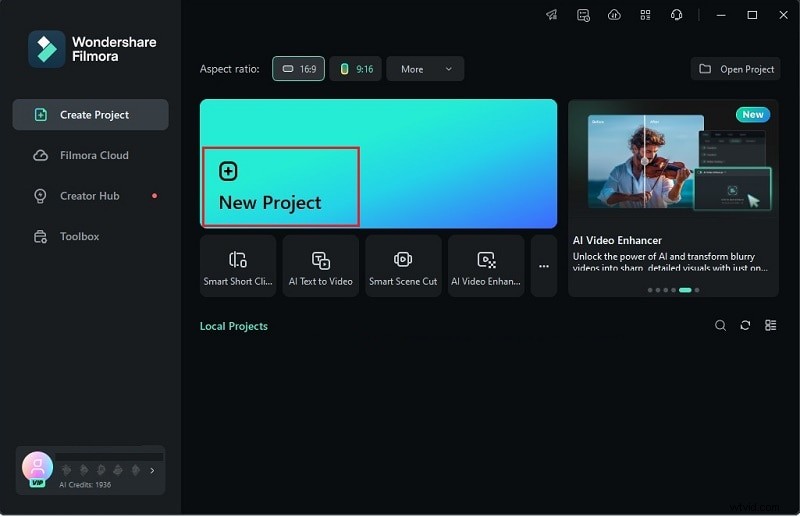
Step 1
Launch Filmora and Start a New Project
Step 2
Import Media

Step 3
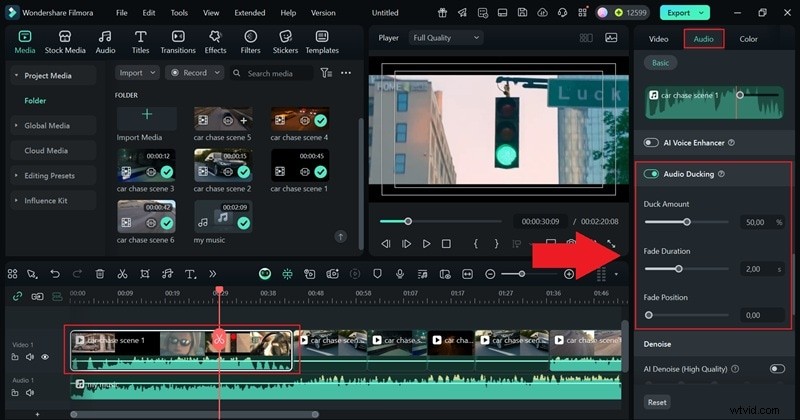
Apply an Equalizer Preset
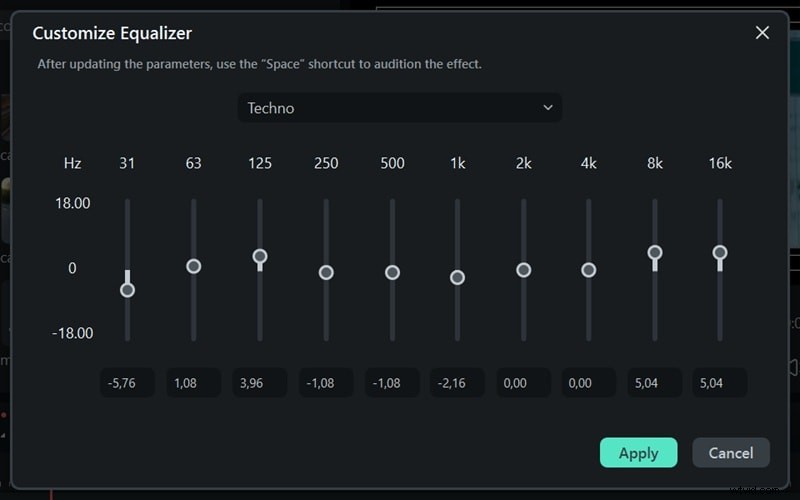
Step 4
Customize (Optional)
Step 5
Optional Further Edits
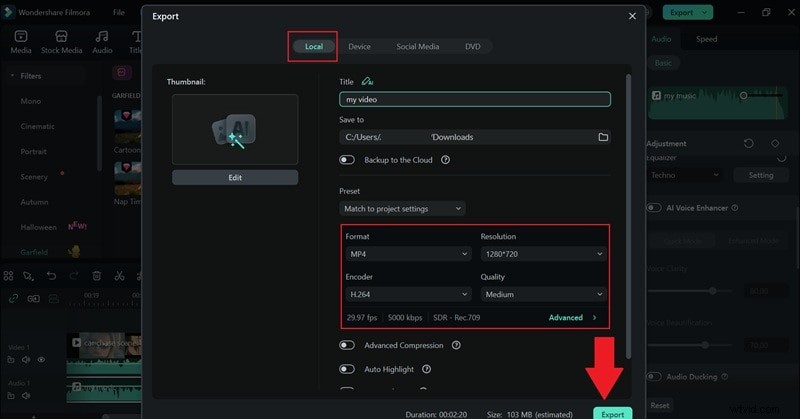
When finished, click Export and choose your destination—Local or Social Media. Set format, resolution, and storage, then hit Export.
Filmora vs Premiere Pro Audio Equalizer
Both editors bring unique strengths to audio work. Use the comparison table to decide which fits your workflow.
| Feature | Filmora | Premiere Pro |
| EQ Adjustments | Presets by genre plus easy sliders for custom tweaks. | Parametric EQ and Graphic EQ with frequency control. |
| Learning Curve | Very easy to pick up, no prior knowledge needed. | Steeper, requires practice and audio know‑how. |
| Voice Enhancement Tools | AI Vocal Remover, AI Voice Enhancer, AI Voice Cloning, AI Voice Changer. | AI‑powered Enhance Speech. |
| Price / Subscription | One‑time plan or lower subscription cost. | $22.99/mo for the annual billed monthly plan. |
| Best Suited For | Musicians, vloggers, podcasters, creators needing fast polish. | Audio engineers, film editors, professionals needing fine control. |

Filmora: AI Video Editing App & Software
Best tool for making videos anywhere for all creators!
Your Perfect First Video Edit Starts Here – No Experience Needed
Part 4. Common Audio Problems You Can Fix with EQ
Now that you know how to use EQ, apply it to real audio challenges:
- Clear Up Muffled Voices: Excess low‑end weight can bury dialogue. Cut lower frequencies to sharpen speech, especially in indoor vlogs with poor acoustics.
- Smooth Out Harsh Tones: Phone or cheap mic recordings often sound sharp. Reduce 2–4 kHz frequencies for a smoother listening experience.
- Add Spark to Flat Audio: Missing high‑end detail can make music or dialogue dull. Boost highs to add sparkle and energy—ideal for podcast intros or YouTube tutorials.
- Remove Background Rumble: Street noise, HVAC, or mic handling introduce low‑frequency rumble. Apply a high‑pass filter to cut these unwanted sounds.
- Balance Music and Dialogue: Background music can overpower narration. Adjust the midrange to let voices cut through cleanly, as in travel vlogs where music supports the story.
Conclusion
Mastering audio equalization in Premiere Pro enhances your project’s overall quality. While the built‑in tools are robust, exploring alternatives like Filmora can provide quick, AI‑powered polish. Choose the editor that best aligns with your workflow and creative goals.