Want to animate a stroke in After Effects for smooth line motion? Stroke animations shine for logo outlines, handwritten signatures, arrows, and route lines. It's a motion that suits video intros and explainers.
But creating this stroke animation in After Effects isn't simple. The challenge is getting the path, timing, and stroke length just right so your stroke looks smooth. A small change in how the line appears or disappears can make a big difference in how natural the motion looks.
This guide will help you understand what a stroke in After Effects means and show you the steps to create it. It'll also show an alternative if you prefer a faster setup for line animations. Let's get started.

Part 1. What is Stroke Animation in After Effects?
Stroke animation in After Effects is the process of making a line or outline draw itself over time. Those lines create smooth paths that reveal shapes, text, or logos in motion. It's a motion graphics technique that turns static elements into something more dynamic.
The main tool to animate a stroke in After Effects is the Trim Paths feature. It lets you control the Start, End, and Offset of a stroke. By adjusting these values, you can define how the line appears, disappears, or moves along a specific path.
You can use stroke animation in many types of videos. It's often applied in:
- Route animations for travel videos: Lines trace across a map to mark a journey or highlight each stop along the route.
- Outline strokes in product showcases: Thin lines highlight product edges or reveal parts of a shape to show design details.
- Handwritten logo or signature reveals: Strokes follow custom paths to imitate natural handwriting, adding a personal touch to branding.
- Arrow indicators for explainers or infographics: Strokes draw arrows in sequence to direct the viewer's focus or connect one element to another.
Part 2. How to Animate a Stroke in After Effects – Step-by-Step
Before you start, you need to understand how the stroke effects in After Effects work. The idea is to draw a line that gradually appears across your screen, using simple shape layers and a keyframe-based animation. You'll use the Trim Paths feature to control when and how the stroke draws itself.
Method 1: Basic Stroke Animation with Trim Paths
Here's how to animate a stroke in After Effects using the Trim Paths feature:
Step 1
Create a Shape Layer
Start by adding your shape to the timeline. You can import an Illustrator file or create a shape directly inside After Effects using the Shape Tool. Both work the same way.
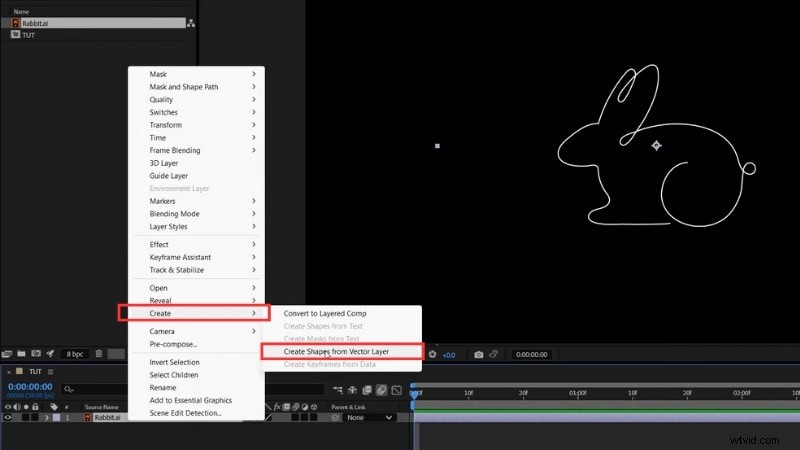
If you're using an Illustrator file, right-click on it, select Create > Create Shapes from Vector Layer.
Step 2
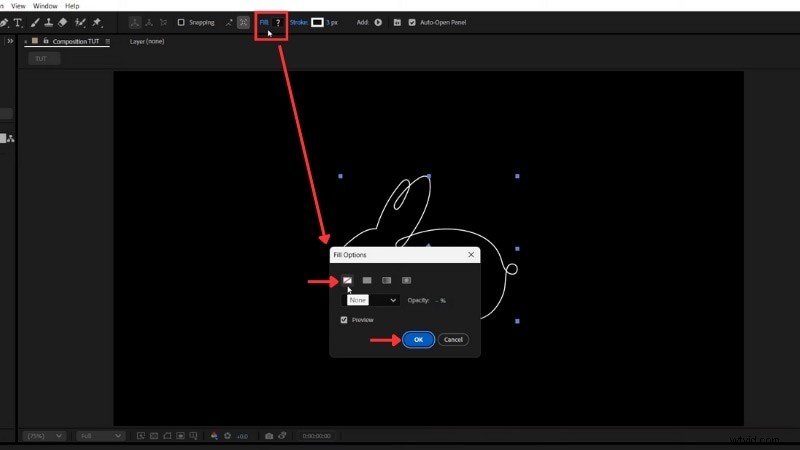
Remove the Fill and Set the Stroke
We need to ensure our shape only has strokes. To do this, select your shape layer and head to the toolbar to set the Fill > None.
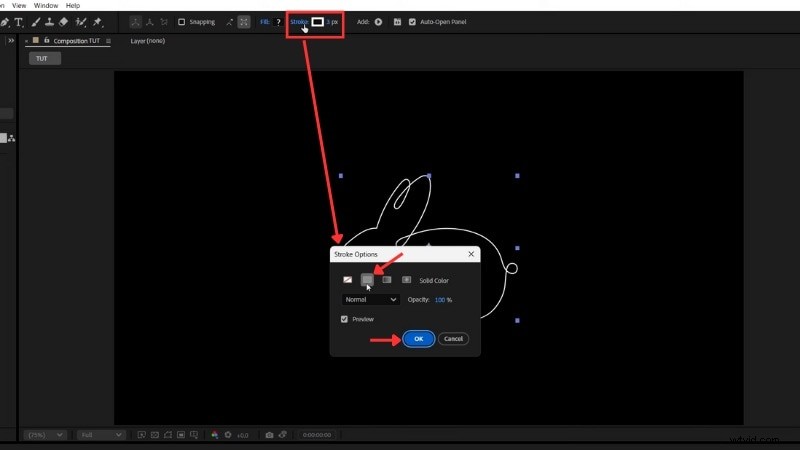
Next to the Fill option, set the Stroke to a solid color. Adjust the Stroke Width to control how thick the line appears.
Step 3
Add the Trim Paths Effect
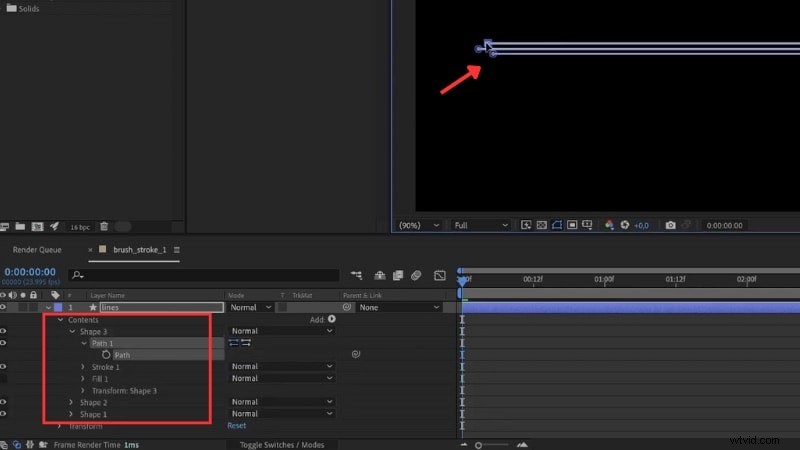
In the Timeline panel, open your Shape Layer's dropdown, click Add, and choose Trim Paths. This feature lets you animate the Start and End points of your line.
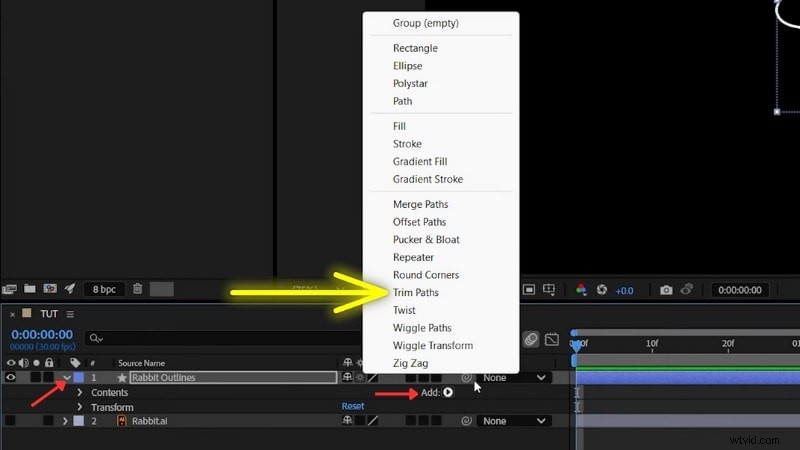
Expand the Trim Paths section. Set End to 0% so the stroke is invisible, and click the Stopwatch beside End to create your first keyframe.

Move the playhead a few seconds forward and set End to 100%. The stroke will now draw itself from start to finish.
Step 5
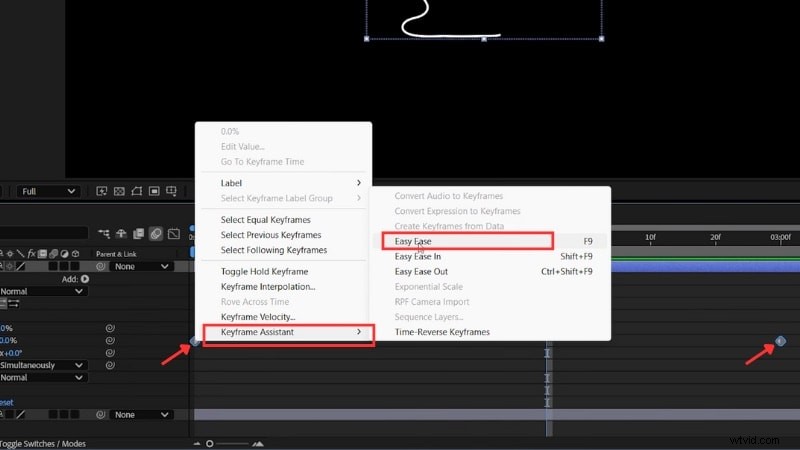
Smooth the Animation
Select both keyframes, right-click, and choose Keyframe Assistant > Easy Ease or press F9. This smooths the motion.
Now you have an animation of a stroke in After Effects using the Trim Paths. You can apply the same steps to different shapes, text outlines, or logos for creative reveals.
Method 2: Brush Stroke Animation
You can also create hand-drawn paint or ink effects using the After Effects brush stroke technique. This creates softer, natural edges that look like real brush paint rather than a clean digital line.
Follow the steps below to learn how to create one:
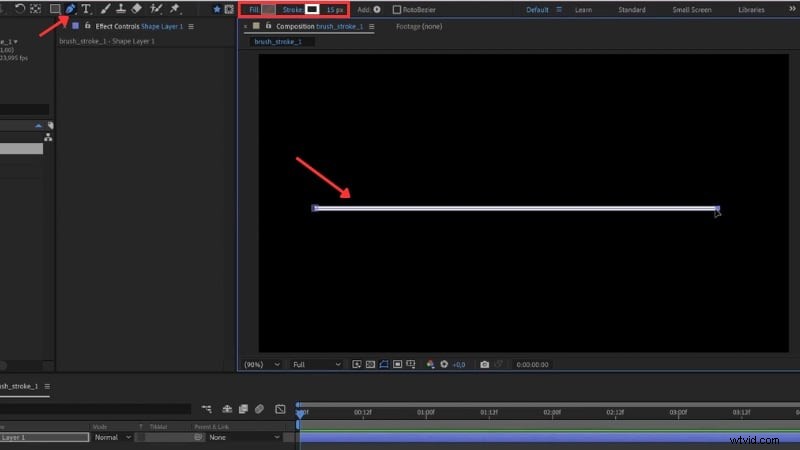
Step 1
Create a New Composition
Make a new comp and name it Brush Stroke 1. Keep it in HD resolution and set the duration to about five seconds.
Select the Pen Tool and draw a straight line across the screen. Hold Shift to keep it straight. Turn Fill > None and set the Stroke Width to around 6 pixels. Pick a color such as white for now.
Step 3
Duplicate and Vary the Lines
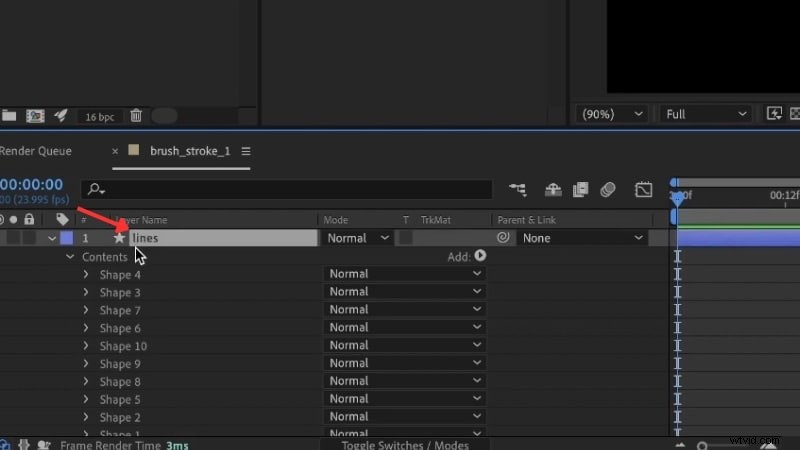
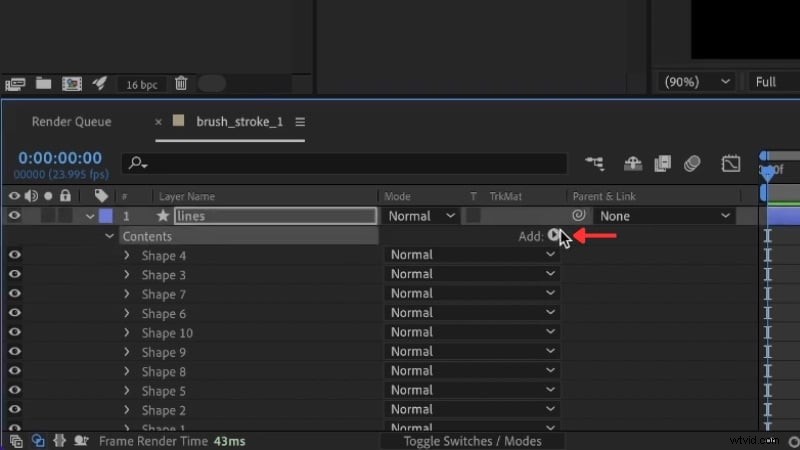
Go to the shape layer, open the Content property, and duplicate the Path several times.
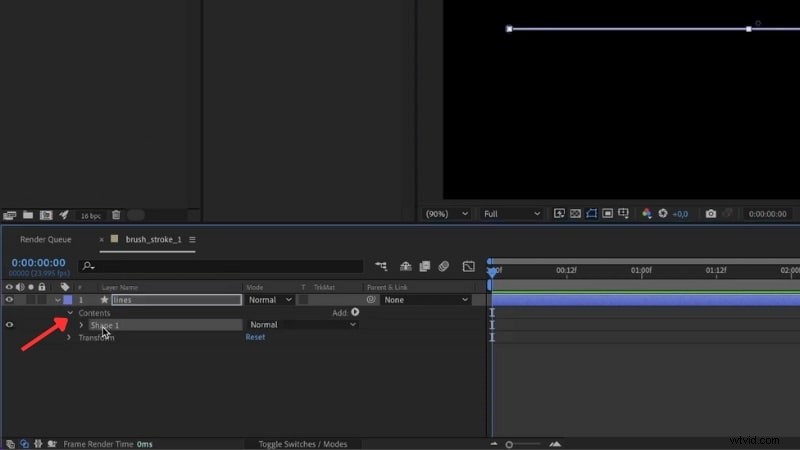
Adjust the Path Position for each new line so they sit slightly below one another. Change some widths to 10 or 15 pixels to create a thicker, layered look. Around ten lines usually works well.
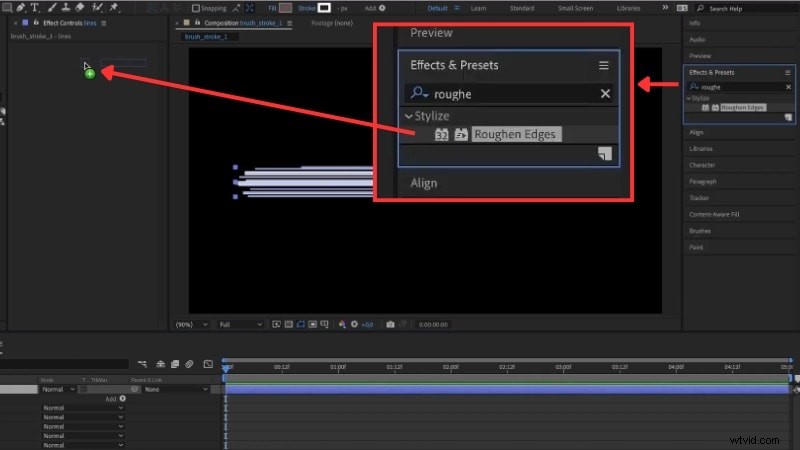
Click on the Lines layer, and head to the Effects & Preset panel.
Search for Roughen Edges, and apply it to the Lines' Effect Controls.
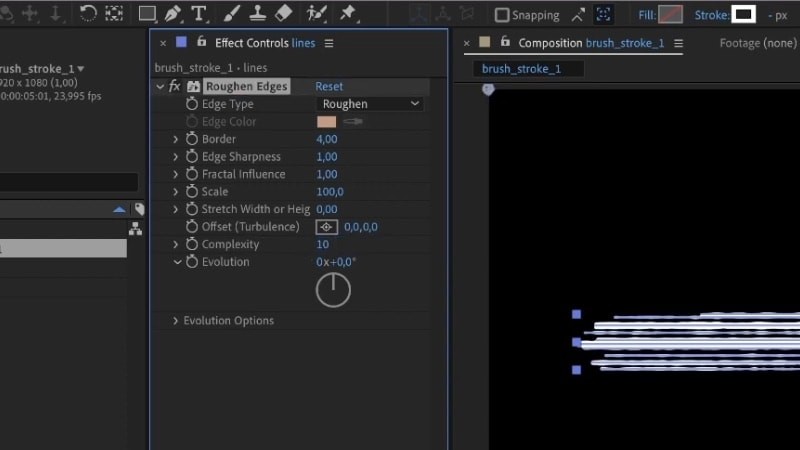
Set the Border around 4 and the Complexity near 10. This adds uneven edges, giving the line a textured, brush-like appearance.
Step 5
Add Trim Paths to Animate the Brush
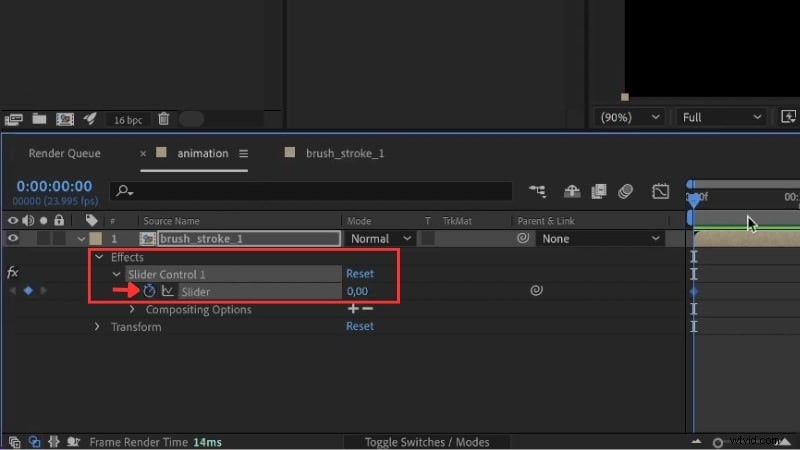
Open the shape layer, head to Content, and click Add > Trim Paths. Ensure you add it to the entire group that contains all your duplicated lines, not just one line. This way, all the lines will animate together as a single brush stroke.
Expand the Trim Paths settings to adjust the Slider. Move the playhead to the start of the line stroke and set the Slider to 0%. Click on the Stopwatch icon beside the Slider to create your first keyframe. Then, move the playhead forward and change the Slider presentation to 100%. The stroke now draws across the screen as one unified motion.
Now you have created a brush stroke in After Effects that animates across the screen. You can combine several brush strokes, adjust their colors, or bend their shape for a more artistic animation.
Bonus: Do You Really Need After Effects? Try the Alternative
Do you want to animate a stroke in After Effects but don't want a complex setup? In motion graphics, strokes do more than decorate. They guide the eye, trace paths, and reveal shapes with intent. You'll often use stroke animation in travel routes, logo reveals, explainer videos, or product highlights.
But, if your goal is to create these effects quickly, After Effects might not be the best fit. Animating a stroke in After Effects can take time and involve several setup steps. For those who prefer video editors that provide a simpler workflow, try an alternative editor like Wondershare Filmora.

 Secure Download
Filmora Version 15 has introduced a Pen Tool feature that also lets you create stroke animation like in After Effects. The difference is that everything happens in one place. You can draw on the video canvas, adjust curves, and animate the line's path without switching between multiple layers.
Compare Stroke Animations in After Effects vs Filmora
Take a look at the table below to see how Filmora stacks up against creating stroke animations in After Effects:
| Feature | After Effects | Filmora |
| Main Stroke Tool | Shape Layers with Trim Paths for line animation. | Pen Tool with Stroke and Trim Path animation controls. |
| Workflow Complexity | Requires multiple layers, effects, and keyframes. | All adjustments in a single panel. |
| Learning Curve | Steep for new users. | Easy to learn. |
| Stroke Animation Controls | Start, End, and Offset for timing. | The Start and End slider settings appear right after activating the Trim Path. |
| Plugin Requirement | Often needed for advanced styles. | Stoke animations don't need a plugin in Filmora. |
| Rendering Speed | Depends on comp size and effects. | Optimized for faster exports. |
| Best For | Complex motion graphics and custom animation rigs. | Quick animations, intros, and tutorials. |
How to Animate a Stroke in Filmora
Follow the steps below to create a stroke animation in Filmora:
Step 1
Start the Project and Add Assets
Open Filmora and start a new project. Import your video or image and drag it to the timeline. Adjust its position or size on the preview window to frame your scene properly.
Step 2
Draw the Path with the Pen Tool
On the toolbar menu above the timeline, go to Drawing Tools > Pen Tool.
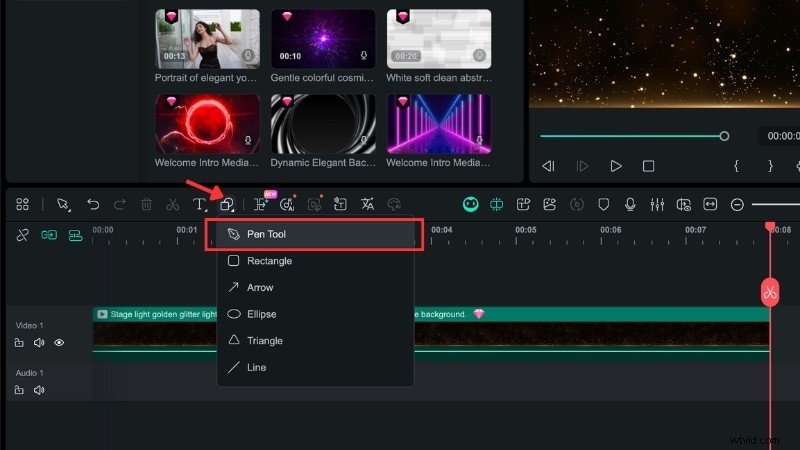
Then, you can draw your stroke on the preview screen.
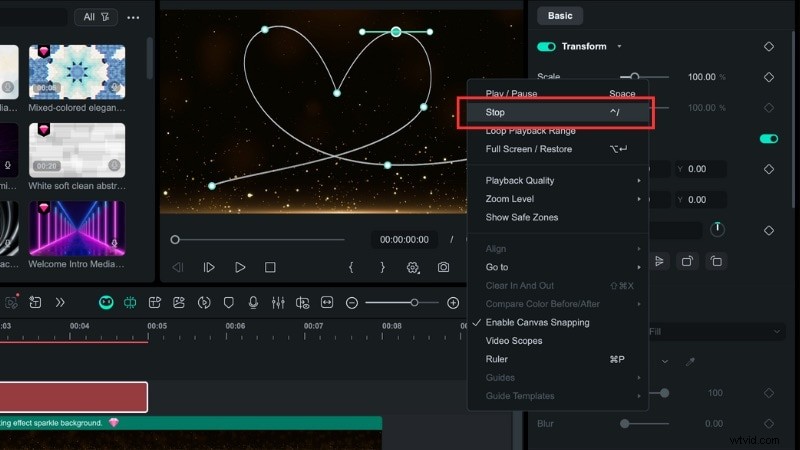
Click once to add straight points, or click and drag to make it curve.
When you finish drawing, right-click on the screen and select Stop to confirm your path.
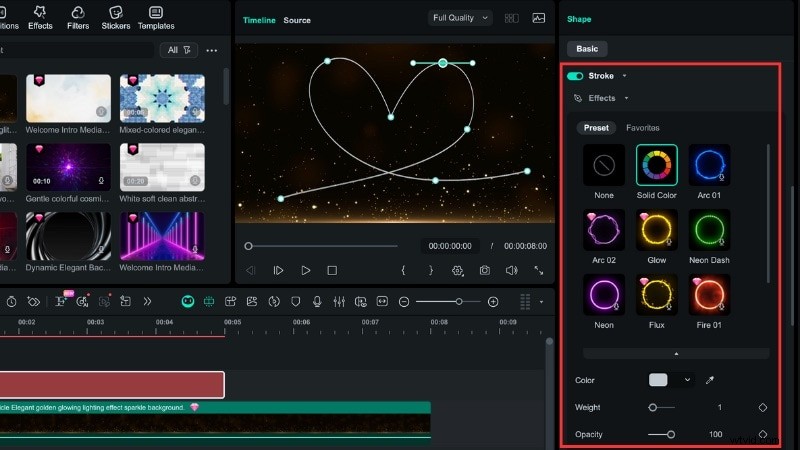
Step 3
Customize the Stroke Style
Once you create a shape with the Drawing Tools, the Shape Editing panel will open on the right side of your screen.
Scroll to the Stroke section where you can set your line Color, adjust the Weight (thickness), or set Opacity. You can also pick from the Preset stroke style if you want a faster setup.
Step 4
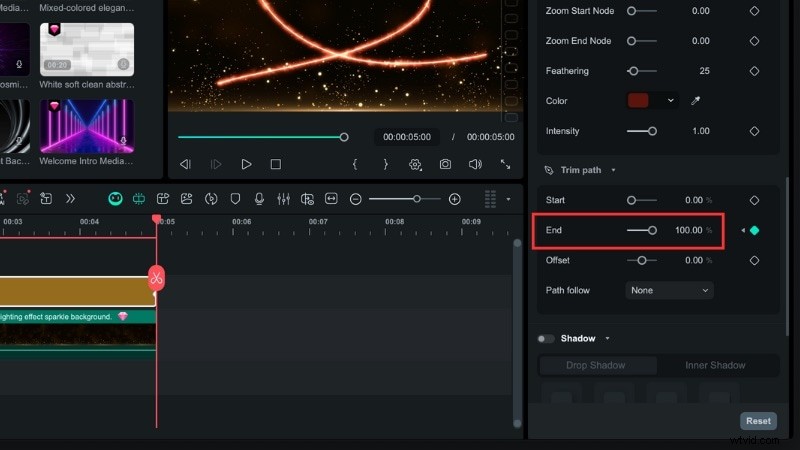
Animate the Stroke with Keyframes
In the same panel, go to the Trim Path section. This tool can help add keyframes to your stroke lines.
Move the playhead to the start of the clip and set End to 0%. Click the Keyframe icon to mark the first frame.
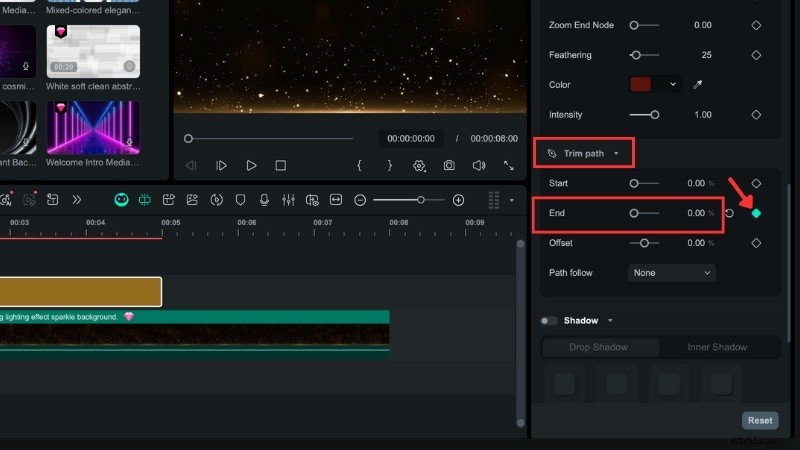
Then, move the playhead forward and change End to 100%. The next keyframe will be added automatically.
This setting creates a smooth stroke animation that draws across the path.
Step 5
Preview the Stroke Animation
Play the video in the preview window to review the animation. Adjust the stroke timing or path shape if needed to make it flow naturally.
Conclusion
Learning to animate a stroke in After Effects is a useful skill for creating outlines, logo traces, or motion paths. It offers precise control but takes time to set up and adjust keyframes.
If you prefer a faster and simpler setup, Filmora's Pen Tool can achieve a similar stroke animation in After Effects with less effort. It lets you draw shapes on the canvas, adjust stroke styles, and animate the path directly in one place.
Filmora suits creators who want smooth stroke animations without a steep learning curve. Try it today and see how quickly your edits can be.

Filmora
AI Video Editing App & Software
Best tool for making videos anywhere for all creators!
Your Perfect First Video Edit Starts Here - No Experience Needed