Have you always admired those neat shots that usually appear at the holidays that give the pretty out of focus lights, referred to as BOKEH, fun shapes? If you have, I have a great, EASY tutorial for you that will send you on your way experimenting in no time! If you’ve wondered how to create shaped bokeh, look no further.
Here is what you will need. You probably have everything around the house and you can pull the whole project together in less than 15 minutes!!!
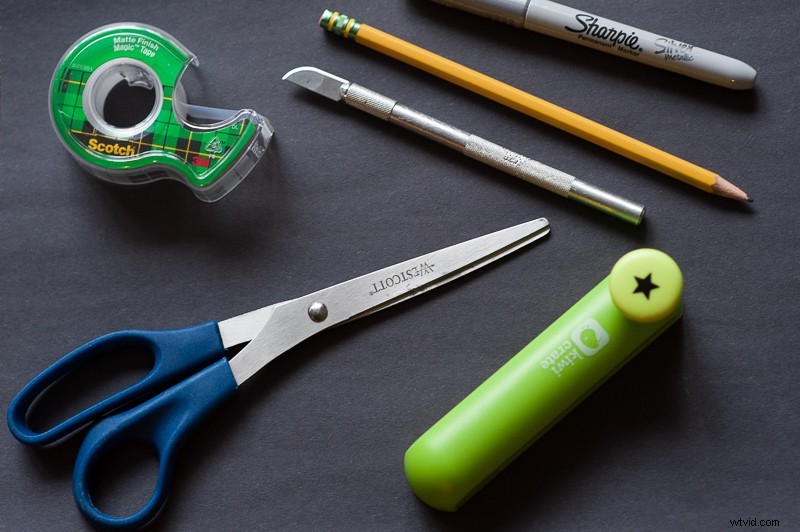
- Black paper
- Scissors
- Tape
- Pencil
- Marker
- Craft paper punch OR item to trace shape and an X-Acto knife
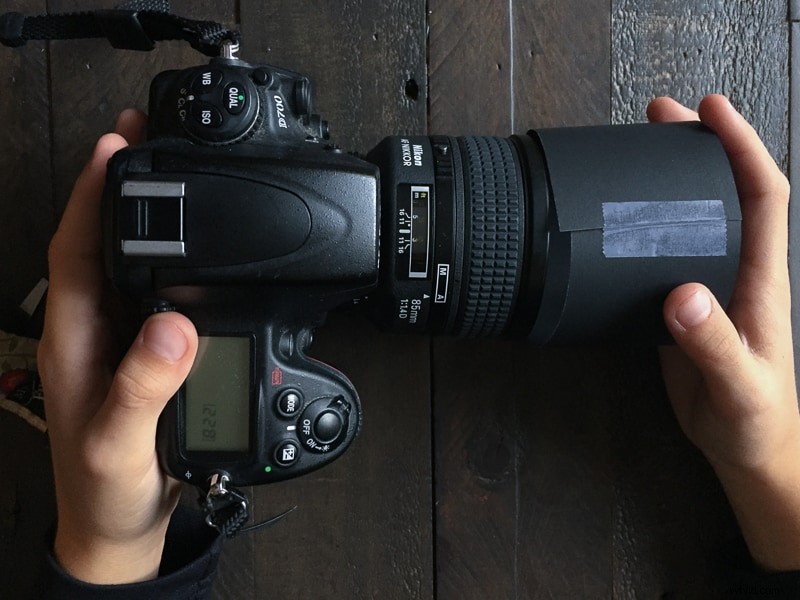
Step 1
Cut a strip of paper about 1 ½” wide that will fit snuggly around the barrel of the lens you plan to use on your camera. Overlap the edges and take together. It should slip on snug over your barrel.
Step 2
Trace your lens on the paper. Then, make another circle around it about an inch bigger. You will only cut on the outer circle line.
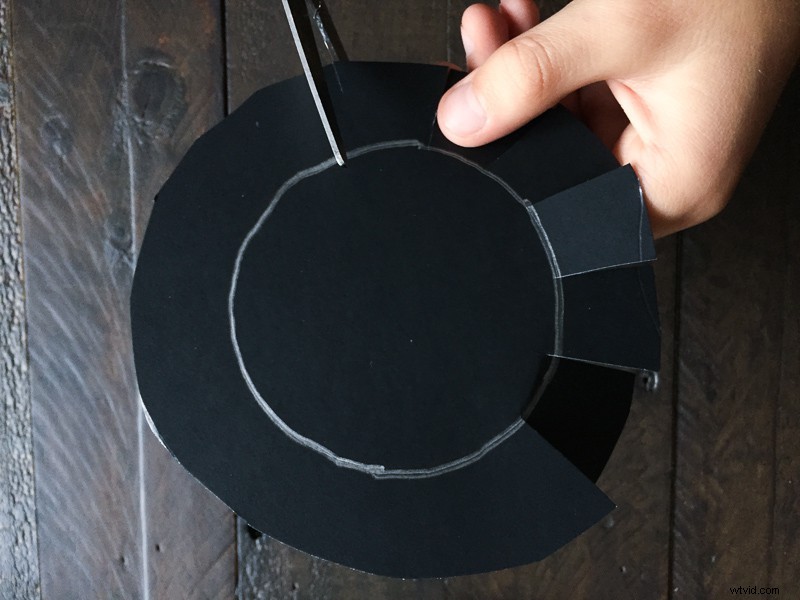
Step 3
Make slits from the outer edge into the inner line, which was the original trace of your lens size. This is so we can fold it nicely and attach it to the original paper that was fitted for the outside of your lens.
Step 4
Use your craft punch to punch out a design in the center. If you don’t have one, draw a shape and cut it out with your X-Acto knife. Make sure it isn’t too small – approximately a ½- ¾ of an inch should do the trick.
Step 5
Bend down all the tabs you made on the circle. Place the circle onto the strip of paper you fitted for your lens body in step 1. Use tape to hold it together.
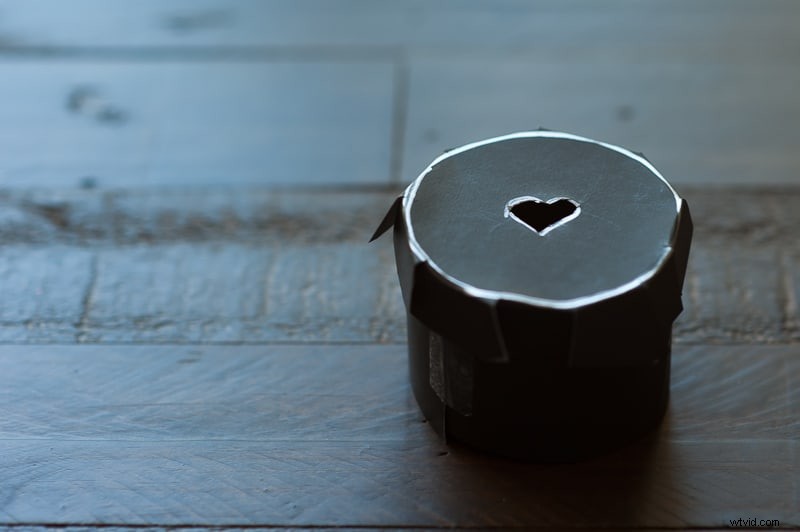
That’s it – slide it over your lens and watch the magic happen. Now that you know how to create shaped bokeh, the possibilities are endless!
Just Released – Snapshots to Stunning Landscape Photography! Click Here for Launch Special Pricing & to Learn More
A few tips:
*Get the best look using your widest aperture. For me this is f1.4 on my 85mm.
*Stand back from the lights.
*If you are photographing a subject, get close to it, and put the focal point on it/them.
*Put space between your subject and the background lights you want blurred out/shaped.
*Full Manual mode and Aperture Priority work well with this technique.
* If you don’t have a subject and just want the lights blurred to a shape – put it on Manual focus and make it “out of focus”.
I hope you enjoy this fun tutorial that you can really use all year long!