Are you looking for new creative inspiration for your photography? One way to do this is to experiment with new props, such as a crystal ball.
This is a fantastic piece of equipment for any photographer to have. It works as an external lens and is very versatile.
In this article, you will learn how to take great crystal ball photography.
Equipment You Will Need
Starting out with crystal ball photography is easy. The glass ball works in much the same way as the optics in your camera lens do. The light bends until it inverts within the ball. This is refraction. Refraction is one of the key characteristics of refraction in lensball photography.
For great crystal ball photography, you only need to opt for the following items.
The Basics
- Crystal ball (or lensball) – Essential for this form of lensball photography. There are various sizes you can choose. The size most photographers use is either 60 or 80mm.
- Camera body – Any camera (even smartphones) can work.
- Wide-Angle lens – This is the best combination for crystal ball photography. It allows you to include the surroundings in your frame. You can also buy a macro lens if you want to fill the frame with the ball.
- A tripod – This is useful if there is no other place to position the ball. You can use the top of your tripod combined with a crystal ball holder. Make sure the tripod head is flat!
Accessories
- A crystal ball holder – This can be useful to keep the ball still when the surface has no natural resting place. If you can find a natural resting place, this will create a more impressive photo.
- A bottle top– An alternative to a crystal ball holder. Upturned, this has a circular edge that the ball will sit on without rolling away. The surface the bottle top is on must be flat.
- An old sock – To prevent the ball from getting scratched, place it inside a sock when in transit. Some crystal balls even come with their own pouch!
- Twigs or pebbles – Sometimes, the ball will need a little help staying still. Placing a few nearby twigs or pebbles behind the ball prevents it from rolling away.
How to Shoot Crystal Ball Photography
Now that you know what equipment to buy, it is time to show you how to use it.
Choose An Enhancing Subject
When choosing a subject for crystal ball photography, check whether it fills the frame with a wide-angle lens. If it does, then you have a good subject because the optics of a glass ball are like fisheye lenses.
Let’s look at a few photography types and see how well they work with crystal ball photography.
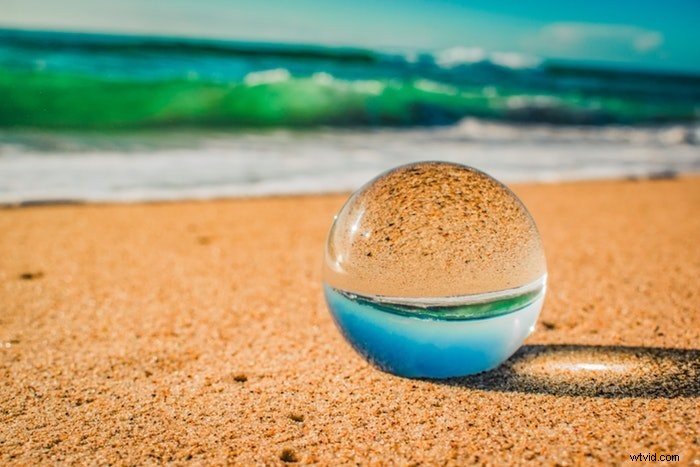
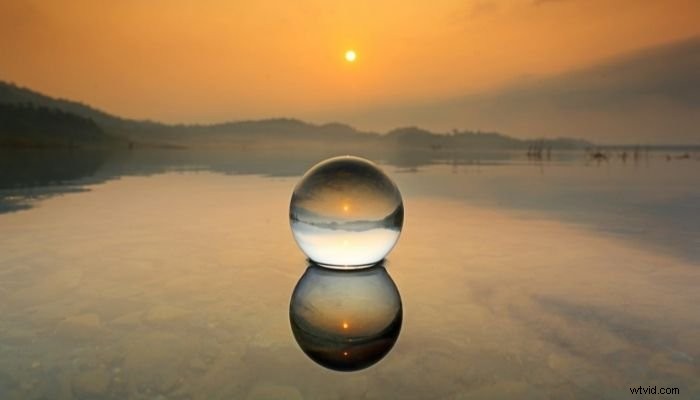
- Landscape – The most common type of crystal ball photography is landscape. You need to find a good location with a wide-angle lens. The trick now is to find a suitable location to place the ball.
- Portrait– Portrait photography with a lensball is possible. The aim is to avoid a busy background with the model appearing upside down. You can achieve this by blurring the model out using bokeh. Or, you can use the glass ball as a prop.
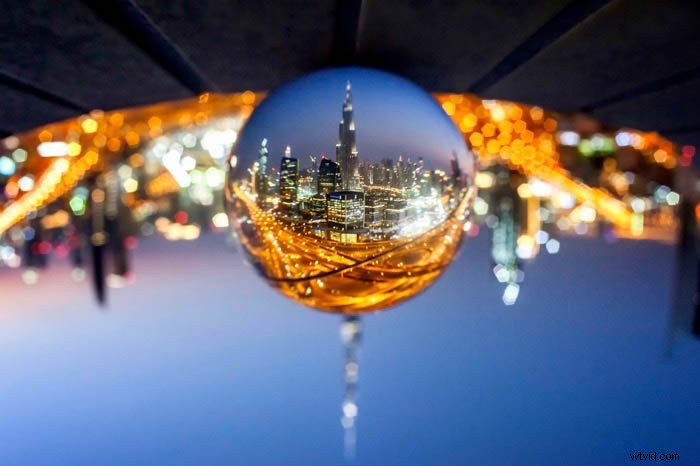
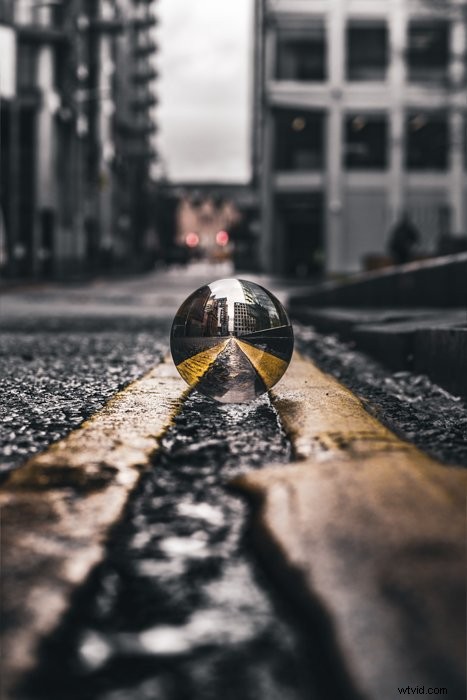
- Architecture– Architecture is one of the best options. Especially when you can use repeating patterns and leading lines in the background. Using a wider angle lens is often better. You can use those leading lines to lead into the ball.
Find the Right Placement for Your Crystal Ball
As with all types of photography, finding a great location is essential. It can more challenging with a crystal ball. You need a good location for your subject and to position the ball. Here are some suggestions.
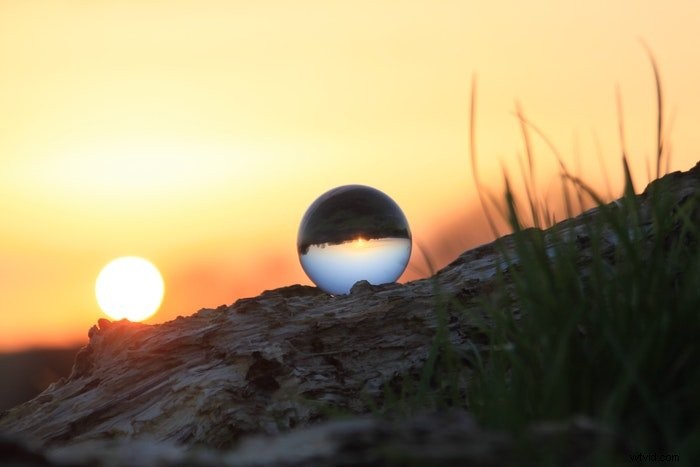
- Natural divots– These are places where the ball will sit without rolling away. These could be rocks, a tree branch, or sand.
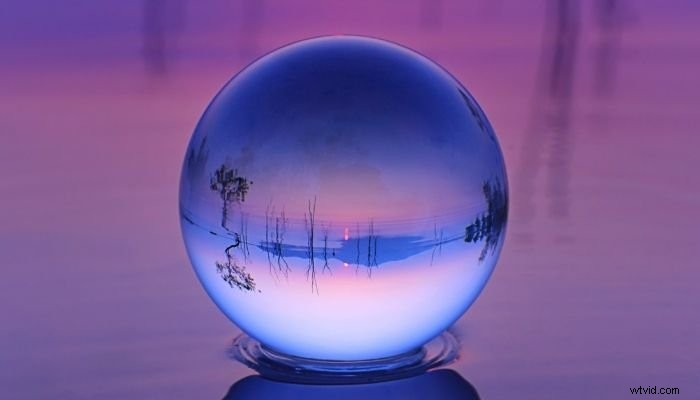
- Reflection pools – This solves the problem of the upside-down image. A clear reflected image will appear to be ‘right side up’ within the ball. If the water is shallow enough, you might be able to place the ball in the pool. Or you can find a position that shows the reflection from the pool inside the ball.
- A wall or fence – Placing here will mean the ball is elevated off the ground. This ensures that there is more of the scene included within the ball, as the ground does not block out the view. Certain fences might have a natural place you can sit the ball, such as a wrought iron fence’s curves.
- Your own props – You can bring bottlecaps with you that balance your crystal ball out. If you are looking for something more creative, get an ice cream cone and place the ball on it. Or use a blanket that will stop the ball from rolling away. The more the prop’s colours match the scene, the better.

Choose a Great Background To Make Your Composition More Flattering
The main subject is the crystal ball, but neglect the background, and your photo will fall flat. Avoid ugly shapes in the background that draw the eye away from the crystal ball itself.
The background is going to be controlled by the type of lens you use, either long focal length or width.
- Long focal length – This means lenses over 50mm. The likeliest such lens is a macro lens. When using this type of lens, you will be compressing the scene. Only concentrate on a small area of the background, while the larger scene is displayed inside the ball. Using a large aperture to blur out the background is a great solution to remove it from your frame. A slight angle adjustment can also change the background.
- Wider angle lenses – Using a wide-angle lens means you intend to show much of the background in your photo. To do this, you need to know how background lines and shapes interact with the ball. The best situation is leading lines directing the eye to the ball. Placing the ball at the centre of an infinity point can look great.
Common Mistakes of Crystal Ball Photography
There are various issues you will need to overcome in your crystal ball photography—these range from safety to the practicality of photographing an upside-down image.
Fire Hazard
This is no joke. You need to be careful where you put your ball for storage and when outside. The glass ball works in the same way a magnifying glass does. Given enough time, it can start a fire.
You also need to be careful when handling the ball as it can burn you. To avoid this, do not store the ball in sunlight and keep it inside a sock so sunlight can not get to it.
Rolling Risk
When the crystal ball is placed on a wall or balcony of a tall building, it can be a serious issue.
Make sure the ball is secure before moving away from it, especially on a windy day. The damage a falling glass ball can do to property or another person can be substantial.
Elevation
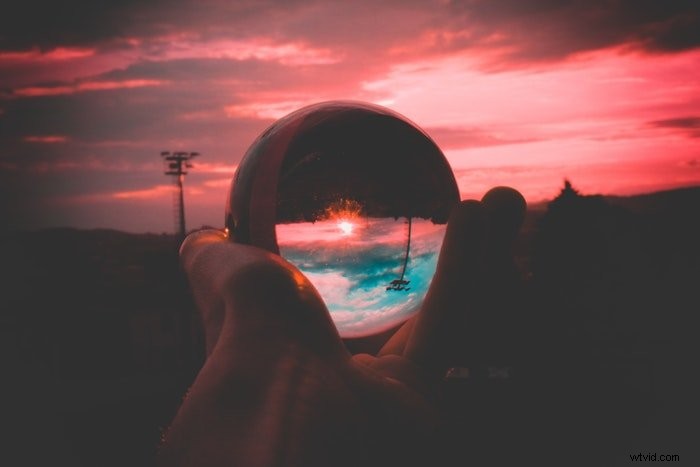
The position of the ball relative to your subject is important. If the ball is on the ground, half the scene will include it, with the other half containing a distorted image of your main subject. The solution is to raise the ball off the ground.
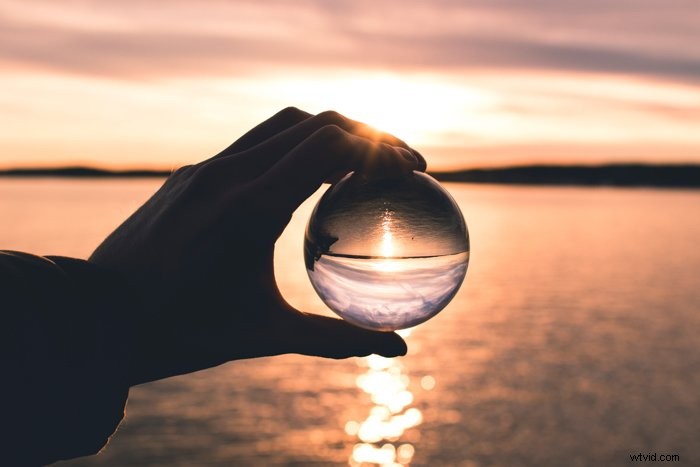
If there are no places you can put the ball down at an elevated angle, then holding the ball is another option. One of the more appealing visual effects the ball creates is when it bisects the horizon line.
Light
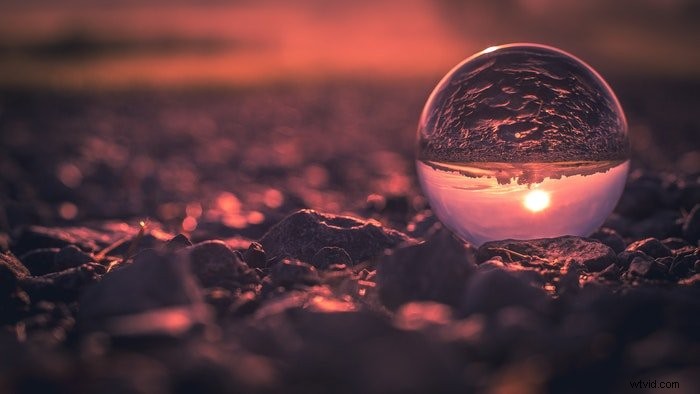
Poor use of light will result in a bad photograph, and this is particularly true of crystal ball photography. The best scenario usually has the sun behind you, lighting up the subject.
Place the ball somewhere in the shade to avoid the reflection from the sun. The aim is to have brighter light in front of you than behind. This means photographing the sunset or blue hour sky will also work well.
Aperture
Aperture is an important function for controlling the background. As mentioned, it will blur the background out with a large aperture.
The catch is that it will create a shallow depth of field within the ball, making it harder to make the image within sharp.
This is where a balance must be reached. Too large an aperture, and the image in the ball is not sharp. Too small, and the details in the background become too prominent.
If you are using a macro lens, then an aperture of around f/6.3 will usually blur the background enough while keeping the image in the ball sharp.
Conclusion
Crystal ball photography is a great thing to try out, and it will lead to added creativity in your work. Whether you are a landscape, macro, or portrait photographer, you can utilise this prop to enhance your images.
We hope that our article has equipped you with a great grounding to go out and get the best photos with your crystal ball.
For more creative inspiration, check out our Wow Factor Photography course.