Autumn is full of bright, warm colours. Every leaf and every tiny pumpkin is just asking to be a part of a still life story. And when it’s time for Halloween, these stories turn into spooky Halloween photography.
Slightly eerie, but really fun to tell. So, why not channel that Halloween spirit and photograph spooky still life with moonlight and a haunted mansion?
1. Make a Sketch of Your Halloween Photography Composition
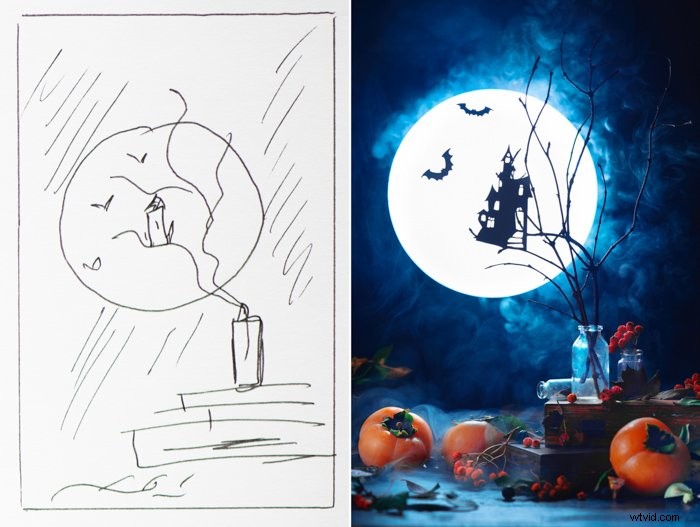
Many fantastic shots of magical moments are spontaneous. But object photography and creative still life usually require some advance planning. So, make a sketch.
Think of the story you’re trying to tell. Is it about a dark wizard study room with an occasional spider? Or maybe you want to photograph a witch flying against a gigantic full moon? Or a classical rising zombie hand?
Graveyards, ancient castles, ghosts, evil spirits, boiling cauldrons, trapped fairies, eerie potions, and flying bats are all at your service!
Pick something and sketch a simple outline of the composition you’re about to arrange.
Go for something scary and fearful. Or something spooky, but all in good fun.
I never take any true goosebump inducing photos. But playful, funny Halloween is still Halloween!
2. Which Thematic Decorations Should You Use
Take advantage of all the Halloween decorations around! Did you buy a spider web spray? Use it! Did you carve Jack-o’-lantern? Perfect!
Artificial spiders, tiny brooms, old books, potion bottles, autumn leaves, orange and black striped socks.
All these things are waiting to be a part of your Halloween photography creative process. Pick something that makes you feel inspired!

3. How to Make Cut Out Halloween Photography Silhouettes
For any still life photographer paper is a life saver. It’s the most wonderful, flexible and versatile material you can use for bringing your ideas to life.
You can craft an entire zombie apocalypse city with glue and scissors!
But if you’re not quite ready for that (I’m certainly not), start with something minimalist, clean and simple.
Simple silhouettes are a great choice.
DIY Silhouettes
Simplified iconic shapes are all you need to create a spooky Halloween story. Silhouettes are easily recognisable.
That’s why you can use a silhouette of a cauldron with boiling bat wings, marrow bones and who knows what else instead of crafting or buying some realistically looking props.
From a narrative standpoint, a plastic 3D model of a dragon and a paper-cut silhouette of a dragon are the same.
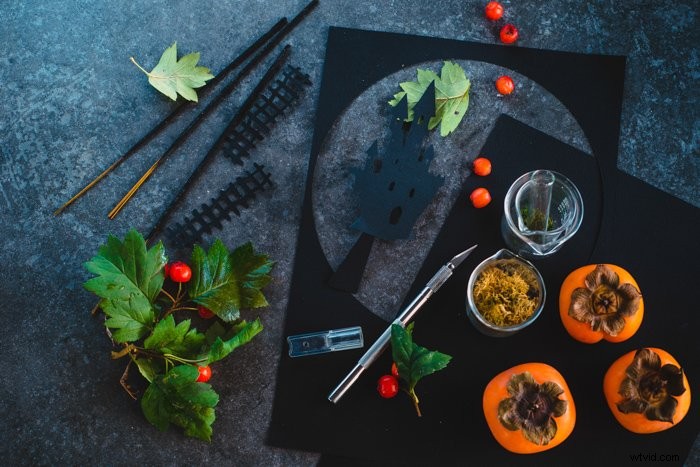
Think about your story first. And then cut out some silhouettes of Dark Lord castles, graveyard fences, cauldrons, pumpkins, witches and ghosts, bats and spiders!
What Paper Should You Use
I’m not a papercraft master. But I managed to cut out a silhouette of a haunted mansion from dark paper with a layout knife. It’s not as hard as it seems, you just need to pick the right paper.
If the paper is too thick, it requires a significant effort to cut through it. If the paper is too thin, it’s too easy to tear.
The best paper I was able to find is pulp-dyed pastel paper with the thickness about 160-180 gsm.
If you’re not used to cutting tiny figures out of paper, just buy some pre-cut paper silhouettes at a local scrapbook store.
They will definitely have some Halloween-themed designs, especially this time of year.
4. Play With Light to Capture the Spooky Mood
Lighting is essential to an eerie Halloween atmosphere. And this is a great opportunity to practice low light photography.
First key feature here is using dark shadows. Take advantage of obscurity and don’t be afraid to use harder light sources.
Create some spots of complete darkness to make your images more dramatic.
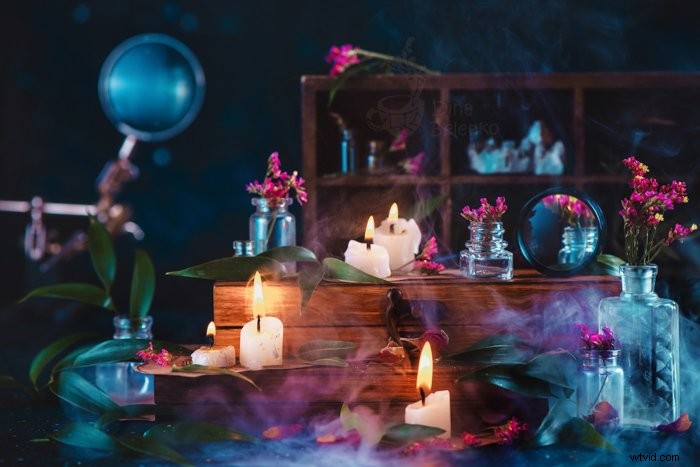
Also you can stress the mood of a picture with the soft glow of candles or fire. The light from burning candles is usually a bit warmer than the rest of the scene.
You can play it as a deliberate contrast or adjust for it using a warm colored gel on your speedlight.
I prefer the first approach, leaving soft warm spots of fire in contrast with blue smoke and a cool background.
Moreover, there are lots of cool Halloween lights you can use. From glowing skulls to small electric torches.
We’re going to use a DIY approach to create a shining moon for a creative Halloween still life.
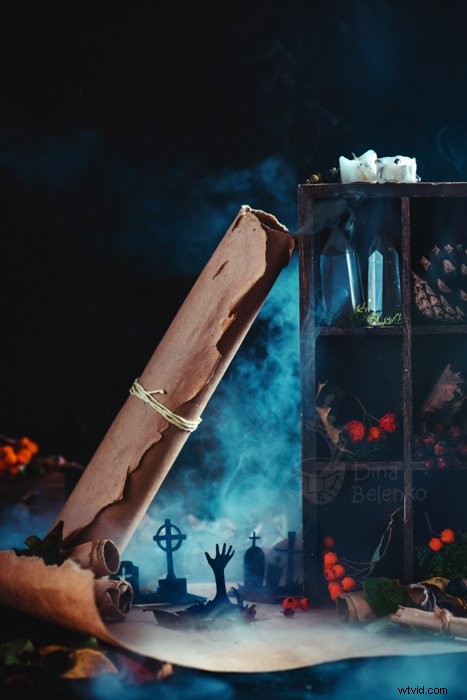
5. What Props and Gear Do You Need
We don’t need anything fancy here in terms of equipment. For the shining moon, you need two things: thick paper and a light source.
The rest can be freely replaced, changed or excluded.
So, the list of props for this project is pretty simple:
- dark thick paper for moon and Halloween silhouettes;
- something to make smoke or steam: from aromatic sticks to dry ice or hand steamer;
- dark background;
- items of your still life like crooked tree branches, wooden boxes, scrolls, candles, tiny pumpkins, if you like (I’m more of a persimmon person);
- a light source, one to make your moon shine and another to lift the shadows (but if you have only one light source, you can make-do with a reflector);
- a camera and a tripod.
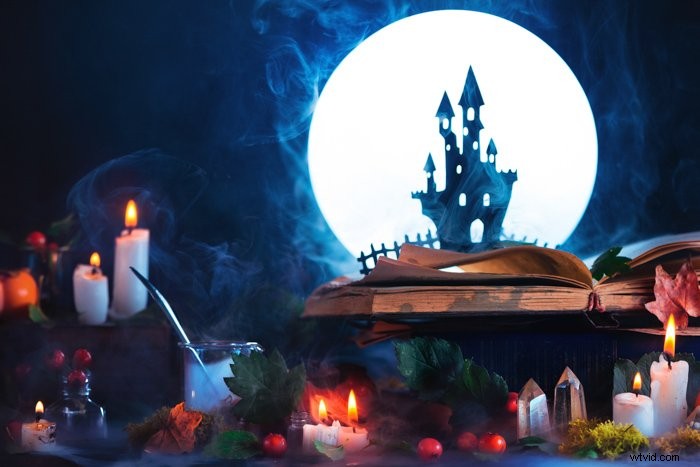
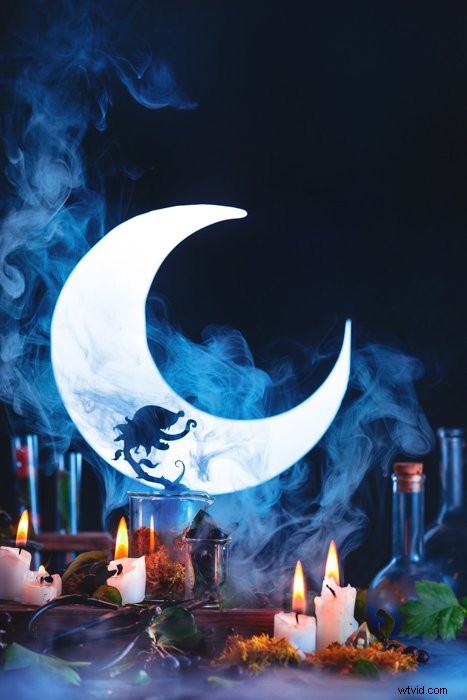
6. How to Light Up the Moon for the Creepy Factor
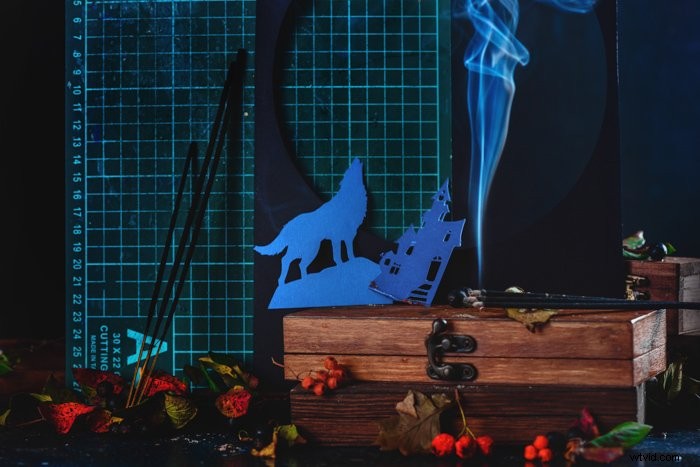
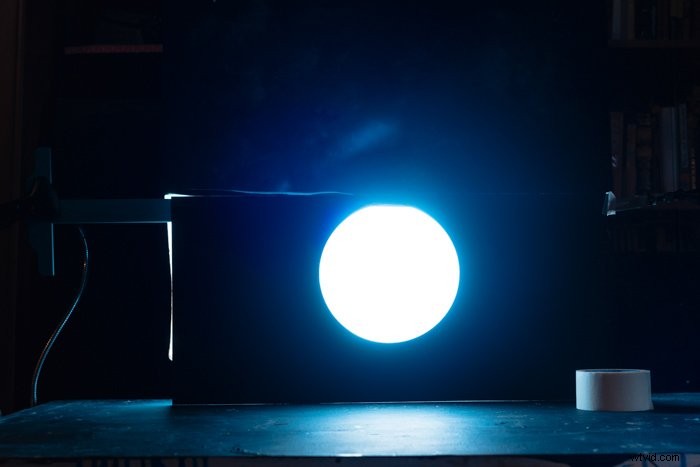
Another important detail of Halloween still life is a full or a shining crescent. Cut a circle out of a sheet of paper.
Place the sheet directly in front of your key light source and make sure that light comes only from this circle and not creeping through the perimeter.
Here, this is your Moon.
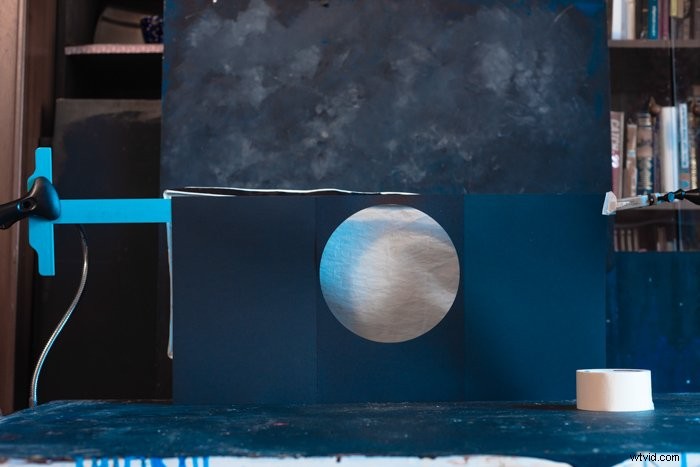
I use A4 paper, which is a relatively small format. So I had to stick together the sheet with my moon and a couple of other sheets of black paper to create the background I needed.
In my case, the scene is quite small. So I didn’t have much trouble covering everything with black paper to leave only the circle of light visible.

7. What Light Setup Will You Need
The light behind our moon is going to be our key light. Backlight works great for dramatic still life photos, that’s why I’m always happy to use it.
I use a speedlight inside a small strip box. Another speedlight behind a large diffuser on the right side of the scene is working as a fill light.
And finally, to make shadows a bit softer, I placed a reflector on the right side.
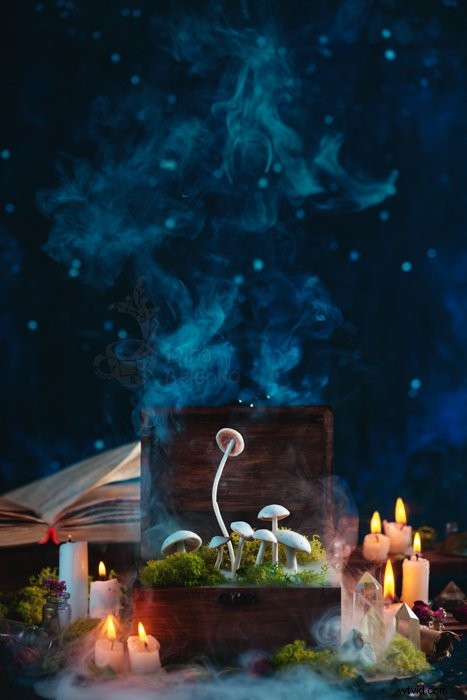
I wanted to include a couple of candles as ambient lighting.
So I had to keep the power of my speedlights down (about 1/16 for the key light and 1/32 for the fill light) to let the candlelight cast reflections on my still life.
8. Composing Your Spooky Scene
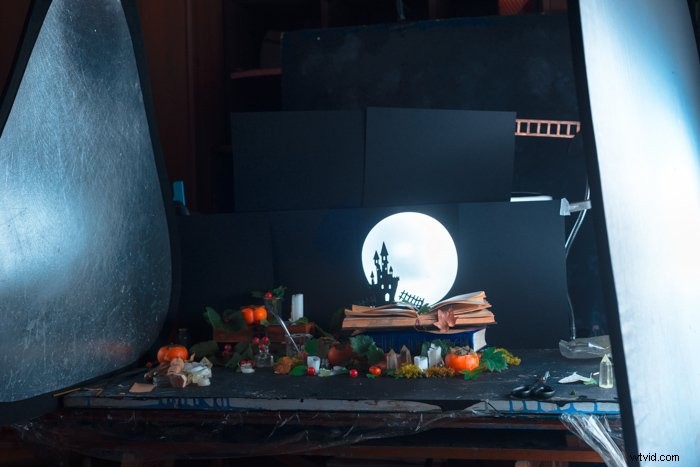
Start from the largest objects and move to the little details when arranging your Halloween scene.
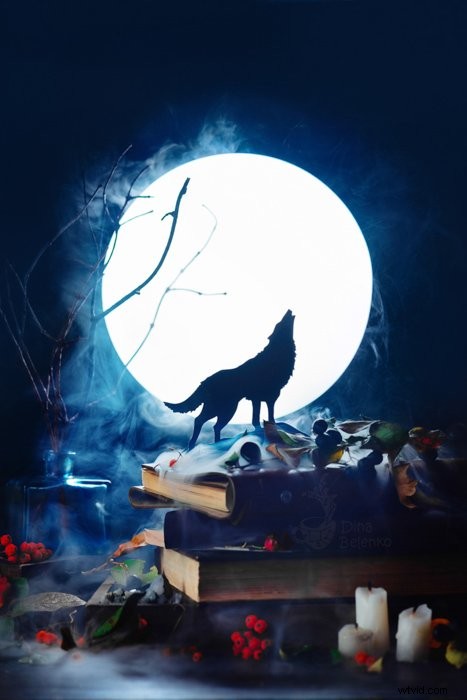
Place your haunted castle or other spooky Halloween silhouettes in front of a light moon circle.
This creates a nice contrast and makes your silhouette the visual centre of the composition.
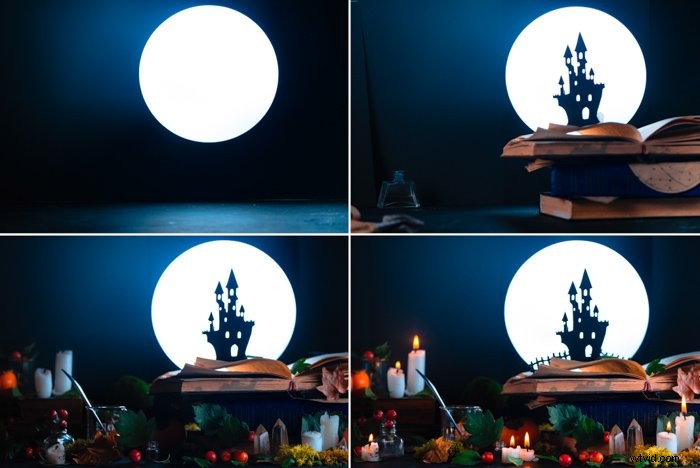
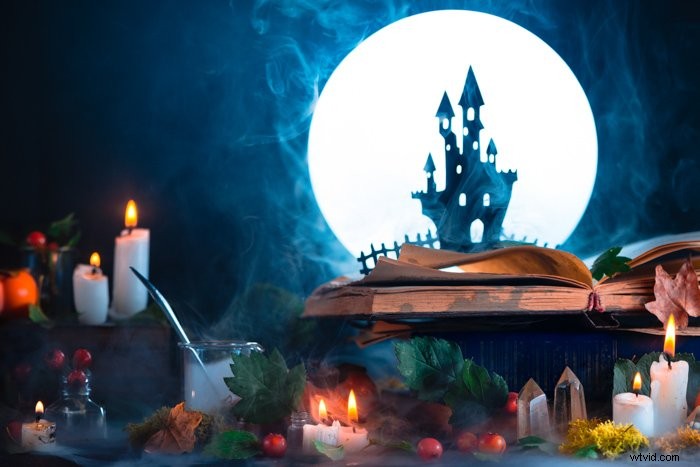
I started with a pile of books as the most massive object. I put my haunted castle on the top of it, fixing it in place with scotch tape.
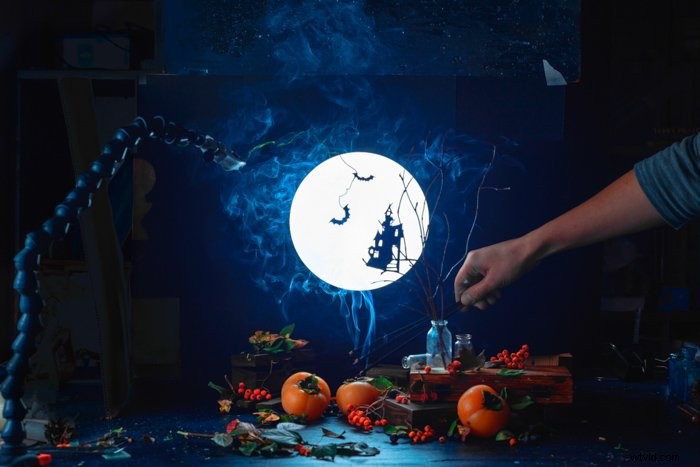
After that, I added moss, crystals, hawthorn branches with leaves and berries, and a couple of alchemy test tubes.
For last year’s Halloween series, I used tree branches as a stand for my castles and spiders.
Their silhouettes looked great even without paper cutouts.
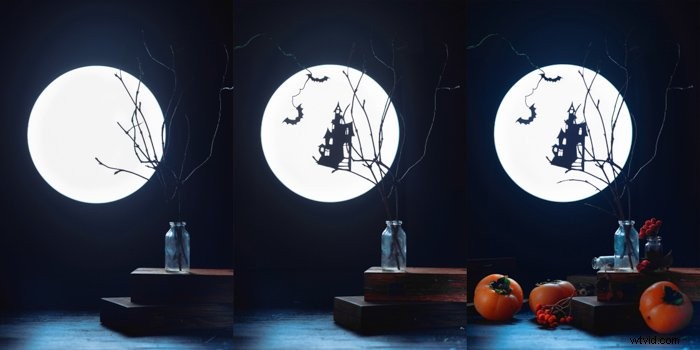
If you don’t want to place your object on a solid surface, you can make it fly in the night sky instead. Use a string of wire to hold a paper silhouette in the air.
I did it with my bats, you can do it with a witch or a flying vampire. And at Christmas, you can try to shoot Santa’s sled that way.

9. Add Some Smoke for Movement
Do you like your composition? Yes? Then it’s time to add some action!
Some smoke or steam, which will be lit from the back, will make it look glorious!
To create smoke I used three burning aromatic sticks.
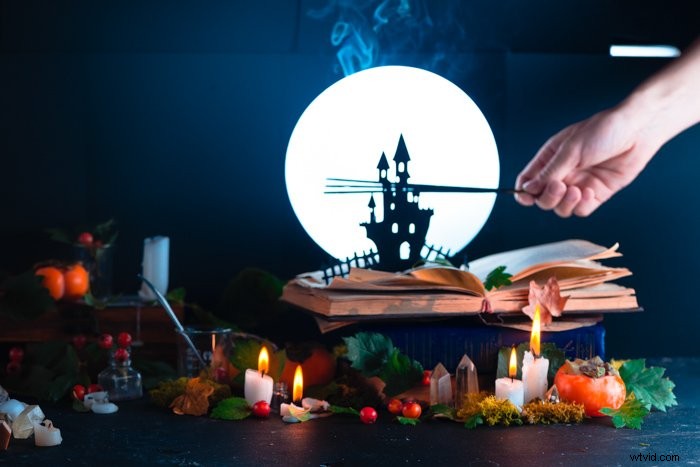
You can try using dry ice, a clothes steamer or a special smoke machine if you’re lucky to have one. I’m not that lucky, so I use incense.
Aroma sticks are cheaper than a fog machine, more accessible then dry ice and safer than an open flame.
You just have to be careful with ashes and shoot in a well-ventilated room.
Check out my specific tutorial on shooting smoke in a still life to see the details.
10. What Settings to Use When Photographing
Ignite your aroma sticks, place them so that the smoke can fill the background and take a sequence of shots.
My camera settings at the time looked like this: f/6.3, 1/100s, ISO 125.
The aperture is rather open in my opinion, but I needed it to make the moon a bit blurry.
And 1/100s is a bit longer than my usual sync shutter speed for my speedlights, but it allowed me to showcase more candlelight.
11. Add Some Magic in Post-Processing
Pick the shot that looks most spooky and Halloween-esque for your tastes and give it a little polish.
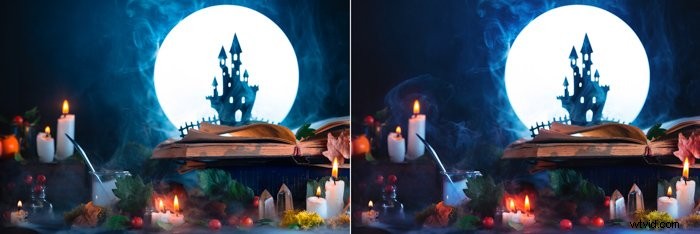
I merged together a couple of shots with the bits of smoke I like most. This is very easy to do with a Layer Mask and a soft brush.
Place these shots as separate layers one above another. Click on „Add Layer Mask“ button in the layer window.
Invert the mask by typing „Ctrl-I“ („Cmd-I“ for Mac) to hide the entire layer.
And use a soft white brush to reveal the parts that should be visible.
Also, I adjusted the contrast slightly and made the foreground a bit lighter.
Voila! Your Halloween photography shot with a full moon and a spooky castle is ready!
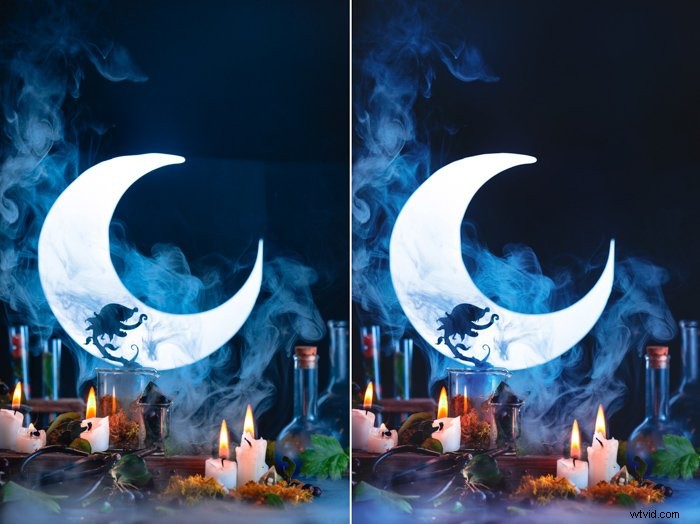
Here are a couple of shots made with the same trick.
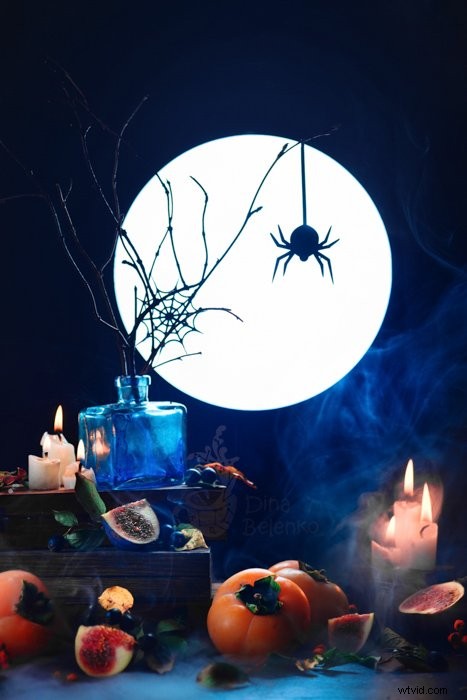
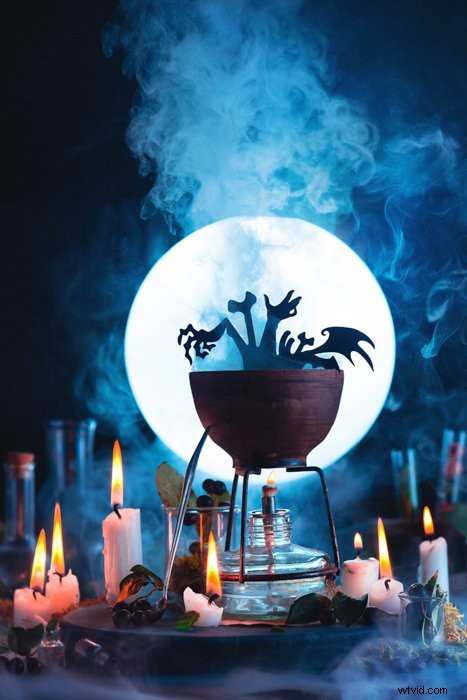
This trick is a very versatile one. You can try creating a similar Halloween photography still life with a crescent of stars.
Use different moon shapes or different silhouettes and try to come up with your own interpretation of this trick.
Let your imagination run wild and share your results with us. Have a happy Halloween!
Check out our post on kirlian photography next!