Preparation
What you need:
- A computer (Windows or macOS)
- Your video footage
- Filmora video editor
Step 1
Download Filmora for Free
Visit Filmora’s download page and click "Free Download." Follow the on‑screen prompts to install the software. Once installed, launch Filmora and create a new project to begin editing.

Masking transitions let you blend two clips smoothly by overlaying one over the other and selectively revealing or hiding parts of the underlying clip. Filmora offers intuitive tools for this effect, making it a favorite among both hobbyists and professional editors.
Step 2
Import Your Primary Clip
Drag your main video into Filmora’s media library or use the "Import" button. Place this clip on the second track of the timeline—this will be the layer that remains visible beneath the transition.
Step 3
Add the Secondary Clip on the Top Layer
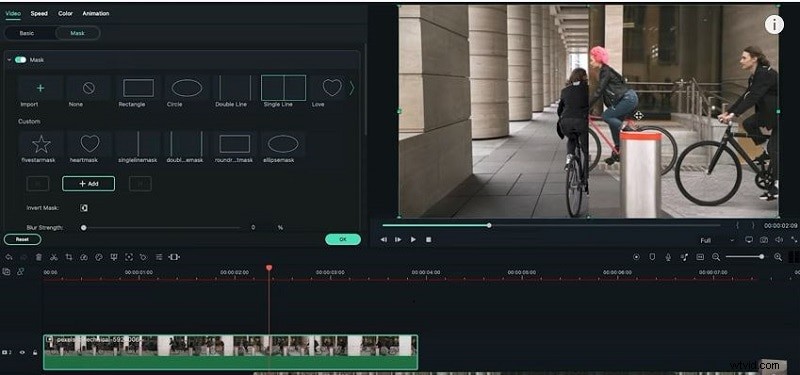
Drag a second clip onto the first track. Double‑click the clip to open the editing panel, navigate to the "Mask" tab, and select a single‑line mask. Click "Add" to begin the masking process.
With the mask in place, you can adjust the transition’s duration (0‑100%) and direction (right‑to‑left or left‑to‑right) to achieve a natural flow between scenes.
Step 4
Fine‑Tune the Mask with Keyframes
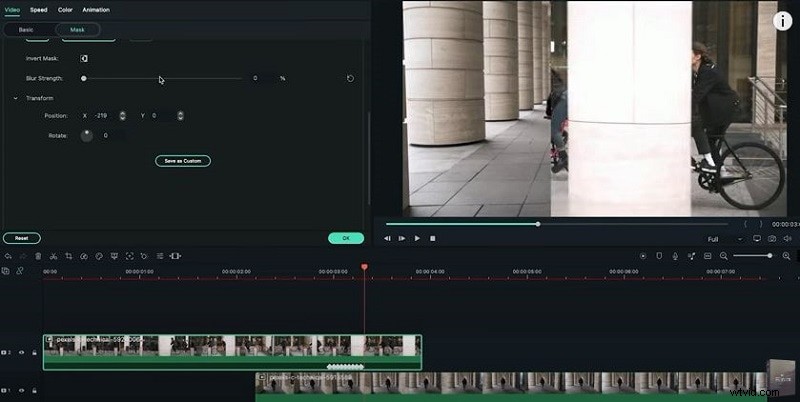
In the "Mask" tab, add keyframes to control the mask’s position over time. Modify the X and Y coordinates for each frame to guide the transition’s path. You can also rotate the mask for a dynamic effect.
Consistent keyframe adjustments ensure the transition moves smoothly across the frame.
Step 5
Configure the Mask Direction
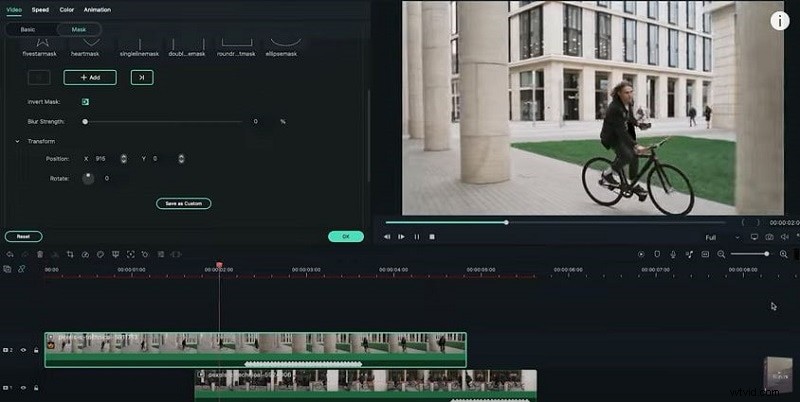
After keyframing, set the mask to exit from the right side (or choose another side as needed). Use the "Invert" option to flip the mask direction. Preview the clip to verify there are no gaps or overlaps between the layers.
This final tweak gives your video a polished, professional look.
Step 6
Export Your Finished Video
When you’re satisfied with the transition, click "Export," choose your preferred format and resolution, name your file, and hit "Save." The completed video will feature the automated masking transition ready for sharing or distribution.
Summary
Key takeaways:
- Masking transitions enable smooth scene changes and creative effects.
- Filmora’s intuitive interface lets you layer clips, add masks, and fine‑tune with keyframes.
- Export your project in any format—share directly to Drive or social platforms.