Preparation
What you need:
- Computer running Windows or macOS
- Your video clips
- Wondershare Filmora installed
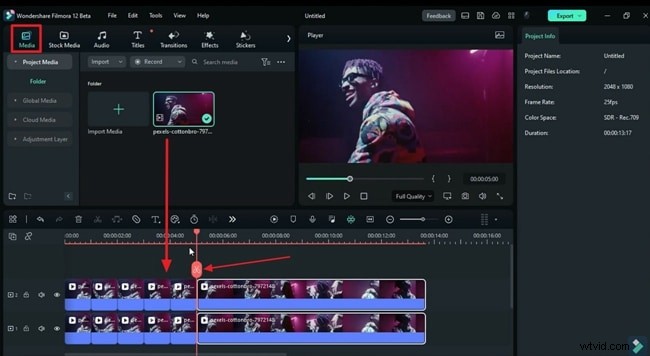
Step 1: Import Media and Split Clips
Start a new project by clicking the New Project icon on Filmora’s main screen. Once you’re in the editor, switch to the Media tab and import your footage. Drag the clips onto the timeline and use the playhead to cut them at the points where you want the time‑lag effect to begin and end.
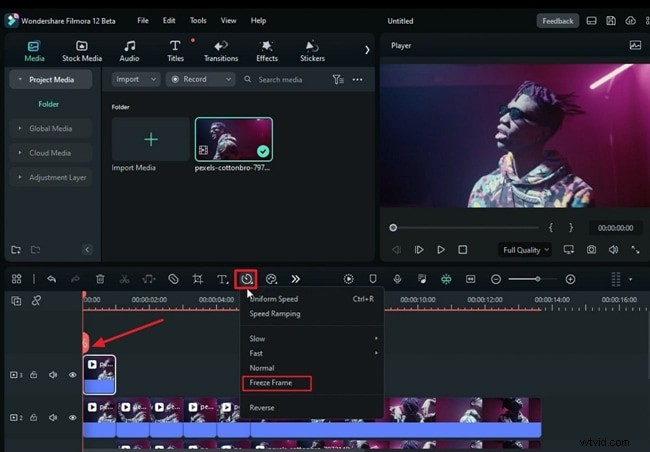
Step 2: Apply Freeze Frame
Move the first segment of the clip to a separate track. Position the playhead at the clip’s start, then click the stopwatch icon in the timeline toolbar and choose Freeze Frame. Return the clip to its original location. Repeat this for each split segment.
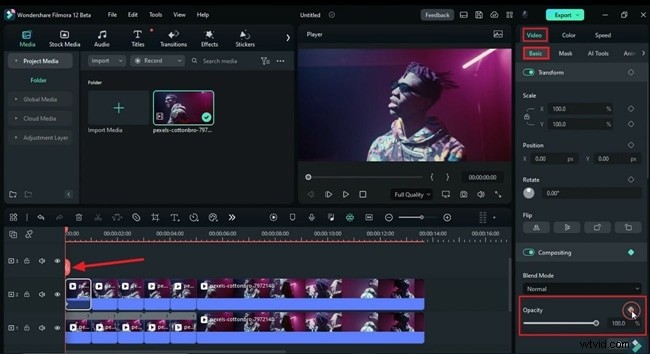
To fine‑tune transparency, open the Video settings on the right, select the Basic tab, and toggle the Opacity keyframes. Adjust the values at the start and end of each clip to create a smooth fade.
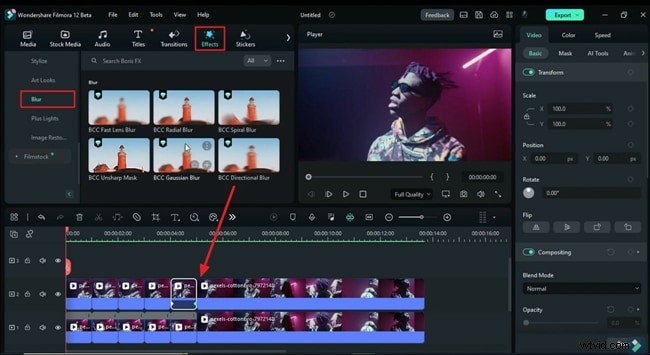
Step 3: Add Blur for a Realistic Look
Navigate to the Effects tab, choose a Blur effect from the left panel, and drag it onto the relevant clips.
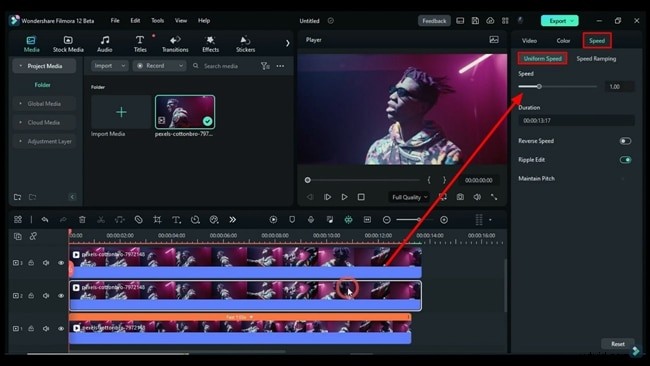
Step 4: Speed Adjustment on Separate Tracks
For an alternative approach, select a clip and go to the Speed panel on the right. Under Uniform Speed, increase the Speed to your desired value. You can apply this to multiple tracks simultaneously. Don’t forget to tweak the Opacity in the Video settings if needed.
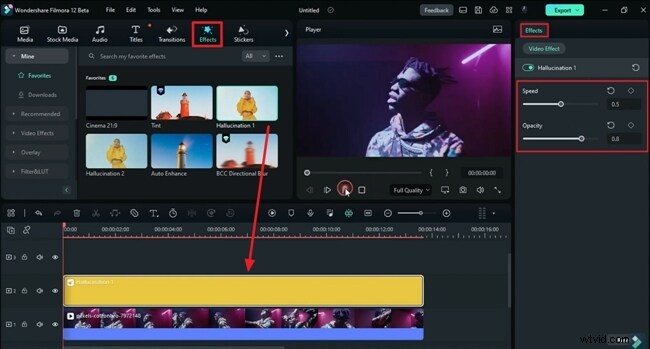
Step 5: Use Dedicated Time‑Lag Effects
Filmora also offers pre‑designed time‑lag effects. In the Effects tab, locate a suitable effect, set its duration, and drag it onto the timeline. If fine‑tuning is required, adjust Speed and Opacity in the Video Effect settings on the right.
Conclusion
Mastering Filmora’s tools empowers you to craft compelling time‑lag videos. This guide covered three distinct methods to achieve the effect, giving you flexibility to choose the workflow that best fits your project.