Self‑Tape Auditions: The Introduction
I’ll never forget the first time I had to review self‑tape submissions for “In The End.”
We needed three actors, but I received 47 videos. By the twelfth submission, I was tempted to toss my laptop out the window.
Not because the acting was poor—some were outstanding—but half the tapes looked like they were filmed in a cave during an earthquake, and sounded as if the actor was underwater. One actor had a cat strolling across the frame. Another’s mother read the lines so loudly she drowned out the performance.
That moment made me realize: a self‑tape is more than a performance; it’s a professional courtesy to the viewer.
Having cast multiple short films and completed my own self‑tapes, I now understand what truly impresses casting directors and what causes them to hit “delete.”
Below is the definitive guide to ensuring your self‑tape earns a call back.
Disclosure: This post may contain affiliate links, which means we may receive a commission if you click a link and purchase something that we have recommended at no cost to you.
What Exactly Is a Self‑Tape Audition?
A self‑tape is a video audition you record at home and send to a casting team. You receive the script pages (sides), film yourself performing them, and submit the finished video. In most first‑round casting—especially post‑2020—self‑tapes have largely replaced in‑person auditions for film, television, commercials, and theater.
Some actors love the freedom: no travel, no waiting rooms, and unlimited takes until it’s perfect. Others dislike it because you must simultaneously play director, camera operator, sound engineer, and actor. Either way, self‑tapes are here to stay, so it pays to master them.
The Problem: You’re Competing With Hundreds of Other Tapes
When I’m casting, I’m not just watching your tape. I’m viewing it alongside dozens of others, often late at night, exhausted, and with diminishing patience for technical hiccups.
If your lighting is poor and I can’t see your eyes, that’s a red flag.
If your audio is wind‑like or muffled, it’s a problem.
If you look stiff or uncomfortable because of a clunky setup, it hurts.
In short, casting directors give you roughly 10 seconds to decide whether to keep watching. That’s all the time you have to hook them.
After reviewing dozens of tapes, the ones that stand out are the ones that look professional and feel authentic.
Most actors focus solely on their performance and treat technical details as an afterthought. That’s a mistake. The technical setup is now part of your performance.

Why Most Self‑Tapes Fail (The Underlying Cause)
After casting “Going Home,” “The Camping Discovery,” and several other projects, I’ve seen the same patterns repeat. Bad self‑tapes fail for three primary reasons:
1. They don’t follow directions
- Casting asks for chest‑up framing in landscape mode; the actor sends full‑body portrait mode. Immediate rejection.
- If you can’t follow simple instructions in an audition, why would a director trust you on set?
2. They overthink or underprepare
- Some actors take 47 takes trying to achieve perfection, losing spontaneity and energy.
- Others film a single take at midnight with zero rehearsal because the deadline is tomorrow.
- Both approaches scream amateur.
3. They forget it’s still filmmaking
- It’s not a selfie; it’s a piece of media that represents your work.
- Even lo‑fi projects need proper lighting and audio. A self‑tape is no different.
- By demonstrating camera, light, and sound knowledge, you show you understand the job you’re auditioning for.
The Solution: Treat Your Self‑Tape Like a Mini Film Shoot
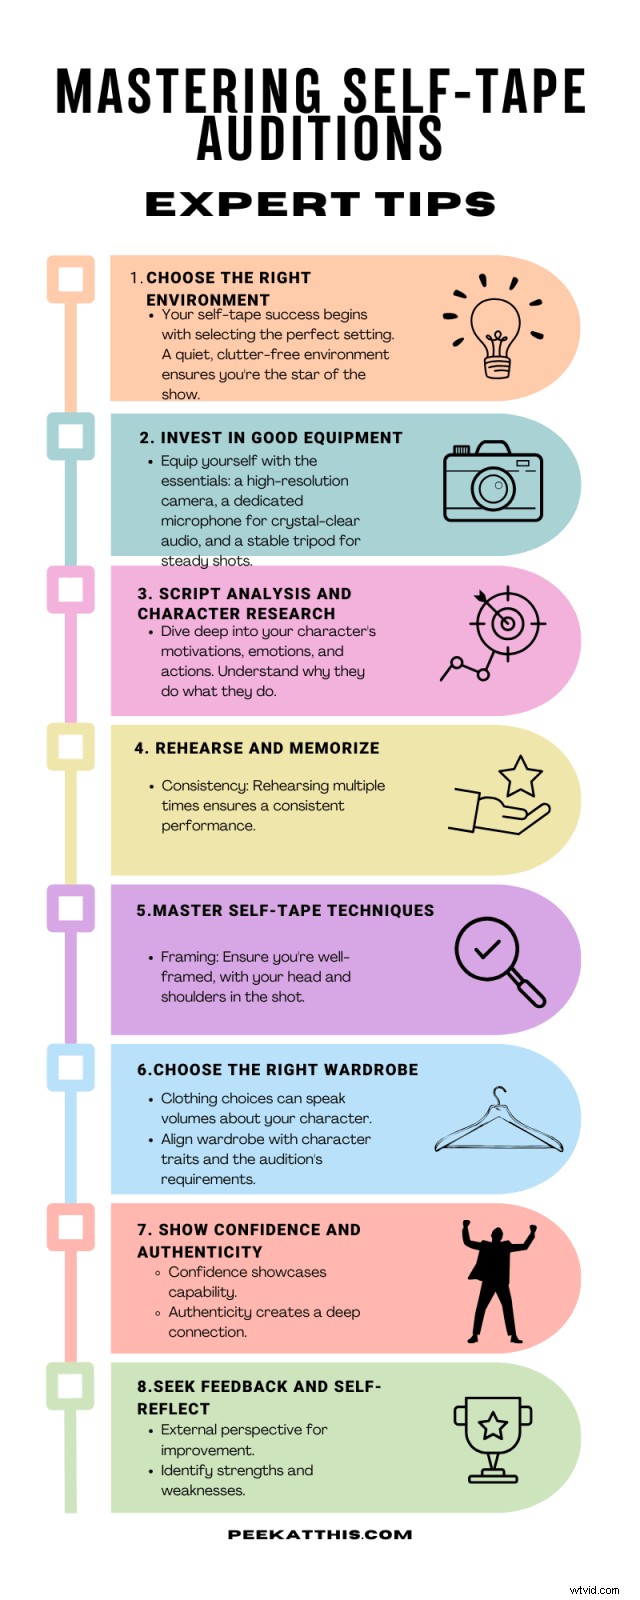
Here’s my approach, refined from both sides of the process:
Think like a filmmaker, act like an actor.
- Set up your shot with proper lighting, framing, and audio.
- Rehearse until you’re confident but not robotic.
- Record 2‑3 solid takes—quality over quantity.
- Edit cleanly, without fancy effects.
- Submit on time with correctly labeled files.
You don’t need expensive gear. My first self‑tapes were shot on an iPhone 7 propped on a stack of books. What you need is intention—treating this like a professional job.

How to Actually Do It (Step‑by‑Step)
Let’s get practical. Here’s how to set up and nail a self‑tape audition without losing your mind or your savings.
Step 1: Read Everything First
Before you touch your camera, read the casting instructions three times. Seriously. Three times.
Note:
- Desired framing (full body, chest‑up, waist‑up)
- Whether a slate is required and the required content
- Number of takes per scene
- File format
- Deadline
- File‑naming conventions
When we cast “The Camping Discovery,” one actor submitted six takes when we asked for two maximum. He didn’t even make it to callbacks because he couldn’t follow basic instructions.
Step 2: Set Up Your Space
Find a quiet room with:
- A blank wall (gray, blue, beige—anything neutral)
- Good lighting (more on this in a moment)
- Minimal background noise
Your backdrop should be boring. We want to see YOU, not your Picasso prints or houseplant collection.
If your wall has texture or color, hang a bedsheet. Iron it first—wrinkles cast shadows.
Step 3: Get Your Equipment Right
You don’t need to spend $2,000 on gear. But you do need the basics:
Camera:
- Your smartphone is fine if it’s recent (iPhone 11 or newer, equivalent Android).
- Mount it horizontally—NEVER vertical unless specifically asked.
- If you have a DSLR or mirrorless camera, even better.
Tripod:
- Essential. No shaky footage.
- $20‑30 gets you a decent one on Amazon.
- If filming with a phone, get a phone‑mount adapter.
Lighting:
- Natural window light works IF positioned correctly (window should be in front of you, behind camera).
- Two cheap LED panels or softbox lights solve 90% of lighting issues.
- Ring light works in a pinch but can create weird reflections in your eyes.
Microphone:
- Built‑in phone/camera mics pick up too much room noise.
- Get a $30‑50 lavalier (clip‑on) mic OR shotgun mic.
- Position it close but out of frame.
- Test your audio levels before recording.
I use a Movo Video Mic for most shoots. Cost me $60. Sounds great.

Step 4: Frame Your Shot
Standard framing for most self‑tape auditions:
- Medium close‑up: Chest to top of head.
- Leave a little headroom (an inch of space above your head).
- Center yourself in the frame.
- Camera at eye level—not looking up or down at you.
For comedy or physical roles, they might want a medium shot (waist up) to see body language. Check the instructions.
Full‑body shots are rare unless it’s dance, stunt work, or a slate request.
Step 5: Nail Your Eyeline
This one trips people up.
Your eyeline is where you’re looking while acting. You’re NOT looking at the camera (unless specifically told to).
How to do it:
- Place your reader (the person reading other lines) RIGHT next to the camera.
- Like, so close they’re practically hugging the tripod.
- Their face should be at your eye level.
- When you look at them, we should see most of your face, including both eyes.
If you don’t have a reader, use:
- A photo taped next to the lens.
- A sticky note at eye level.
- Zoom/FaceTime with a friend positioned behind your camera.
Common mistake: eyeline too far off‑camera. It looks like you’re having a conversation with your wall, not another person.
Step 6: What to Wear
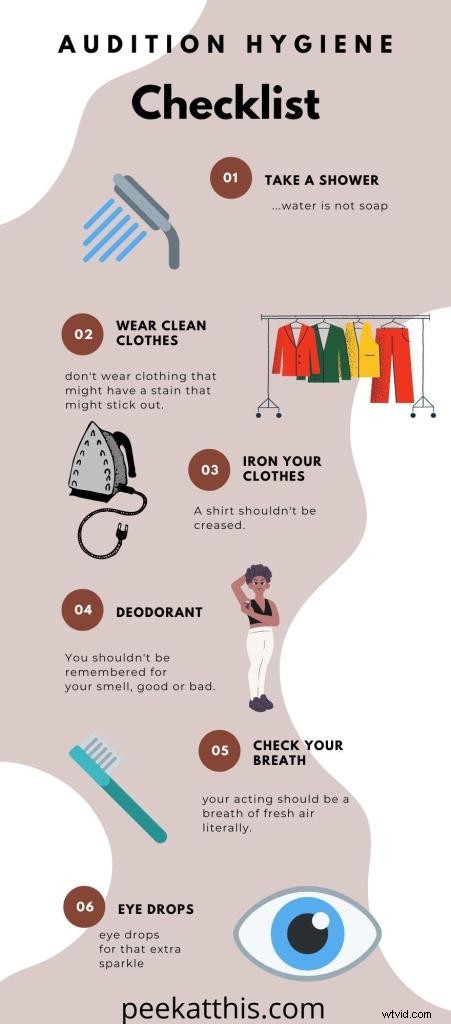
Dress like the character would dress—but dialed down.
Playing a lawyer? Button‑down shirt, not a full suit.
Playing a high schooler? Casual tee, not a costume.
Avoid:
- Thin stripes (they “strobe” on camera).
- All white (reflects too much light).
- All black (disappears into shadows).
- Loud patterns or logos.
- Heavy jewelry that clanks or catches light.
Solid colors work best. Bring out your skin tone without being distracting.
Step 7: Get a Reader (If There’s Dialogue)
If your scene has multiple characters, you need someone reading the other lines WITH you in real‑time.
Not pre‑recorded. Not silence where you imagine their lines. An actual human being.
Good reader checklist:
- Another actor is ideal (they understand pacing and delivery).
- Positioned next to camera.
- Speaking at moderate volume (not drowning you out).
- Reading with some energy, not monotone robot voice.
No reader available? Call an actor friend on Zoom and position your laptop next to the camera.
For “Blood Buddies” auditions, the best tapes came from actors who clearly had engaged readers. The connection felt real.
Step 8: Rehearse (But Don’t Overdo It)
Run through your sides enough times to:
- Know your lines cold (or mostly cold).
- Understand your character’s objective in each scene.
- Feel comfortable with your blocking/movement.
- Have 2‑3 different approaches ready.
But stop before you go dead inside.
I’ve seen actors do 15+ takes because they keep second‑guessing themselves. By take 12, all the life is gone. They’re just reciting words.
Aim for 3‑5 total takes. Pick your best 1‑2. Done.
Step 9: Record and Review
Hit record. Commit to your choices. Be bold.
Then watch it back.
Check:
- Can you see my face clearly?
- Can you hear me without background noise?
- Is my energy/emotion landing?
- Am I in frame the whole time?
- Does this feel authentic?
If something feels off, do it again. But trust your instincts—your second or third take is usually your best.
Step 10: Edit Smart (Not Fancy)
Keep editing minimal:
- Trim any dead air at beginning/end.
- If submitting multiple scenes, each should be a separate file (unless told otherwise).
- Don’t splice together takes from the same scene—one take, start to finish.
- Add slate if requested (separate clip, direct to camera, state name/height/location).
Use free software like iMovie (Mac) or DaVinci Resolve (PC/Mac). You’re not creating a music video—just clean, simple cuts.
Step 11: Label and Submit Correctly
File names matter. Use this format: YourName_ProjectName_Role_SceneNumber.mp4
Example: TrentPeek_GoingHome_Dad_Scene2.mp4
Submit via:
- WeTransfer (most common).
- Dropbox/Google Drive.
- Vimeo (private link).
- Whatever platform they specify.
Never attach large files directly to email—it clogs inboxes and might not even go through.
Submit BEFORE the deadline. Not at 11:59 PM. Early submissions get watched first when casting is fresh.

Common Self‑Tape Mistakes (And How to Avoid Them)
After watching hundreds of tapes, these are the mistakes that instantly kill your chances:
- Portrait mode video – Always landscape unless specifically requested otherwise. This is non‑negotiable.
- Looking into camera – Unless you’re filming a slate or it’s a documentary‑style self‑tape, don’t look at the lens. Use your eyeline.
- Bad audio – Muffled, echoey, or noisy sound is worse than mediocre acting. Fix your audio.
- Over‑editing – Splicing together words from different takes looks fake. One solid take beats a Frankenstein edit.
- Too many takes – Don’t submit 6 versions unless asked. Casting doesn’t want options—they want your best choice.
- Ignoring slate instructions – If they say “no slate,” don’t slate. If they say “slate with full body shot,” do exactly that.
- Messy background – Your laundry, posters, or furniture should not be visible. Blank wall only.
- Wrong file format – They ask for MP4, you send MOV? Nope.
- Late submission – Deadlines exist for a reason. Miss it, lose the opportunity.
- Overthinking it – Trying to guess what casting “wants” instead of making strong, committed choices.
What Casting Directors Actually Look For
From my side of the table casting “Noelle’s Package” and “Closing Walls,” here’s what stood out:
- Believability – Do I believe this person IS the character? Or are they “acting”?
- Clear eyes – I need to see your eyes. That’s where the emotion lives.
- Strong choices – Don’t play it safe. Make bold choices and commit fully.
- Technical competence – Shows you respect the craft and the process.
- Energy – Even in subtle scenes, there should be life behind your eyes.
- Following directions – If you can’t follow audition instructions, I can’t trust you on set.
The best self‑tapes feel effortless. Like the actor isn’t trying—they just ARE.
That only comes from doing the prep work so thoroughly that you can forget about it and just perform.
Equipment Recommendations (Budget‑Friendly)
You don’t need to break the bank. Here’s what I recommend:
FAQs (Questions Casting Gets Constantly)
Do I need to memorize my lines?
Ideally yes, but it’s okay to have your sides nearby if needed. Just don’t be obviously reading. Memorized is always better—it lets you connect with your reader and stay present.
How long should my self‑tape be?
However long the sides are. Don’t add extra. If the scene is 2 minutes, your tape should be about 2 minutes.
What if I don’t have a reader?
Use Zoom/FaceTime with a friend, pre‑record yourself reading other lines (not ideal but works), or just read your lines with pauses (last resort).
Should I do multiple takes?
Yes, 2‑3 takes of each scene. Let casting choose which they prefer. More than 3 per scene is overkill.
Can I improvise or change lines?
Only if specifically told you can. Otherwise, stick to the script. Changing words shows you can’t take direction.
What about props?
Use sparingly and only if essential to the scene. A phone is fine. A fake gun is distracting. A baby doll is weird.
How do I send large video files?
WeTransfer (free up to 2GB), Dropbox, Google Drive, or Vimeo private link. Never email directly.
Do I slate every take?
Usually no—slate once at the beginning unless instructions say otherwise.
Portrait or landscape?
LANDSCAPE. Always. Unless explicitly told portrait for a full‑body slate.
What if my space is tiny?
You only need about 6 feet from camera to you. Small spaces work fine—just control your lighting and sound.
Final Thoughts: You’ve Got This
Look, self‑tapes are awkward at first. You’re going to feel ridiculous setting up a camera in your bedroom and performing monologues to your wall.
Do it anyway.
The more you practice, the easier it gets. The first time I self‑taped, it took me three hours and I hated every second. Now I can knock one out in 30 minutes start to finish.
Remember: this is just a new audition format. The fundamentals haven’t changed. You still need to understand your character, make strong choices, and deliver an authentic performance.
The technical stuff? That’s just showing you’re a professional who respects the medium.
Treat your self‑tape like you’d treat any other part of your craft—with preparation, intention, and a little bit of swagger.
And hey, if you screw up the first few? Welcome to filmmaking. We’ve all been there.
Now grab your phone, find a blank wall, and go nail that audition.