How to Make Your First Short Film: What I Wish I Knew Before I Started
My first short film was supposed to be a 10-minute Christmas comedy. It ended up being a 48-hour sprint through script rewrites, last-minute prop changes, and enough caffeine to power a small city. We shot “Noelle’s Package” in one frantic weekend, edited until our eyes blurred, and somehow won the Audience Choice Award.
Looking back, I cringe at half the decisions I made. But here’s the thing—I learned more from that chaotic first film than from any textbook or tutorial. Five short films later, including “Going Home,” “Married & Isolated,” and “The Camping Discovery,” I’ve figured out what actually matters when you’re making your first short.
This isn’t going to be one of those articles that tells you filmmaking is easy if you just follow these 12 simple steps. It’s not. But it’s also not as complicated as the film school textbooks make it sound.
The Problem: Most Beginners Start in the Wrong Place
I see the same pattern with every new filmmaker I talk to. They obsess over cameras, lenses, and gear. They spend weeks researching the perfect equipment. Then they show up on set with a $2,000 camera and absolutely no idea what story they’re telling.
The gear doesn’t make the film. I shot “Elsa” on an iPhone. It screened at three festivals.
Here’s what actually derails first films: trying to do too much. You write a 25-minute script with six locations, ten actors, and a subplot about the protagonist’s childhood trauma. Then reality hits—you’ve got one weekend, two friends who can help, and maybe $200.
Most festivals cap short films at 20 to 30 minutes, and programmers prefer even shorter work. The optimal length sits around 13 minutes, with films in the 5-15 minute range getting the most festival play. When I made “Blood Buddies” at 22 minutes, I struggled to get it programmed. Festivals would rather screen four 5-minute films than one 20-minute piece.
That’s not a creative judgment—it’s simple math.

The Real Cause: We Think Like Feature Filmmakers
The movies we love are features. Two hours of complex characters, multiple storylines, dramatic arcs. So when we sit down to write our first short, we try to cram all that into 15 minutes.
It doesn’t work.
Filmmakers often complicate stories that can be told simply, adding too many characters or plot twists. I did this with my second film. Three characters, two timelines, and a twist ending that made absolutely no sense because I hadn’t set it up properly.
The fundamental issue is that shorts work differently than features. They’re not mini-movies—they’re their own format. Think of them like short stories versus novels. A short story doesn’t try to be a condensed novel. It focuses on one moment, one emotion, one turn.
Your first short needs to do the same thing.
The Solution: Start Simple and Build Smart
Here’s what worked for me, across five films and countless mistakes.
Write for What You Have
Before you write a single scene, look around. What locations can you access for free? Who will actually show up and help? What can you shoot in one or two days?
When I wrote “Watching Something Private,” I knew I had my apartment, one actor friend, and a weekend. So I wrote a story that happened entirely in one room with two characters. The limitation forced me to focus on dialogue and performance instead of trying to wow people with production design.
Many successful short films feature a complete story in a single location, focusing on strong characters and tight scripts. Kevin Smith shot “Clerks” in the convenience store where he worked. Your constraints aren’t limitations—they’re creative guardrails.
Keep Your Story Focused
One character. One clear goal. One obstacle. That’s it.
In “Chicken Surprise,” the story is dead simple: A guy tries to cook dinner for his girlfriend. He can’t cook. Things go wrong. That’s the whole film. Seven minutes. It played at more festivals than my 22-minute “masterpiece” did.
The best short films have a clear, concise premise with a specific goal or short time frame. Strip away everything that doesn’t directly serve your core idea. If a scene doesn’t move the story forward or reveal something essential about your character, cut it.
Plan Everything in Pre-Production
This is where most first-timers fail. They think pre-production means casting a few actors and buying some props. Then they show up on set and realize they have no idea how to block the scenes, where to put the camera, or how to get all their shots before sunset.
Spending the bulk of your time in pre-production makes for a smoother experience during filming and editing. Here’s what actually needs to happen before you touch a camera:
Shot List: Write down every single shot you need. Wide establishing shot of the apartment. Medium shot of Character A entering. Close-up of her seeing the mess. When I skip this step, I always forget crucial coverage and realize it in editing when it’s too late to reshoot.
Storyboard: You don’t need to be an artist. Stick figures work. I use simple sketches to figure out camera angles and movement. It saves hours of standing around on set trying to figure out where to put the camera.
Schedule: Make a shooting schedule that accounts for setup time, breaks, and the inevitable delays. My rule: Whatever time you think you need, double it. When I shot “In The End,” I scheduled eight hours for what I thought would take four. We finished with 20 minutes to spare.
Gear Check: Test everything the day before. Camera settings, audio levels, battery life. On “Closing Walls,” I showed up to discover my external mic wasn’t compatible with my camera. We had to use the built-in mic, and the audio quality suffered.
Understand the Basics Before You Shoot
You don’t need to memorize every filmmaking rule, but you should understand a few fundamentals that will immediately improve your footage.
The 30-Degree Rule
When cutting between shots of the same subject, move the camera at least 30 degrees to avoid jarring jump cuts. If you shoot someone from one angle, then move the camera just slightly for the next shot, it looks like a mistake. Move it at least 30 degrees—or change your shot size, focal length, or angle significantly.
I ignored this on my first film. The editor spent three hours trying to make the footage cut together smoothly. It never really did.
The 5 C’s of Cinematography
The five C’s—Camera Angles, Continuity, Cutting, Close-ups, and Composition—provide essential concepts for visual storytelling. These aren’t rigid rules, but thinking through each one will elevate your shots:
- Camera Angles: Where you place the camera changes how viewers perceive the scene
- Continuity: Keep consistent screen direction and spatial relationships
- Cutting: Edit for rhythm and emotional impact, not just coverage
- Close-ups: Use them to reveal emotion and create intimacy
- Composition: Arrange elements in the frame to guide the viewer’s eye
Implementing the Solution: Your Actual Production Plan
Step 1: Write a 5-10 Page Script
That’s it. Five to ten pages. One page of screenplay roughly equals one minute of screen time, so you’re aiming for 5-10 minutes of finished film.
Focus your story on one character’s immediate problem. Not their life story—just this moment. What do they want right now? What’s stopping them? How does it resolve?
Write a simple outline first:
- Opening: Show us the character and their world
- Problem: Present the obstacle or conflict
- Complication: Make it worse
- Resolution: Pay it off (doesn’t have to be happy)
Get feedback from someone who’ll be honest. Not “Do you like it?” but “Where did you get confused?” or “Where did your attention drift?”
 Making Films for Social Change: My 'Going Home' Experience
Step 2: Pre-Production Checklist
Set Your Shoot Date (at least 2-3 weeks out): This creates a real deadline. Put it in everyone’s calendar. Send reminders.
Cast Your Actors: Friends are fine for your first film. Just make sure they can actually commit to your schedule. I’ve had shoots fall apart because an actor bailed the morning of.
Find Your Locations: Scout them in person. Check the light at the time of day you’ll shoot. Listen for ambient noise—traffic, construction, air conditioning. That highway noise you barely notice while scouting will ruin your audio.
Create Your Shot List: Go scene by scene. For each scene, write down:
- Wide shot to establish the space
- Medium shots for dialogue
- Close-ups for reactions
- Any specific inserts or details
This isn’t creative—it’s insurance. It ensures you get everything you need.
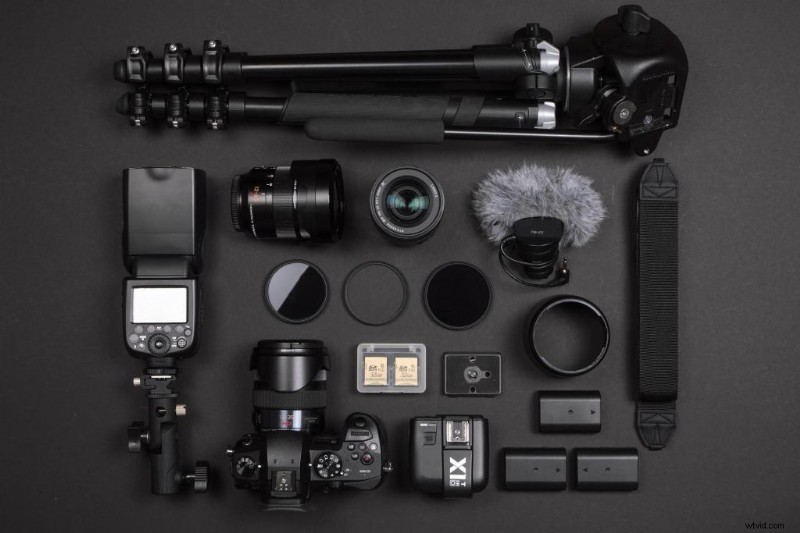
Gather Your Gear:
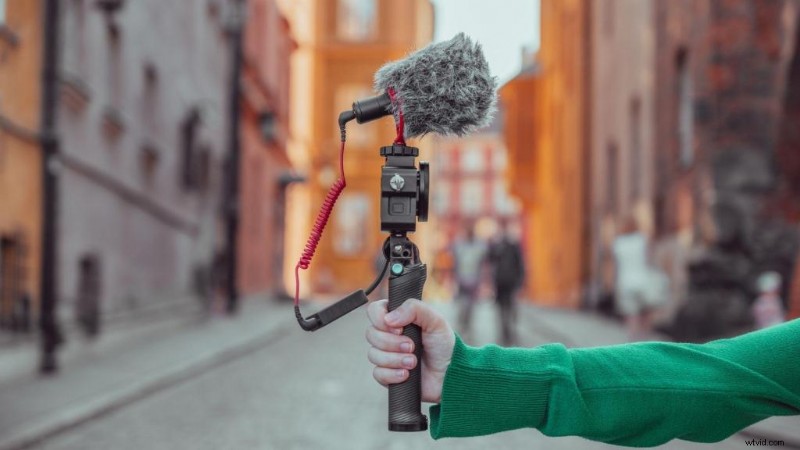
- Camera (phone cameras work fine)
- Tripod (absolutely essential—hand-held looks amateur)
- External microphone if possible
- Extra batteries and memory cards
- Basic lighting (natural light + reflectors work for most shorts)
Build a Simple Production Kit:
- Gaffer tape
- Extension cords
- Snacks and water (seriously—fed crew = happy crew)
- First aid kit
- Release forms for actors and locations
Step 3: Production Day Strategy
Audio Matters More Than You Think
Bad sound is often the hallmark of amateur filmmaking. People will forgive imperfect framing or lighting. They won’t forgive dialogue they can’t understand.
If you don’t have an external mic, get close to your subjects and record room tone (30 seconds of just the ambient sound of your location) that you can use in editing to smooth out audio transitions.
Stick to Your Shot List
When you’re on set, everything feels urgent. You’ll be tempted to skip shots or change your plan. Sometimes you should—filmmaking requires flexibility. But check your shot list before moving to the next scene. Did you get everything you need? Can these shots cut together?
I learned this the hard way on “Married & Isolated.” I skipped what I thought was a throwaway shot. In editing, I realized that shot was the only thing that made the sequence work. We had to reshoot, which cost another weekend and coordination with actors.
Do a Test Frame
Before every shot, do a quick test. Check your focus, framing, and audio levels with the actors in position. Look for weird shadows, distracting background elements, props out of place.
Move Fast But Don’t Rush
You’ve got limited time. But rushing leads to mistakes. It’s better to get five perfect shots than ten mediocre ones.
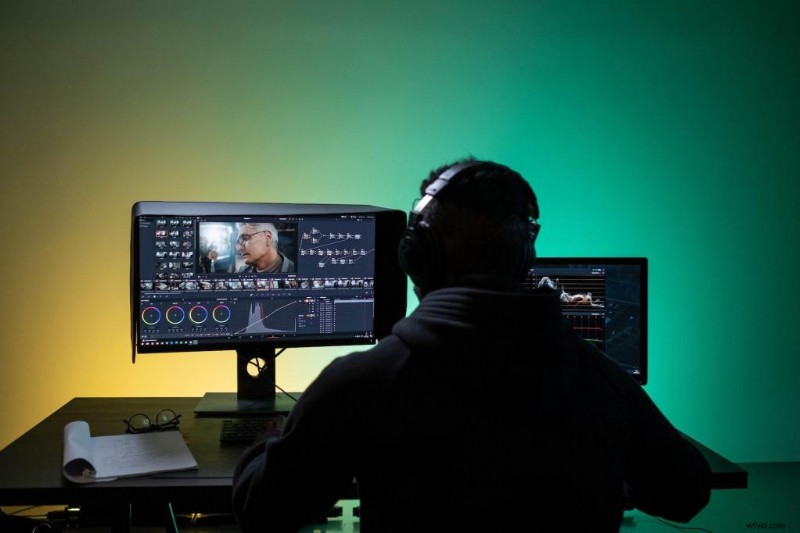
Step 4: Post-Production Reality Check
Editing Software: Start with free options. iMovie (Mac) or DaVinci Resolve (Windows/Mac) both work fine. Don’t let gear be an excuse.
Your First Assembly Will Suck: That’s normal. Just get all your footage in order. Watch it through. Then start cutting.
Be Ruthless: Kill your darlings. That beautiful shot you spent 30 minutes setting up? If it doesn’t serve the story, cut it. When I edited “Going Home” down from 18 minutes to 12, it became a better film. Every time.
Sound Design Matters: Add ambient sound underneath everything. Find royalty-free music that fits the mood (Artlist, Epidemic Sound, or free options like Bensound). The right music can transform a scene.
Get Fresh Eyes: Show your rough cut to someone who wasn’t involved. Ask specific questions: “Where were you confused?” “Where did you check your phone?”
Color Correction: Even basic color grading makes your film look more professional. DaVinci Resolve has incredible free color tools. Watch a few YouTube tutorials. Fifteen minutes of color work can make your film look twice as expensive.
Reshoots Aren’t Failure: Sometimes you realize you’re missing a crucial shot. Reshoot it. I’ve done pickup shots for every film I’ve made. It’s not a sign you failed—it’s part of the process.

Answering the Common Questions
How do you make a short film as a beginner?
Start with a simple story you can shoot in 1-2 days with available resources. Focus on strong characters and one clear conflict. Plan everything in pre-production, shoot more coverage than you think you need, and be ruthless in editing.
What is the 20/30 rule in film?
The 30-degree rule states the camera should move at least 30 degrees between successive shots of the same subject to avoid jarring jump cuts. Some filmmakers also reference a “20% difference rule”—each shot should differ by at least 20% in angle, size, or focal length to cut together smoothly.
What are the 5 C's of film?
The five C’s of cinematography are Camera Angles, Continuity, Cutting, Close-ups, and Composition AAFT. These fundamental concepts, introduced by Joseph V. Mascelli, form the foundation of visual storytelling and help filmmakers think about how camera work impacts narrative.
Is 25 minutes too long for a short film?
While some festivals accept films up to 40 minutes, most programmers prefer shorter work. A 25-minute film takes the slot of five 5-minute films, making acceptance harder. Aim for 5-15 minutes for your first film—you’ll have more festival options and force yourself to tell a focused story.
Distribution: Getting Your Film Seen
Once your film is done, don’t let it sit on your hard drive.
Film Festivals: Research festivals that fit your genre and budget. FilmFreeway makes submissions easy. Start with local festivals—they’re more accessible for first-timers and you can attend. I submitted “Noelle’s Package” to eight festivals. It got into three. That felt like a huge win.
Online Platforms: YouTube and Vimeo give you immediate access to global audiences. Create a compelling thumbnail. Write a description that includes key search terms (short film, your genre, your film’s title). Don’t underestimate social media—I’ve had films go semi-viral on Instagram Reels just from cutting together a 60-second teaser.
Your Website/Portfolio: If you’re trying to build a filmmaking career, create a simple website with your work. It doesn’t need to be fancy. Wix or Squarespace work fine. Having a professional-looking place to showcase your films matters when you’re reaching out to collaborators or potential clients.


What I Wish Someone Had Told Me
Your first short film will not be perfect. It might not even be good. That’s completely fine.
The goal isn’t to make a masterpiece—it’s to finish something. To go through the entire process from script to final export. Every mistake you make teaches you more than any tutorial.
I look back at “Noelle’s Package” and see so many flaws. The audio is inconsistent. Some shots are out of focus. The pacing drags in the middle. But we finished it. And finishing that first film gave me the confidence to make the next one.
Start simple. Plan thoroughly. Shoot deliberately. Edit ruthlessly.
Then do it again, slightly better.

Resources to Kickstart Your Filmmaking Journey
Royalty-Free Music & Sound Effects
Bensound: Simple, beginner-friendly library with a wide range of music and sound effects.
Freesound: Massive user-generated library. Search can be hit-or-miss, but perfect for finding unique effects.
Editing & Filmmaking Software
iMovie: Ideal starting point for Mac users—clean interface and great for learning fundamentals.
DaVinci Resolve: Professional-grade, with a powerful free version perfect for growing into advanced editing, color, and audio tools.
Filmmaking Tutorials
YouTube Channels
StudioBinder: Clear explanations of filmmaking fundamentals—from directing to producing.
Indy Mogul: Creative, hands-on tutorials with a DIY and low-budget mindset.
Websites
No Film School: Articles, guides, and tutorials covering everything from cinematography to gear.
PremiumBeat Blog: Deep-dive production tips and sound-focused articles.
FiLMiC Pro: Tutorials and guides from the creators of the popular mobile filmmaking app.
Moment: Smartphone gear plus a surprisingly robust blog of filmmaking how-tos.
Online Filmmaking Communities
Reddit
r/Filmmakers: Large, active community perfect for problem-solving and specific technical questions.
r/BeginnerFilmmakers: Small, supportive group tailored to rookies and first-time filmmakers.
Topic-Specific Help
Smartphone Filmmaking
DSLRguide and Peter McKinnon (YouTube): Friendly, accessible breakdowns of smartphone shooting, gear, and techniques.
Lighting
Aputure and Neumann Films (YouTube): Practical lighting setups, budget hacks, and professional concepts explained clearly.
Sound
Curtis Judd (YouTube): One of the best sources for learning filmmaking audio, from mic placement to on-set workflow.
Editing (General)
Search YouTube for “YourSoftware Beginner Tutorials” for the most current, step-by-step walkthroughs.
Peekatthis.com is part of the Amazon Services LLC Associates Program, which means we get a small commission when you click our links and buy stuff. It’s like our way of saying “Thanks for supporting us!” We also team up with B&H, Adorama, Clickbank, CJ, and a few other cool folks.
If you found this post helpful, don’t keep it to yourself—share it with your friends on social media! Got something to add? Drop a comment below; we love hearing from you!
📌 Don’t forget to bookmark this blog for later and pin those images in the article! You never know when you might need them.
About the Author:
Trent Peek is a filmmaker specializing in directing, producing, and acting. He works with high-end cinema cameras from RED and ARRI and also values the versatility of cameras like the Blackmagic Pocket Cinema.
His recent short film “Going Home” was selected for the 2024 Soho International Film Festival, highlighting his skill in crafting compelling narratives. Learn more about his work on [IMDB], [YouTube], [Vimeo], and [Stage 32].
In his downtime, he likes to travel (sometimes he even manages to pack the right shoes), curl up with a book (and usually fall asleep after two pages), and brainstorm film ideas (most of which will never see the light of day). It’s a good way to keep himself occupied, even if he’s a bit of a mess at it all.
P.S. It’s really weird to talk in the third person
Tune In: He recently appeared on the Pushin Podcast, sharing insights into the director’s role in independent productions.
For more behind-the-scenes content and project updates, visit his YouTube channel at https://www.youtube.com/@trentalor.
For business inquiries, please get in touch with him at trentalor@peekatthis.com. You can also find Trent on Instagram @trentalor and Facebook @peekatthis.