
Interactive Tutorial Content
Click here to view the tutorial video for Perfecting the Pan and Scan Effect.
Known as “The Ken Burns Effect”, the Pan and Scan technique has become the norm when combining still photos with your moving images. This tutorial takes you through the steps of the average pan and scan effect, to guide you through the technique that will showcase both video and stills into a fluid moving video.
Pan-and-scan is an effective technique used in photo montages and presentations in order to make the viewing experience more interesting. Techniques such as panning and zooming allow for movement of still images across the video frame. These techniques, when done correctly, are pleasing to the eye and make the video less… well… boring. This tutorial looks at some of these techniques using Adobe After Effects.
Step 1: Set Up Your Composition
We’ll be working with standard-definition widescreen, so we’ll set up our composition with those settings. COMPOSITION > NEW COMPOSITION (or keyboard shortcut CTRL+N) will bring up our new composition options.
Step 2: Import Your Footage


FILE > IMPORT (Ctrl+I) to bring up the import window. Navigate to the folder on your hard drive where you stored the pictures you want to use. Select them and press ENTER. You can select more than one picture at a time.
Step 3: Bring Your Pictures into the Composition
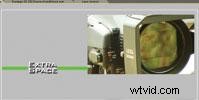
Position the picture in the composition the way you want it. Notice how large the picture is compared the actual video frame size.
The video is 720×480, but the picture is 960×1280. The extra size will allow us to move pictures across the frame, because we still have all that extra space.
Step 4: Animate
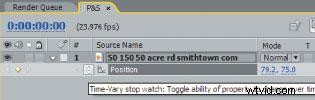
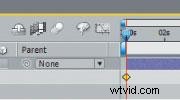
Make sure your playhead is at the time where you want your picture to begin animating. Select your footage in the timeline window. Press P to bring up the position properties. Then, set a keyframe by clicking the stopwatch icon.
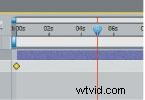
Move your playhead to the place you want your animation to end.
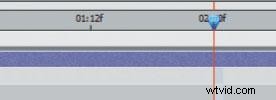
I chose two seconds as the end of my animation.

Now, set another keyframe by clicking and dragging your image to the location where you want the animation to end.
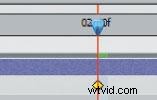
Notice how After Effects automatically set a new keyframe.
Step 5: Preview
Press 0 on the numeric keypad to create a RAM preview and play back your animation. Your photo should pan according to the start and stop locations you chose. Make fine adjustments where necessary.
Easy Ease Keyframe
Another cool trick is to highlight the start and stop keyframes in the timeline and press F9 on the keyboard. This will change the selected keyframes to a different type of keyframe called an easy ease keyframe. This gradually starts up the animation and gradually slows down the movement at the end of the animation. This may not be suitable for your animation, but it is definitely a great variation to know about.
Zooming
Zooming is another technique that you can accomplish easily in After Effects. This is a very effective technique that can make a sensitive or important picture more dramatic.
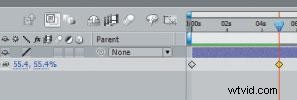
Here we have our YouTube superstar, xgobobeanx. Let’s zoom in on her to make the shot more dynamic and dramatic. In the timeline, press S to bring up the Scale properties, and set a Keyframe at the time when you want the zoom to start. In this case, I chose the first frame.
Move the playhead down to where you want the zoom to stop. Here, I chose around 5 seconds.

In the composition panel, zoom into your photograph by clicking on a corner and scaling the image up. Hold SHIFT on the keyboard while scaling, in order to scale uniformly (maintaining the aspect ratio of the picture). Zoom in slightly, so the zoom isn’t too quick and distracting.
The scaling you just did will automatically create another keyframe in the timeline.
Press 0 on the numeric keypad to play back your zoom animation. Make adjustments where necessary. Also, keep in mind that you can use easy ease keyframes to gradually start and stop the zoom.
Again, the key here is experimenting, especially when creating photo montages to music. You want the timing and the subtlety to match the music. that’s it! Be creative and create memorable moments in your video and film productions!
Find Out More
Learn about the history of this effect and how to use stills best in storytelling technique in our associated story Using Stills to Tell a Story.
Paul Del Vecchio is a “do-it-all” director and owns Triple E Productions, a movie/video production company.
Interactive Tutorial Content
Click here to view the tutorial video for Perfecting the Pan and Scan Effect.