We don’t all have access to studio space, and may not have the budget to rent one. Here’s how to achieve studio shots pretty much anywhere.
One of the nice things about having a studio is the ability to light a photograph on a blank canvas—giving you complete creative control over how your photo looks. But, you don’t necessarily need an entire studio space to achieve a controlled studio look.
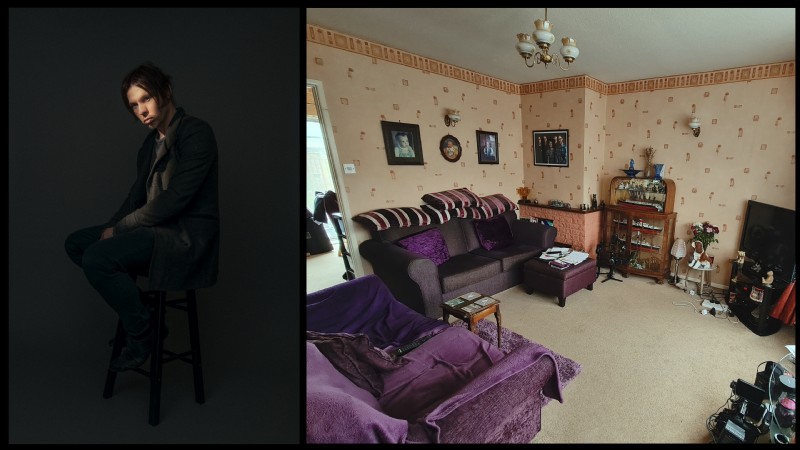
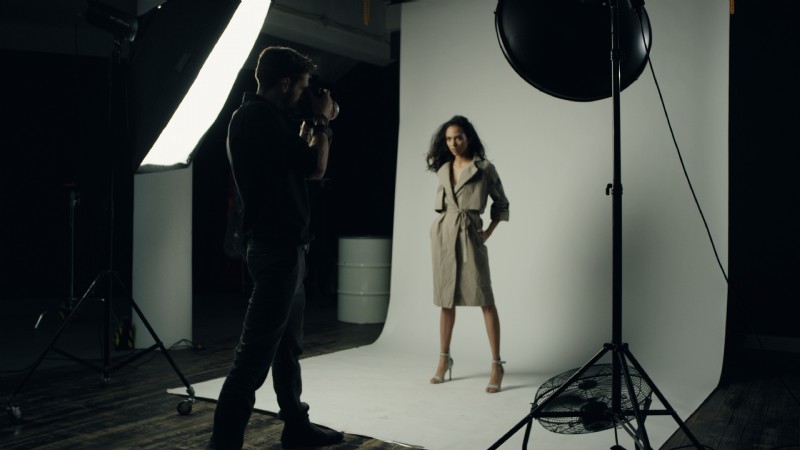
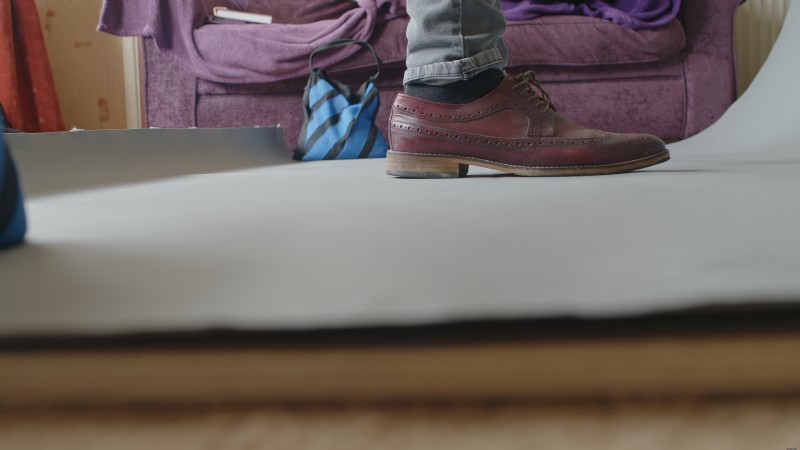
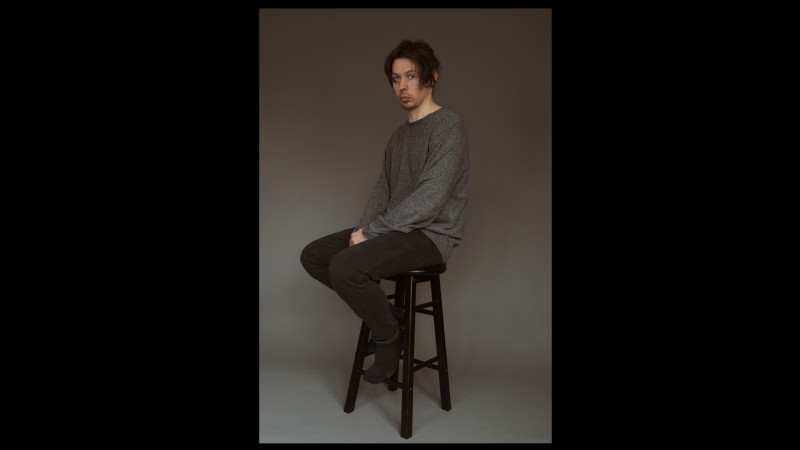
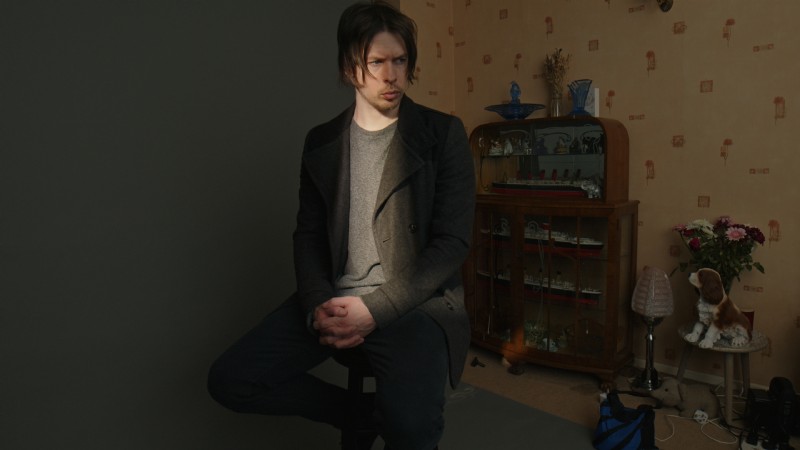
So, you might think creating an image like the one above would be impossible in the space shown adjacent. But, actually, that’s precisely where the photo was taken.
Let’s see what our options are and how we shot them.
The Collapsible Backdrop
First, let’s talk about collapsible backdrops.
Collapsible backdrops can be purchased from a few different manufacturers in different colors. These backdrops collapse to a manageable size, similar to a cheaper 5-in-1 reflector, making them easy to transport and set up.
You can hang them, prop them up against a wall, or make any number of creative solutions. As long as they stay up, you have the background to shoot your subject/product against.
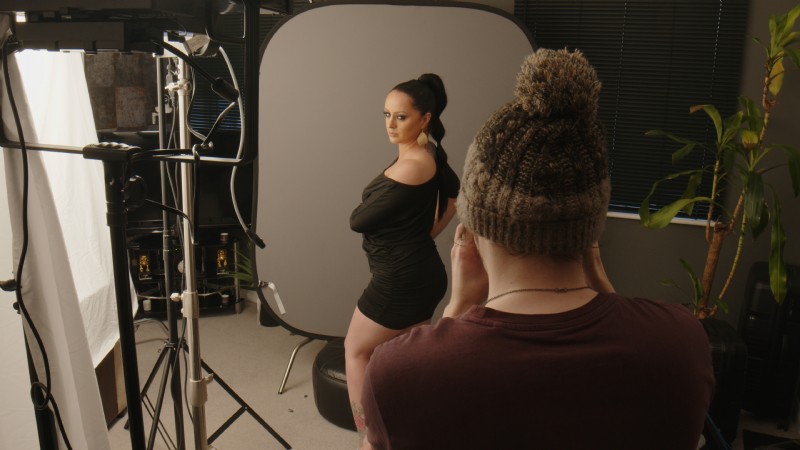

Obviously, there are some limitations with the size and usability of these backdrops—you won’t be taking any wide or full-body portraits. But, by using a longer lens—for example, above, we used an 85mm—we have both a flattering focal length for a headshot, and we’re able to frame out the edges of the backdrop easily.
But, if you want to go a little wider with your focal length, or if you’ve caught the edges of the backdrop in shot, it’s usually an easy fix.

In Photoshop, for example, we can select the Patch tool and patch these areas out, using sections of the backdrop that are close by.
In my personal experience, I’ve used these collapsible backdrops in my video work for product shots, and simple lighting demonstrations. And, even if finding a space indoors proves to be difficult, the ease of use of these backdrops means you can even use them outdoors, weather permitting.
So, the collapsible backdrop is pretty versatile and easy to use. But, what if we want a full-length portrait?
The Seamless Paper Backdrop
Well, we’re going to need something like a seamless paper backdrop, as these roll down to cover the background and the floor. And, you can buy these in pretty manageable widths, with a much longer length, which gives us options depending on the size of the space we’re working in.
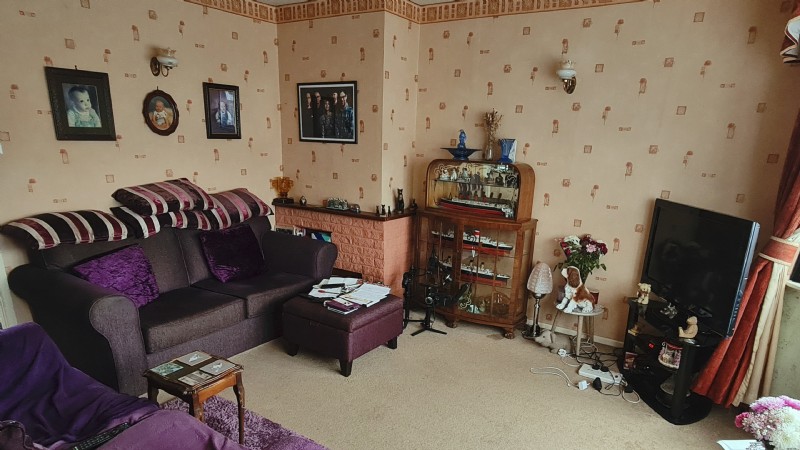
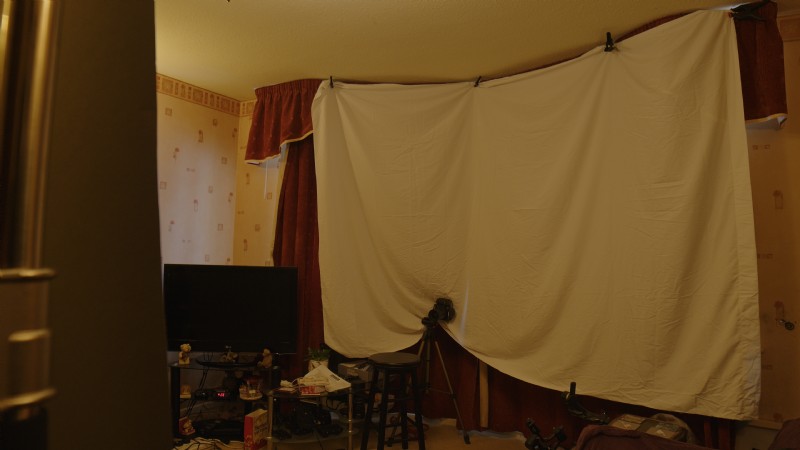
So, say we’ve got the lounge pictured above to shoot in. Once we shuffle a few things around, we’ve got about 2 x 1.5 meters to work with for the seamless paper, and around another 1.5 meters to shoot from.
This isn’t a huge amount of space. But, we wanted to test the limits of what we could achieve with studio space, so that you have a good idea of the limitations and how you can make it work for you.
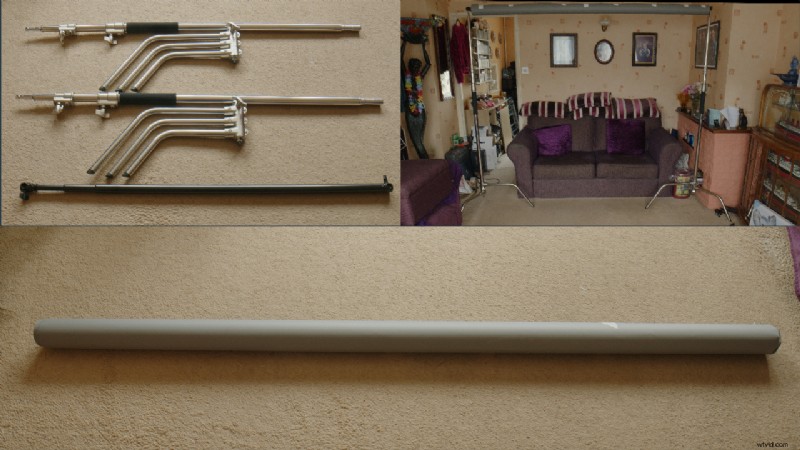
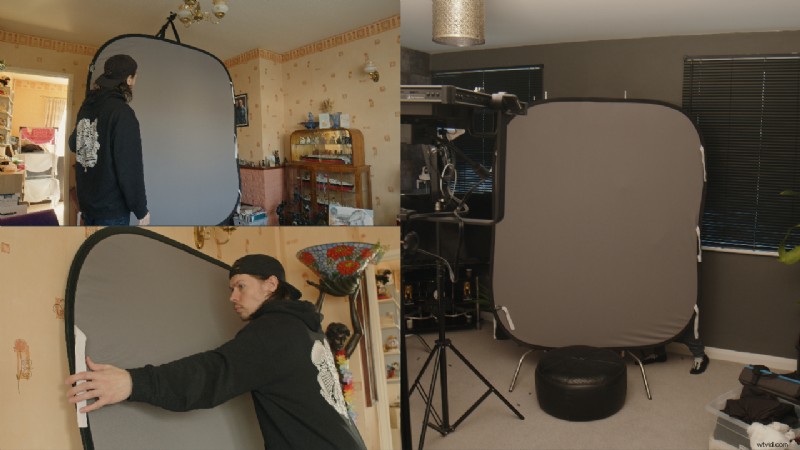
We put together our backdrop using two C-stands and a telescopic crossbar pictured above. Since our backdrop has a width of just under two meters, it’s perfect for this space. Depending on the area you want to shoot in, you can get different widths of backdrops or even cut them down to size.
So far, so good. But, you may have noticed in the photos, we’re working on the carpet. If we roll our backdrop down, we’ll have major issues when any weight is placed on the paper. This is especially problematic if you’re shooting someone wearing heels.
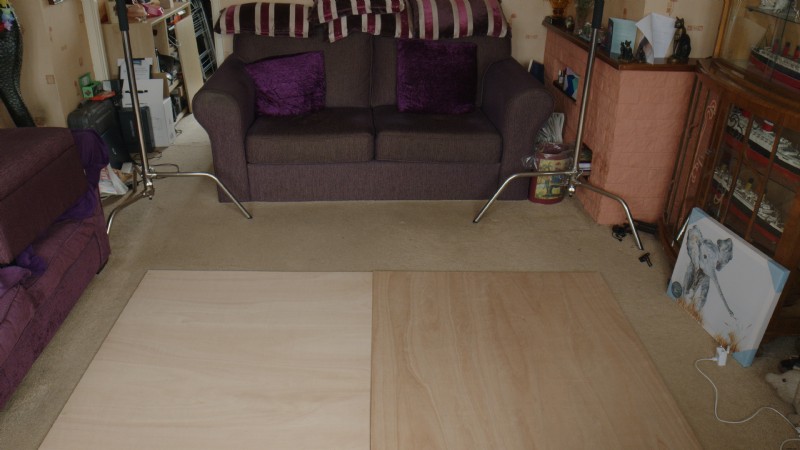
To solve this, we’ve got two 1 meter by 1.1 meter pieces of plywood to put on top of the carpet, providing a flat surface for our subject to stand on without damaging the paper. Once the backdrop is rolled down, the flat surface also helps us sandbag down the paper and helps prevent the movement of the wood.
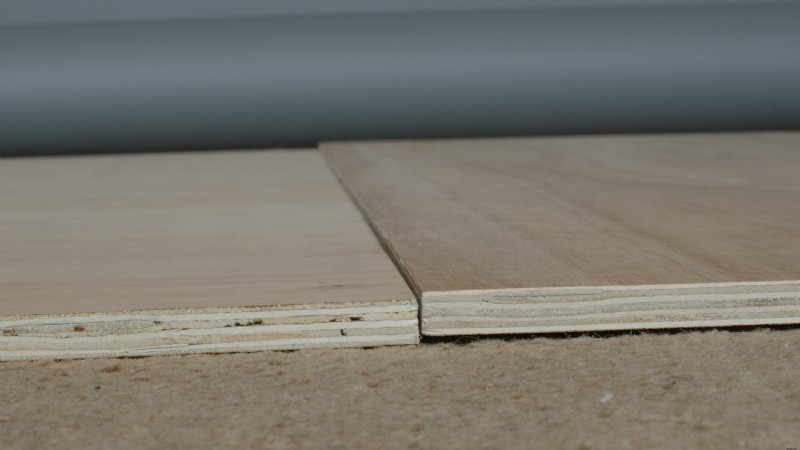
However, two pieces of wood aren’t often going to line up perfectly, and this can cause lines and marks on your paper with usage.
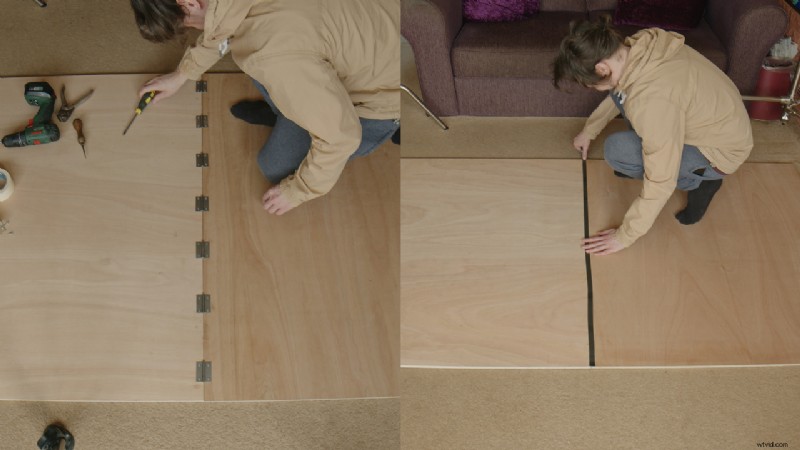
We can mitigate the unevenness between the two pieces of wood by hinging them together and using tape to cover the edges as an extra precaution while we use it.

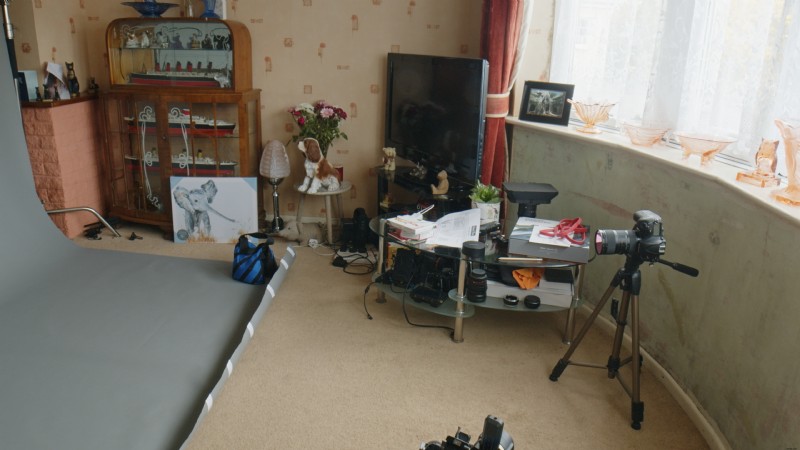
Now we’ve got our backdrop set up, and in this situation, we’ve got just about enough space for our camera!
Framing Up
A quick test shot, and we’re getting an excellent composition at around 28mm. We’re shooting in crop mode since we’re using an APS-C lens, so this would be about 40-50mm on full-frame, to give you an idea of the focal length possible in this kind of space.
Due to the smaller area, the limitations here mean we won’t be getting any full-length portraits at 85mm. However, 50mm is a versatile focal length and a popular option for full-body shots.
Lighting Our Image
Now, let’s get some lighting set up! We want to go for something simple yet dramatic, using continuous lighting.
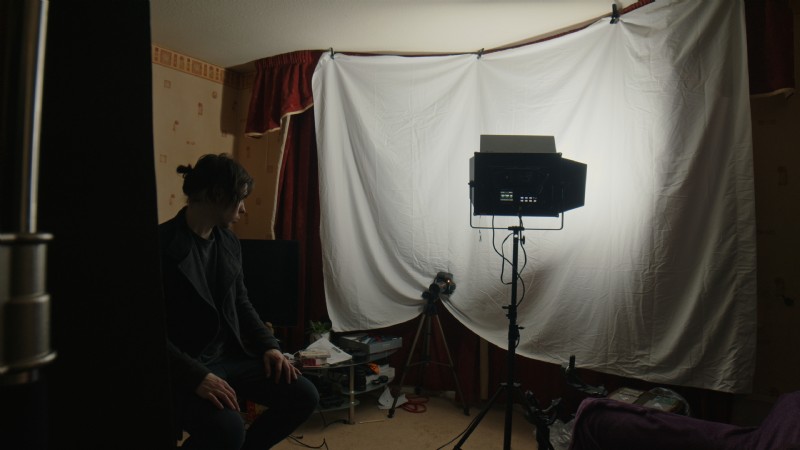
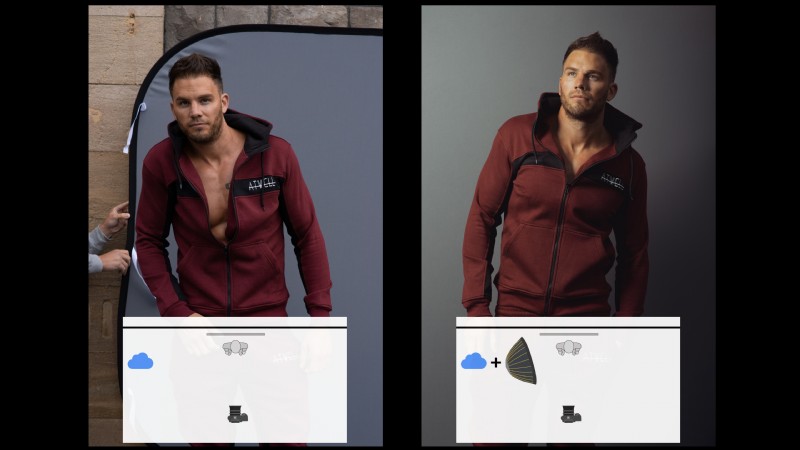
We don’t have the space for any large softboxes, so we’ll go DIY and clip a large piece of bleached muslin material to the curtain behind our camera. By bouncing an LED panel into it, we create a significant, soft, base level of fill light in our image.

At a low level, this large bounce allows for some legible detail on the clothes and skin, while providing enough exposure to our slightly lighter backdrop so that our subject and clothing can stand out and separate from the background.
Since we’re going for a dramatic look, we’d like to introduce a hard light to our shot to create contrast and work as a key light for our subject. But, as we’re working in a tight space and our subject is quite close to the backdrop, we need to ensure our light is adequately controlled to prevent unwanted shadows and light spills.
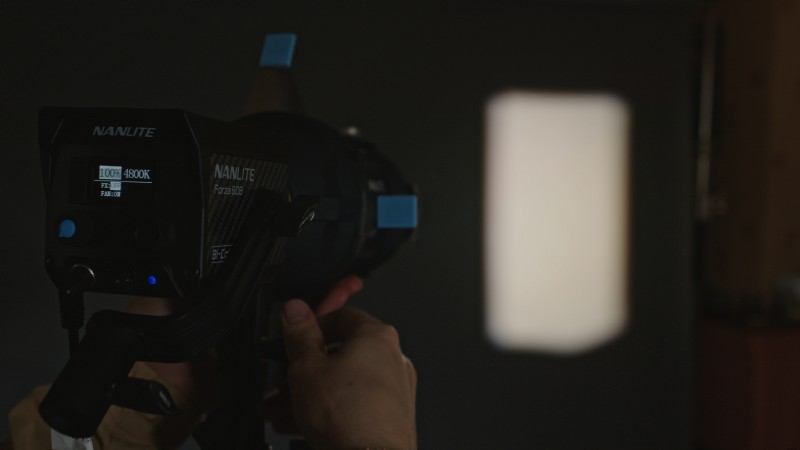
Setting up a lighting unit equipped with a projection (or spotlight) mount, we can change the size and shape of our hard light, meaning we have complete control over where it goes and how it affects our image.
In this case, we’ve created a slash of light across our subject’s face and some of his body.
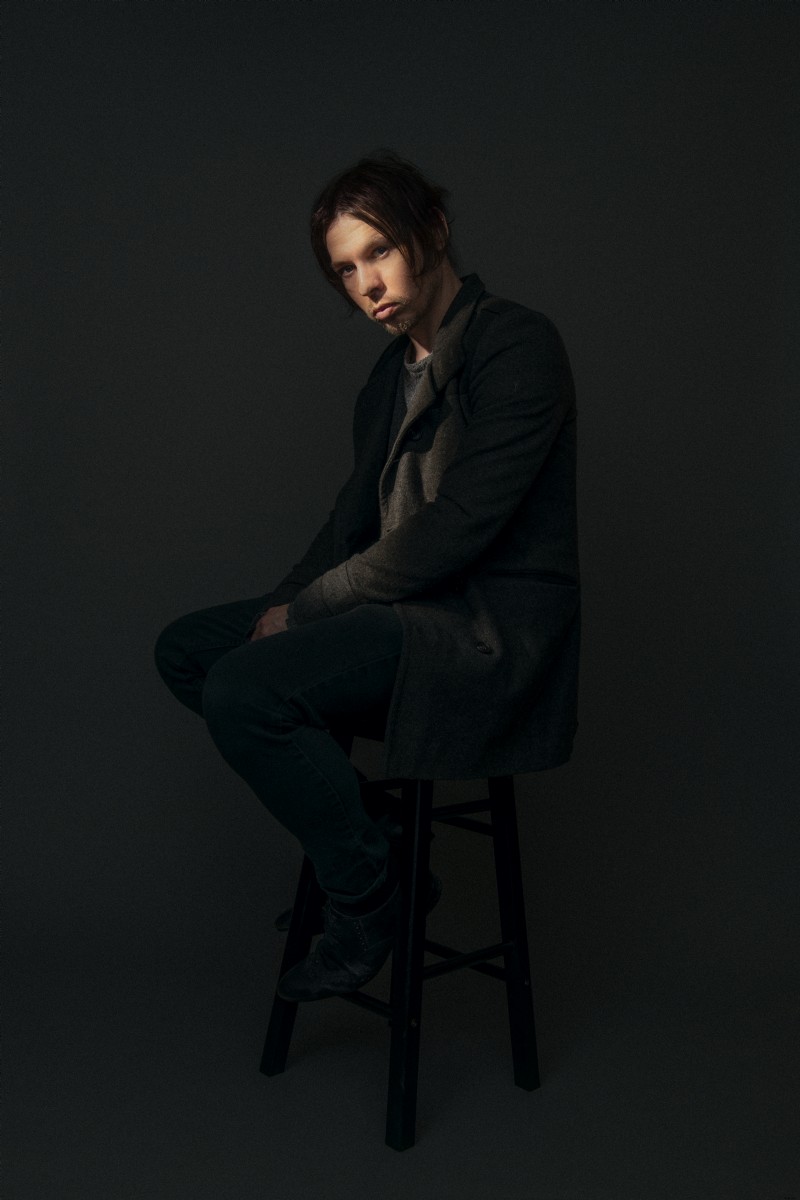
You can see in our final photo, by setting our key at a much higher power than our fill light, we’ve created a large contrast ratio between our hard key and soft fill light. And, by exposing within our camera’s dynamic range, we have detail in both our shadows and highlights.
So, with just a few preparations, and by controlling our lighting and how we want our photo to look, we’ve managed to create a studio portrait that our audience likely wouldn’t believe we shot in a small space like our lounge.
The Usefulness of Continuous Lighting
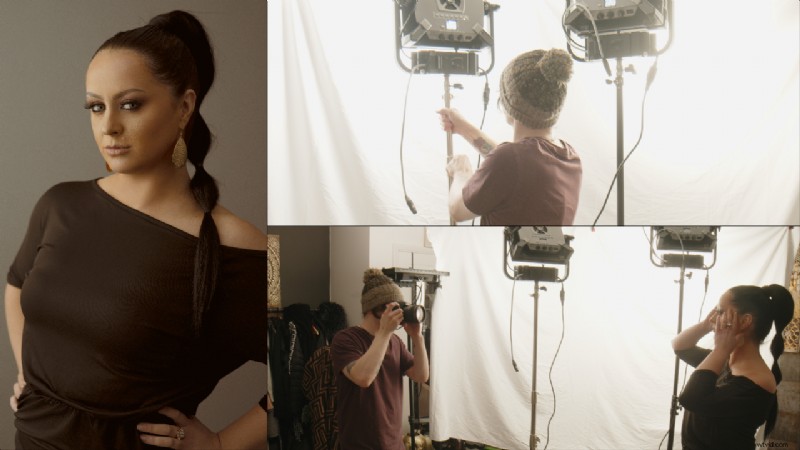
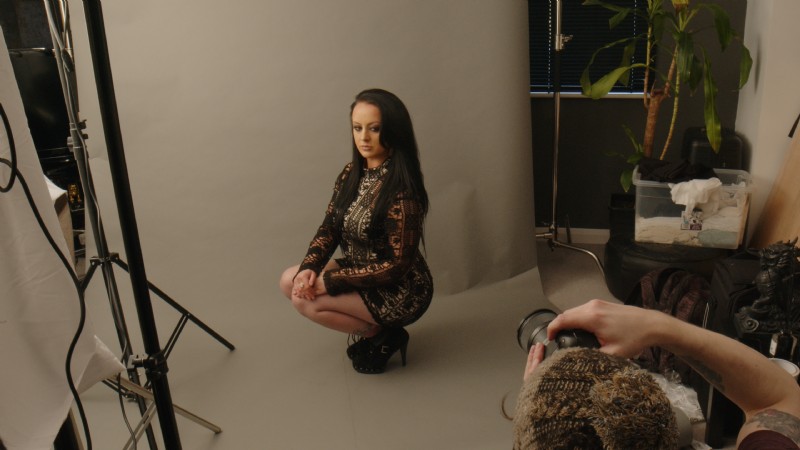
We also used continuous lighting for this shoot. Since we wouldn’t have been able to fit a softbox or octabox this large in this space (it’d also be costly!), we hung a large piece of bleached muslin material on a couple of boom arms.
We bounced two LED panels from the material, along with a third LED panel bounced from the ceiling. This created a large, soft, yet directional, wrapping source of light that fits into our spatial limitations.
Along with continuous lighting being much easier to use for photography these days, as you can get a more affordable output, it can also make more sense logistically when you’re shooting in tighter situations like with these DIY studio shoots.
The fact that we used soft LED panels meant we could use them very close to the bleached muslin material while maintaining a good spread of light, using as much surface area as possible. We also have the option to adjust color temperature.
This isn’t to say to dump your strobes or flashguns. Just choose the best tools for the job, depending on the situation and what you have access to.
By using a large, soft source, pretty close to our subject, we’ve managed to create a moody portrait with soft, wrapping light, with a nice falloff into shadow—all in minimal space.
Wrap Up
Hopefully this article and the accompanying video can help to anyone looking to create studio-based work without owning a studio.
Much of an image is about how you use the space and the tools you have, along with an understanding of how you utilize light to create the image you want, even in slightly more challenging circumstances, without a large studio to work in.