Today, let’s look at two lighting terms—hard light and soft light—what they mean and, more importantly, how you can employ them.
If you’ve only recently dipped your toes into the world of filmmaking, I’m sure you have hundreds of terms and phrases hurtling towards you at unprecedented speeds. With the broad scope of the art form, it’s easy to feel overwhelmed, especially when certain terms represent the same element. Let’s look at hard light and soft light, what each term means, and how you can incorporate them into your next project.
Soft Light and Hard Light
Two terms you may have come across in your venture into filmmaking are soft light and hard light. Initially, they may sound bizarre. Light is light, right? How can it have an adjective describing the feeling of something you cannot hold?
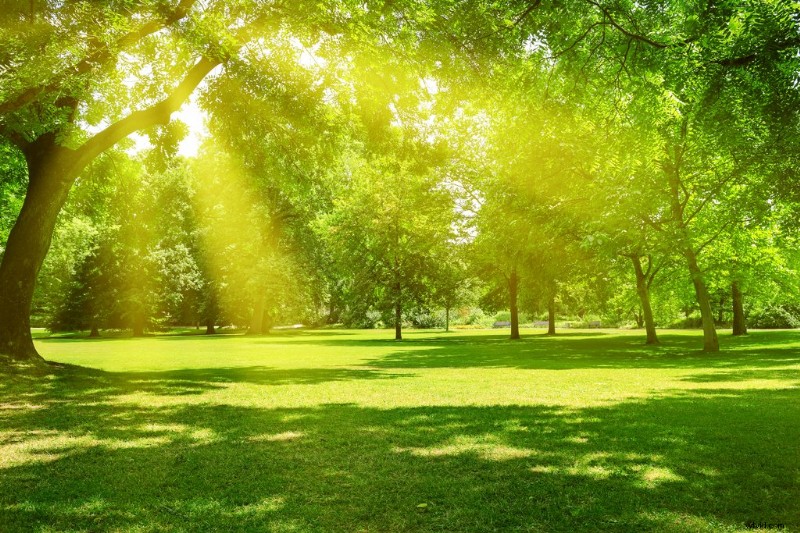
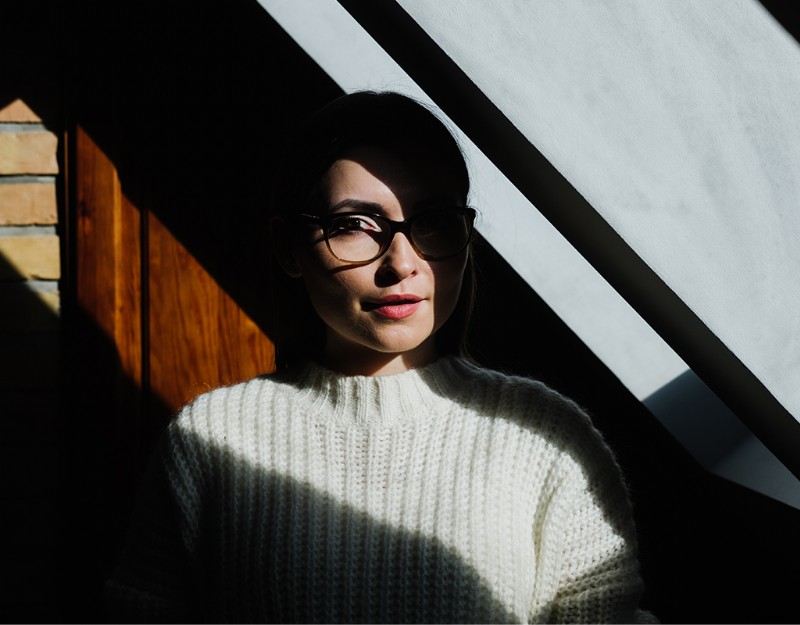
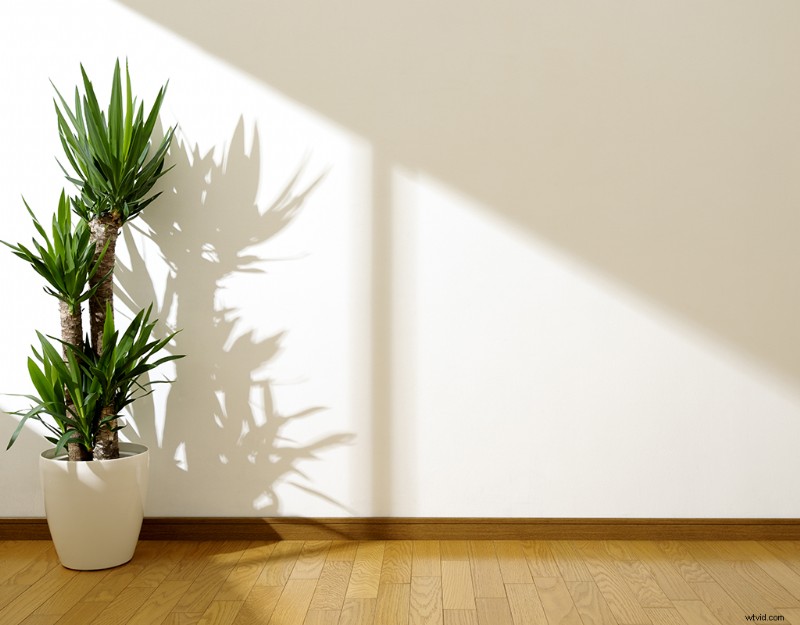
Well, picture the light from the midday sun beaming down into a park. The light will be intense and bright, and the shadows will be harsh and short.
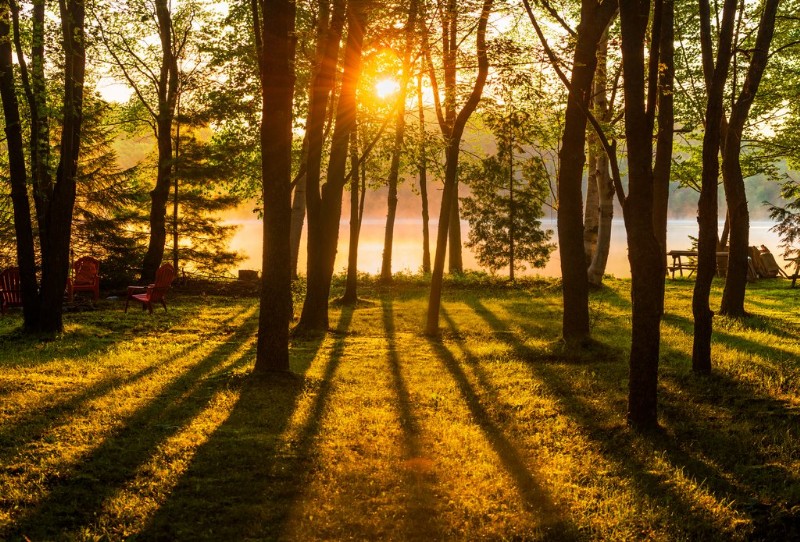
Whereas, if I ask you to picture the light of the evening sun in the same park, it’ll paint a different picture. The light will be easy on the eyes, golden in color, and the shadows will be extended with feathered edges.
Already, we can see that light is not just light. Let’s discuss their differences.
Soft Light
Soft light is light that wraps around objects, projects diffused shadows with soft edges, and is pleasing to look at. However, it should be noted that there’s no real metric for measuring how soft light is. Soft light is created by a scattered or diffused light source. But, what does that mean?
As noted in the Set Technician’s Handbook, there are three factors that influence the softness of light.
- The size of the surface of the source.
- Its distance from the subject.
- The thickness of the diffusion material.
The primary aspect you want to focus on is the size of the source. The larger the source, the softer the light will be. This is because the light rays will travel in varying directions towards the subject. In contrast, a small source leaves little leeway for the directionality of the light, leaving a focused intensity.
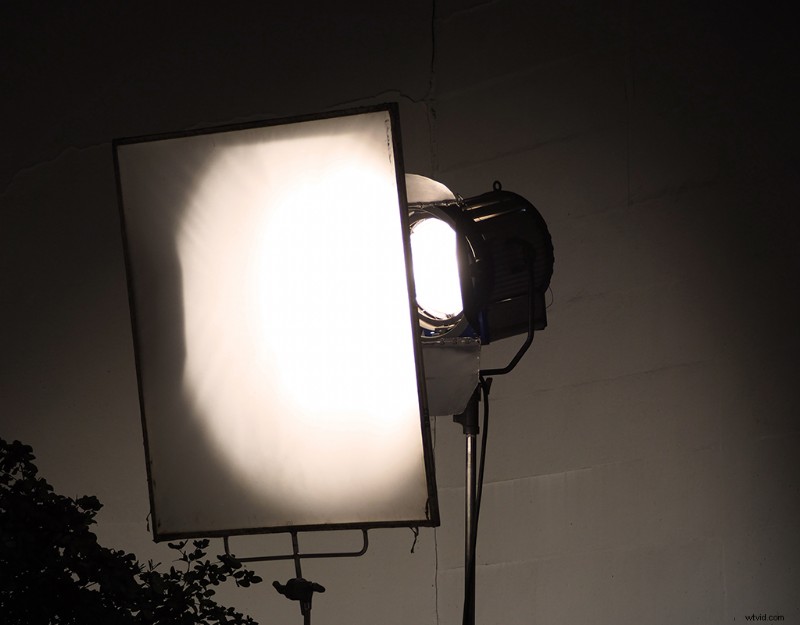
However, you might wonder what light is big enough, at least on a budget level, to do this? Well, not many. That’s why you’d typically use something like a softbox or a diffusion scrim to do just that.
The softbox interior is usually of reflective material. The light will bounce around inside the softbox, and when passing through the outer fabric (which will further soften the light), the light is coming from many directions, which makes the shadows soft with graduated edges.
If you were to direct hard light into a large diffusion sheet, it’s essentially doing the same thing. It’s stopping the firm directionality of the parallel light and scattering the rays.
However, because of this, soft light is typically a lot harder to control. You can bring the soft light in closer to the subject to maximize the softening effect, which will also fall off quickly. But, if you wanted to contain the soft light to a certain area, unlike a hard light where you could use the barn doors of the lamp, you’d need to use a set of instruments—such as flags—to block the light.
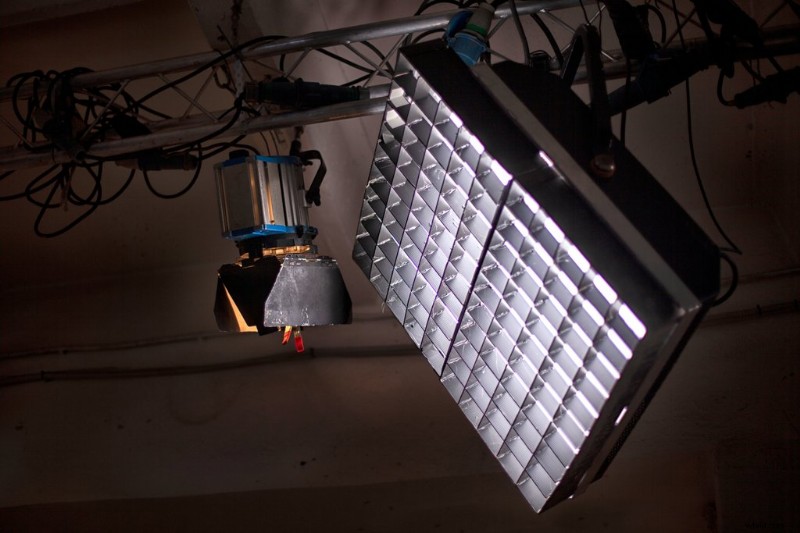
However, you could use grids or egg crates to control the soft light. They don’t reduce the softness, but they do control how much of the light spreads to the sides. Additionally, if you’re working with a low budget, an egg crate requires fewer additional tools to control the spread of the soft light.
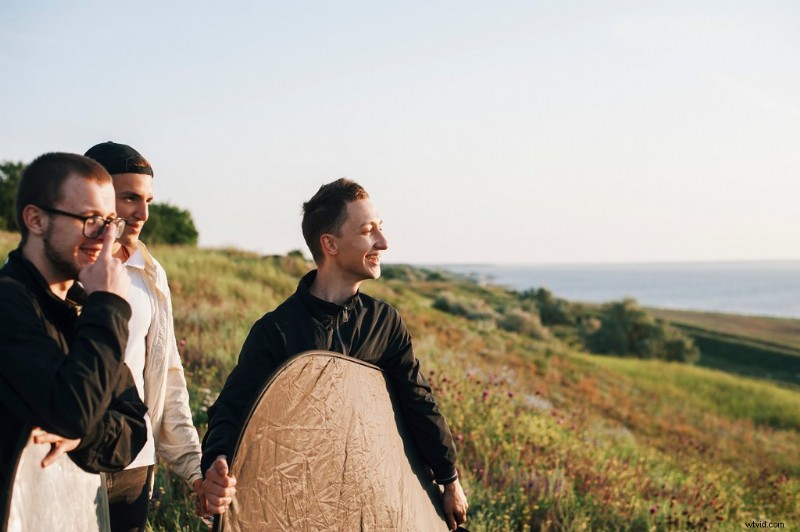
Alternatively, if a softbox isn’t an available tool, you can easily create soft light by directing your light into a surface to be bounced. This could be a bounce board, a tool specifically created to bounce and reflect light for photography and film. Or, you can even bounce the light from a white wall. However, the larger the surface you’re bouncing the light into, the less overall control you’ll have as to where that light will fall.
Soft light is perfect for scenes involving people as it creates a flattering form of light. It’s also nice for creating ambient fill. For inexpensive forms of soft light, check out our video tutorial below:
Hard Light
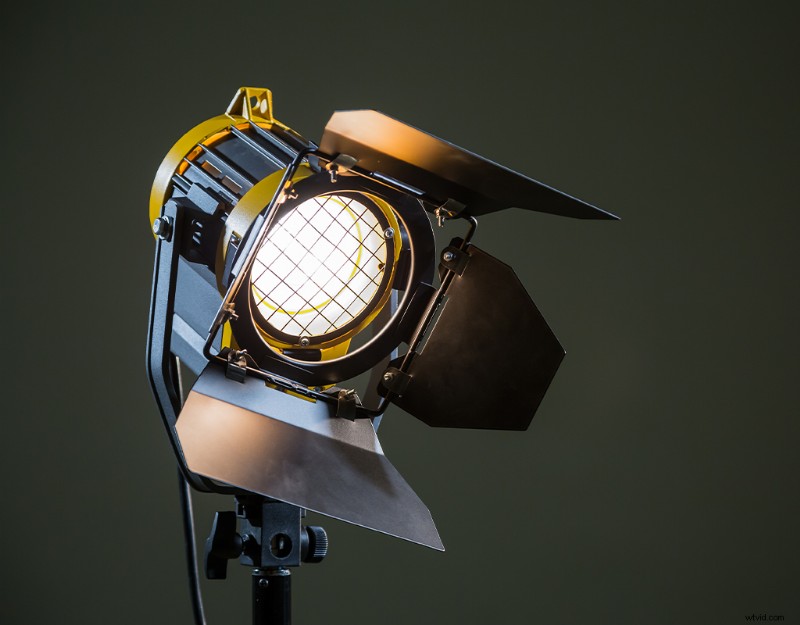
Hard light is created from a small light source. Meaning, the diameter of whatever is producing the light is relatively small in comparison to the subject. For example, the light below, a standard Tungsten Fresnel, will produce a hard light because the Fresnel lens only has a small surface area.
There’s a lot that goes into producing soft light. And, note that this section covering hard light is significantly shorter.
That’s because hard light is the default for most lights. By nature, light sources, at least low-to-mid budget light sources, will be from a small source. Whether that’s from a Tungsten Fresnel or an Aputure LS 300d LED fixture, the area of light emission is usually small.
With the small light source, there’s little leeway for directionality of light. As such, the light rays are traveling parallel from the source. Therefore, it’ll produce an intense illumination within one area, creating high contrast and sharp shadows.
With this, we can see that there isn’t much you need to do to use hard light other than turn on your light fixture. The above section on soft light can seemingly make it sound like hard light should be avoided at all costs. However, there are several circumstances where it’s preferable to use hard light over soft light.
For example, by using shadow you can shape the location in a manner that isn’t possible with set design—producing shadows to paint the walls and create contrast.
Hard light is excellent for producing volumetric lighting for when you need to create rays of light bursting through open areas.
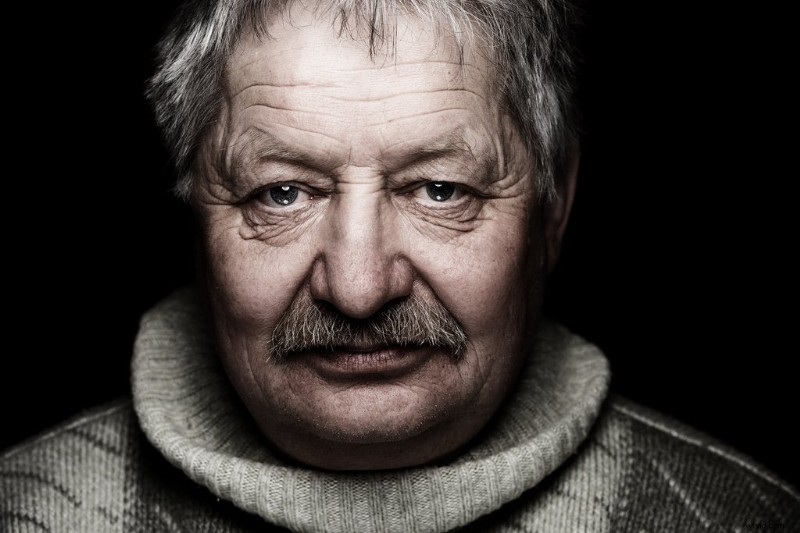
Additionally, if you were to use hard light on an older model, you’d be able to accentuate the details within the subject’s face, maybe to add grace and wisdom to the character. In contrast, a soft light would typically lessen the intensity of skin creases.
Let’s say, on the off chance, you happen to have inherently soft light. (For example, light panels are usually soft because the light emits from a larger area, and you need a hard light.) You may initially think you’re out of options.
However, the distance between the light source and the subject will also affect the size of the source around the subject. If we use the sun, for example, the mean radius of the star is 432,450 miles. That’s a huge light source! But, because it’s 93 million miles away, it’s nothing but a small circle in the sky, resulting in the light being parallel. It’s also a hard light (throughout midday, at least).
Therefore, you could look to move your soft light back to render harder shadows. However, the intensity of your light is also essential when doing this. As you move the light further back, the intensity of the light also weakens on the subject. So, if you’re already at full power when close to the subject, you’d be unable to create hard light.
The video below has several tips on how you can use hard light in your footage.
For more on lighting, check out these articles:
- Lighting the Virtual Workspace: A Beginner’s Guide
- Use These Inexpensive Hacks to Manipulate Your Video Lighting
- Without Additional Lighting, Should You Expose For The Highlights or Shadows In Digital Filmmaking?
- Color Temperature and 3 Point Lighting Basics
- The Ultimate Guide to Artificial, Natural, and Mixed Lighting
Cover image via Grisha Bruev.