Without additional lighting in some locations with a high contrast ratio, you may find that you can’t correctly expose the image. Here’s what you can do instead.
In an ideal world, or perhaps a dream scenario, nothing would be greater than starting your filmmaking journey with all the equipment you need. Unfortunately, but probably for the better because it allows you to learn more, for many of us, we will likely start with nothing more than a camera, lens, and shotgun microphone.
As a result, without additional lighting equipment in some locations with a high contrast ratio, particularly indoors, you may find that you can’t correctly expose the entire image. Instead, you must expose for either the shadows or the highlights, resulting in clipping in the other. As digital sensors react differently to film, which should you expose for in this circumstance? The tutorial below investigates this.
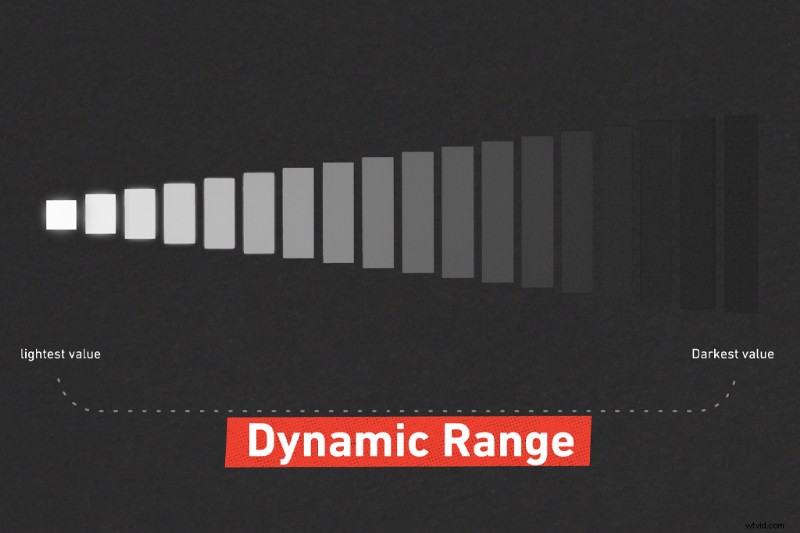
What is Dynamic Range?
Dynamic range is the ratio between the darkest and lightest values your camera can register. How much you’ll have to compensate for one region is dependent on the dynamic range of your camera.
I’ve already previously explained what that is in my Grad ND tutorial, but for the sake of keeping all the information within this one video, let’s pull an extract.
With the advances in camera technology, especially something like a Blackmagic Pocket Cinema Camera 4k. This camera has thirteen stops and shoots in RAW, so information is recoverable but only to an extent. If we can increase some shadows and recover some highlights, which should you opt toward in fully saving?
For digital, you want to expose for the highlights, then bring up the shadows later. There are a few reasons for this.
Film handles highlights differently
Celluloid has a greater dynamic range due to how the film dyes and silver reacts to extreme exposures. You may have heard of the phrase highlight roll-off. This refers to the gradual rounding off of values of the highlights where they fade or progressively bloom into white. Instead of a sharp transition, film has a relaxed increase in overexposed areas.
I unfortunately have never had the luxury of shooting with film. But, from my 35mm film photographs, you can see where this happens. Consumer digital cameras have been trying to replicate this for years. High-end cinema cameras such as the Arri Alexa can do this very well, hence their predominant use in films and television.
Digital images, however, will clip at either end of the tonal scale. Shadows can drop off abruptly into black and highlights cut off into flat white areas with no detail at all.
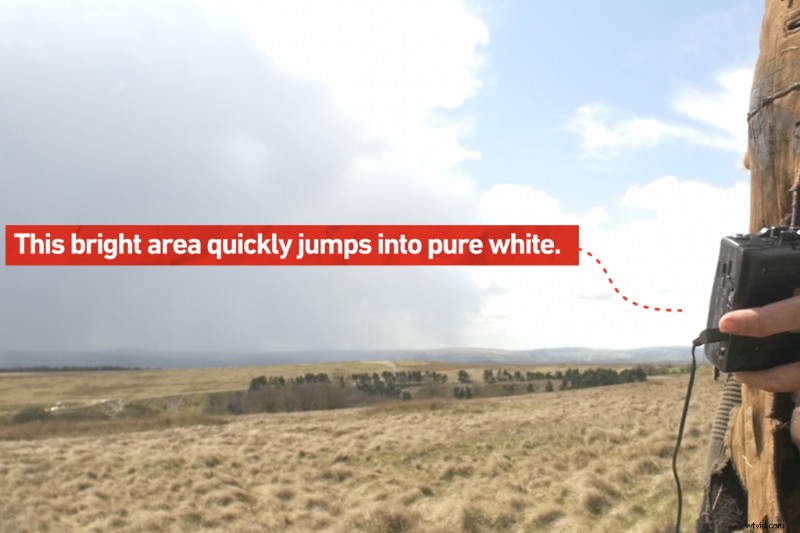
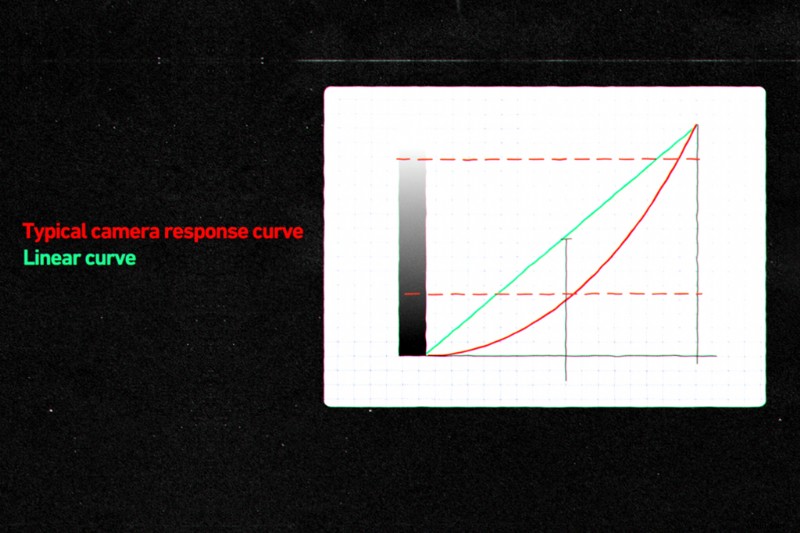
While this tutorial is aimed towards beginners, I will dip slightly into camera technology. Highlights blow out when the photosite (this is what makes up your sensor—millions of them, in fact) reaches the full well capacity. It tends to fill up linearly without the forgiving tail off that you find with film. That means digital can quickly jump into having no detail at all once pushed past the threshold of your sensor.
While the shadow end of the scale will, of course, still clip, it won’t clip very easily because the response curve slopes more gradually. You’ll have to underexpose your footage to clip the blacks severely.
In layman terms; If we expose for the highlights in a high contrast scenario, we can then bring up the shadows in post-production (of course this is going to depend on the notion of not completely underexposing your image).
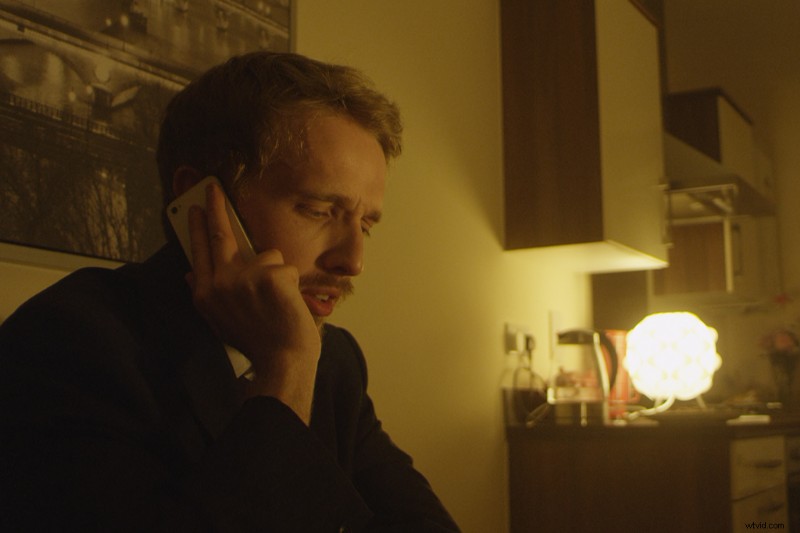
Let’s look at this example. In the following scene, we illuminated the actor with the two practical lamps in the kitchen. We weren’t able to compensate with additional lighting to keep both the actor exposed and to stop the lamp clipping.
I exposed this shot to maintain details in the shadows.
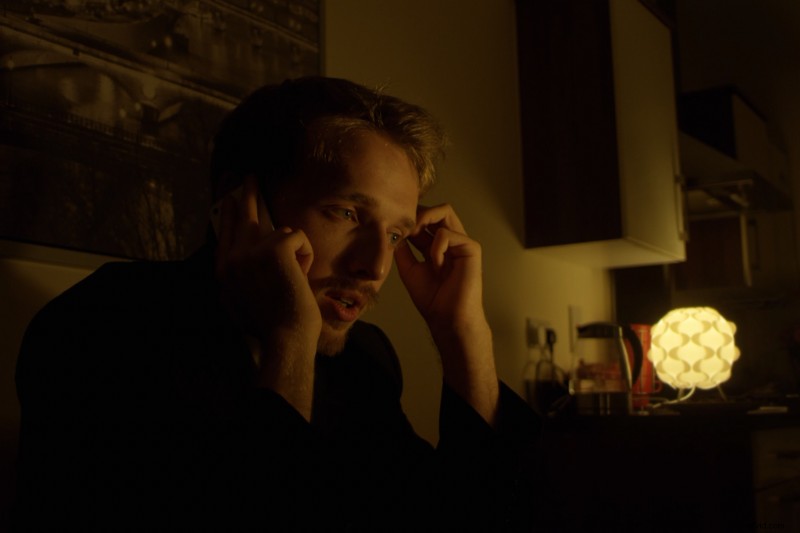
And the other exposed to limit the overexposure of the lamp.
In the shot where I’ve exposed to keep the slight details of his jacket, we can see the lamp in the back has become extremely hot. However, it is necessary to note that elements such as a lamp or streetlight are going to be bright. Plus if it’s a naked bulb at full brightness or a translucent lamp shade, they’re likely going to clip naturally.
However, this lamp was just too bright, distracting, and just plain ugly. I exposed for the shadows, and as a result the lamp is a ball of hot white light. If I bring down the highlights, we get no detail back in the lampshade—the information is gone.
Alternatively, in the second shot where I’ve exposed for the bright light, we can now see the detail within the lampshade. However our shadows are now crushed. There’s no detail in his suit and his hair fades to black. Even though this is a night-time scene in a location with just one light source, it’s a little too dark.
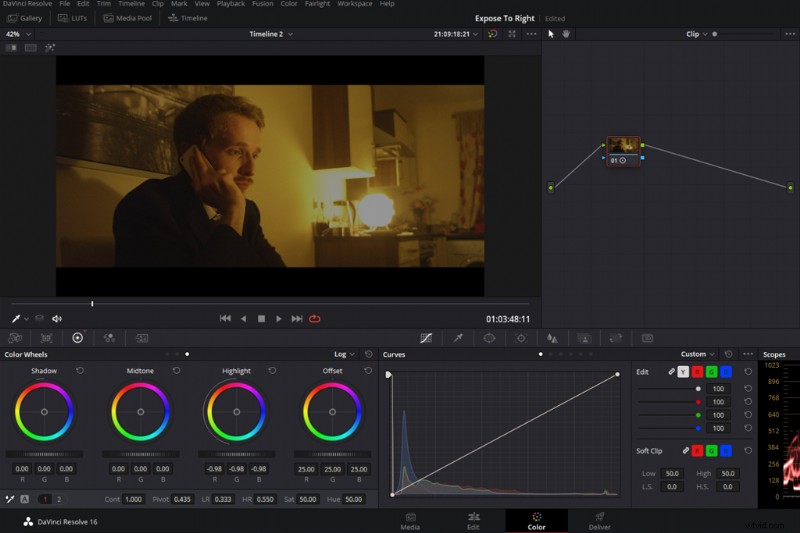
But, because we have that extra leeway with the shadow curve, we can raise these blacks and bring the details into the more shaded areas of the image. Again make sure the shadows are still relatively obeying the laws of a night-time scene. Now, however, they are no longer crushed.
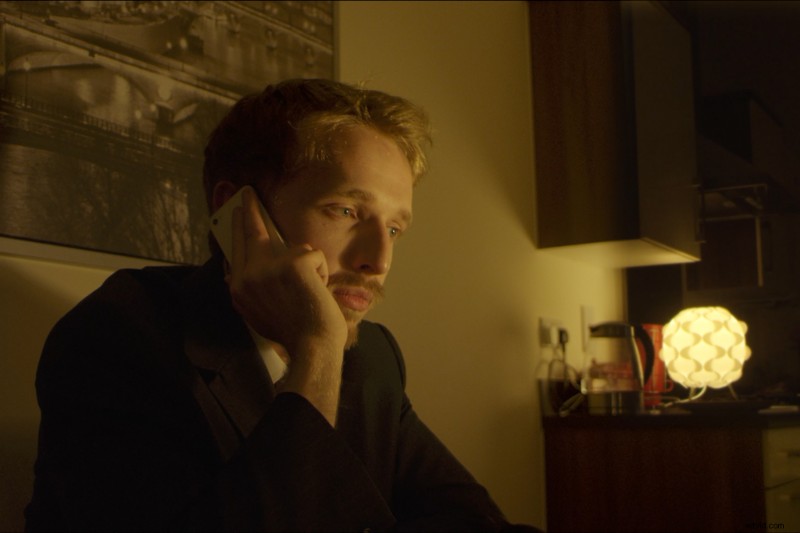
So, we’ve retained the detail of the bright highlights and brought the shadows back up into visibility. This motion wasn’t possible when we were trying to retain the details of the clipped highlights in the lamp. However, depending on the severity of the underexposure and the performance of your camera, it will introduce digital noise. However we can negate this with a noise reduction plugin.
While this is the better option for most circumstances when it’s unavoidable, it doesn’t mean it’s great for every situation. If you spend so much trying to protect the highlights, you’re may end up incorrectly illuminating the primary focus of the shot, your subject. So, while you don’t want to clip highlights on details like as a white shirt in a standard dining room scene, there are circumstances where it’s best to let the windows clip to correctly illuminate your subject.
Learn more about lighting for video with these articles:
- Cinematography Tips: How to Use Additive and Reductive Lighting
- Top 10 DIY Lighting Rig Tutorials to Light Up Your Set
- Color Temperature and 3 Point Lighting Basics
- Using Tungsten Lighting in a Daylight-balanced Scene
- Cinematography Tips: 10 Things Beginners Need to Know About Lighting