Need a different look for your video clips? Try speeding them up and slowing them down.
One of the basics of creating a montage is manipulating your footage to fit a “vibe,” which you can do by speeding up or slowing down the footage. Most Premiere Pro amateurs think that there is only one way to adjust speed on your clips, but there are actually three, and they all have their time and place in an edit. Let’s learn a little about each one.
Record at a High Frame Rate
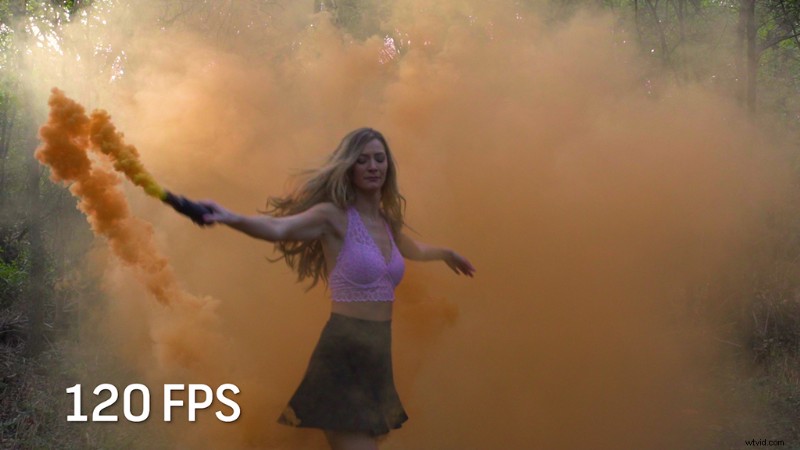
Whenever you shoot something that you’re going to slow down, always shoot higher than 60 fps for time remapping. The reason for this is because when you slow down your footage, you need to have enough frames to meet the 24 fps threshold, so the footage still looks cinematic. If not, it will look extremely choppy.
Speed/Duration Effect
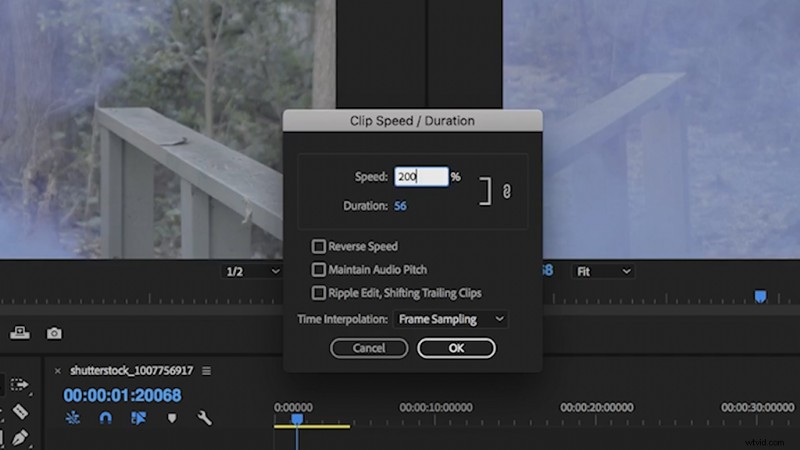
This is the bread and butter of the time/duration effects — the one that everyone learns first when adjusting speed for the first time. All you have to do is right-click your clip, and select “Speed and Duration.” From here, you can adjust either the speed or duration of your clip. Speed will adjust the rate at which your clip will play, and duration will adjust the actual length of your clip. Both will speed up or slow down your footage, but you can choose which one to adjust based on your length or speed requirements.
Changing the Frame Information
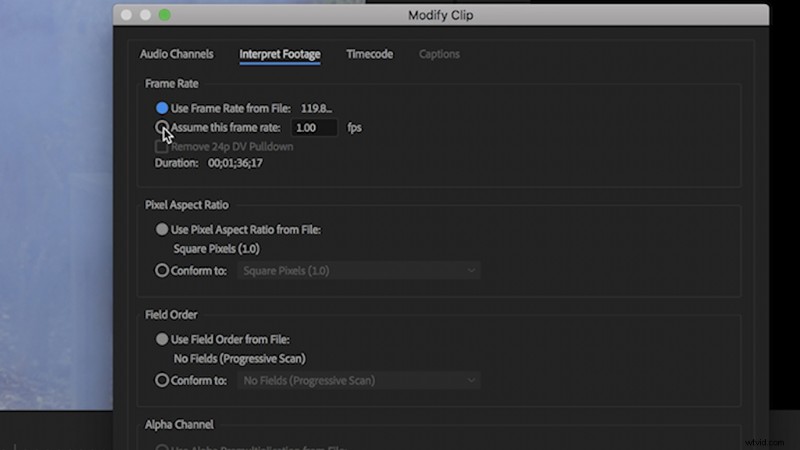
This effect actually changes the properties of the clip from the inside out. If you have a clip at 120fps, and you want to slow it down to 24 fps, you can actually change the clip’s settings to represent that. To adjust the frame information, right-click your clip in the project window, then navigate to Modify > Interpret Footage. This will bring up a settings box. In the “Frame Rate” section, select “Assume This Frame Rate.” Change the frame rate to 23.976. Now, your clip will stretch all of its frames into a 24fps sequence. This effect will bring your clip down to the slowest speed at which it can play back without becoming choppy.
Keyframing/Speed Ramping
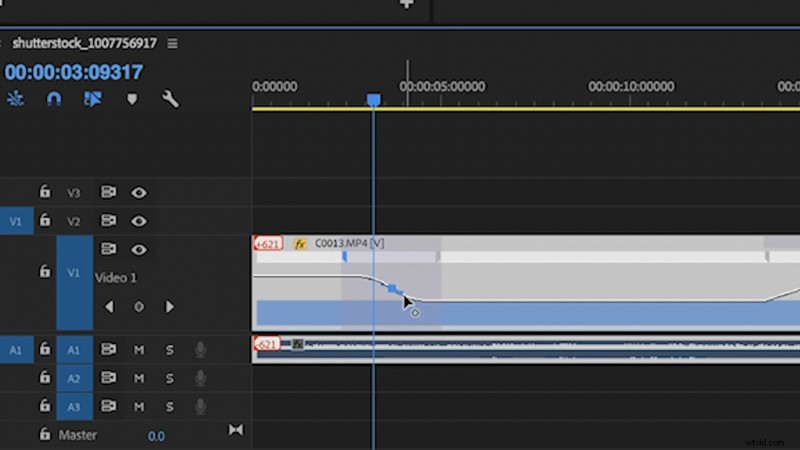
Speed Ramping is one of the tricks that has drastically improved my edits. It’s my favorite way to adjust speed on clips, because it is so simple to modify on the timeline. To start off, right-click your clip in the timeline and navigate to Show Clip Keyframes > Time Remapping > Speed. Now, a small “rubber band” will appear on your clip. You can drag that band up and down to instantly adjust the speed of your clip.
Now, say you want your clip to go from fast to slow — this is where speed ramping comes in. If you select the pin tool (P), you can make marks on your clip, which will form cuts on your rubber band. You can adjust the speed in certain sections of your clip. If you want a smooth transition, just drag the brackets on the pin out, and Premiere will automatically create a “ramp” that will gently guide the speed transition. You can even smooth it out more by clicking the bracket and grabbing one of the small arms of the dot in the middle to create a “sine curve” that your speed will follow.
Looking for more video production tips and tricks? Check out these tutorials.
- How to Use Colored Smoke Canisters on Your Next Film or Video Project
- 4 Trippy Ways Blend Footage in Your Video Projects
- Video Tutorial: How to Build Your Own Film and Video Sets
- How to Easily Color Match Any Two Cameras in Post-Production
- DIY Filmmaking: 7 New Hacks to Help Your Shots — and Sanity