Whether it’s The Brave Little Toaster or WALL-E, we’re willing to bet there’s an animated film out there that always brings a smile to your face. The curse of being a motion designer is that everything you see on screen becomes something you want to be able to create. The key, of course, is starting small. With this tutorial, you can get your feet wet with a little animated walking sequence. Keep it up, and you could be working at Pixar one of these days.
If you’re a character illustrator, you can always make your own assets, but for this tutorial, I chose this adorable vector set by contributor artenot.
Step 1
Open your character file in Illustrator and copy your final character design by hitting Command + C.
Step 2
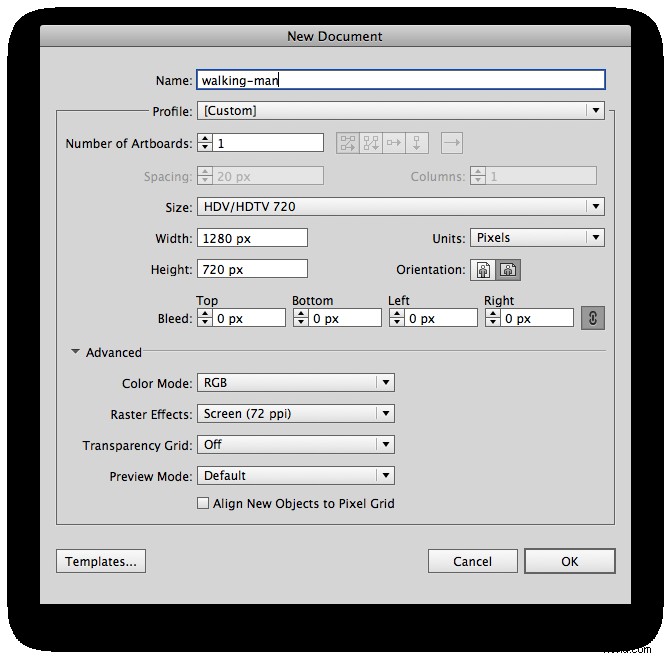
Create a new Illustrator file using the same settings you plan to use in your After Effects file. Illustrator has similar presets to After Effects under the Video and Film profile. I also turn off the Transparency Grid as a personal preference. Having the file the same size will ensure that your character doesn’t have to be stretched to fit in later on.

Step 3
Adjust the legs on your character so that they’re standing straight. Group all of the parts you plan on animating together: the right and left arms, legs, and the torso should each be in their own group.
Step 4
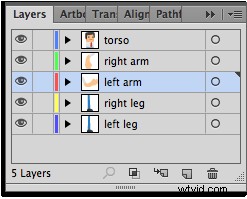
Put each of the groupings into its own layer and label them correctly. This will be extremely helpful later on.
Step 5
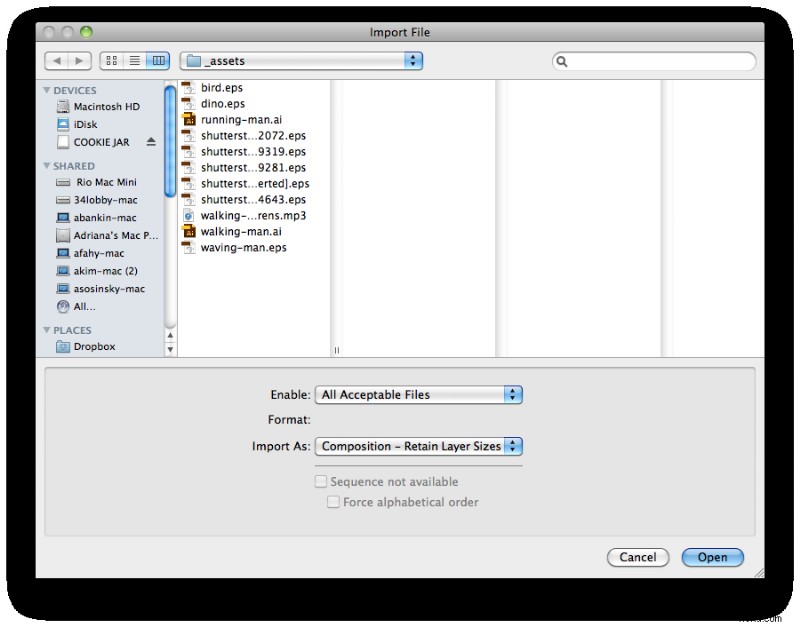
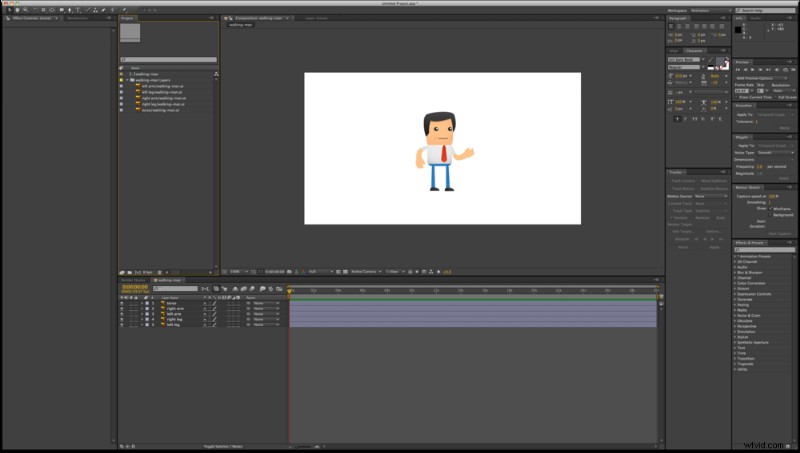
Now that you have your character all set up, save your Illustrator file and import it into After Effects. Make sure you import as Composition – Retain Layer Sizes. This will import your layers and keep them all in the same place.
Step 6
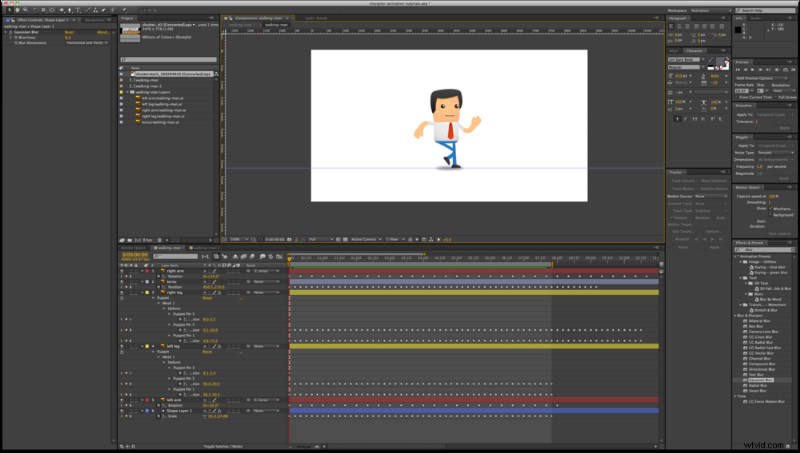
Open up the composition of your Illustrator file. You should see all of your named layers located in the right place.

Step 7
Select the Anchor Point Tool and adjust each layer’s anchor point to the joints of the character. The anchor points for the arms should be at the shoulders and those for the legs at the hips.
Step 8
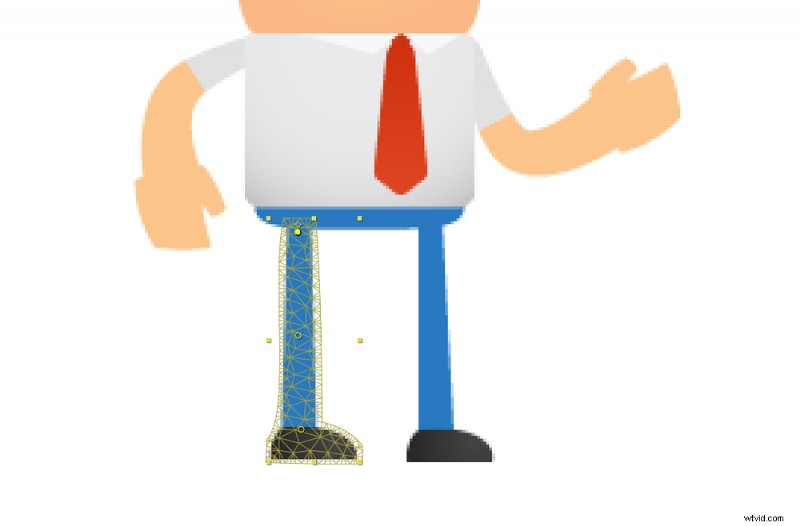
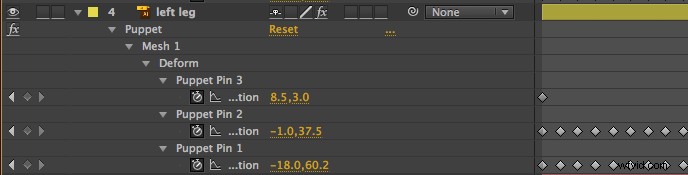
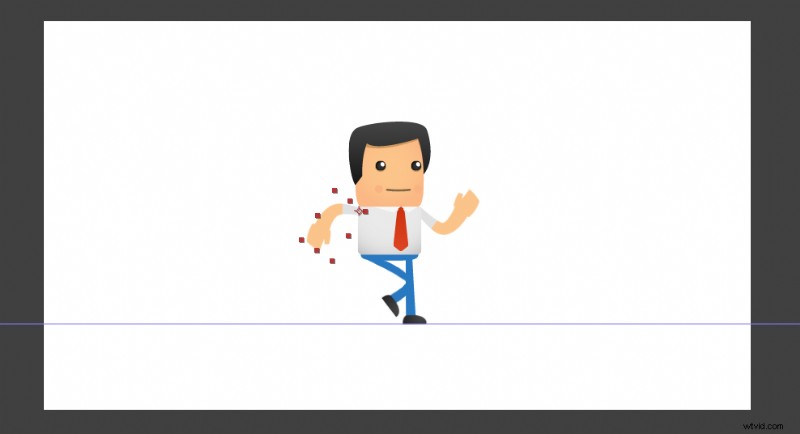
Select the Puppet Tool from your tool bar (it looks like a push pin). Now, select one of your leg layers and click on the joints of the leg with the Puppet Tool: knee, ankle, hip. Repeat the process for the other leg.
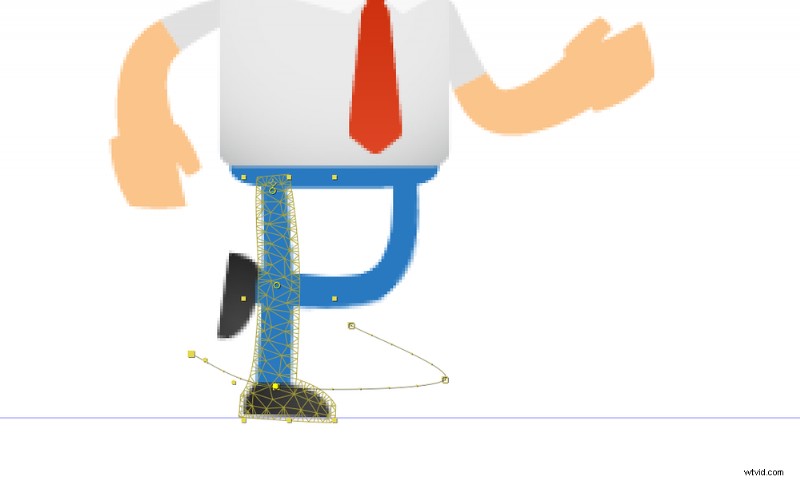
Step 9
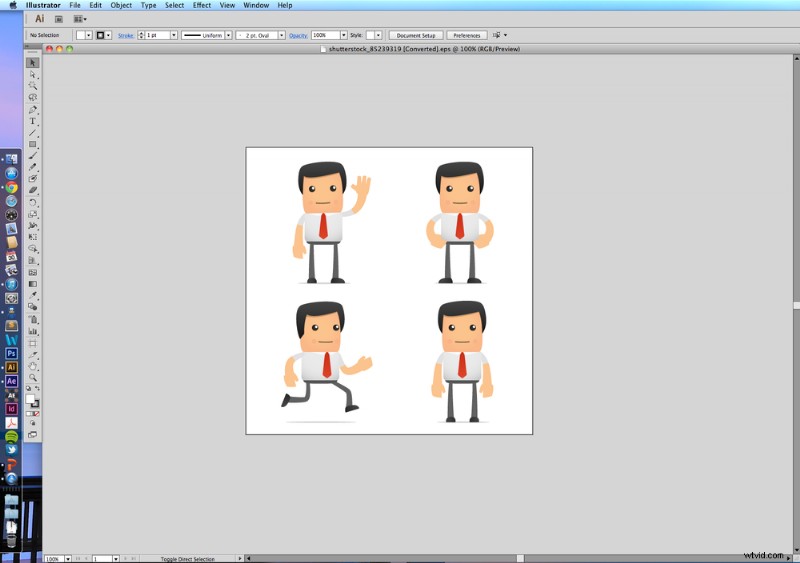
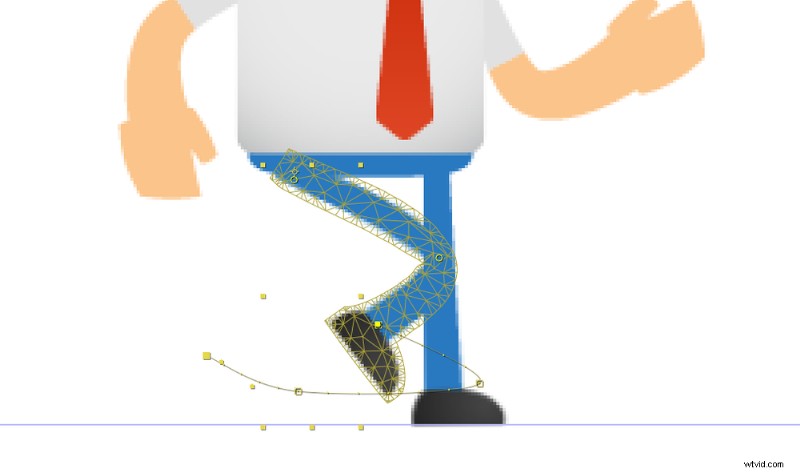
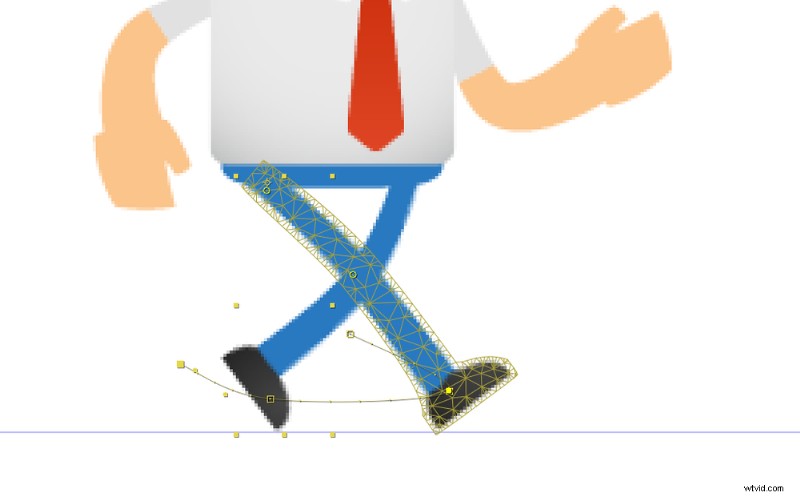
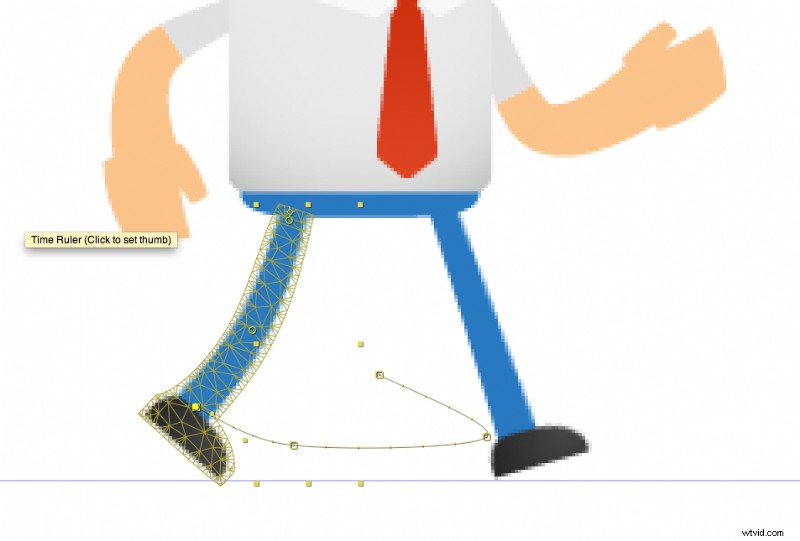
This is the most important step. There are four different leg positions in a walking sequence, which I have laid out in order above. Choose your right-leg layer and hit the U key on your keyboard. You will see all of your Puppet Pins for that leg. Create the first position (top-left corner) by adjusting your pins.
Once you have successfully created that position, move down your timeline slightly and create the next position. Continue this process until you have created four key frames per leg, mirroring the four positions above.
If you scrub through your timeline, you should see your character’s legs walking. Duplicate your key frames down your timeline for as long as you want your character to walk. You will also find that creating a “floor plane” with one of your Ruler Guides will be helpful in this process.
Step 10
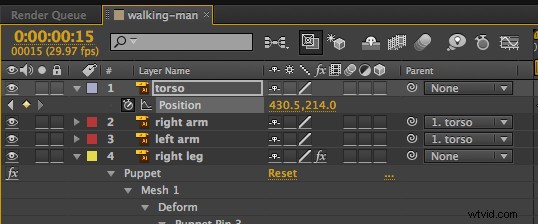
Now that you have your legs working properly, it’s time to get the rest of your body up to speed. Parent both of your arms to the torso using the Parenting Piq Whip.
At each position that your legs are most extended (positions 2 and 4), create a key frame making your torso’s position lower. Give the opposite positions (1 and 3) key frames of the torso at normal height. You will see that your body and arms now “bob” as your character walks.
Step 11
Almost there. Move your character’s arms from front to back on every other position (1 and 3 or 2 and 4), or as so desired. If you’ve lined your key frames up from the beginning, this process will be rather simple.

Step 12
To add a little depth to your animation, let’s add a shadow. Use the Shape Tool to create an ellipse that sits on the floor plane you created earlier.
Step 13
Go to Effect > Blur & Sharpen > Gaussian Blur and apply the effect to your ellipse. Adjust the transparency and blur until you reach your desired effect. Animate your shape to shrink and grow as your character goes up and down — smaller as it goes up, and larger as it comes down. These key frames are good to match up with your torso for proper timing.
Step 14
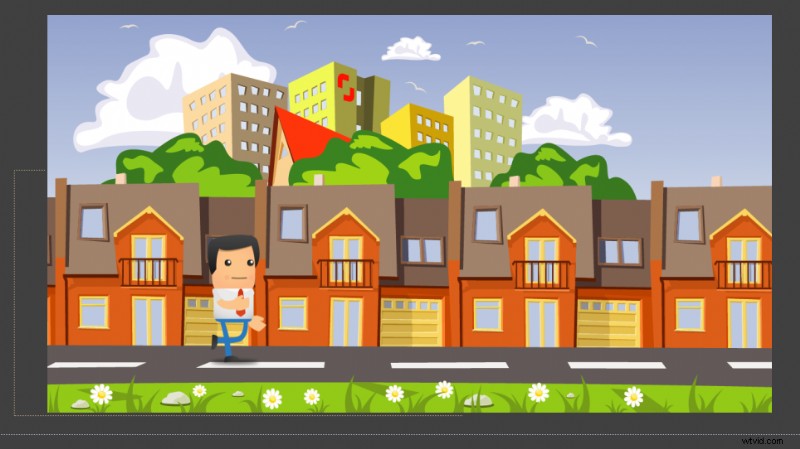
Thats it! Your walking animation is complete. Add your character animation composition to whatever background you desire and animate its position from left to right. I chose a colorful vector city by contributor jupeart for this tutorial.
Keep experimenting with this technique to see how far you can go. The Puppet Tool is a powerful part of your animation arsenal, and learning to master it will open up new worlds of possibilities for what you can create.
Images Used in this Post:

 Like this tutorial? Check out these other great After Effects lessons from Shutterstock: