Design elements like shapes or images that have texts written along their edges add a personalized touch to generic design ideas. This "tweak" is possible with Illustrator's Text in Path tool which allows text to be manipulated along a drawn path, whether it's in a circle, a curve, or any custom shape.
The Type on a Path tool is very versatile and can be used when you want your text to follow the contours of a design element or the twists and turns of a hand-drawn shape.
This article will guide you through the process of writing on a path with Illustrator. You'll learn how to efficiently use the text on a path tool for basic and creative design, as well as practical tips to enhance its functionality.
In this article
-
- Some Keyboard Shortcuts for the Type on a Path Tool in Illustrator
-
- Apply Effects to Text
- Adjust Spacing
- Adjust Alignment
- Important Tips to Note
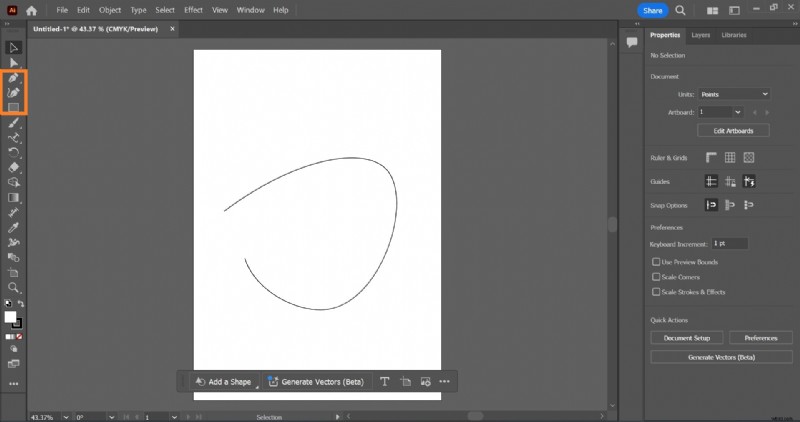
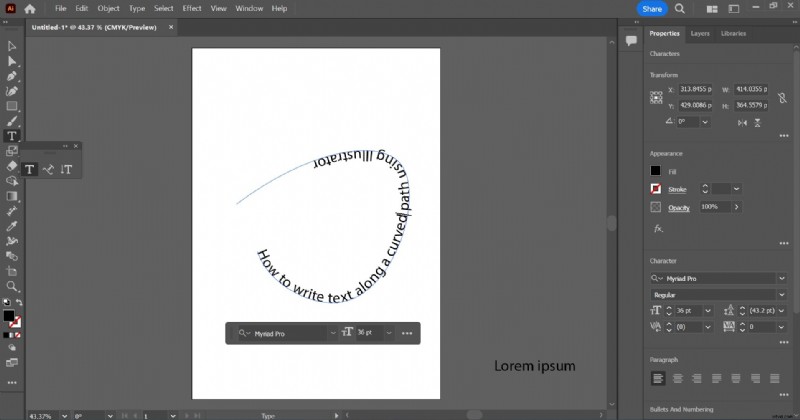
To text along a path in Illustrator, you need a path. This could be a shape or a series of hand-drawn lines and curves.
Step 1: Use the Pen Tool to hand draw straight paths and the Curvature Tool for curved paths. To use a shape as a path, select the Rectangle Tool and choose your desired shape.
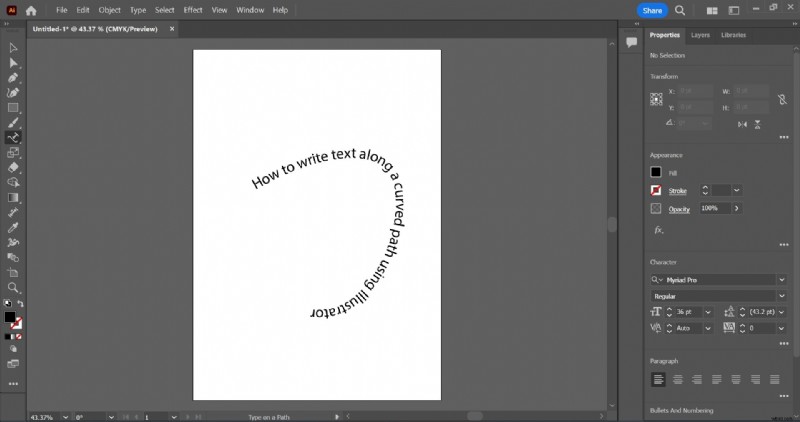
Step 2: To add text along the path, select Type > Type on a Path on the dashboard. To type vertically across a path, select the Vertical Type Tool.
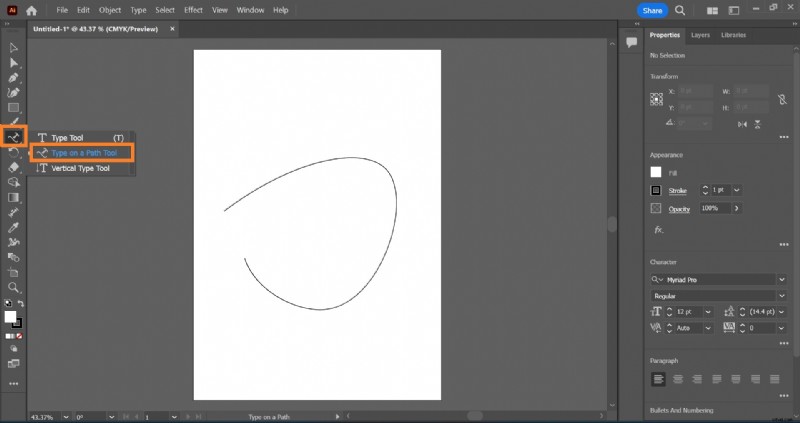
Step 3: Position the cursor on the path, click, and start writing.
Some Keyboard Shortcuts for the Type on a Path Tool in Illustrator
| Shortcuts | Windows | MacOs |
| Pen Tool | P | P |
| Curvature Tool | Shift + ~ | Shift + ~ |
| To select the type object | Ctrl – Click the text | Cmd – Click the text |
Some Advanced Text Formatting for Type on a Path in Illustrator
The versatility of the Illustrator type on a path tool lies in your ability to get creative even with the most basic text manipulations.
After you fit text to path on Illustrator, you can manipulate text by flipping or moving it, applying effects, or adjusting letter spacing and text alignments.
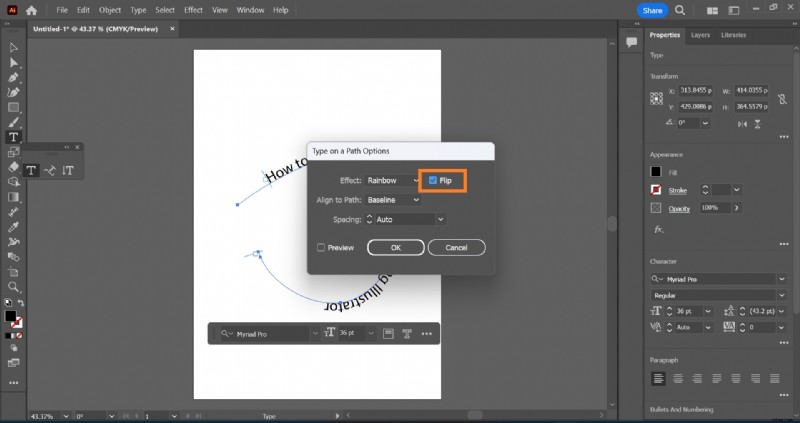
Move or Flip Text
If you want your text on the inside of the shape or curve rather than along, move or flip the text.
To move text, select the path using the Selection Tool. Hold down Ctrl on your keyboard, double-click on the text, and drag. For iOS, hold down Command, instead of Ctrl.
To flip text, select Tools > Type in a Path > Type in a Path Options. Select the Flip option and click Ok.
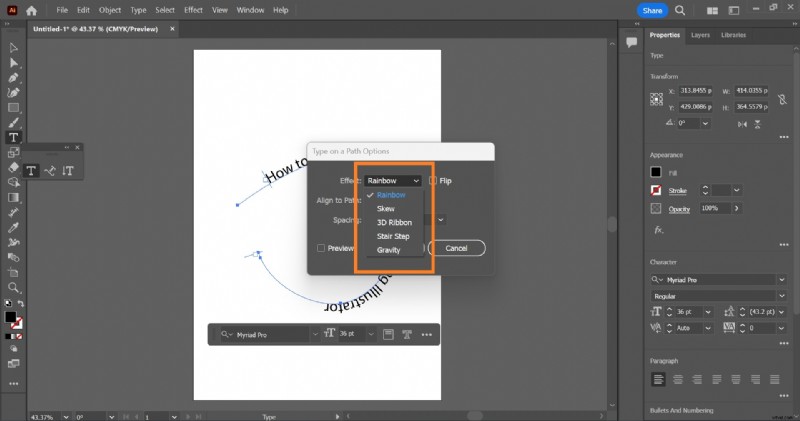
Apply Effects to Text
Get creative with your texts; add effects that suit the style or concept of, or enhance the message in your design.
Step 1: Select the text.
Step 2: Select Type > Type on a Path > Type on a Path Options, and choose from any of the effects. Common effects you can add to text include; Rainbow, Ribbon, 3D, Skew, Gravity, and Stair Step.
Adjust Spacing
To change the letter spacing of the characters on the path:
Step 1: Select the text
Step 2: Select Type > Type on a Path > Type on a Path Options. Increase or decrease extra space between characters till you reach your desired setting.
Adjust Alignment
You can align your text to fit your design requirements. To do this:
Step 1: Select the text.
Step 2: Select Type > Type on a Path > Type on a Path Options. Choose the text alignment option that suits you.
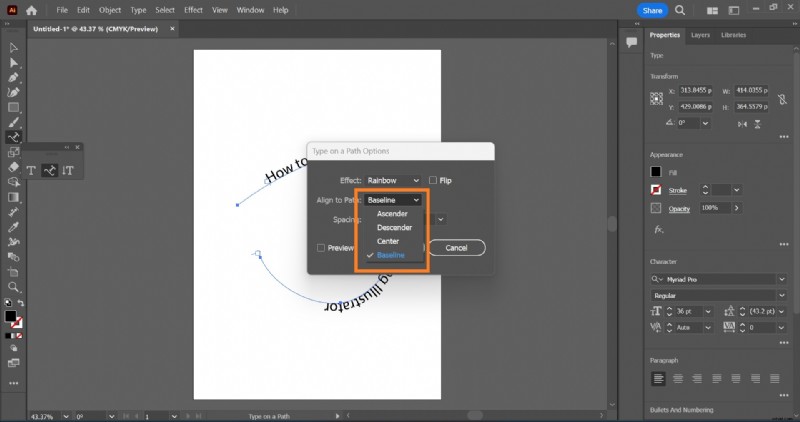
When aligning text, take note of your design needs and ensure your alignment choice matches your overall design theme. Ascender alignment aligns text along the font's top edge. Descender alignment aligns text along the font's bottom edge. Center alignment aligns text halfway between the font's ascender and descender. Baseline alignment aligns text along the baseline. The default alignment for typing on a path in Illustrator is baseline alignment.

Important Tips to Note
- Illustrator automatically masks your path when you click outside the text or path.
- Text characters without ascenders, descenders, or a baseline, align vertically with characters with these alignments.
- To change character spacing along a straight path, use the Kerning or Tracking feature.
- On a perfectly circular path, the Gravity effect looks more like the Rainbow effect. It works as expected on other shaped paths.
- To move text across a path without changing its direction, click on the Baseline Shift on the Character panel.
Limitations of adding text on a path in Illustrator

Despite this tool's creative flexibility, it comes with certain limitations that can affect the design process.
- Text distortion: Writing text on a path with sharp angles or tight curves may cause the letters to squish more tightly, or be more stretched out than normal. This would distort the text, affecting its readability.
A simple way to get around this is to manually adjust the text on the path by tweaking kerning and tracking on the Character Panel. Alternatively, you can add the text to smaller segments of the path.
- Long texts on closed paths like shapes: When writing texts on shapes like circles, you must consider the length of the text. Texts that are too long may overlap at the starting and ending points.
To manage this, try reducing the text size, or increasing the size of the shaped path. Better still, stick to writing longer texts on open paths; break the shaped path at strategic points to convert it to an open path.

- Disproportional Scaling of Text on a Path: Scaling or resizing a path may affect the text added to it. Unlike the regular text tools, text on a path does not scale proportionately when the path is resized. It may cause misalignment, resulting in distorted text or irregular and awkward spacing.
To avoid this problem, scale the text separately after scaling the path to your desired size. Adjust the text size and spacing using the Character Panel, to ensure the text fits the new path size.
- Variety of Fonts: Not all fonts are suitable to be used when writing text on a path. Some font types and font styles can complicate the appearance of text on a path, making the text illegible, especially when typed on complex paths.
How to Use the Type on a Path Tool in Filmora for Video Editing
Texts have increasingly become an integral part of video content as they enhance the visual appeal of your videos. A creative way to use text in video editing is by curving it along a path, following the contours of shapes or objects in the video. A simple tool like Wondershare Filmora can be used to achieve that.
Animate Text Along a Path In Wondershare Filmora
- Create text that flows along a path you design.
- Customization options to design interactive text effects.
- Draw any shape with ease using the Bézier tool.
- A variety of Text Styling Options aligns with your creative vision.
- Combine the text along a path with Filmora's Creative Assets.


Step-by-step guide to add a Text on Path Using Filmora
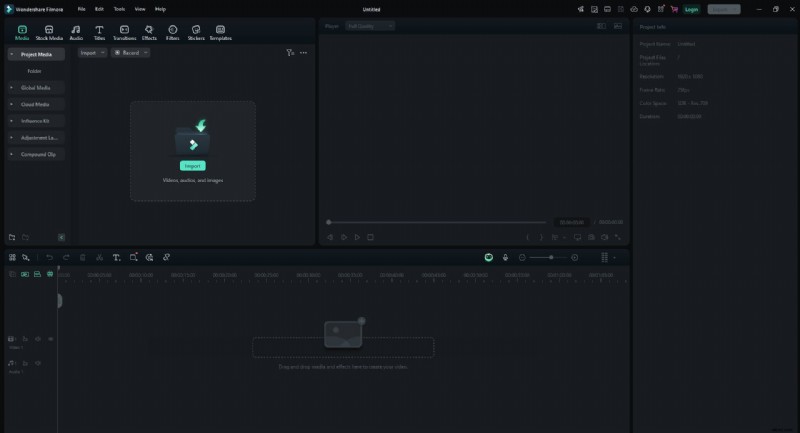
Step 1: Import Your Media Files
Start by launching Filmora and importing your video or image into the timeline. Drag and drop the file from your computer to the Media Library in Filmora.
Step 2: Add Your file to the Timeline
In this guide, we will use a solid background from Filmora as the background image. Drag the background file onto the timeline.

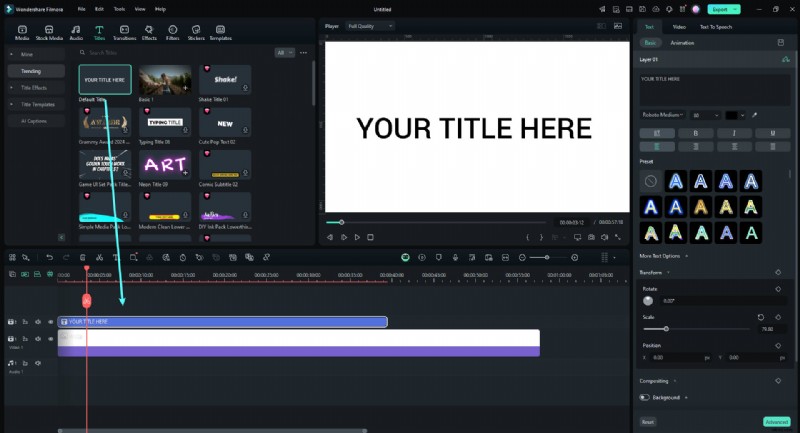
Step 3: Add Text Layer in Filmora
Click on the "Titles" tab and choose a text style that complements your design. Drag the text style onto a new track.
Step 4: Edit Text and Apply Effects
Double-click on the text in the timeline to edit it. Customize the font, size, and color to match your design. You can also apply effects from the Effects tab.

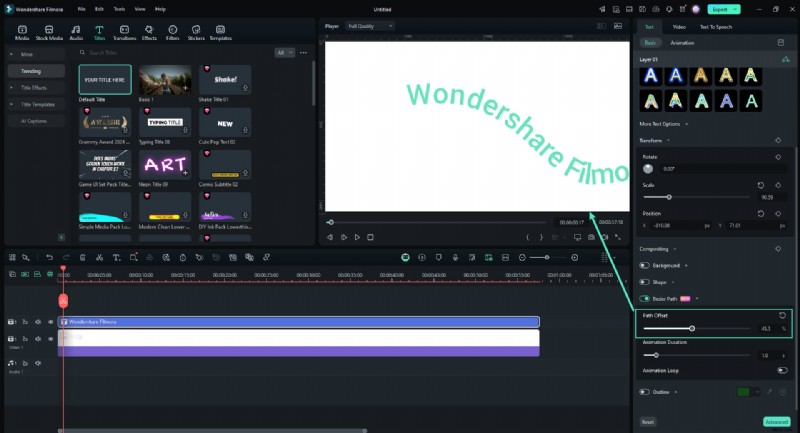
Step 5: Position the Text Along the Path
Turn on the "Bezier Path" toggle in the "Basic" section. Drag selections around points and Bezier handles to position the text along the path of your design. Adjust the rotation, spacing, and alignment as needed.
Use the "Animation Duration" slider to adjust the animation speed.

Step 6: Fine-tune and Preview Your Project
Play the timeline to preview how your text fits with the path. Make final adjustments to the text's position or effects by using the "Path Offset" slider to ensure it fits seamlessly.
Step 7: Export Your Project
Once you are satisfied with the text fit, click on the "Export" button. Choose your preferred format and resolution, then export the video or image with your fitted text.

Conclusion
Mastering the basic Illustrator Type on a Path Tool is important for designers as it builds creativity and encourages flexibility and precision in design. This tool can be useful when creating custom designs, adding a personal touch to edited photos, or exploring video editing techniques. Other tools like Filmora can be used to add texts on a path to videos—whether you're creating a title frame or watermark for your video content.