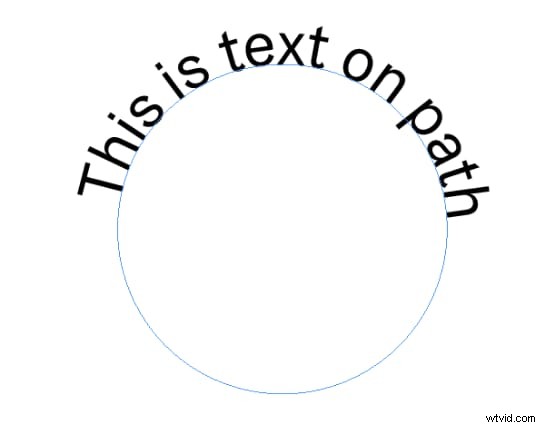
Suppose you create a circular path around a product image and type text on that path. This will enhance your design and draw attention to your content.
Curved text and type-on-path tools are essential for designers to maintain outstanding content. These features allow you to add something new to your graphics, leaving the traditional text placement behind. You can use these features when creating a banner, website, or any other graphic element. You can add text inside the circle in InDesign or even warp it outside.
This article will discuss professional tools like Filmora and Adobe InDesign type on a path. Now, let's get started with further details.
In this article
-
- Benefits of using InDesign text on a Path Tool
-
- Steps to add Curved Text feature in Filmora
- Similarities and differences between Filmora and InDesign
In Adobe InDesign, you can type your text along an open or closed path. You can add the above line or inline anchored objects. You can also add curve text in InDesign. You can use a pen, line, or pencil tool to create a path in InDesign. You can also turn an existing text into a path by clicking Type < Create Outlines. Select the “Type on Path” tool, click on the path, and enter the text. Now, in the Character panel, you can edit the text.

Benefits of using InDesign text on a Path Tool
Unique and Eye-Catching Designs: Type on a path feature in InDesign adds a dynamic and visually exciting element to your layouts.
Enhanced Readability: Typing on a path can improve readability and engagement by following the shape of an image or graphic.
Creative Text Effects: Create curved text, flowing text around objects, or even text that appears to be written on a surface.
Brand Consistency: Use the Type on a Path tool to create consistent and recognizable brand elements.
Improved User Experience: You can enhance the user experience by adding good visuals to attract more users.
Steps to Type on a Path in Adobe InDesign
Using the InDesign text on a path feature, you can make text follow a path in your layout or curve. It is perfect for adding curved headings or making attractive designs and elements. Below are the steps to create a path and type on a path in InDesign.
- Click and hold the Type tool to display a menu, then select the “Type on a Path” tool.
- Place the pointer on the path until a small plus sign appears next to it.
- For default settings, click the path to place the insertion point at the start.
- For a specific placement, click the path where you want to start, drag along the route, and release to set the endpoint.

- Enter the desired text. If you click, the text will appear along the entire path or only along the dragged portion.
- If you need to change the start or end point, refer to the "Adjust the type on a path position" documentation.
What are other ways to create a path in InDesign?
There are plenty of ways to create a path in InDesign. You can add a path using the Shape tools, Pencil tools, or Pen tool, or you can convert an existing element into a path.
1. Use the Pen Tool
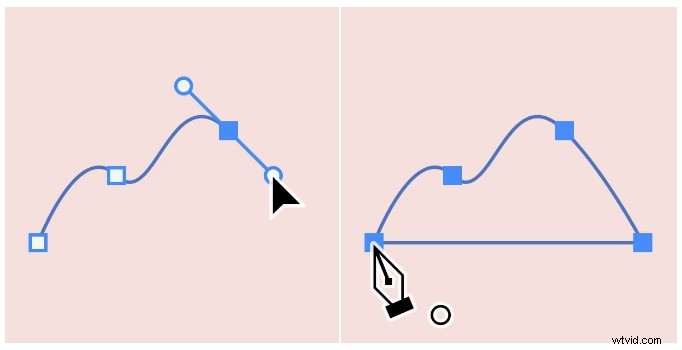
- Select the Pen Tool (shortcut P).
- Click to create anchor points and handles, then drag to create curves.
- Hold Shift while dragging to constrain the angle.
- Click the first point (hollow anchor) to close the path.
- You can also create an open path by clicking away from the path anywhere on the screen using Ctrl-click.
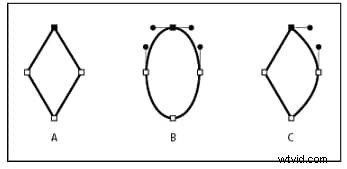
2. Use the Shape Tools

- Select a shape tool like the Ellipse Tool.
- Click and drag to draw a shape.
- Hold Shift key while dragging to constrain the proportions.
3. Convert Existing Objects
- Draw a shape or line using other tools.
- Select the object and go to Object > Path > Make.
- This converts the object to an editable path.
Now, we will discuss another professional tool to type text on path.
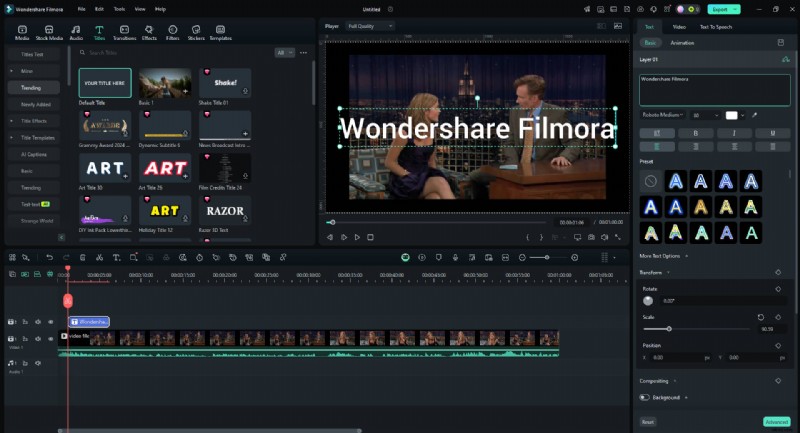
Create Text on Path for Video in Filmora
Titles have always been a powerful tool for communicating with viewers in videos. Wondershare Filmora's innovative Type on a Path feature empowers editors to shape text to match their video's style, creating visually engaging and memorable content.
Now, to understand how users can add type on a path feature and benefit from it, below are the steps:
Text Path Animation Tutorial [NEW & FAST]
Animate Text Along a Path In Wondershare Filmora
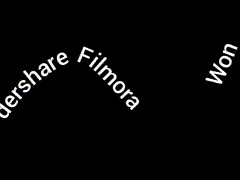
- Create text that flows along a path you design.
- Customization options to design interactive text effects.
- Draw any shape with ease using the Bézier tool.
- A variety of Text Styling Options aligns with your creative vision.
- Combine the text along a path with Filmora's Creative Assets.


Steps to add Text Animation feature in Filmora
Step1Start a new project in Filmora

Step2Go to the "Titles" tab in the top toolbar
Select and add your preferred text preset to the timeline. Make any necessary basic edits to the text.
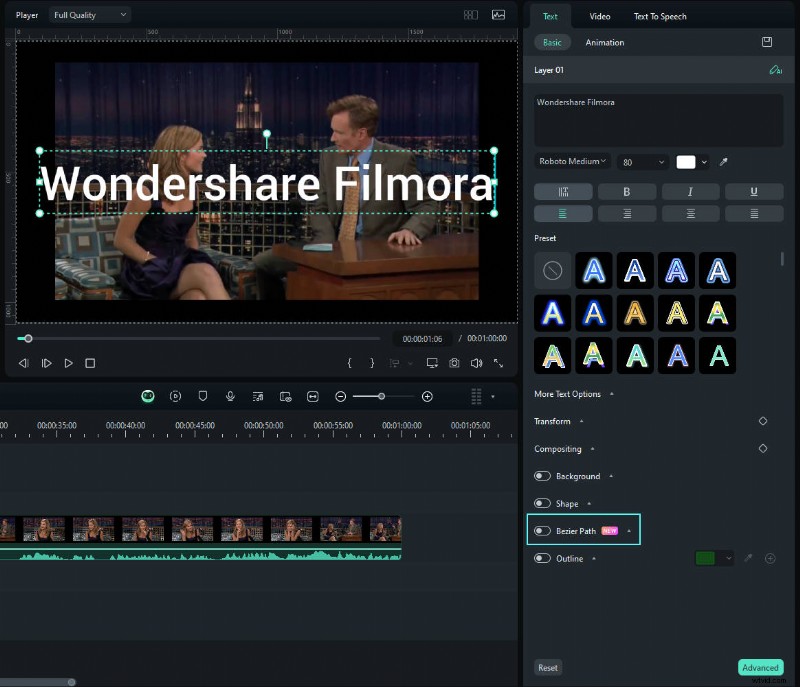
Step3Using Bezier Path
Locate the "Bezier Path" toggle in the "Basic" section. Turn on the toggle to activate the feature.
Step4Adjust the Text Animation Settings
Drag selections around points and Bezier handles to modify the text path.
Use the "Animation Duration" slider to adjust the animation speed.
Turn on the Animation Loop to keep the text animation on your video consistently.
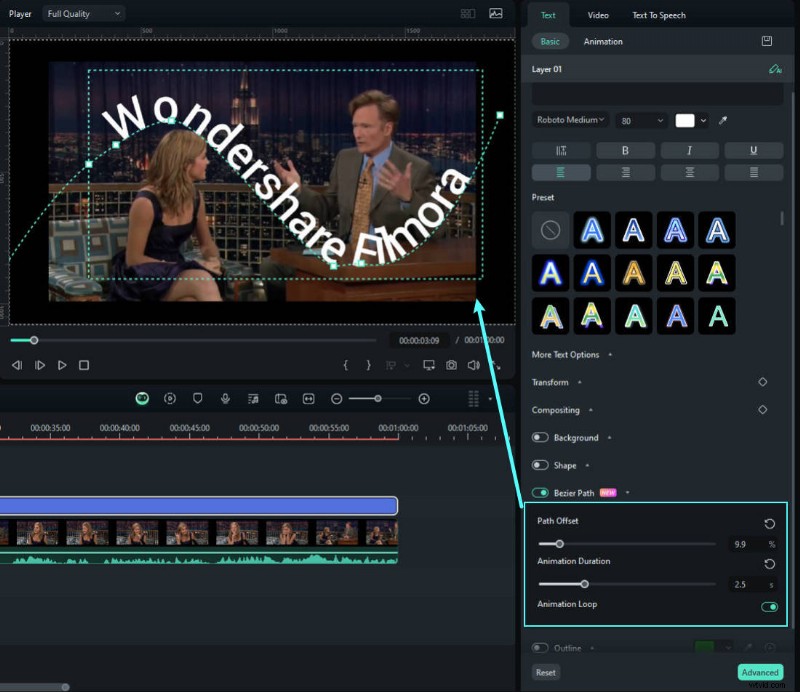
Step5Preview the Animation
Preview the text animation and adjust the text position by using the "Path Offset" slider until you are satisfied.
Similarities and differences between Filmora and InDesign
Similarities1. Both tools let you make text bend or curve.
2. You can change how the text looks and where it goes.
DifferencesFilmora: Mostly for videos. It's easier to use but might have fewer options.
InDesign: For making layouts and graphics. There are more options, but can be harder to learn.
Conclusion
Don't be afraid to experiment with InDesign Type on a Path and Filmora's Text Path Animation features. Each tool offers its strengths and can be used to achieve different creative effects. You can discover the best approach for your design needs by exploring both options.
For video editors and those looking for a user-friendly tool, Filmora's Text Path Animation feature is an excellent choice. It offers a variety of customizable options and integrates seamlessly with other video editing features.