You’ve seen it before—the dreaded (but sort of inevitable) dead pixel. In this guide, we’ll explain what they are, how they differ from hot pixels, and provide a clear, node‑based workflow to eliminate both in DaVinci Resolve.
First, let’s address a hard truth: many dead pixels are permanent camera defects that will require ongoing correction in post. If your footage contains one, check your camera’s warranty or contact the manufacturer for a repair or replacement.
What Is a Dead Pixel?
A dead pixel is a sensor element that has stopped transmitting data, usually appearing as a fixed dark, red, or blue dot in your image.
Hot pixels arise from sensor hot spots—often after long exposures or high ISO—and tend to manifest as bright, transient spots. They’re more common than dead pixels and can often be mitigated by cleaning the sensor.
Despite their differences, both issues can be addressed with the same DaVinci Resolve tools. Below is a step‑by‑step walkthrough using the Dead Pixel Finder and stabilization.
In my recent shoot with a Blackmagic Pocket Cinema Camera, I noticed a dead pixel that disrupted the scene’s color fidelity.
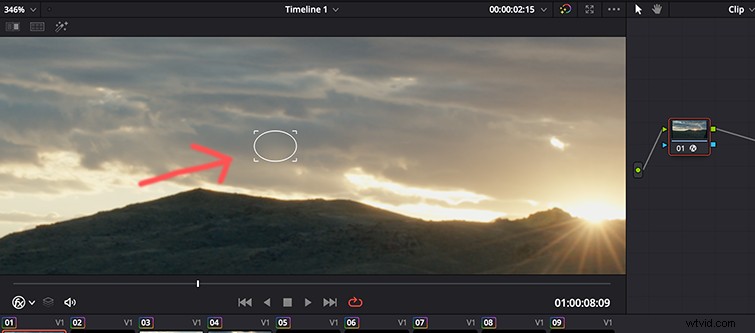
Here’s the affected clip.

Zooming in reveals the pixel clearly.

It may seem minor, but the pixel’s persistence—and the likelihood it will become more prominent when the camera moves—made it a source of concern.
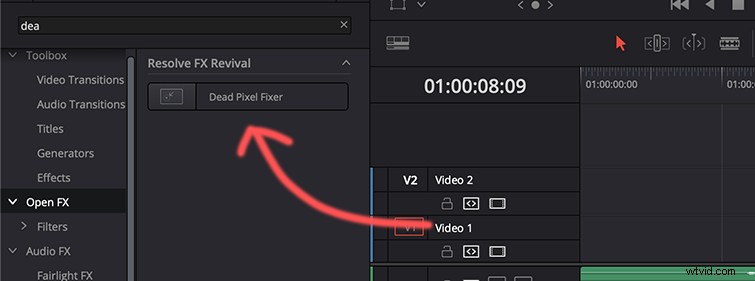
Step 1: Add the Dead Pixel Finder
Place a new node on the Color page and apply the Dead Pixel Finder to that node. A node‑based approach isolates the correction to the problematic area, preventing unwanted side effects on the rest of the clip.
Step 2: Apply the Effect with an Open FX Overlay
In the node’s inspector, ensure the Qualifier is unchecked. Instead, select Open FX Overlay so you can drag the effect directly onto the pixel.
The pixel is now blurred and hidden. However, this approach can introduce artifacts if the clip is stabilized, as the effect moves with the image.
Step 3: Resolve Stabilization Artifacts
Apply the Dead Pixel Finder first, then create a Compound Clip from that node. Stabilize the compound clip instead of the original clip. This ensures the pixel correction remains in place even as the frame shifts.
After stabilizing the compound clip, the footage retains its correction without visible artifacts.
This method works equally well for hot pixels caused by sensor dirt. For a deeper dive into sensor cleaning, refer to PetaPixel’s step‑by‑step guide. If you’re uncomfortable performing the cleaning yourself, a local camera store can typically handle it at a reasonable cost.
License this cover image via cybermagician.