We need videos for everything: sales, marketing, HR, creation… But for the sake of digital accessibility, we also need reliable and readable subtitles.
This is the crucial benefit of merging your subtitles into your videos. By hardcoding them on your content, you are sure that they are available on any player or platform.

How do you do this? Don’t worry, you don’t need to code. Just follow our guide!
Why burn subtitles into your video?
Whether on video hosting sites (Vimeo, YouTube, Dailymotion) or social networks (Facebook, LinkedIn, Instagram), the built-in captioning options are quite diverse.
Some ask for SRT or VTT files, provide you with an automatic solution, or require creating subtitles manually or from a transcription. It’s easy to get lost!
But the advantage of hardcoded subtitles is that you don’t have to worry about adapting them to each platform. You just add your subtitled video on your platform, and you’re done.
But that’s not all. By embedding your subtitles, you can also customize them to your liking (font, color, highlighting, position, etc…) and burn the display settings into your video.
So that you can use all the benefits of subtitles :
- You allow deaf and hard of hearing people to understand your video in all circumstances.
- You make your video easily available to foreign languages and nationalities
- You improve the impact and readability of your video with your audience and on social medias.
- Viewers can easily react and comment on your video clips
If you’re interested, here’s how you can do it.
Hardcoded subtitles: the different solutions
Merging subtitles into your video seems like a tricky operation because it involves changing the encoding of your video. However, there are many solutions that have appeared on the internet that do the job quickly. Here are the different ways to do the encoding.
SRT, VTT, SUBRip file encoder
You can first merge subtitle and video manually with proper software. For example, VLC or Submerge for Mac allow you to modify the metadata of your video. Be careful though, you need to have a subtitle file (SRT, VLC, Subrip) already at your disposal. If this is not the case, scroll further down.
Submerge
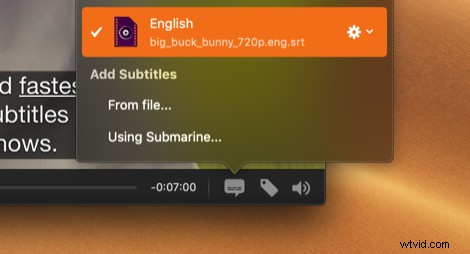
#1
Export your video to Submerge. Add your SRT to the “add subtitles option”. Be sure to preview the subtitles before exporting them to the video.
You can also customize the appearance, size, font, color, outline, and background of your subtitles according to your preferences.
#2
Now it’s time to find metadata online. Submerge will automatically find the metadata and tag the video for iTunes (if your exported file is mp4/mpv). So you don’t have to do anything.
#3
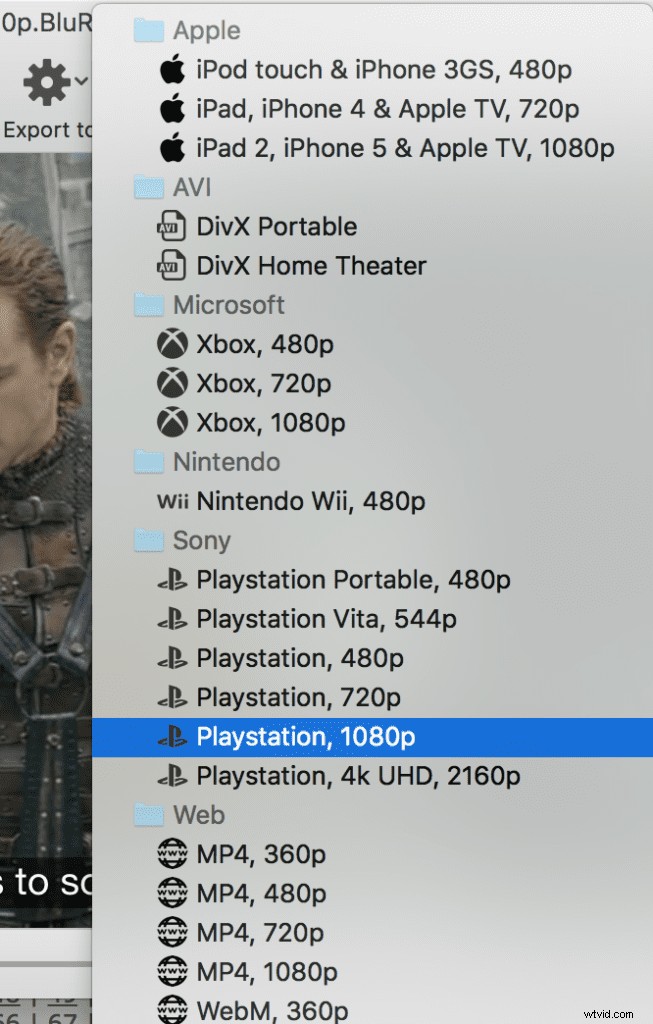
Once you have burned the hard-coded subtitles of the video, you can export it like a pro. Submerge offers several built-in presets to export videos that are suitable for all types of devices on which you will enjoy watching the video.
VLC
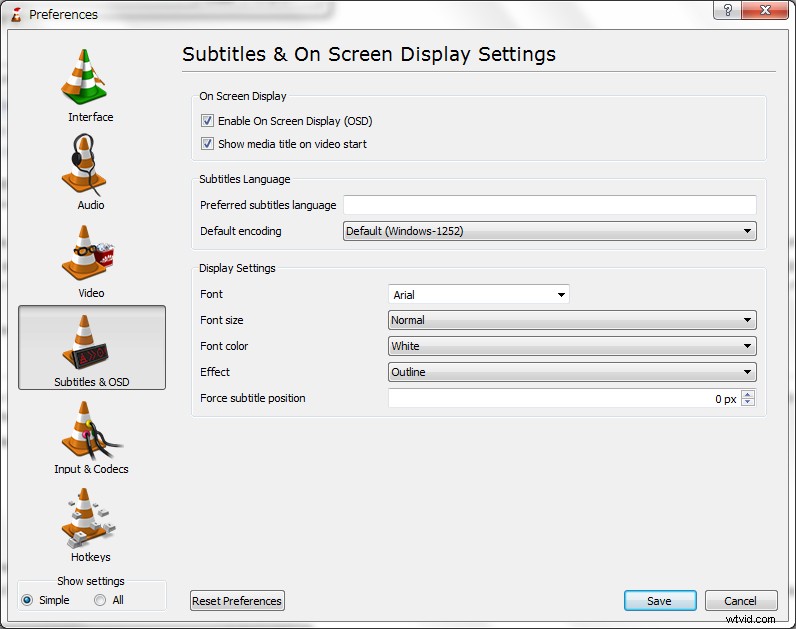
- Open the VLC software and click on media > play
- Choose your video and select add a subtitle file by taking your ass file.
- Click “Stream”, then “Next”, then choose “File” and name your video.
- Click “Next” and choose the profile of your video. Then check “transcode video” and press the small wrench, go to the subtitle tab and check the two boxes “subtitles” and “overlay the subtitles on the video”.
- Press “Next”, then “Stream”.
VLC will then encode your subtitle in the video according to your settings.
How to use a burn-in subtitles generator ?
If you don’t have subtitle files yet, you can generate them and inlay them automatically with specific applications. For example, you can use manual subtitle editors such as Aegisub or Imovie. But we recommend automatic subtitling solutions that will save you a lot of time. These new tools have the latest voice recognition technology to immediately transcribe and synchronize your subtitles.
You can test solutions such as Authôt.com, Rev.com. Here we present you our automatic subtitle generator Checksub. You will see, it provides interesting features like :
- An advanced speech recognition API
- A collaborative interface with subtitlers and translators to manage your video project
- A machine translation engine to translate your video, with 128 different languages available.
- A powerful and easy-to-use online subtitle editor
Creating subtitles with such solutions is really simple and convenient! Here is the step-by-step procedure :
1# Upload your video on the interface
To get started, login to the Checksub platform. By logging in, you will have direct access to the platform to upload your video. Select your content and indicate its original language. You can also choose between several languages to make a translation if necessary.
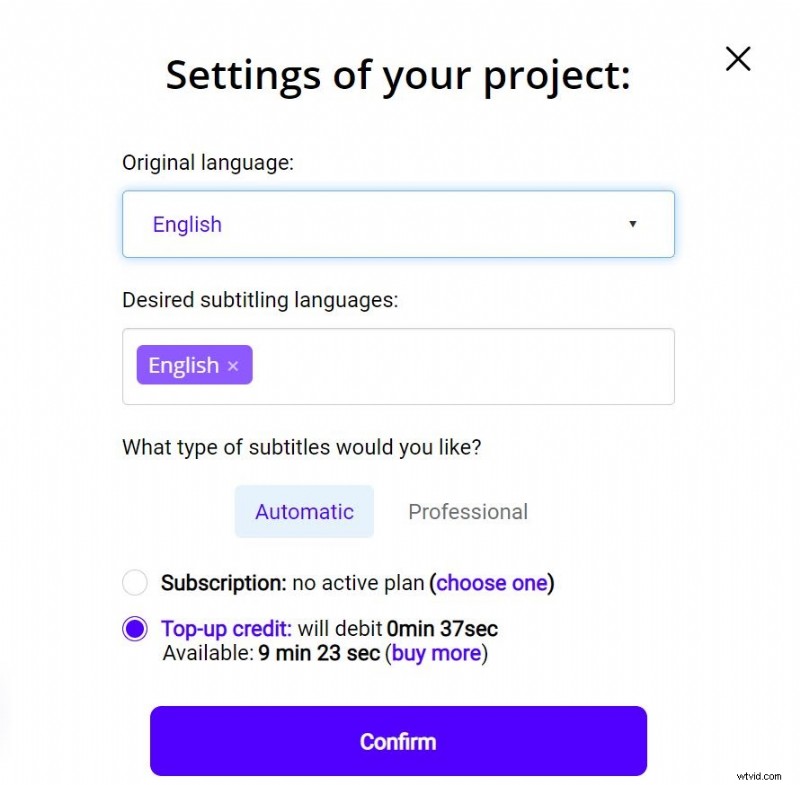
To try the platform, you have one hour free. If this is not enough, you can buy credits at a low price.
The API will then perform the speech recognition and provide you with the result in a few minutes.
2# Check and optimize the transcription
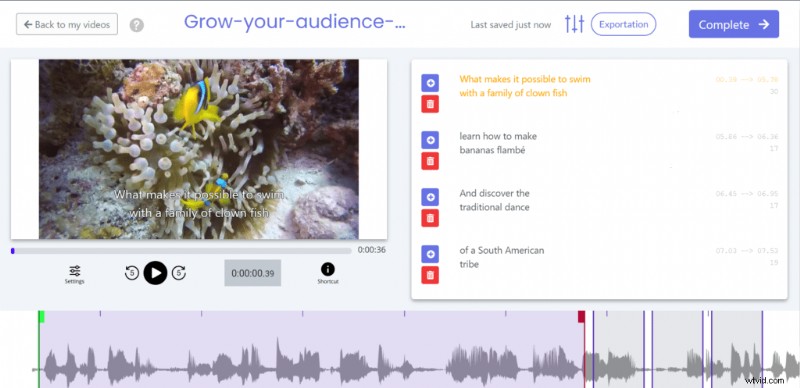
When the result is ready, you can click on the language of your video and access the dedicated subtitle editor to check and optimize the synchronization.
3# Encode your subtitles in your video
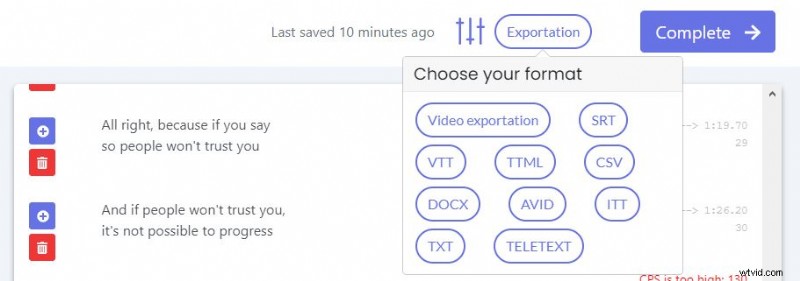
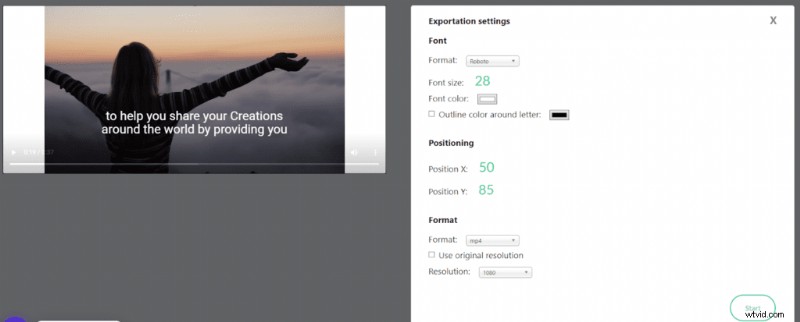
When you are okay with the result, you can then directly convert the subtitles in your video. Just press “Export” and then “Video Export”. You will then be able to customize the display of your subtitles. Once you have made the changes, you can then upload your subtitled video in MP4 or MOV format. That’s it!
Professional burned-in subtitles: Checksub

As you can see, creating and encoding subtitles is a complex job. This is even more the case if you have a large volume of video or videos that are difficult to transcribe (ambient noise).
Fortunately, there are professional services that can take care of your video projects. With the help of proven human expertise, they deliver your projects in a short time and with high quality. Our subtitling experts, for example, are at your service!
Voilà, hoping we’ve helped you engrave your words in gold letters!