Snapshot is common in our workplace as it shows exactly what you're viewing. You may often use this specific image to make a function instruction. People who see this image will quickly understand what you want to express. It is also a kind of solution to avoid confusion.
If you want to learn about how to screenshot on Lenovo laptop, read this tutorial. It provides you with guides about the two methods, including using the tool and use the default keyboard method.
How to Take a Snapshot on Lenovo With Screenshot Tool
A powerful tool like EaseUS RecExperts with the same snapshot method can be used on most versions of Windows. It meets all your needs to take a screenshot on a Lenovo laptop.
Most importantly, you can customize the hotkey setting to take a screenshot. Instead of using the built-in setting method, this screenshot tool allows you to set. Let you set the hotkeys according to your own habits. For example, if you like to use F1 for personal habits, then you can set it.
Also, if you install this tool on Lenovo, you can use it for screen capturing. It's a free solution for capturing with a webcam and audio. You can decide to add the system sound or microphone as you like. Let's see more features.
What other functions provided by this tool:
- Allow advanced settings for the video output format, frame rate, etc.
- Effective record audio with screen for online meeting
- Capture desired area of your computer display
- With task schedule capturing function
- Record webcam to increase more engagement
Click the button below to have a free try! After that, don't miss the followed guide to help you.
Here is a list of steps for you to follow with!
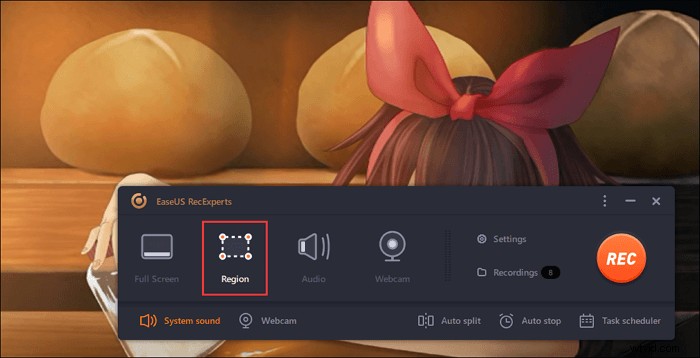
Step 1. Open this screen recorder. To take a snap for your screen, select "Region" from the main interface.
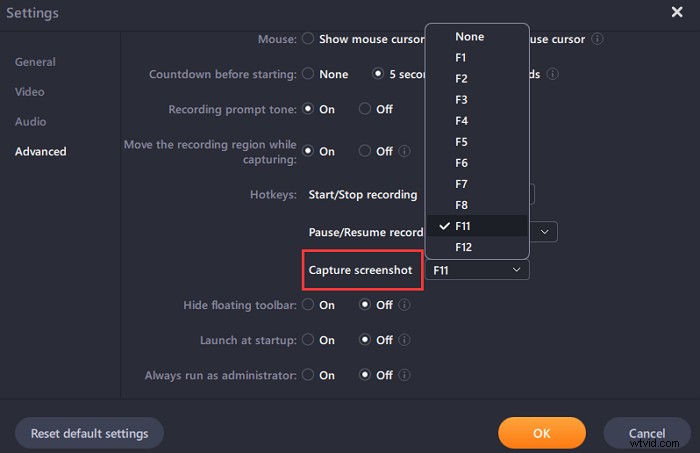
Step 2. Also, you can customize the hotkey of taking a screenshot. Click "Settings" to choose "Advanced". Then, change the hotkey from "Capture screenshot".
Step 3. Now, drag your mouse to select the desired screen area. Then, release the mouse and press the hotkey.
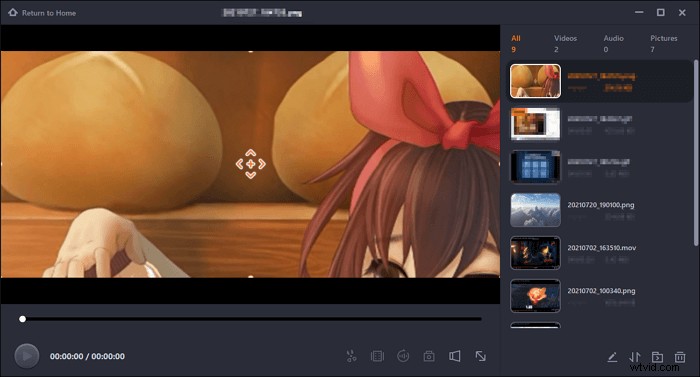
Step 4. After pressing the hotkey, the image is automatically saved on its "Recordings" and you can view it.
How to Screenshot on Lenovo With Keyboard
Capturing a snapshot using the Windows default method works differently based on the size of your screenshots. Also, the keyboard combination varies from different operating systems. In terms of Lenovo, you should ensure its operating system. If it is in Windows 10 or above, you will have more options.
Then, you decide your area of the computer display. You can take an entire display snapshot and an activity window by referring to the different keyboard combination methods below.
It is used Print Screen hotkey for screenshots on Lenovo, which can be found on your keyboard. And it can be shown in types like PrtScr, PrtSc, etc. The guide and image below show you an example for PrtSc.

Task 1. Take a Whole Display Snapshot
You can have two options for taking a snapshot of the entire display on Lenovo. For the first one, you need to press the PrtSc and see this image on C:\Users\username\Pictures\Screenshots. If you install an external editing tool, the snapshot will appear immediately.
Another way to take an entire display image is by clicking the Windows logo key and then hold down the PrtSc. Your computer display will dim for a while, and the snapshot will be saved in the same location.
Task 2. Snapshot of an Activity Window
This method is to save an activity window display. Hold down the Alt + PrtSc keys at the same time. Then, this activity display is captured and saved to your Lenovo. To locate that image, you need to find File Explorer. Choose the Pictures folder on the side navigation pane. Finally, you can find your saved image on Screenshots.
Task 3. Take a Custom Snapshot (for Windows 10 or above)
Look at the below ways if your Lenovo is on Windows 10 version or above. Press Windows logo+Shift+S to take a custom screenshot on Lenovo Windows 10, then using Ctrl+ V to paste the image into the built-in Paint tool. (Find Paint tool: Windows search text box>Paint)
If you want to edit your custom screenshot, there is another method. This built-in tool provides you with several basic functions like highlighting, cropping, etc. Also, you can set the saving location as you want.
Here are several simple steps for you to have simple editing functions with this snapshot.
Step 1. Press the Windows logo and then hold down the W key.
Step 2. Then, from the right side of the display, you can see a Windows Ink menu. Choose the Screen Sketch.
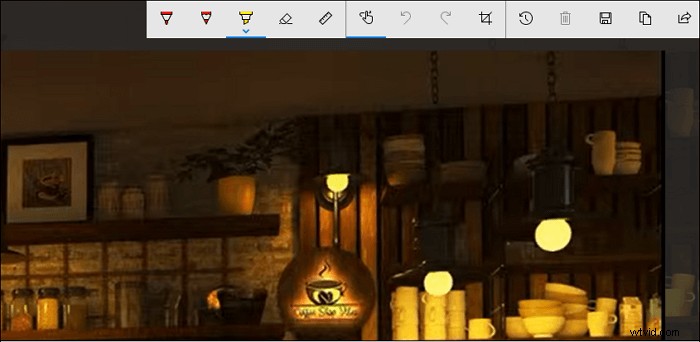
Step 3. On the top toolbar, there are several editing tools like cropping, highlighting, eraser and sharing, etc. After finishing editing, save it on your Lenovo.
Difference Between the Above Two Methods
Firstly, you need to know the variation between the two methods. Using the default hotkey method is very simple. However, you need to refer to the guidelines based on the version of your computer. Meanwhile, as the operating system is updated, the keyboard combo would be changed as well.
While an effective tool can help you avoid confusion because the same screenshot method meets all your requirements. Using the same hotkey can capture the specific area of the display and also the entire screen. You don't have to remember the combination rule.
Conclusion
Since you have learned about how to screenshot on Lenovo laptop, choose the most efficient method. A powerful tool like EaseUS RecExperts helps you avoid confusion on keyboard combinations for differents versions of computers. Its advanced features for the hotkey can be more in line with your habits. Try it now!