Home
Blog
Four Essential Audio Tips Every Filmmaker Must Know
Shawn Steiner
January 5, 2024
Blog
Audio is the backbone of any film. Even the most stunning visuals can be ruined by poor sound. That’s why mastering audio is crucial for filmmakers who want to deliver a polished, immersive experience.
Industry audio specialist Alex Zarfati shares his expertise on everything from mic placement to post‑production editing. Whether you’re just starting out or looking to elevate your current workflow, these four key tips will help you capture and refine professional‑quality sound.
1. Choose the Right Audio Gear
High‑quality sound doesn’t require a fat budget, but it does require the right tools. Start with a reliable shotgun mic—essential for on‑set dialogue and on‑camera pickup.
For most filmmakers, the Sennheiser MKE 600 offers an excellent balance of price and performance. If you can invest more, the industry‑standard Sennheiser MKH 416 (≈$1,000) delivers exceptional clarity and low noise floor.
When you need to record dialogue from a distance or capture interviews, a wireless lavalier system is indispensable. Zarfati recommends the Sennheiser EW‑DP Digital Wireless Lavalier Mic System for its wide dynamic range and robust wireless reliability.
Although some cameras have built‑in audio inputs, a dedicated recorder gives you better control, higher quality, and additional input options. The Zoom H6 Handy Recorder is a popular, affordable choice that lets you adjust each channel individually and record a backup directly to the camera.

Image Credit: Sennheiser
2. Master Mic Placement
Good audio starts with proper placement. For close‑up dialogue, place a lavalier on the actor’s chest—centered between the collarbones—and secure it with tape or a clip for discretion.
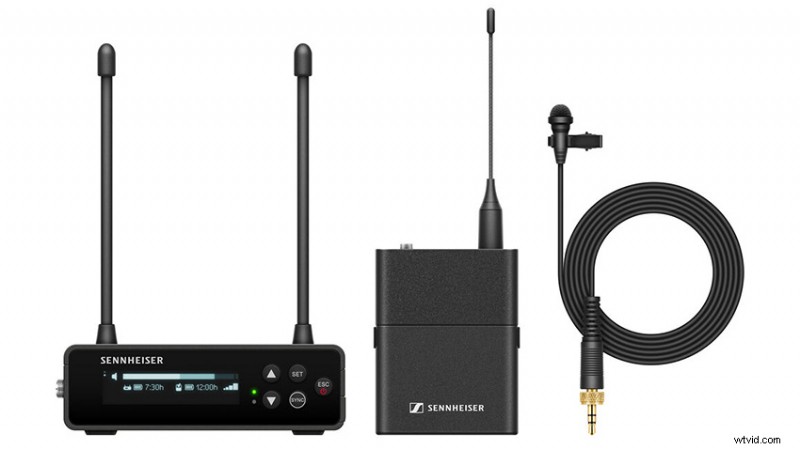
Image Credit: Sennheiser
Shotgun mics should sit as close to the source as possible while remaining out of frame. Angle the mic toward the speaker’s mouth or upper chest, and monitor the levels continuously with headphones so you can track movement or ambient noise.
3. Set Proper Recording Levels
Just like exposure, audio levels must be carefully managed. Too high and you’ll clip; too low and you’ll introduce hiss. Aim for an average input of around –12 dB, leaving headroom for dynamic peaks.
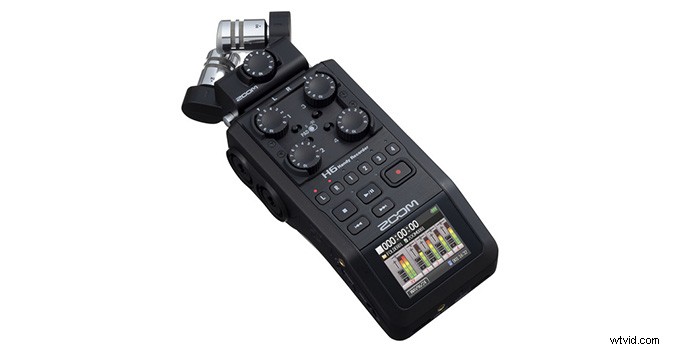
Image Credit: Zoom
4. Polish Your Audio in Post
Once you have clean recordings, a few post‑production steps can elevate the sound quality. Start with a frequency sweep in your NLE’s EQ to identify and tame unwanted tones.
Apply a low‑cut filter to remove rumble and background hiss, and use a limiter to protect against accidental clipping. For advanced cleanup, consider AI‑driven tools available in Adobe’s beta suite, which can automate noise reduction and enhance dialogue clarity.
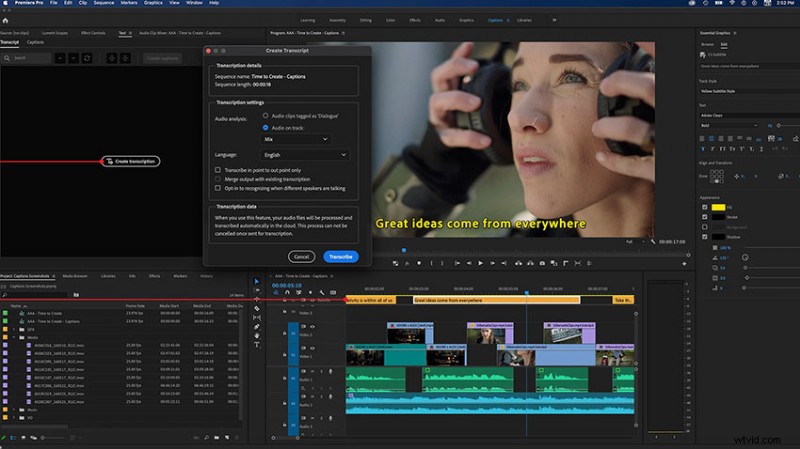
Image Credit: Adobe
Ready to take your audio game to the next level? With the right gear, placement, levels, and post‑production techniques, you can ensure your film’s sound matches its visual excellence.
[source: Alex Zarfati]
Order Links:
- Sennheiser MKE 600 Shotgun Microphone (B&H, Amazon)
- Sennheiser MKH 416 Shotgun Microphone (B&H, Amazon)
- Sennheiser EW‑DP ME 2 SET Digital Wireless Lavalier Mic System (B&H, Amazon)
- Zoom H6 Handy Recorder (B&H, Amazon)
Disclaimer: As an Amazon Associate and participant in other affiliate programs, we may earn a small commission from qualifying purchases made through the links on this page—at no additional cost to you.
About The Author

Shawn Steiner
Shawn combines a background in cinema and photography with a focus on photojournalism and documentary work. Follow his latest projects on Instagram and other social media platforms at @shawncsteiner.