
Start Your Flash Journey One Step at a Time
When you first pull out your flash, it can feel like a tentative first meeting. You look at the device, consult the manual, and yet the instructions may seem cryptic. That’s why this guide is here—to demystify your flash and set you on the path to confident flash photography.
What This Tutorial Covers (and Doesn’t)
This article introduces the fundamentals of your flash unit itself: modes, power, zoom, and basic functions. It does not dive into advanced lighting setups, modifier selection, or compositional techniques. For those topics, see our studio lighting series.
Flash Types: Built‑In, Speedlights, and Strobes
In flash photography, “flash” refers to any intermittent light source. The three main categories are:
Built‑In Flash
Most cameras and many smartphones feature a pop‑up flash. While convenient, it is typically small, harsh, and often produces red‑eye because it sits at eye level. It also offers limited control over direction and intensity, making it less suitable for professional work. From here on, we’ll focus on speedlights and strobes.
Speedlights
Speedlights are compact, portable units that attach to the camera’s hot shoe or fire wirelessly in an off‑camera system (OCF). They usually run on AA batteries or rechargeable packs, which can limit rapid recharge times. Common models include:
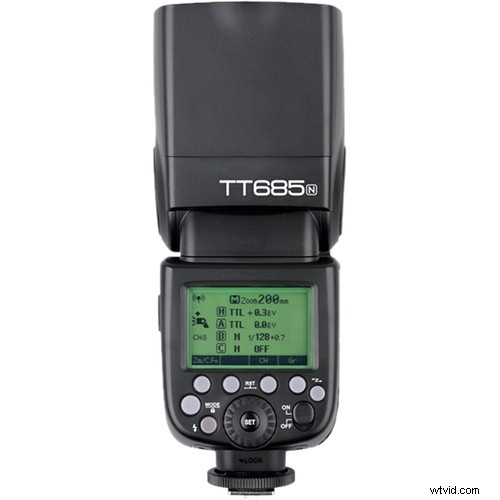
- Godox TT600/TT685
- Yongnuo 560‑IV
- Nikon SB‑700
- Canon 600
Strobes
Strobes, often called studio strobes or monolights, are larger and more powerful than speedlights. They are powered by AC outlets or high‑capacity battery packs and provide consistent, high‑output light for studio or event work. Notable examples:
- Alienbeep 400 / Digibee 800 (Paul C. Buff)
- Godox AD200/AD400
- Interfit Honey Badger 320W
- Einstein Monolight (Paul C. Buff)
- Broncolor Siros 800 S
Understanding Flash Modes
Choosing the right mode is essential to control how your flash illuminates a scene. The most common modes include:
Manual (M)
In manual mode you set the exact power level and trigger the flash either via camera hot shoe or a remote. Mastering manual control is foundational for more complex lighting setups.
Slave (S, S1, S2, …)
Slave mode lets the flash fire only when it detects another flash (the master). It’s useful for synchronized off‑camera lighting but can be accidentally triggered by other nearby flashes.
Through‑The‑Lens (TTL)
TTL automatically calculates the necessary flash output based on a pre‑flash measurement. While convenient, not all flashes support TTL, so verify compatibility before purchasing.
High‑Speed Sync (HSS)
HSS allows you to shoot at shutter speeds faster than the camera’s native sync speed by emitting a series of rapid, lower‑power pulses. The trade‑offs are reduced maximum power and increased battery drain.
Stroboscopic / Multi‑Mode
In stroboscopic mode the flash fires a rapid series of pulses, capturing multiple exposures of a moving subject in a single frame. This mode is available on some advanced speedlights and strobes.
What Does Flash Zoom Do?
Flash zoom adjusts the spread of light by changing the distance between the flash tube and the diffuser. Many speedlights feature automatic zoom that matches the camera’s focal length, while others allow manual adjustment for creative control. Strobes rarely include zoom due to their design.
Grasping Flash Power
Flash power is expressed in fractional increments—full power (1/1) down to 1/128 or lower. In manual mode, each step halves or doubles the light output, equivalent to one photographic stop. Understanding this relationship helps you match flash exposure to camera settings.
- 1/1 – Full Power
- ½ – Half Power
- ¼ – Quarter Power
- 1/8, 1/16, 1/32, 1/64, 1/128
Some flashes offer 1/3‑stop increments for finer control, displayed as +0.3 or –0.3 next to each base power setting.
Flash Power Across Units
While the number of stops is universal, the absolute light output differs between units. A speedlight at full power emits less light than a strobe at full power, but a single stop of increase or decrease affects the scene equally across models.
Controlling Flash Direction
Speedlights typically feature a pivoting head that can tilt and swivel, allowing you to point the light directly at a subject, bounce it off surfaces, or create creative lighting angles. Strobes, due to their bulk, rely on repositioning the unit or light stand to change direction.
Advanced Flash Features
Many modern flashes include:
Battery Power Indicator
Visual alerts warn you when battery levels are low, ensuring you can swap or recharge before a shoot.
Channels and Groups
These wireless settings let you isolate flashes on separate radio frequencies (channels) and further control individual units (groups), essential for multi‑flash setups or sharing space with other photographers.
Focus‑Assist Beam
A small red LED assists camera autofocus in low light, and some models allow you to enable the beam without firing the flash.
Modeling Light
Continuous, soft light helps preview the strobe’s impact on the subject and assists focusing. Most strobes let you toggle or silence this light when the flash fires.
Flash Beep
Audible alerts notify you when the flash is ready; you can usually toggle this feature on or off.
Ready to take the next step? Check out Getting Started with Off‑Camera Flash Photography.
Firing Your Flash Off‑Camera
Off‑camera options include:
- Purchase a flash that natively supports your camera’s wireless system.
- Use the built‑in flash to trigger a slave flash.
- Invest in external triggers and remotes for greater flexibility.
Each approach has pros and cons regarding cost, compatibility, and convenience. Understanding your flash’s capabilities will guide your choice.
From First Meeting to Mastery
Just like building a relationship, getting acquainted with your flash is the first step to mastering flash photography. Spend time learning the controls, testing power levels, adjusting zoom, and familiarizing yourself with optional features. Once you’re comfortable, you can move on to integrating the flash with your camera and light scenes effectively.
Take a moment to sit with your flash, review the manual, and experiment. The more you know, the more confident you’ll feel when you hit “fire.”
[ad id=’2′]