Have you ever heard of Adobe’s DNG Profile Editor? No? It’s okay if you haven’t because up until about a month ago I had no idea it even existed. It’s a little bit of an Adobe secret.
Despite being a relatively unknown piece of software the DNG Profile Editor (no easy way to abbreviate) is somewhat of a necessity when it comes to editing infrared images. Not only that, it is extremely useful if you like being a complete photography nerd and you enjoy creating your own unique flavor of processing.
Think of the DNG Profile Editor as a way to make presets that are something more just your run of the mill develop preset. Enough of introducing it, this is the DNG Profile Editor in all its glory:
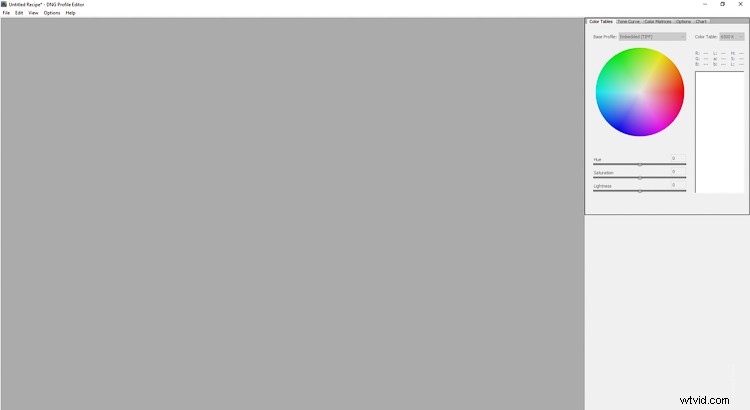
Just kidding, it’s not very impressive but it serves to facilitate a very useful function. What function do you ask? It allows you to create your own custom camera profiles for use inside Lightroom’s Adobe Camera Raw.
Camera profiles are the silent weapon of post-processing but they don’t get a lot of press. I won’t go too far into explaining the usefulness of camera profiles here, but there is an excellent article by Andrew Gibson here on dPS if you want to learn more about camera calibration and profiles in Lightroom.
For the purposes of this article, I will focus on how you can make your very own custom camera profiles using Adobe’s little secret, the DNG Profile Editor. Oh, and did I mention the software is available absolutely FREE from Adobe? If you want to follow along with me then click one of the links below to download the latest build of the DNG Profile Editor from Adobe.
- DNG Profile Editor for Windows
- DNG Profile Editor for Mac
Adobe DNG Profile Editor Geography
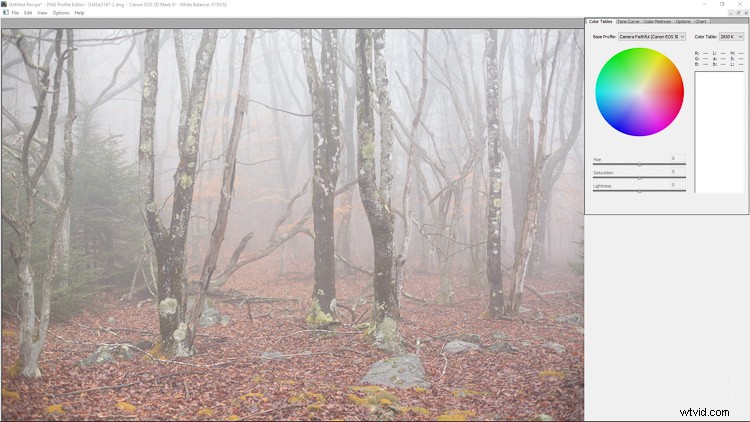
Finding your way around the DNG Profile Editor is alarmingly straightforward because the majority of the controls are nestled on the right-hand side of the window.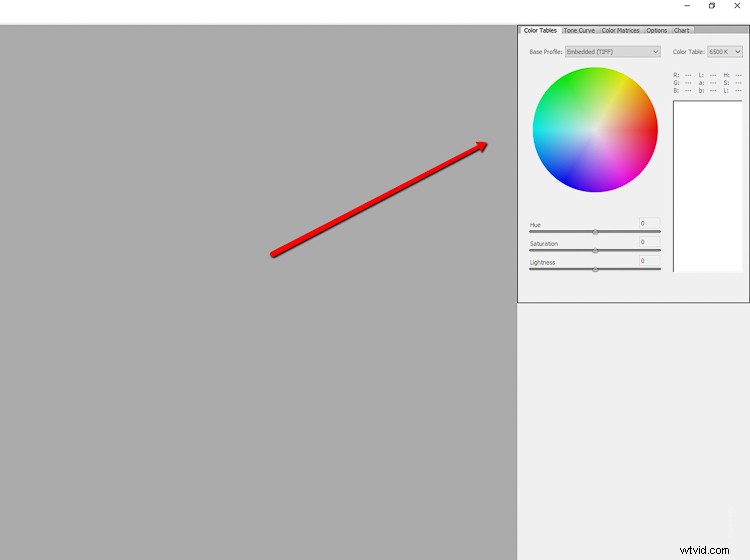
This is where you will make your custom camera profiles. As you’ll notice there are a number of tabs at the top. I’ll briefly explain what each one of them does.
Color tables
The color table is just the color wheel and it is laid out for you to pick colors from your image (more on this later) to adjust their hue and saturation as well as lightness. You can also control the temperature of the color table in degrees Kelvin just as you would in Lightroom.
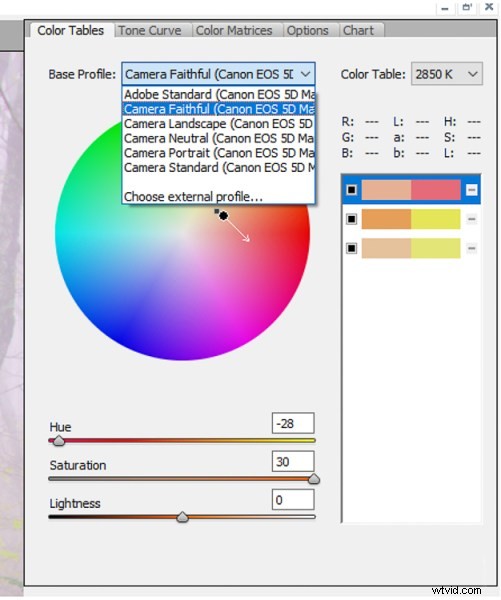
This is all birthed from the embedded profiles (or downloaded) from the camera used to make the image being used as a reference. Base your custom camera profile on existing profiles of your particular camera by using the “Base Profile” drop-down.
Tone Curve
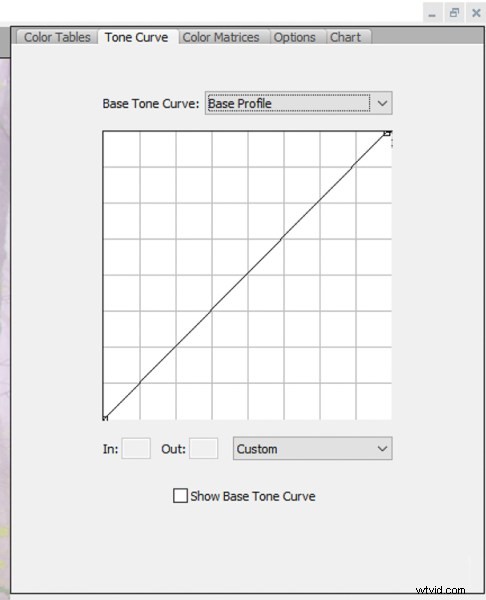
This is the familiar face in the DNG Profile Editor. The Tone Curve is a long-standing staple in not only Lightroom but many other post-processing software offerings. Here, it operates exactly the same as it does elsewhere by allowing you to adjust luminance values.
Color Matrices
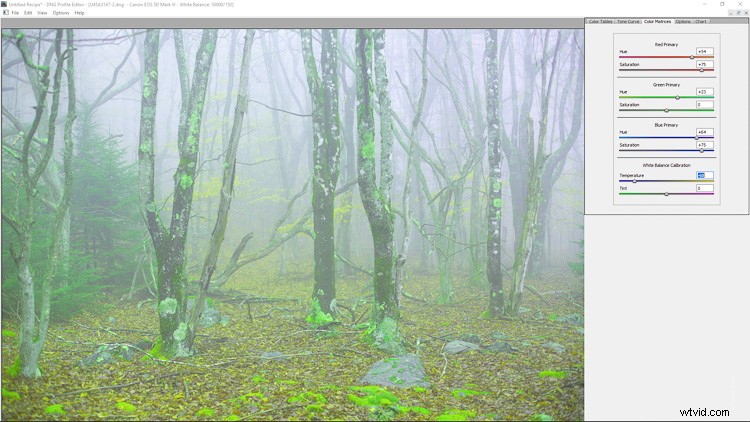
Through 99% of your work, you will likely use the Color Matrices tab of the DNG Profile Editor more than any other section. This is a boiled down version of the color table and is extremely useful for adjusting the global white balance of your image as well as RGB hue and saturation.
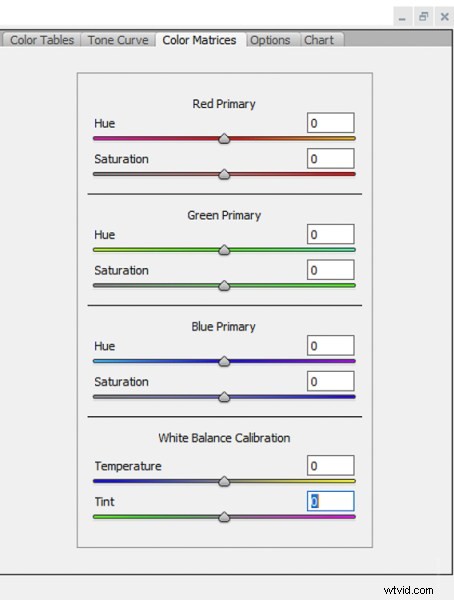
As I mentioned earlier, if you are a practitioner of infrared photography the Color Matrices tab will become your best friend.
Options
In the Options section, you can name your custom camera profile and add the copyright information.
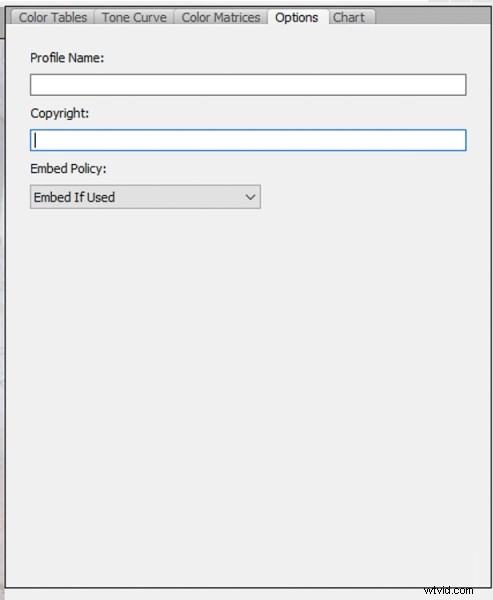
The Options tab is incredibly simple but don’t let that fool you. It is perhaps the most important part of the DNG Profile Editor as far as the way you will eventually be able to locate and apply your custom camera profiles.
Chart
In a program that is already geared towards more advanced manipulation of RAW files, the Chart tab is the Jedi level of the DNG Profile Editor. It is used for making color profiles based on the use of a color chart to fine-tune accurate color renditions based on different natural and artificial lighting scenarios.
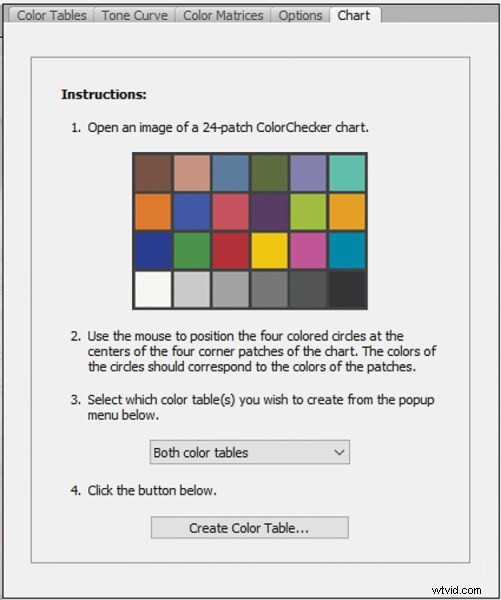
I seldom find myself in portrait, product, or other situations when light-based color rendition is needed. However, if you are a studio or location shooter who uses speedlights or constant artificial lighting the Color Chart option is a valuable tool.
How to make a Custom Profile
Next, let’s walk through the making of a custom camera profile using the DNG Profile Editor.
Make a DNG file
You’re going to need a DNG (digital negative) RAW file to base your profile adjustments upon. The great thing is that Lightroom offers a super simple way to convert any RAW image file to a DNG.
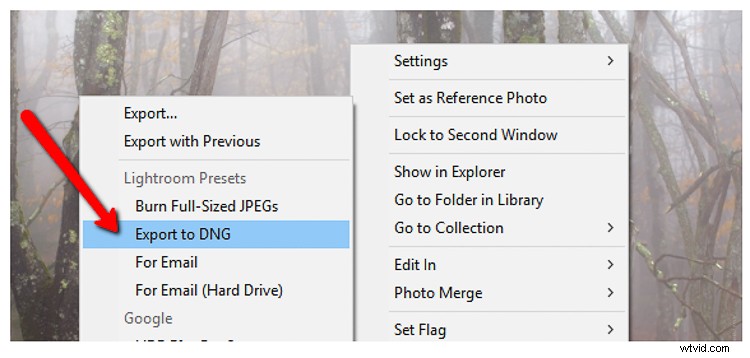
To get started, right-click on a RAW file in Lightroom. Select Export > Export to DNG (under the Lightroom Presets section). I usually just send my DNG base files to the desktop for quick access but feel free to place yours anywhere you choose.
Next, open the DNG Profile Editor program and select File > Open DNG Image from the drop-down menu.
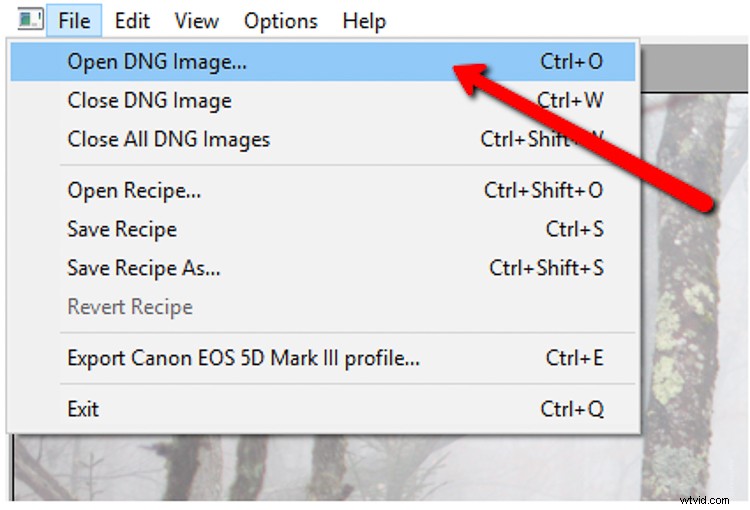
Locate the DNG file you just exported from Lightroom and it will open automatically in the editor.
Using the DNG Profile Editor
From here, the world is your oyster as far as creating your custom camera profile. You can adjust the color tones and hues of colors within the photo based on your needs. The possibilities are virtually limitless so I will show a few examples to demonstrate the effects.
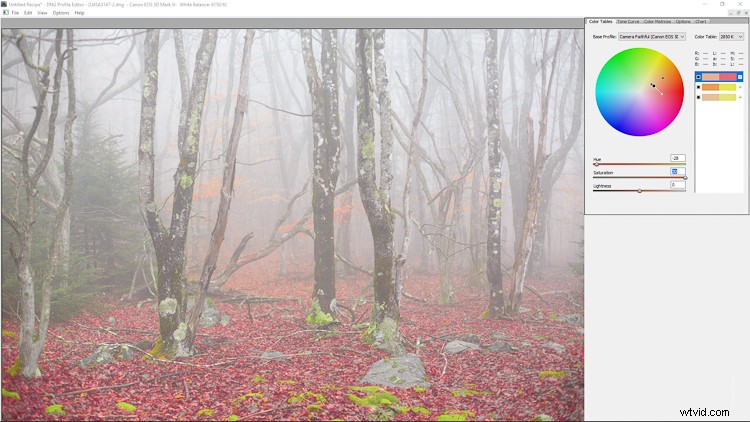
In the Color Tables section, I select three separate colors within the leaves in the image and they now appear both on the color wheel and in the color picker table at the right. You can choose as many colors as you like. I’ve based my profile on the Faithful profile from my Canon 5D MK3.
You can select each color from the table and adjust their individual hues, saturation, and lightness. Toggle the on/off of your edits using the black boxes and completely remove the selection with the minus (-) sign. Here is the photo after some fairly drastic hue and saturation adjustments from the color table.
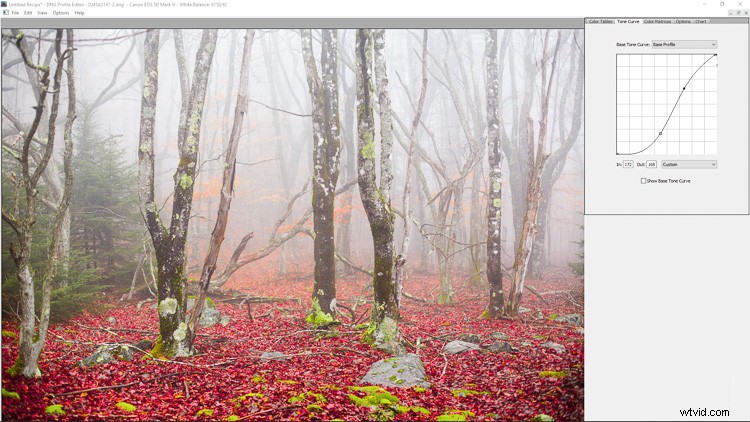
Moving on to the Tone Curve, you can adjust the image just as you would anywhere else by changing the curve. For our example, I’ll add contrast by implementing a classic S-curve.
In the color matrices section, you can further manipulate the colors and white balance of the RAW file. I’ve made some radical changes here just for the sake of example (plus it’s fun).
Keep in mind that when using the DNG Profile Editor you are free to use as many or as few of the tools it offers, either together or singularly.
Saving Your Custom Profile
From here it’s just a matter of naming and saving the custom profile you just made. Switch over to the Options tab.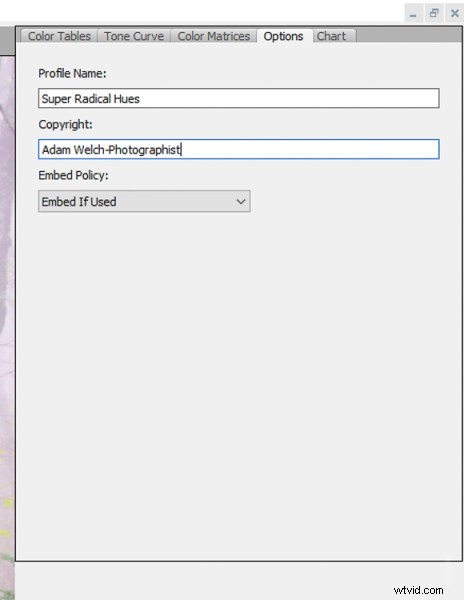
Enter a name for your custom profile so you can easily identify it later in Lightroom. Also, it is here where you can add in copyright information and other options.
Unless you’ve chosen to use a custom color chart, it’s time to export and actually put your freshly made camera profile to use. Exporting the profile is incredibly easy. Click File > Export (your camera name) Profile.
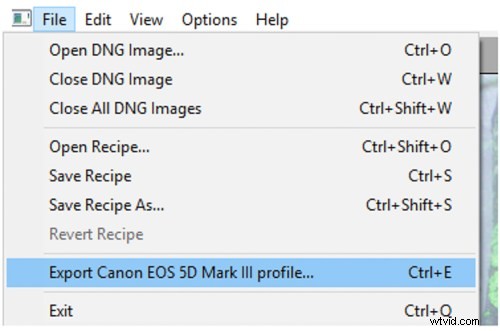
Yes, Adobe calls these profiles recipes, which is fitting in an odd kind of way.
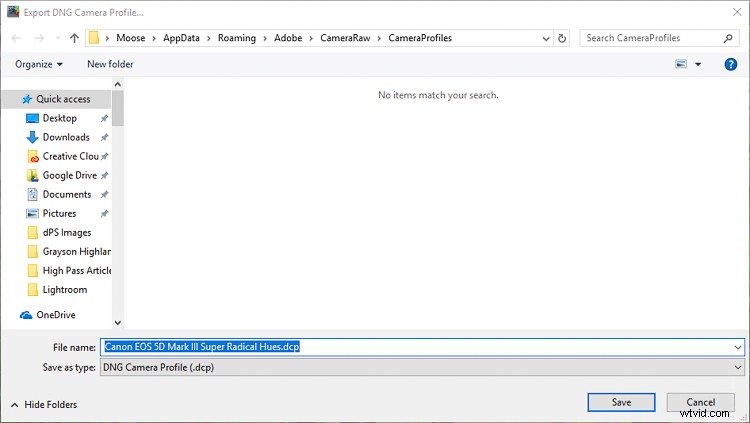
Make sure the export was successful and then click OK (see below).
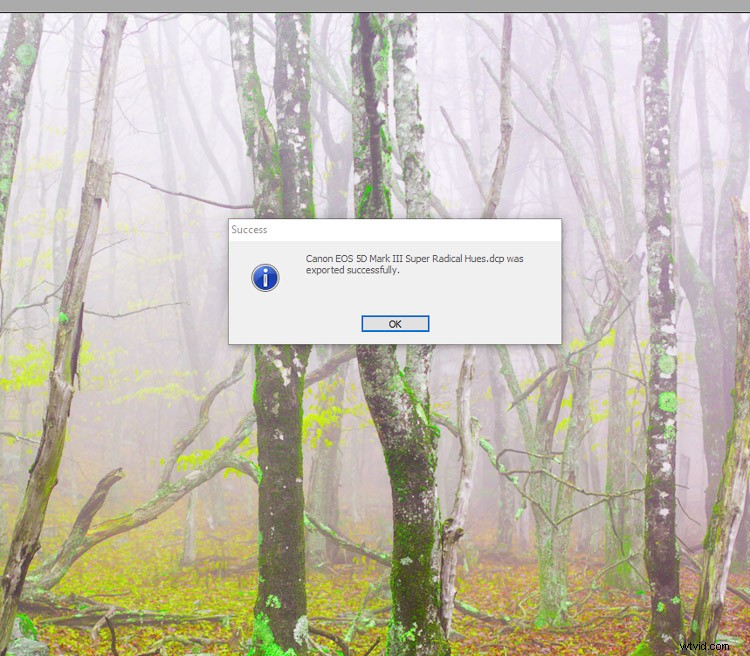
And you’re done! (Unless you’d like to also save your recipe for editing later in which case just select Save As in addition to the export.)
There’s no locating the new profile or trying to remember where you placed it on your computer. The DNG Profile Editor does everything for you and will park it exactly where it needs to be for use in Lightroom. Speaking of which, let’s use the new profile in Lightroom. Here’s how.
Applying Your Custom Profile
If you had Lightroom open while you made your new profile, be sure to restart it for the changes to take effect. Next, scroll down to the Camera Calibration Panel of the Develop module. Click on the Profile drop-down.
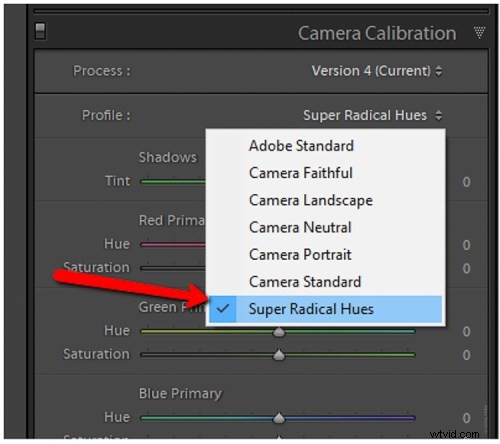
Boom. There is your newly minted camera profile. Remember, these profiles are camera exclusive. For example, the profile I just made will only work with a Canon 5D MK3. It won’t work an image from my Sony A7R, for example.
Some Final Thoughts on Adobe’s DNG Profile Editor
Is the DNG Profile Editor a piece of software that is intended for everyone? Well, not exactly. That isn’t to say that even non-professional shooters can make great use of its tools.
It allows you to customize exactly how Adobe handles its RAW files and enables you to save new camera profiles to fit different situations. If you regularly employ artificial lighting on location or in the studio you will love the DNG Profile Editor. Oh, and remember, as I mentioned before these profiles can also be used in Adobe Camera Raw (inside Photoshop).
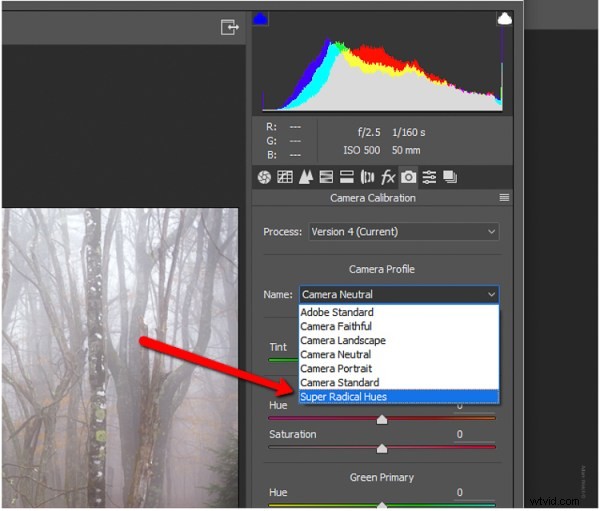
Just select your custom profiles from the Camera Calibration section of ACR and continue as usual.
Thanks for sticking with me all the way to the end. I hope you at least give the DNG Profile Editor a test drive. After all, it’s free and could potentially open up new creative possibilities for your work.