There are lots of tools in Photoshop that are sometimes a bit confusing due to the similar nature of their functionality. With subtle differences, these tools have been a topic of confusion between a lot of Photoshop enthusiasts. In this article I am going to share a distinction between Fill and Opacity, the Healing brush and Stamp tool, and “Merge Visible” and “Flatten image”. I hope it will help you one understand these tool a little better.
Fill versus Opacity
Both Fill and Opacity control the transparency of a layer. They work exactly same except for the layer styles. When you reduce the percentage of opacity the layer starts to get transparent and at 0 % the layer is completely invisible, even if layer styles likes drop shadow, stroke, inner glow etc., are applied. Where as, if you reduce the fill, the layer starts to get transparent, but layer style stay the same. Keeping it simpler:
Opacity = Takes away both layer content + layer style
Fill= Takes away only layer content – but leaves the layer style as it is
Additionally there are eight blending modes that react differently with Fill and Opacity. These are called special eight groups. These 8 blending modes are Color Burn, Linear Burn, Color Dodge, Linear Dodge, Vivid Light, Linear Light, Hard Mix, and Difference. When these blending modes are applied, the 50% Fill will have different effect than 50% Opacity.
The below images should help you understand the concept better.
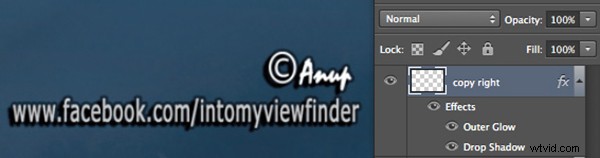
I added text and then applied two layer effects, outer glow and a drop shadow. Opacity and Fill both are both at 100%
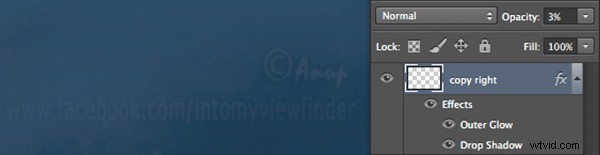
Now I have reduced the opacity to 3 percent, you can see the layer is almost invisible. If I reduce the percent to 0%, the layer would be completely invisible.
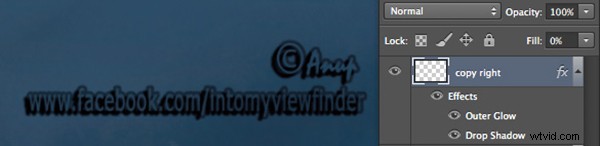
Now, I have changed the Opacity back to 100% and reduced the Fill to 0%. You will see, the layer content became transparent, but the layer style remains the same.
Healing Brush versus the Stamp Tool
Healing brush captures the texture of the area you sampled and blends with the color tone of the area you are painting. Another option: Spot-healing brush is more like content aware. It analyzes the texture around the brush and fills in the center, blending with the color tone.
Stamp tool is more like a copy and paste. It copies the area you sampled and pastes over the area you are healing.
So when is each tool will be most appropriate to use?
I mostly use the Healing Brush whenever I have to remove the blemishes of the skin, remove the mark or any texture (pimples, wrinkles) but like to have the same natural skin color tone. This helps my image remain evenly colored.
I use Stamp tool, when I want to remove something from image. For example, if I want to remove the hanging clock on the wall, light bulb or anything whose both texture and color both need to be removed.
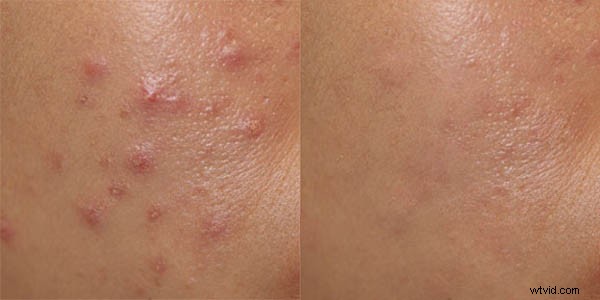
Below is an immage of skin with blemishes. I used Healing Brush to remove the pimple by sampling a clean area and painting over the blemish.
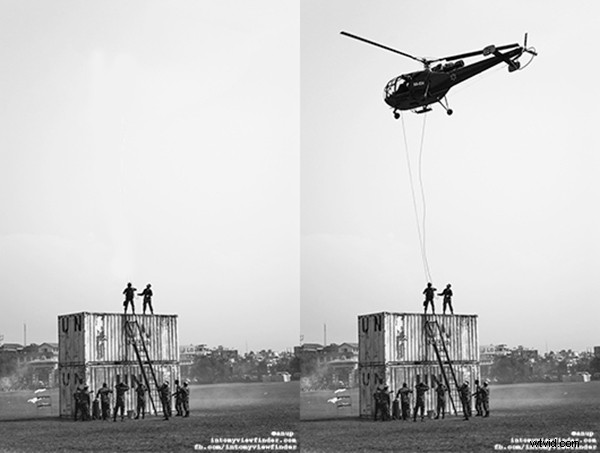
Here in the image below I have used the Stamp Tool to remove the helicopter. This is the after and before version of an image.
Merge Visible versus Flatten Image
This is a very simple technique we regularly use whenever we work in layers, but a lot of photographers are still confused about the distinction between these two options. If you are working with multiples layers and apply Merge Visible, only layers will be merged which are visible or with eye icon turned onon. Where as Flatten Image merges all layers together, discarding the invisible layers.
The images below should help you understand better:

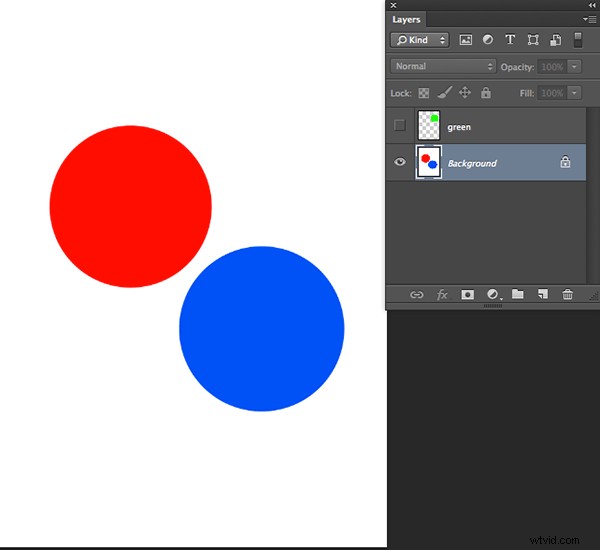
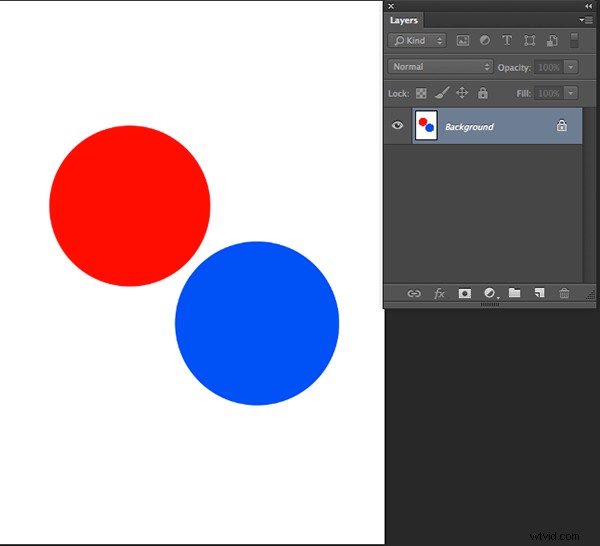
I created three layers with only two currently visible (blue and red)
Apply Merge Visible by going to: Layer> Merge Visible
You can see that only the visible layers have been merged, leaving the hidden layer alone. Now we will apply Flatten Image.

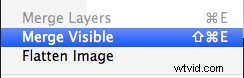
If there are any hidden layers when you apply Flatten Image, you will get this dialog box:
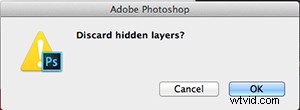
Now if I click OK in the dialog box, the hidden layer will be deleted and all visible layers will be merged like this:
Have you used these tools before? If you’ve had some confusion over the subtle differences I hope that has helped clear that up. Please share if have any questions or comments on these tools.
For more Photoshop tips and tutorials see here.