You may have seen it mentioned before to avoid mixed light sources. Very often people aren’t completely sure what that means or realize just how much havoc it can wreck on your photos.
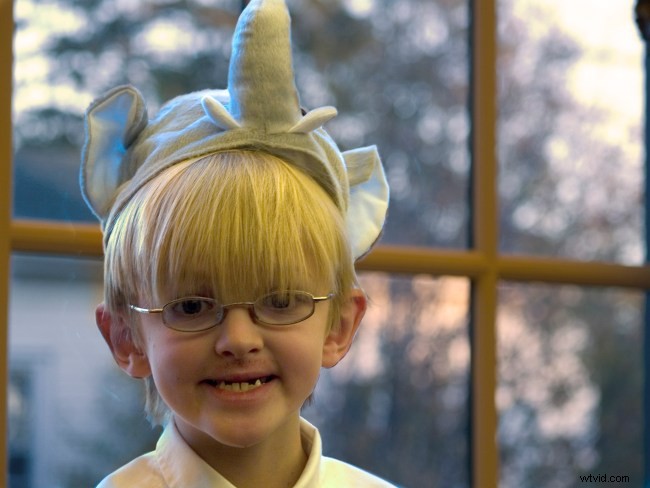
Today, let’s look at how to fix multiple problems in a single photo all at once including correcting for two different color casts from mixed light sources. This may get a bit complicated but I’ll try to keep it as simple as I can. You can see from the original image (below) that we have three main problems to deal with:
- The background is very cool/blue. So are the highlights on one side of the subject’s face. (This color cast will become more obvious as we go along.)
- Overall, the subject is a bit too warm/amber toned. (This will also become more obvious as we make our adjustments.)
- The primary subject is underexposed.
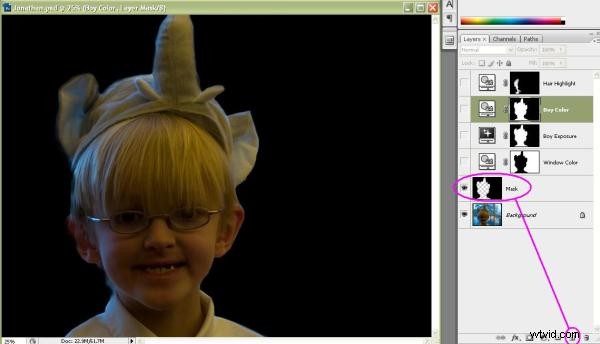
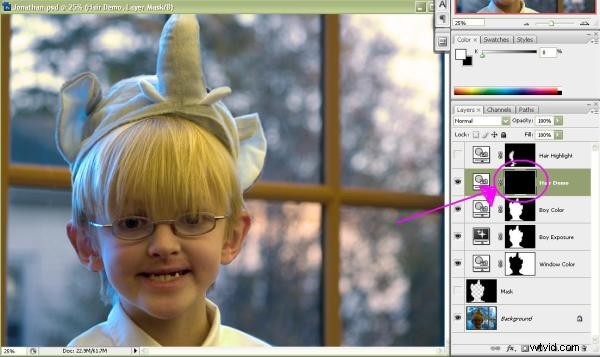
The first thing I did was create a new, blank layer and paint black over everything except the main subject. This made it easier for me to select just the subject or just the background. Since I knew I would need to do both, it made sense for me to perform this intermediate step.
As you paint nearer the edges of your subject, you may wish to feather (decrease hardness on) your brush in order to blend the transition.
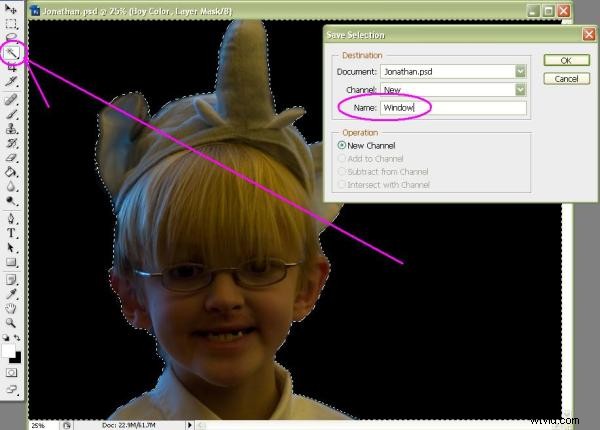
With my background painted a uniform color, it was easy for me to use the Magic Wand tool to select the background. With the background selected, I was able to save my selection (Select | Save Selection…) You’ll want to save it in case you need to use it multiple times. I gave mine a meaningful name, in this case “Window”.
I then inverted the selection (Select | Invert) so that my subject was selected and saved that in the same way but with the meaningful name “Subject”.
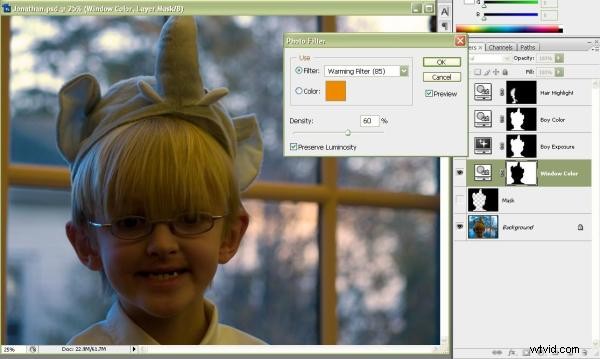
I then clicked on the background layer to ensure it was active and loaded the Window selection (Select | Load Selection…) so that the “marching ants” were once again around the window in the background. With that selection active, I created a layer mask (Layer | New Adjustment Layer | Photo Filter…) to fix the color balance.
I made the adjustments by eye but you can see that warming filter #85 set to a density of 60% seems to have fixed the color cast nicely. Also note that, because I had an active selection when I created the layer, the layer was automatically masked to include only my selection area. No extra work! So the effect was applied only to the area inside my selection. (As the mask is created, your selection automatically goes away so there’s no need to deselect it.)
Next I clicked on the background layer again and loaded my saved selection of the subject (Select | Load Selection…) With that selection active, I created a new layer mask (Layer | New Adjustment Layer | Exposure…) to bring up the brightness level. Since the window in the background was not underexposed, I wanted to brighten only my main subject and this type of selection mask does that perfectly.
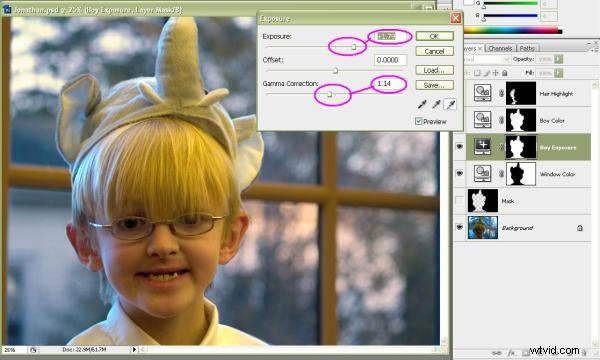
Looking at the screen shot for this step, some may say I overdid it on the brightening. In truth, I initially applied a smaller adjustment but the next step darkened the subject again slightly and necessitated my opening up this layer again to tweak the settings. In fact, that’s one of the best things about using adjustment layers versus making the adjustments directly on your image: you can go back, even many steps down the line, and play around with the adjustment settings. Nothing you do to your photo is ever permanent as long as it remains on its own layer.
The second thing I would point out is that I also adjusted the Gamma. For those who avoid using Gamma, it’s essentially the same as contrast. I prefer Exposure/Gamma over Brightness/Contrast because the final effects seem more subtle to my eye. It’s all a matter of preference.
Having brightened my subject, you can now see more easily that he’s much too yellow. This marks a second color cast, and one that’s completely different from the first; a hallmark of the problems associated with mixed light sources. I corrected this little problem by loading my saved selection of the subject again (Select | Load Selection…) With the selection active, I created a new color correction layer mask (Layer | New Adjustment Layer | Photo Filter…) This time I used a cooling filter #82. Filter density was set by eye but 20% seemed about right.
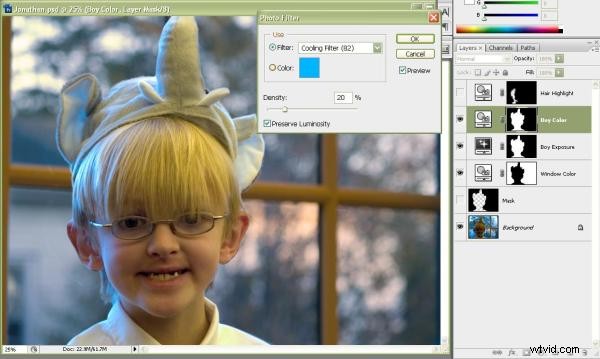
This fixed most of the light on our subject but now you can plainly see how blue the highlights on the right side of his face (left side of the picture) are. We’ll need to do something about that.
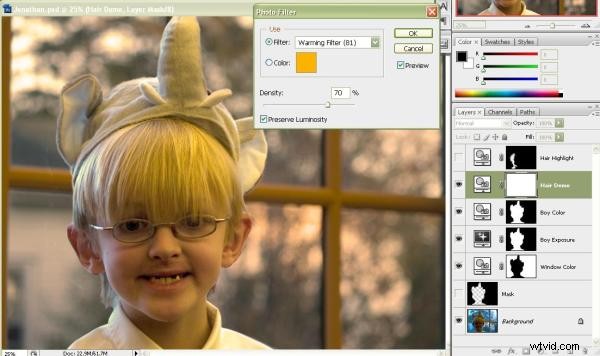
This next section is a lot harder for me to explain than it will be for you to actually do. (Once you’ve done it a couple of times, you’ll see what I mean.) First, making sure I don’t have any active selections, I create a new color correction adjustment layer (Layer | New Adjustment Layer | Photo Filter…) This is just a plain ole adjustment layer which will affect the entire image. For now.
Knowing that I want to warm those highlights, I go ahead and select a warming filter #81. This is less intense than the #85 filter. I set the filter density to 70%. This was done by eye, looking only at the highlights I want to correct. (Yes, the entire image was warmed considerably but we’ll take care of that in the next step.)
Click on the layer mask to make sure that’s where you’ll be painting, then select the paint bucket and “pour” black onto the image. This has the effect of masking off the entire layer and completely undoing the color adjustment you just did.
Next, making sure that the layer mask is still active, I select the paintbrush tool. I switch the colors so that I will be painting with white instead of black. I want the effect to be subtle so I reduce opacity on the brush to 40%. (I can always use multiple strokes to build-up the effect.) I also set an extremely soft brush, in this case 20% hardness. That way, I won’t have any hard edges where I paint. Finally, I set the brush size fairly large so just a few strokes will cover most of the areas I’m targeting.
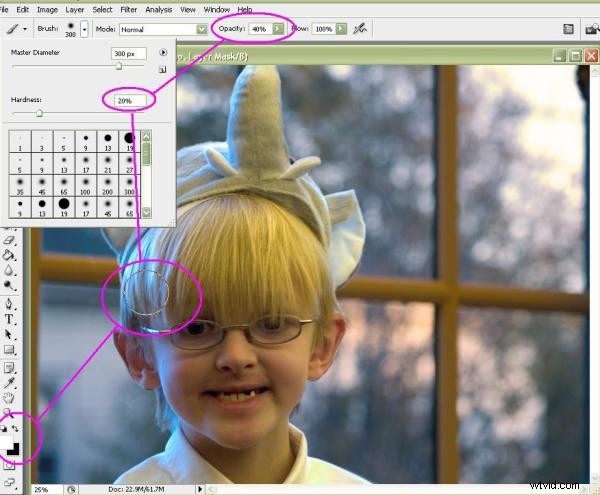
Then it’s just a matter of painting directly onto any areas that look too blue. As I paint onto the image, what I will see is some of the warmth coming back into the places my brush touches. Until I’ve finally transformed this…
…into this.