HSL sliders in Adobe Lightroom help bring out the best in your photographic work. The first step is knowing what they are, what they do and where you can find them.
Like much post-production editing, Lightroom has it all. Read on to find out how to increase or reduce the Hue, Saturation, and Luminance across your images.
What Is Lightroom?
Lightroom is a great way to work through the images from your latest shoot. It is an editing program from Adobe. It not only lets you edit and adjust a whole range of settings, but you can also organise and tag your work. This can speed up your workflow.
For playing around with HSL elements of your images, look no further.
What Are HSL Sliders?
HSL sliders are features of Adobe Lightroom that allow you to change the Hue, Saturation, and Luminance of your work. All three work on getting the most out of your photography, specifically looking at color.
These adjustment layers are easy to use and can help make the difference between good and great. But, you need a good, well-composed image to start with.
The Role of Color in Photography
Color plays an integral part in photography. It isn’t always an easy element to maintain and control. Firstly, ensure that you capture in Raw. This allows you the most amount of play when it comes to your editing stage.
The types of lighting you use are important. Each source needs to have the correct setting to make the scenes look realistic. A mixture of different light sources, for example, natural and tungsten could be difficult to manage later on.
On top of that, white balance needs to be correct in each and every image you capture. If not, correcting it afterwards in post-production could be time-consuming and troublesome.
All of these things affect the color in your image before you even start. The color in each scene needs to be well represented, depending on the style of your image.
Some of these colors, tones, shades can be worked on during the editing stage. They can be reduced, to remove their strength or enhanced to make them more prominent.
This is where Hue, Saturation, and Luminance come into play.
What Is Hue?
Hue is just another way to say color. Some systems use numbers to describe colors, others use words to differentiate between the lightness or colorfulness of these hues.
The Hue slider in Lightroom changes the colors found in your scene. It replaces them with the bordering colors you find on the color wheel.
Hue Adjustment Panel
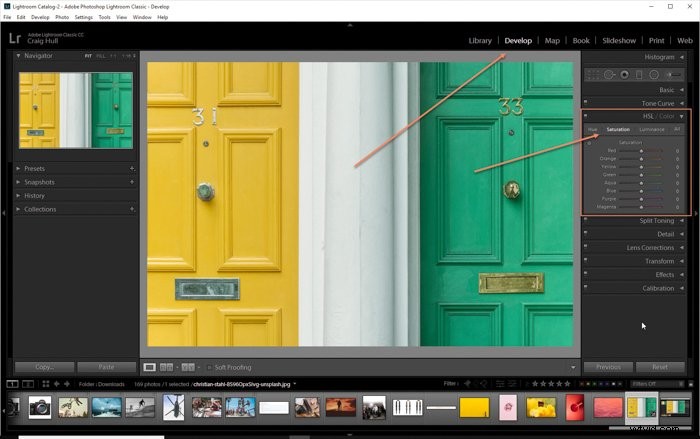
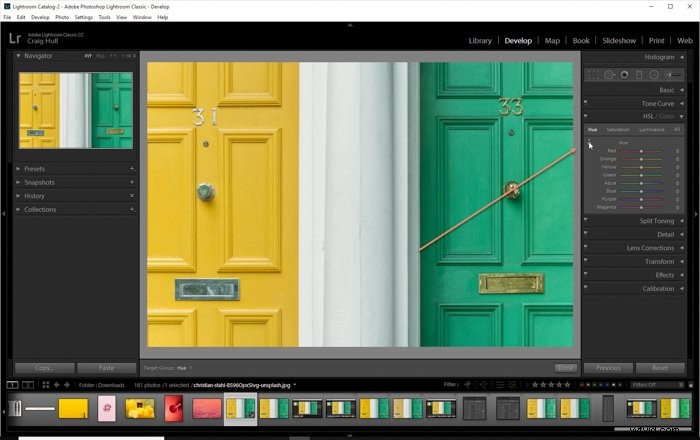
Let’s start with the first question: Where is HSL in Lightroom? To find the HSL adjustment panel, you need to go to the right-hand side when in the Develop module. Within this, you will find tabs for Hue, Saturation, and Luminance.
The Hue sliders are in the first tab.
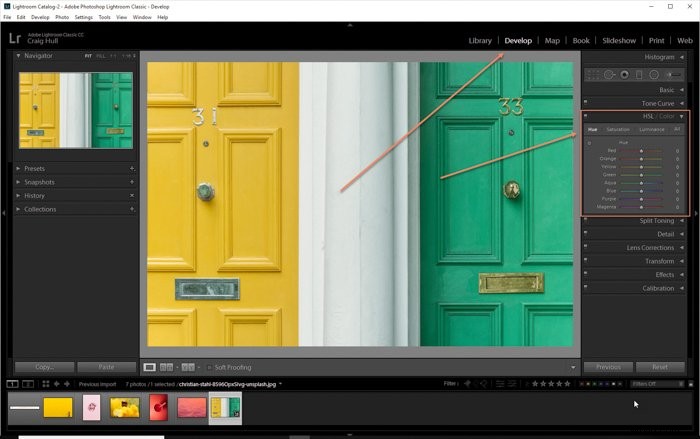
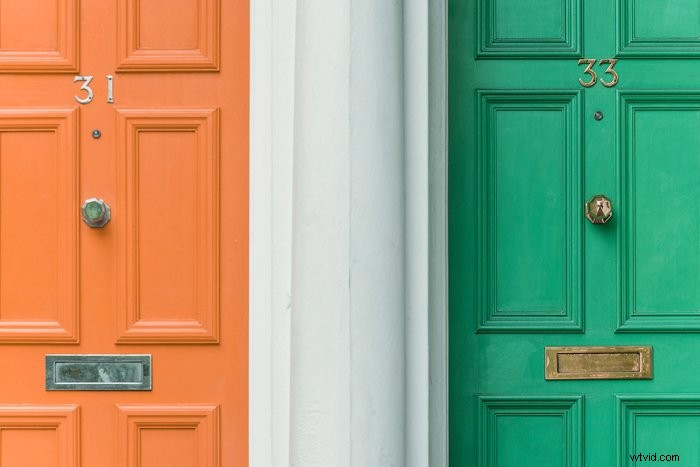
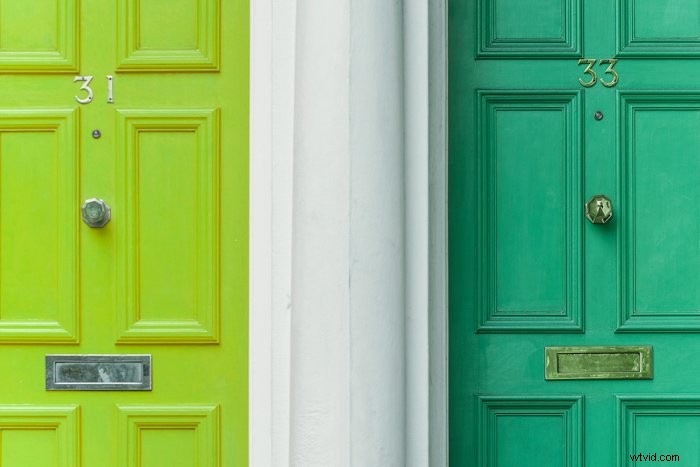
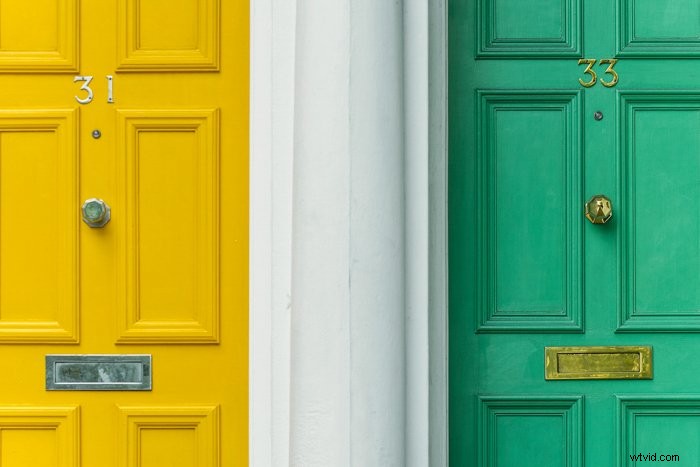
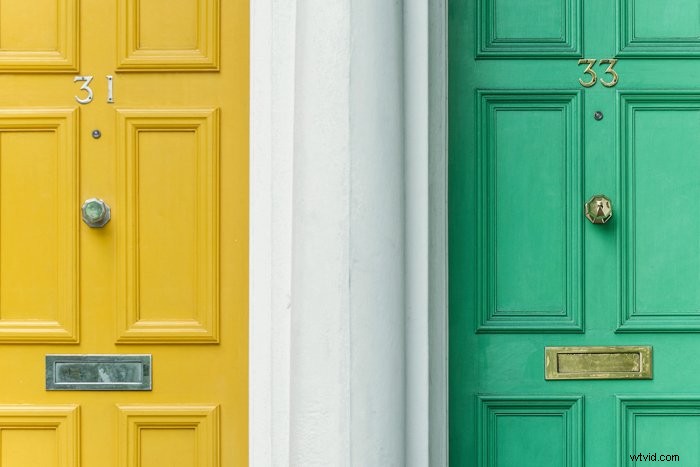
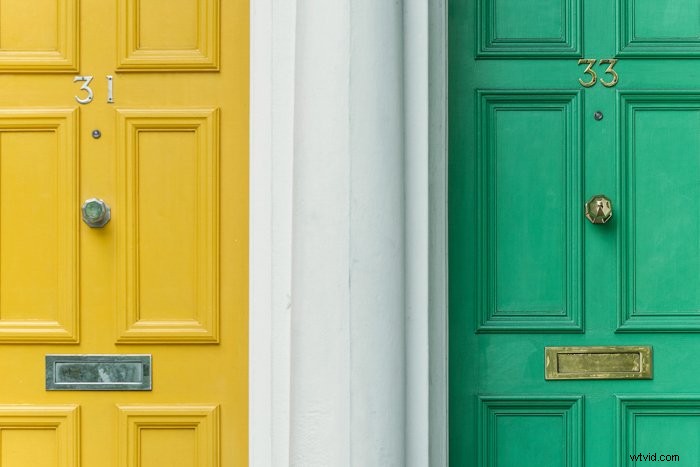
Let’s look at an example. Here you’ll see the original image of two doors; one yellow and one green.

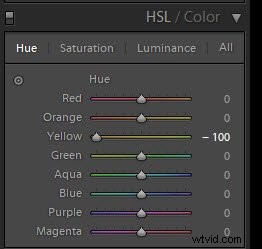
By changing the Hue Yellow slider from 0 to -100, you change the Yellow in the image to Orange. The primary color shifts to the secondary color next to it, in this case, Orange.
If I was to move the Hue slider from 0 to +100, then the Yellow shifts to something closer to Green.
This is the final image when using a -100 Hue slider value.
This is the final image when using a +100 Hue slider value.
You can, of course, use any of the color Hue sliders in the Hue adjustment panel.
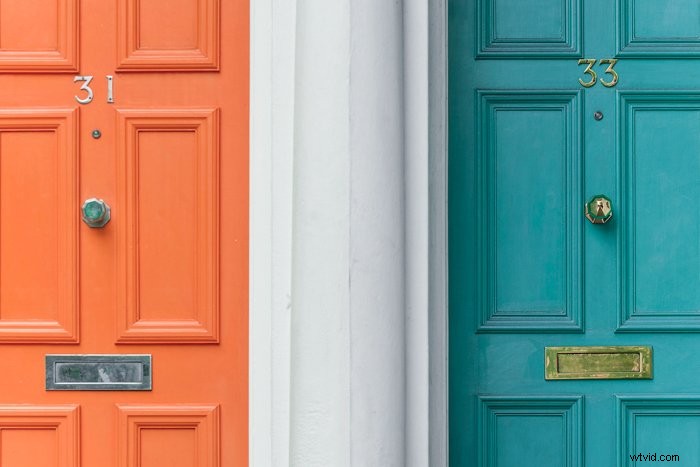
For example, you can change both colors, just by moving four sliders. To achieve the below image, I shifted the Orange and Yellow values to -100 and the Green and Aqua values to +100.
It changed the yellow to Orange and the Green to Blue.
What Is Saturation?
Saturation is the power behind the color. You can change the strength of any color by using the Saturation slider. This is where you make the color more or less prominent in your scene.
By increasing the slider value, you increase the color’s strength. Similarly, by reducing the value, you make the color weaker.
You can emphasise any color in your scene with this method. The alternative is to weaken the colors around it, making it appear stronger.
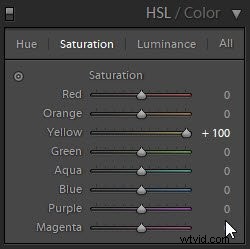
Saturation Adjustment Panel
The Saturation adjustment panel is the second tab in the HSL dropdown menu.
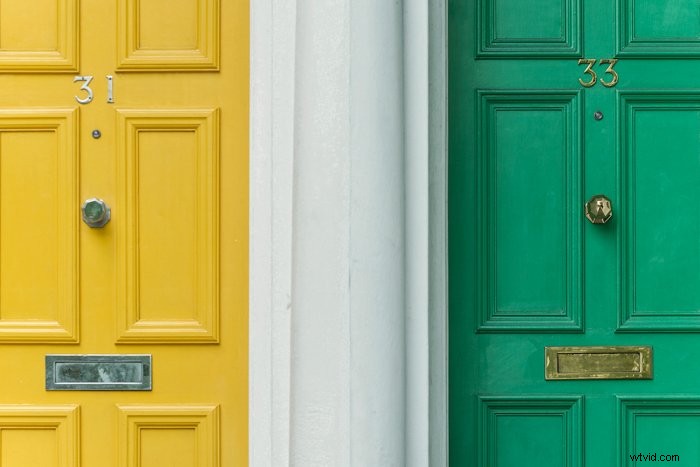
This is our original shot.
With the below image, we moved the Yellow slider value from 0 to +100.
With the below image, we moved the Yellow slider from 0 to -40. This made the yellow weaker, pushing the green as more powerful.
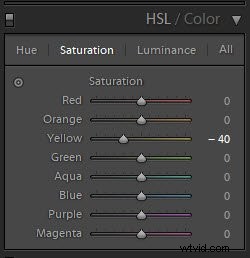
NB: We didn’t go to -100 as this makes the color look very strange. The trick here is to move the slider enough to look good without going over the top.

What Is Luminance?
Luminance refers to how bright a color is. Just like with saturation, increasing the slider value makes it stand out more. Decreasing the slider value makes the color that you’re working with darker.
How light or dark your color becomes depends on where it starts. This is the one slider that can have a knock-on effect on the saturation of the color.
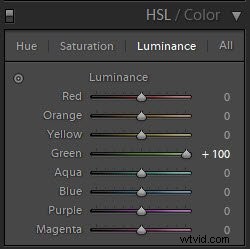
Luminance Adjustment Panel
The Luminance adjustment panel is the third tab in the HSL dropdown menu.
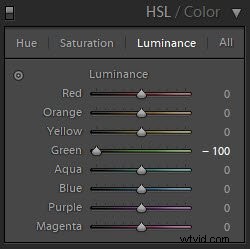
This is our original image.
By raising the Luminance slider from 0 to +100 makes the color Green in the image lighter.
By reducing the Luminance slider from 0 to -100 makes the color Green in the image darker.
Using All Three Sliders
The idea is that you can use these slider groups individually, or all together. One changes the color, one changes the strength and one changes the brightness, so they can easily be used layered.
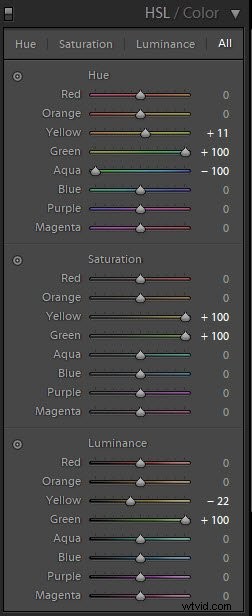
You can flip between the three areas, but if you click on All in the panel, it opens up to show you all three at the same time.
This is our original image.
Here, we played around with all three areas, raising or lowering the following slider values –
- Hue – Yellow 0 to +11
- Hue – Green 0 to +100
- Hue – Aqua 0 to -100
- Saturation – Yellow 0 to +100
- Saturation – Green 0 to +100
- Luminance – Yellow 0 to -22
- Luminance – Green 0 to +100
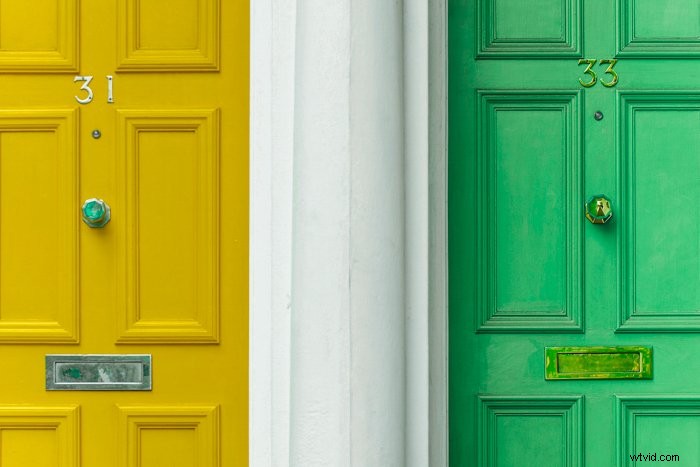
 Here is our final image.
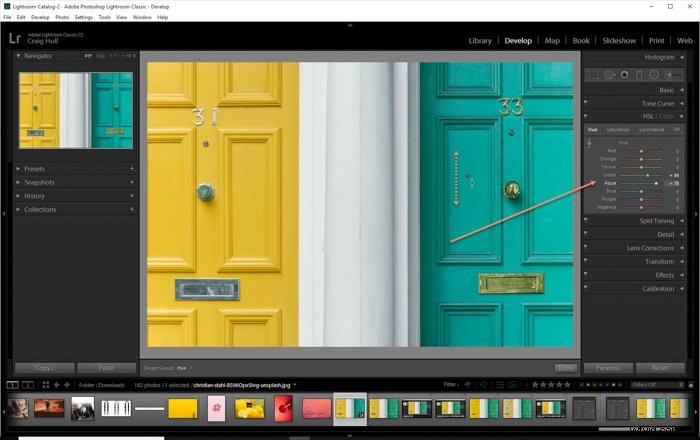
Editing With the Targeted Adjustment Tool
So far, we have looked at how to change the HSL sliders by moving the sliders themselves.
There is another way, which is a little more intuitive. It is an alternative and gives you more control over the color. It is a more precise way to apply the HSL effects, as each color isn’t exactly one color.
The Green and Yellow images we used above isn’t exactly Green and Yellow. They are a mixture of different hues, saturation, and luminance.
To start, you need to click on the slider you want to change. Next, to the slider is the icon you need.
After clicking, your mouse icon turns into a circle with an up and down arrow, next to a crosshair. Click-and-drag on the image to raise or lower the Hue, Saturation, and Luminance of the color you click on.
For example, if I click-and-drag the Green, it will only affect the colors present where the crosshair falls. As the Green isn’t 100% Green, it will affect the Green and Aqua sliders.
Some colors will raise or lower faster. That means there are more of that color present where you placed your mouse.
Dragging the mouse up raises the slider values; dragging it down reduces the slider values.
Conclusion
The HSL tool is a quick and effective way to modify colours in Lightroom. It’s up to you to do it subtly or to turn your image’s colours inside out. You have the option for both.
As with every tool in Lightroom, the most important thing is to use HSL with a concept in mind – with a result in mind. Then, your path to stunningly and creatively processed images is clear.
For more great tutorials, why not check out how to create a cool Lightroom Slideshow or editing macro photos in Lightroom next!
You should also try our Effortless Editing with Lightroom course!