With Macphun (soon to be Skylum) keen to promote Luminar 2018 as a replacement for Lightroom, there’s no doubt that there are many photographers who are interested in trying it. Unfortunately, that’s where the confusion may start as the Luminar interface is completely different from both Lightroom and Photoshop.
If you’re new to Macphun software then it can take time to find your way around the new interface. But if you’ve already used some of their other programs you’ll find that Luminar is very familiar, as Macphun tends to use the same layout in most of its software.
Note: The screenshots in this article are taken from the Mac version of Luminar 2018.
Luminar Dashboard Layout
When you open a photo in the program for the first time, you see something like this.
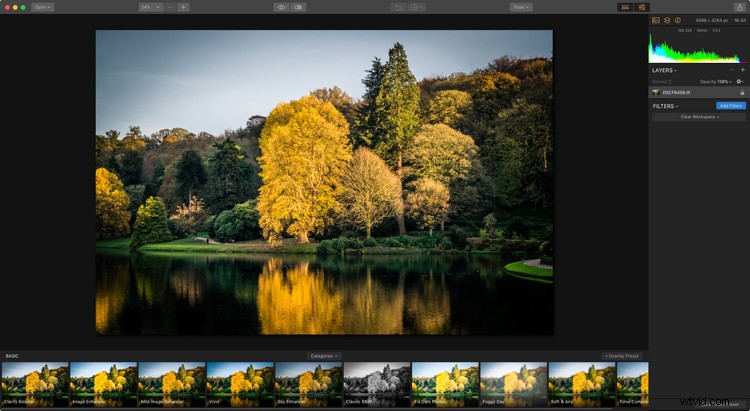
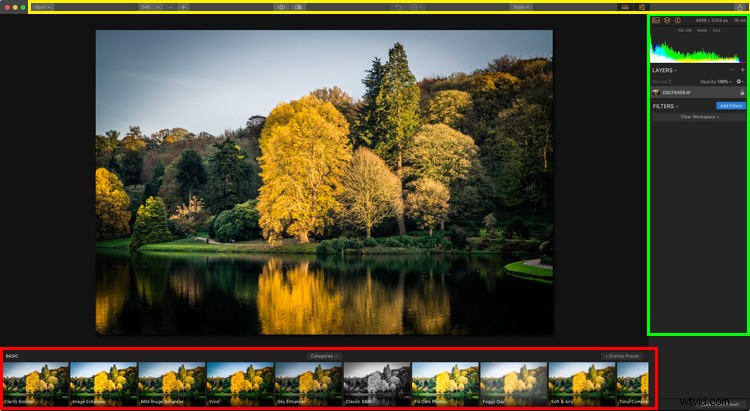
The photo you’re working on is displayed in the center. Presets are shown along the bottom (red). The side panel on the right is where you apply filters and create workspaces (green). There are more tools along the top (yellow). See the image below.
Let’s take a look at each of these in more detail.
Luminar Presets
One of the benefits of using Luminar is that it comes with lots of presets that you can use. If you don’t like presets, that’s okay – presets are optional and you can ignore them, or hide the panel if you do not use them.
Luminar presets are intelligent and each one comes with an amount slider. If you like a preset but the effect is too strong you can reduce the intensity. That means Luminar presets are adaptable and you can use them in a subtle way if that’s what you prefer.
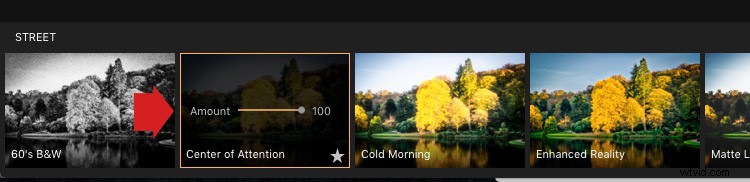
Click on any preset to apply it to your photo (marked below). In this example, I selected a preset called Center of Attention. Afterwards, you’ll see an amount slider which you can set anywhere on a scale from zero to 100. You can also click on the star icon to add the preset to your list of favorites so you can find the ones you like quickly.
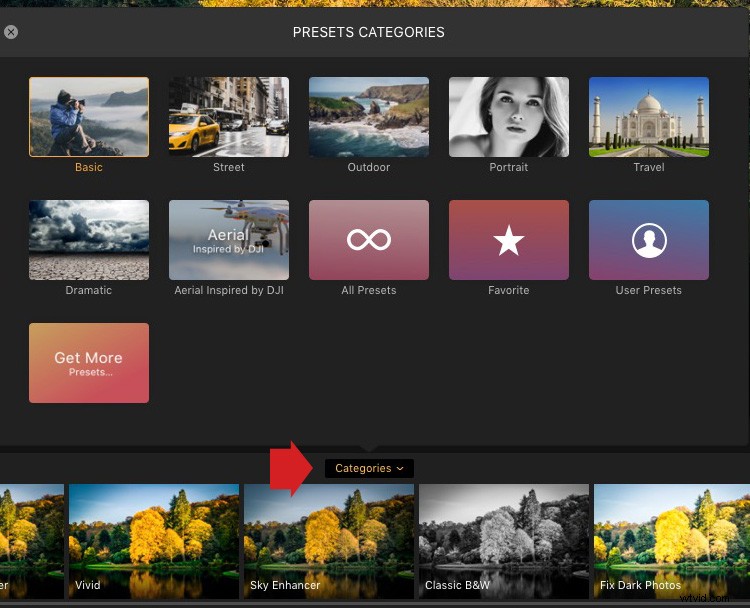
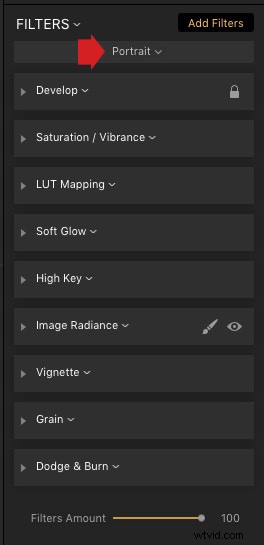
Click on the Categories button (marked below with the big red arrow) to reveal a list of preset categories available in your version of Luminar. Click on any of the categories to display the presets underneath.
Luminar displays Basic presets by default, but you can choose from categories such as Street, Dramatic and Portrait. You can also click on Favorites to show any presets you have marked as a favorite. Clicking on “Get More Presets” takes you to a page on the website where you can get additional sets of preset (some which are paid, and some that are free).
Workspaces, Layers, and Filters
If you’re a Lightroom user then Luminar’s right-hand panel will look familiar as they are similar to the panels in Lightroom’s Develop module. There’s a histogram at the top, layers underneath that (yes, Luminar has layers!) and then filters below.

This area might look a little bare at first, but that’s only because the workspace is clear. In Luminar, a workspace is a selection of filters displayed which are ready for you to use.
Filters are Luminar’s equivalent of the right-hand panels in Lightroom, or the various Layer adjustments available in Photoshop. The reason Luminar doesn’t display all the available filters is that there are so many of them (50 in total). Instead of showing all the filters, Luminar arranges them into workspaces. You can use one of Luminar’s built-in workspaces or you can create your own.
Click on the Clear workspace button (below) to choose one of Luminar’s built-in workspaces. Here, I chose the Portrait workspace. It has nine filters which, as you might expect, are useful for developing portraits.
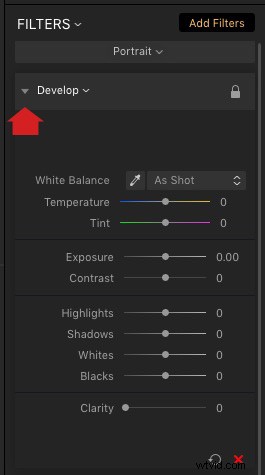
Click on the gray arrow (marked below) to open up a filter and reveal its settings and sliders. The screenshot below shows the Develop filter, which is similar to Lightroom’s Basic panel.
Note: When working with RAW files this filter is called RAW Develop, and when working with JPGs is simply called Develop.
Another benefit of using workspaces is that you can customize them to display only the filters that you want to use. You can start by removing and adding filters to one of Luminar’s built-in workspaces.
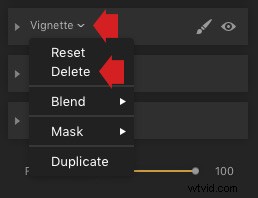
To remove a filter click on the white arrow next to the filter name (marked below) and select Delete from the pull-down menu.
To add a filter, click the Add filters button (marked below). Luminar opens the Filters Catalog to the left, and they are displayed in helpful categories as you can see below like; Issue Fixers, Creative, etc. Here, you can select a filter to add it to your workspace.
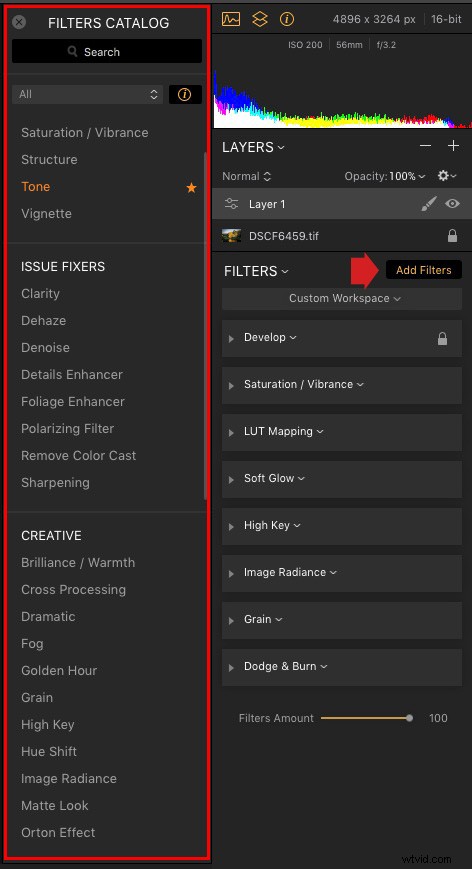
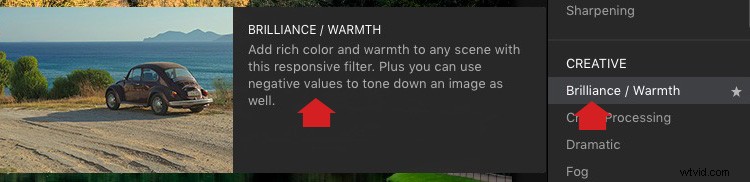
When you hover over the name of a filter in the filters Catalog Luminar displays an information panel to tell you what the filter does.
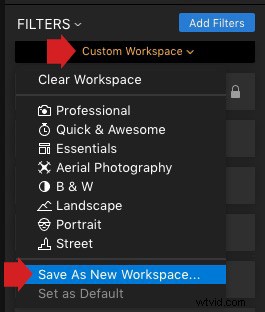
To save the workspace, click on Custom workspace (marked below) and select Save As New Workspace. Now, your new workspace will appear in the list and you can select it any time you want.
The Luminar Toolbar
Finally, the Toolbar at the top of Luminar contains some extra commands and tools that you will find useful. Most of these are self-explanatory. When you hover the mouse over an icon Luminar displays a strip of text to explain what it does. In the screenshot below, you can see that the mouse pointer is over the Compare icon.

As you can see, the Luminar interface is simple and easy to use. The biggest obstacle to using Luminar is understanding how presets, workspaces, and filters work. Once you understand how to use these tools then you can start exploring the potential of Luminar to create beautiful photos.
Disclaimer: Macphun, soon to be Skylum, is a dPS advertising partner.