Saving presets in Lightroom is essential for digital photographers—it slashes editing time while guaranteeing a consistent look across a series, whether you're capturing weddings, landscapes, or street scenes.
In this guide, we'll walk you through creating, applying, and customizing presets in Adobe Lightroom. By the end, you'll master the full preset workflow.
We’ll use the term Lightroom CC to distinguish it from Lightroom Classic, noting their distinct interfaces and feature sets.


What Are Lightroom Presets?
A Lightroom preset is a preconfigured set of adjustments you can apply with one click. Unlike auto‑tone, presets use fixed values, so the same preset behaves consistently across images, regardless of exposure or color temperature.
Lightroom ships with numerous built‑in presets, including AI‑driven Adaptive Presets that intelligently target specific image components—such as subjects, portraits, or skies—applying edits only to those areas.
They’re especially useful when processing large batches taken under similar conditions, or when establishing a personal style. Once applied, you can tweak individual settings for refinement.
Using presets can save hours of editing and enable you to share a signature look with colleagues or clients. Lightroom’s preset workflow is both robust and intuitive.


Lightroom Presets in Classic vs CC
While both Classic and CC support presets, their interfaces differ slightly. We’ll highlight those differences to help you choose the right version and ensure presets remain portable between them.
Each preset includes a strength slider from 0 to 200, with the default intensity set at 100. This allows you to fine‑tune the effect on the fly.
Lightroom Presets in Classic
In Classic, the Presets panel sits in the left column of the Develop module. If hidden, enable it via Windows > Panels > Presets.
Presets are grouped into categories, each expandable to reveal individual presets.
Hovering over a preset previews its effect, letting you quickly assess which style matches your image.
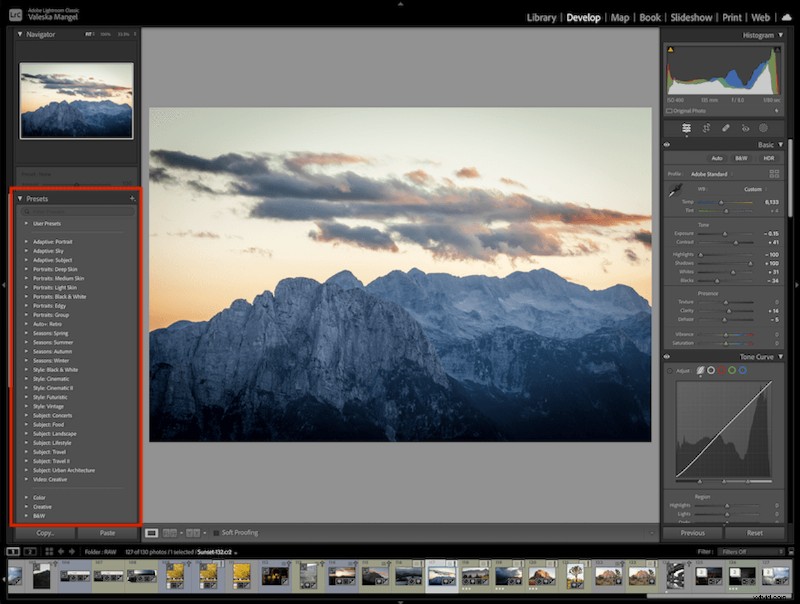
In Classic, presets are accessed from the left side of the Develop workspace.
Lightroom Presets in CC
In CC, the Presets panel is accessed via the right‑hand toolbar icon—a pair of overlapping circles—or by View > Presets.
The panel offers three tabs: Recommended, Premium, and Yours. Premium and Yours mirror Classic’s presets; Recommended is exclusive to CC.
CC’s Recommended tab showcases AI‑suggested presets tailored to your image. Thumbnails provide a quick preview, and hovering reveals the full effect.
AI‑suggested presets are ideal when you’re experimenting or need a starting point for a new look.
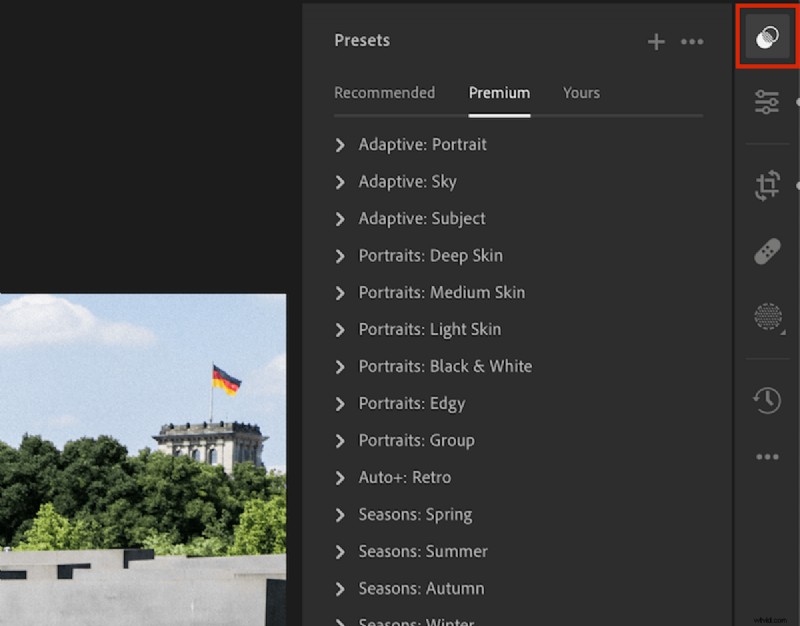
The CC preset panel appears on the right; the icon is highlighted for easy access.
How to Save a Preset in Lightroom
Let’s walk through creating a custom preset in both Classic and CC.
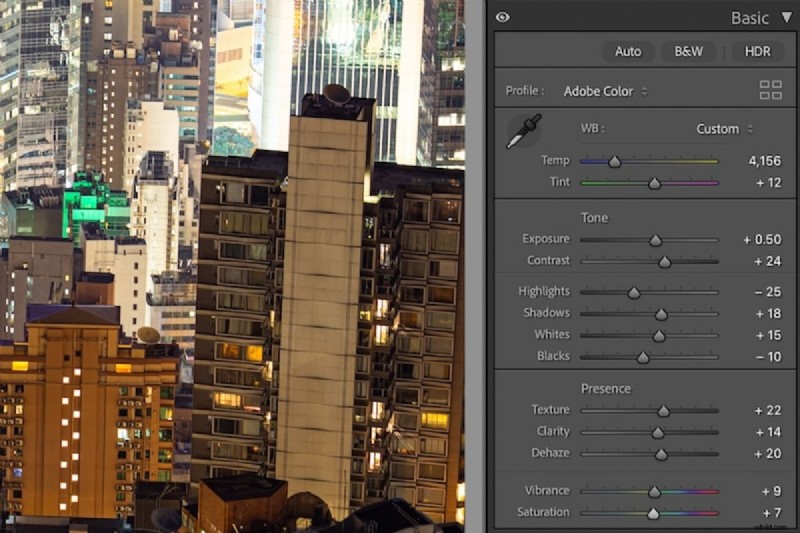
Step 1: Make Your Edit
Open a photo and apply the adjustments you wish to capture. Work through Lightroom’s adjustment panels to tweak exposure, tone, color, etc.
Alternatively, start with an existing preset, then refine the sliders to achieve your desired look before saving it as a new preset.

Step 2: Create the Preset
Next, open the Presets panel and click the plus (+) icon in the top‑right corner—same position in both CC and Classic.
Select the specific adjustments you wish to include. This allows you to capture only the changes you made.
Classic presents a checklist of all adjustable parameters; tick the ones you want to include.
CC streamlines this with drop‑down menus, making it easier to select the categories you want to copy.
In CC, the Select dropdown offers options like ‘Modified’—only the adjustments you altered—and allows you to include masks, a feature unavailable in Classic.
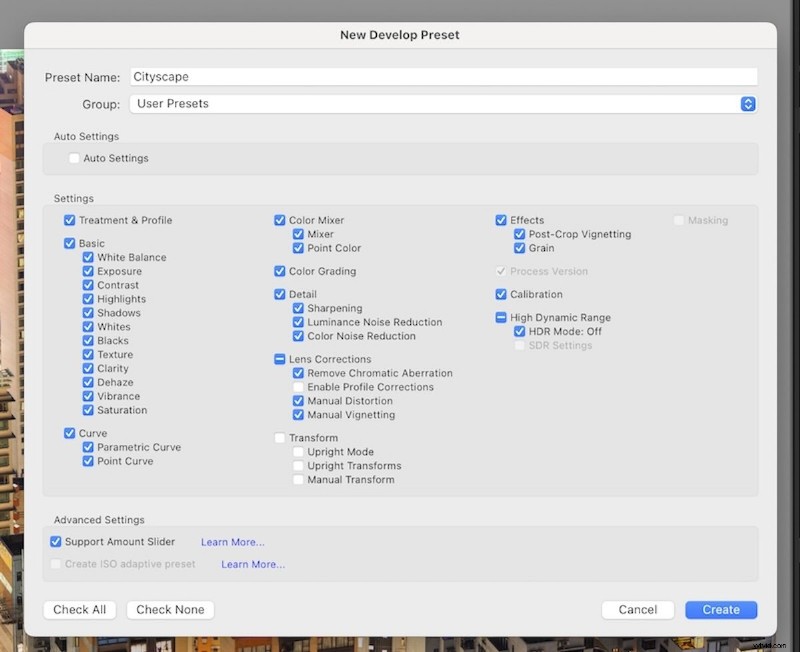
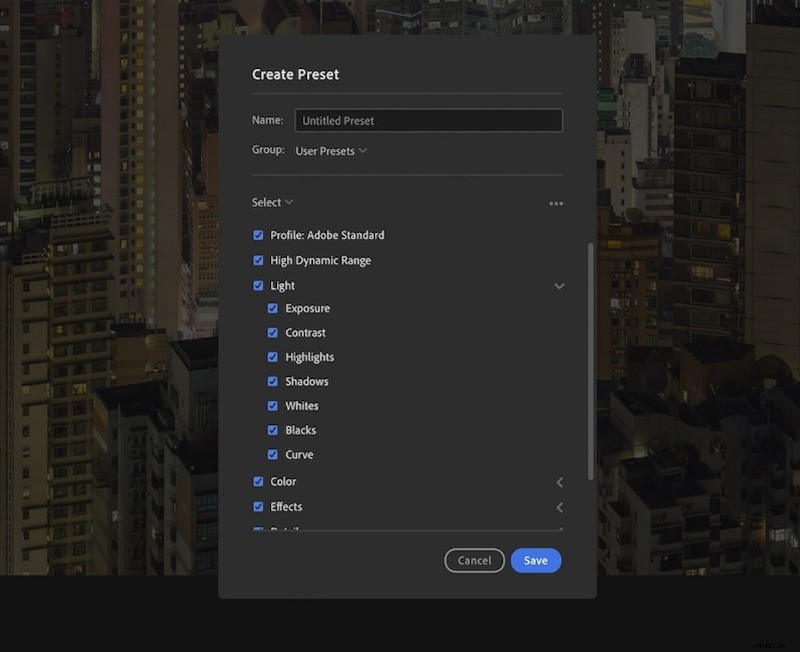
Step 3: Finish Your Preset
Give your preset a clear, descriptive name—e.g., the event name or a concise style descriptor.
Assign it to a group (User Presets is default, but custom groups are welcome). Click Save, and your preset is ready for use.
How to Apply Lightroom Presets to Multiple Images
Applying a preset to several images at once saves even more time. Below we explain the workflow for Classic and CC.
Applying Presets to Multiple Images in Lightroom Classic
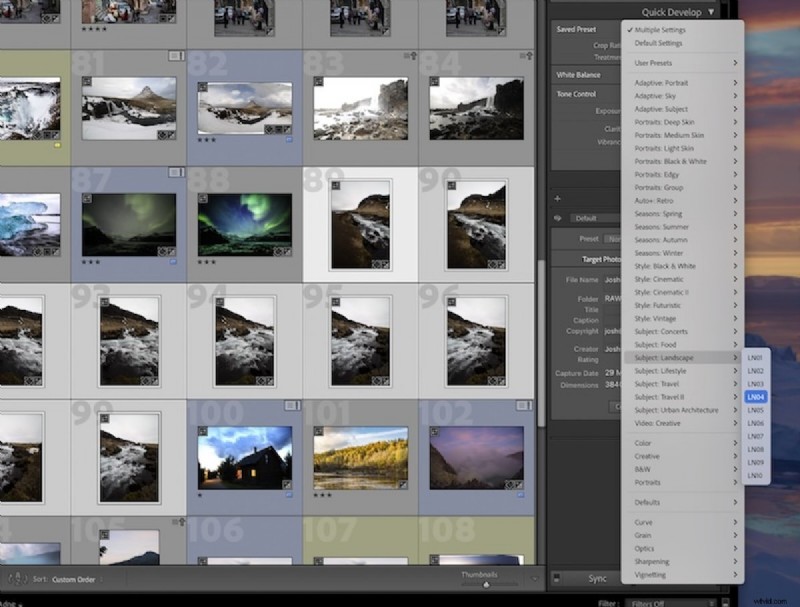
In Classic, select multiple photos in the Library module—use Ctrl/Cmd‑click for individual picks, Shift for ranges.
Open Quick Develop, locate the ‘Saved Preset’ dropdown, and choose the preset you want to apply.

Applying Presets to Multiple Images in Lightroom CC
CC restricts batch edits to Detail View. Apply the preset to one photo first, then switch to that view (View > Detail).
Use the ‘Copy Edit Settings’ button under the filmstrip, select target images, then click ‘Paste Edit Settings’ to apply the preset across them.
How to Import and Export Lightroom Presets
Lightroom lets you import and export presets, making it simple to share or adopt styles from other professionals.
Importing Lightroom Preset Settings
To import, click the plus (+) icon in Classic and select ‘Import Presets…’. In CC, click the three‑dots (•••) in the Presets panel.
Choose the preset file (XMP or LRTemplate) from your computer; it will be stored in the User Presets folder.
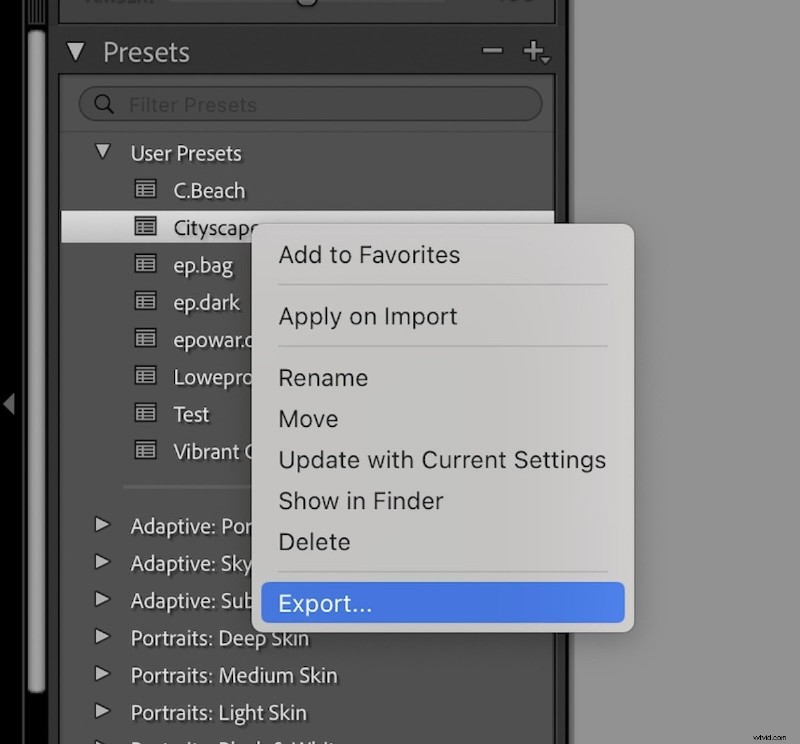
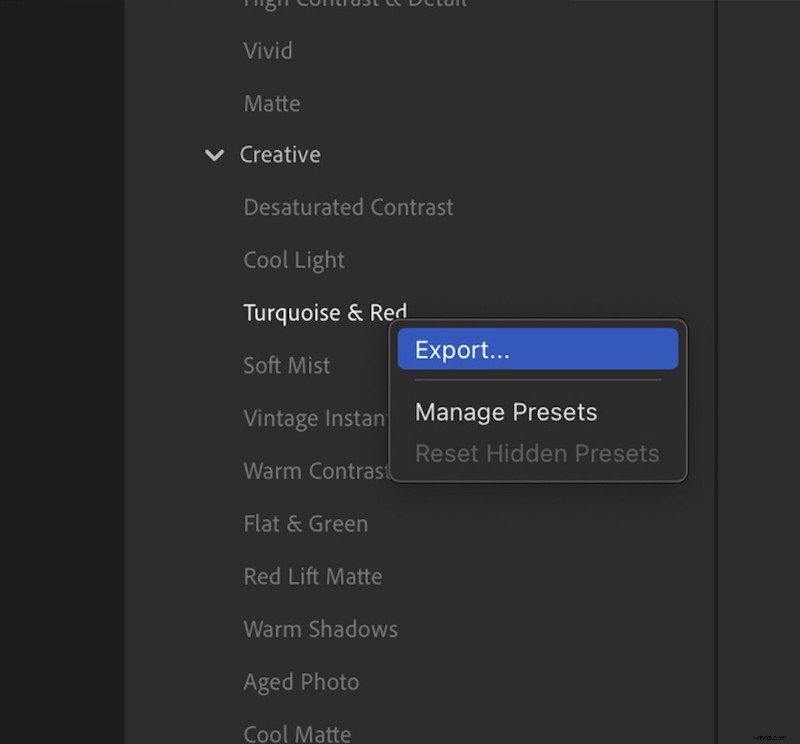
Exporting Lightroom Preset Settings
Export a preset by right‑clicking it and choosing ‘Export’. The file can then be saved anywhere you like.
Conclusion: How to Save a Preset in Lightroom
You’re now equipped to create, apply, and distribute Lightroom presets, whether for personal workflow or commercial use.
Presets streamline bulk editing across all genres—ideal for delivering preliminary edits to clients quickly.
Explore our guide to the best free Lightroom presets, including top picks for portraits, landscapes, and street photography. Check out The Preset Collection for a quick, impactful upgrade.