
Lightroom is a powerful photo‑editing tool, but mastering its interface can take time. One of the most useful features for any editor is the ability to compare the original image with the edited version.
Below you’ll find clear, step‑by‑step instructions on how to switch between before and after views, use split‑screen modes, and even set a custom “before” state from your edit history.
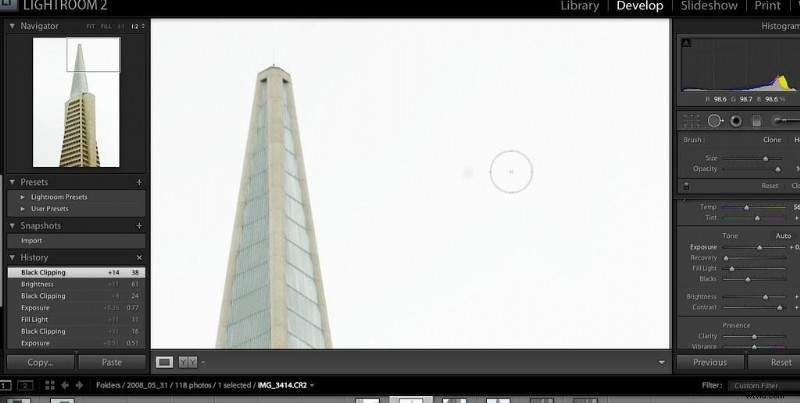
“Lightroom 2.0 Includes Healing Brush” by Thomas Hawk is licensed under CC BY‑NC 2.0
Before and After
Even without the full Develop module, you can activate Lightroom’s View Modes to instantly toggle between your photo’s original and edited states.
To enable the feature, follow these simple steps:
- Click the small triangle under the image, to the right.
- Select View Modes; a checkmark will appear when it’s active.
- Look for the Y|Y button that now appears in the bottom‑left corner beneath your image.
With the Y|Y button visible, you can choose from several comparison styles.
Before Only
If you want to see just the original or just the edited image, Lightroom offers a single‑key toggle.
- Press the backslash key (
\) once to view the before image (original, pre‑crop). - Press
\again to return to the after image (all edits applied).
That’s all—one keystroke gives you instant feedback on your progress.
Left/Right
To view the original on the left and the edited version on the right, use the Y|Y button:
- Locate the Y|Y button at the bottom left.
- Click the arrow to open the menu.
- Select Before/After Left/Right from the drop‑down.
This view works best for portrait‑oriented images.
Split‑Screen
Split‑screen mode presents the photo in a single window divided by a line—half showing the original, half the edits. It’s ideal for a focused comparison.
- Click the Y|Y button in the Develop module.
- Choose the small triangle to open the menu.
- Select Before/After Left/Right Split for a side‑by‑side comparison.
- Or select Before/After Top/Bottom Split for a vertical split.
Both options keep the image in full‑screen mode while still allowing side‑by‑side evaluation.
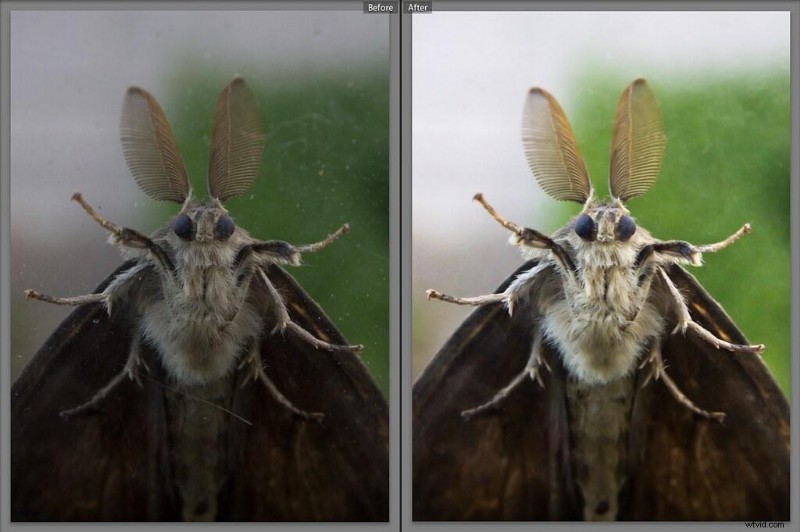
“Moth Macro #2 Lightroom before/after” by GuySie is licensed under CC BY‑SA 2.0
Top/Bottom
The top/bottom layout places the before image above and the after image below—perfect for landscape shots where a broader view is needed.
- Find the Y|Y button at the bottom corner.
- Open the drop‑down menu.
- Select Before/After Top/Bottom.
Changing the “Before” State
Lightroom’s History panel lets you set any previous edit as the new “before” image, making it easy to compare a current look against earlier iterations.
- In the Develop module, choose your preferred view (e.g., Top/Bottom).
- Open the left panel and navigate to History.
- Drag the desired step and drop it into the “before” section of the screen.
Now your chosen history point becomes the reference image, enabling a side‑by‑side comparison with the latest edits.
Frequently Asked Questions
How do I view original photos in Lightroom?
Follow these steps to toggle between the original and edited versions:
- Open Adobe Lightroom on your desktop.
- Navigate to the Develop tab.
- Select the photo you want to inspect.
- Press the backslash key (
\) to jump between the original and edited images. - Alternatively, use the Y|Y button for split‑screen comparisons.
Conclusion
Regularly reviewing the original image is essential for spotting mistakes, refining edits, and ensuring you haven’t over‑processed. By mastering Lightroom’s before‑and‑after tools—whether you prefer a simple toggle, left/right split, or a custom history state—you’ll make the editing workflow smoother and more precise.
Explore the methods above and choose the one that best fits your style and project needs.