When you first launch Adobe Premiere Pro, you’ll be impressed by its expansive feature set—yet that richness can overwhelm newcomers. These nine practical tips will help you master the essentials and keep your workflow clean, efficient, and error‑free.
1. Organize Your Files in Folders
Before you even start importing, structure your media on disk. A clear folder hierarchy saves time, prevents missing clips, and keeps projects scalable.
Create separate top‑level folders for Project files, Footage, and Audio. For larger shoots, add sub‑folders by day or card number:
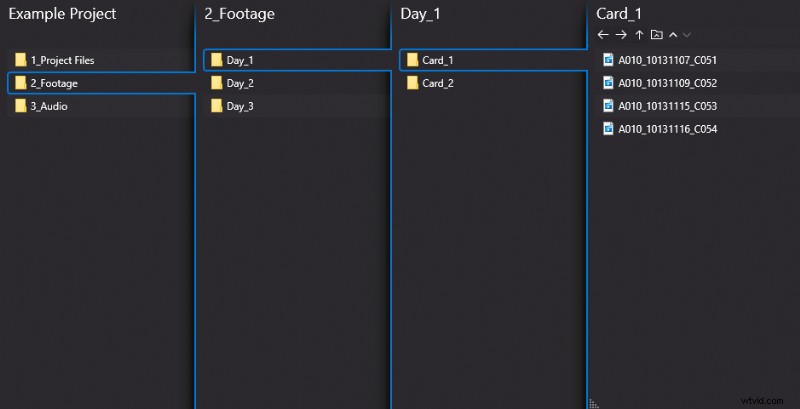 (We are using the 3‑party file explorer OneCommander on Windows.)
- Project files – Store Premiere, After Effects, and other project files here.
- Footage – Keep all video files; sub‑divide into "Days" and "Card #" as needed.
- Audio – Mirror the footage structure so you can quickly locate matching audio.
Expand this base if you need dedicated folders for music, VFX, graphics, etc. Once the structure is set, never rename or relocate files in the project; Premiere will lose the links and you’ll have to hunt for clips.
2. Select the Correct Sequence Settings
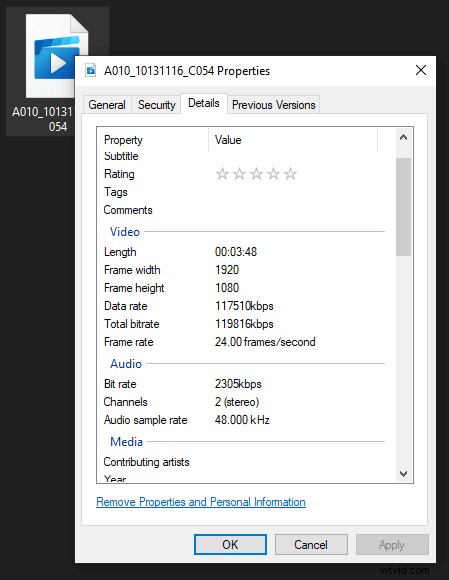
Choosing the right sequence template is critical. It determines aspect ratio, resolution, and frame rate. Mismatched settings cause lag or unwanted cropping.
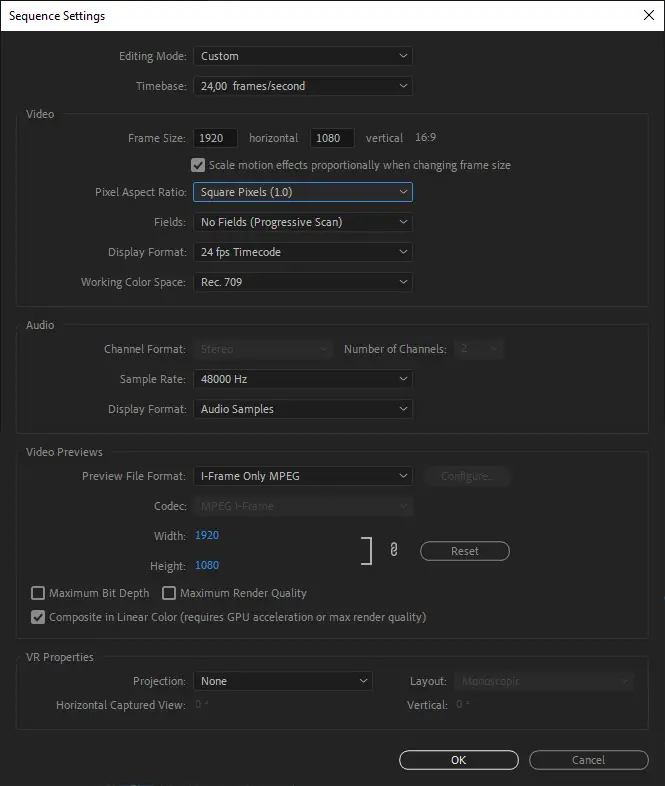
Always check your source footage properties before creating a sequence. For instance, a 24 fps clip in a 25 fps sequence will appear jittery. If you need to change the aspect ratio, do it deliberately and document the rationale.
3. Keep the Timeline Streamlined
New editors tend to stack layers, creating clutter and confusion. Aim for 2–3 tracks while editing; reduce to a single track when exporting.
Using fewer tracks improves playback performance, makes color correction easier, and keeps the focus on storytelling.
4. Create New Sequences for Each Section
Leverage Premiere’s sequence system to separate scenes, versions, or rough cuts. A dedicated sequence for each scene keeps your main timeline tidy.
Before fine‑tuning, duplicate your rough cut into a backup sequence. That way you can always revert to the original if something feels off.
5. Delay Effects Until the Cut Is Final
Apply color correction, grading, and visual effects only after you’re satisfied with the edit. Adding effects early taxes your computer and can distract you from the core narrative.
A proven workflow is: Assembly → Rough Cut → Audio Cleanup → Color Correction → Color Grading → Effects & Overlays.
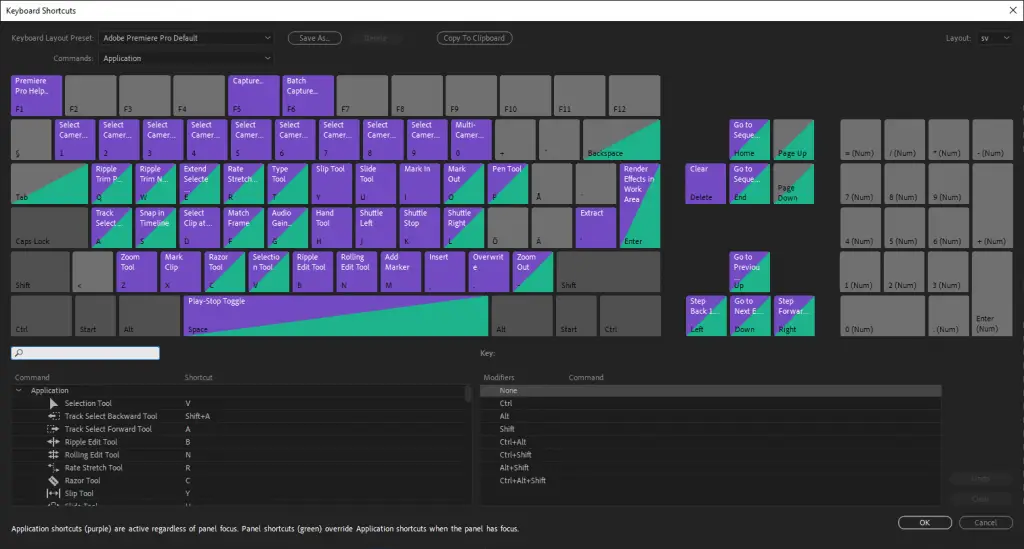
6. Master Keyboard Shortcuts
Keyboard shortcuts drastically speed up editing. Below are essential actions and their default shortcuts:
| Action | Windows | macOS |
|---|---|---|
| Undo | Ctrl + Z | Cmd + Z |
| Redo | Ctrl + Shift + Z | Shift + Cmd + Z |
| Razor Tool / Cut | Ctrl + X | Cmd + X |
| Selection Tool | V | V |
| Select All | Ctrl + A | Cmd + A |
| Mark In | I | I |
| Mark Out | O | O |
Explore Adobe’s full shortcut list on their website or customize shortcuts via Edit → Keyboard Shortcuts:
7. Ignore Unfamiliar Features
Premiere is packed with advanced tools that most beginners never touch. Concentrate on the core editing functions; revisit deeper features only when you need them.
Focusing on what you know keeps projects moving forward and reduces frustration.
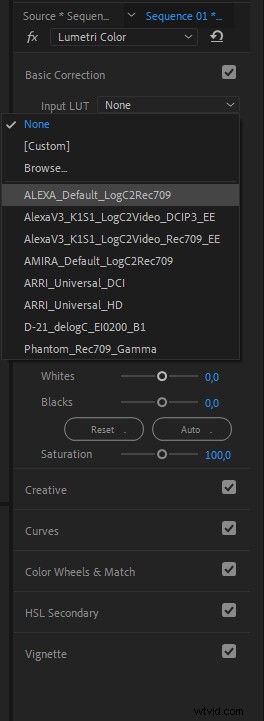
8. Leverage LUTs for Quick Grading
A Look‑Up Table (LUT) offers a ready‑made color palette. Premiere’s Lumetri Color panel hosts built‑in LUTs, and you can import free or premium LUTs from sites like vision‑color.com, looklabs.net, and lutify.me.
9. Embrace Experimentation
Hands‑on exploration is the fastest way to learn. Test tools, tweak settings, and watch the results. If you hit a roadblock, YouTube and dedicated blogs are excellent resources.
In Conclusion
These nine beginner‑friendly strategies focus on organization, workflow discipline, and incremental learning. Video editing is a marathon, not a sprint—so keep the process simple, take regular breaks, and revisit your footage with fresh eyes to refine your craft.