Photoshop allows you to blur images and faces to amplify motion, bring focus, and add various artistic elements to the photos. When viewers' eyes have nothing else to focus on but the subject of the photo, they will take time to appreciate the subject's beauty. They will be able to see the freckles on your cheeks and your eyes and connect with the expression you have on your face. In this article, we'll give you a low-down on how to blur faces in Photoshop. You'll also learn how to blur faces on videos.
In this article
Part 1. How to Blur Faces/Background/Texts in Photoshop
Learning how to blur part of an image in Photoshop helps you enhance your images and hide details. With that in mind, here is how to blur texts, backgrounds, and faces in Photoshop.
How To Blur Faces in Photoshop
If you want to blur face Photoshop, follow the steps below.
Step 1. Launch Photoshop on your device.
Step 2. Click on the File button.
Step 3. Select the Open option and double-click the file you would like to work on.
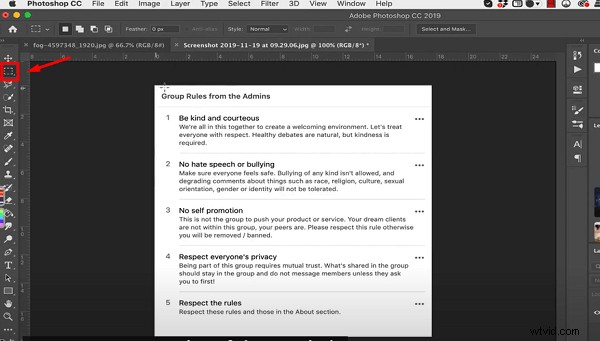
Step 4. Once you have opened your image in Photoshop, choose the Marquee Tool located in the Tool Bar. Alternatively, you can use the keyboard shortcut M.
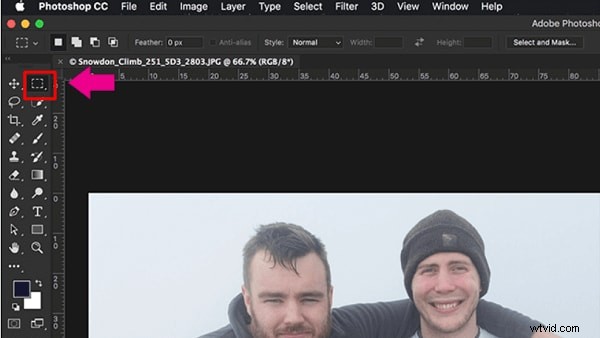
Step 5. Now, draw a selection around the face you would like to blur.
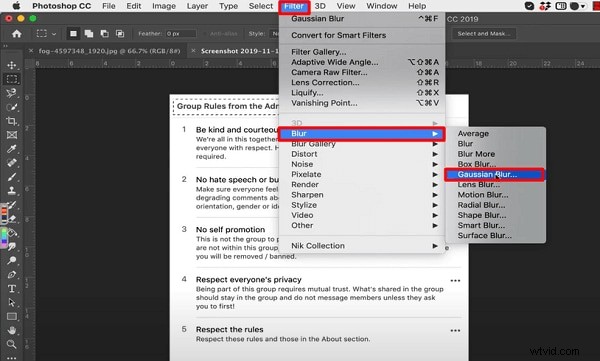
Step 6. Navigate to Filter and select the Blur option, then choose Gaussian Blur. You will see the Gaussian Blur menu and a preview of the effect of the blur on the area of the face you had selected.
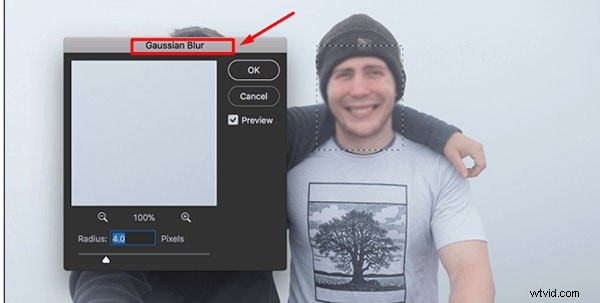
Step 7. Dial the radius up; do this until the face is completely blurred.
Step 8. Hit the OK button to apply the effect and save the new image on your device.
How To Blur the Background in Photoshop
You can create beautiful soft backgrounds in Photoshop using the blur effect. Using Photoshop blur part of image helps you increase the focus on a subject. To learn how to blur the background on photoshop, follow the steps below:
Step 1. Open Photoshop on your PC and click on the File button on its menu bar.
Step 2. Next, select the Open option from the dropdown menu and choose the photo you want to edit from your gallery.
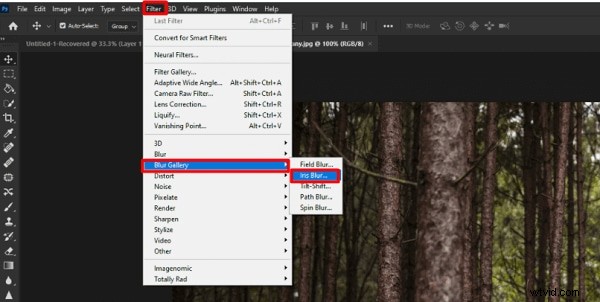
Step 3. On the menu bar, click the Filter function. Find the Blur Gallery option in the dropdown menu; you'll see a list of several blur options when you click on it.
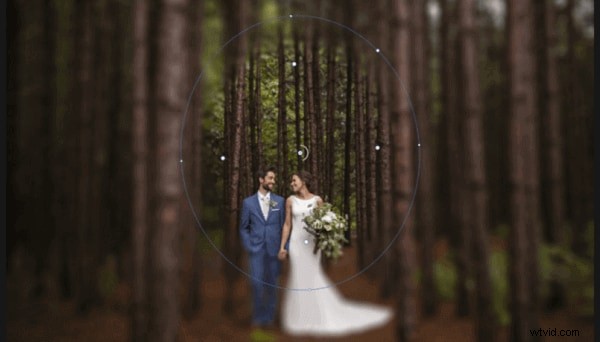
Step 4. Choose Iris Blur to blur the background; this option helps define a focal point in your image and blurs the rest of the photo.
Step 5. A large Blur Ring with Pin at the center will appear on your image. You'll also see several dots around the Blur Ring. The Pin acts as a target; your image will get more blurry as you increase the distance from the center.
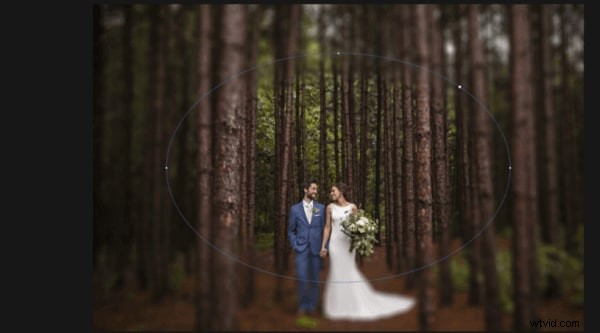
Step 6. Click the center of this pin, then drug it to the subject. To place the pin, release your mouse.
Step 7. Now you need to adjust the blur transition. There are four large white dots inside the Blur Ring, which define the blur transition area. Essentially, the blur transition will be sharper when you move these dots far from the focal point and smoother when you move them closer to the focal point. Clicking and dragging these dots allows you to adjust the blur transition area.
Step 8. You'll see four small dots on the outer ring of your blur preview. Moving your mouse over any of these dots will make your cursor change to a curved arrow.
Step 9. You need to rotate the double-ended arrow clockwise by moving your mouse. This will increase the blur area. Moving the arrow counter-clockwise will decrease the blur area. Alternatively, you can click and drag the Blur Ring line.
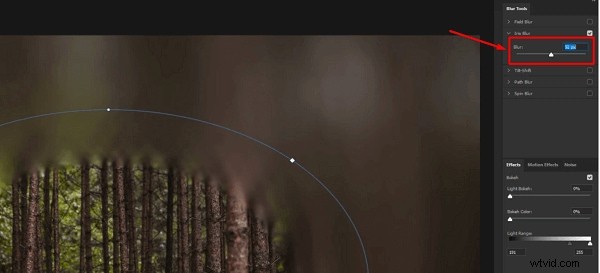
Step 10. Tune the blur amount by using the Blur Knob at the center of the Blur Preview close to the Pin. Rorate the Blur knob counter-clockwise to decrease the blur and move it clockwise to enhance the blur. Alternatively, you can use the Blur Slider found in the Blur Tools panel to adjust the blur.
Step 11. Once you're satisfied with your background, hit the OK button to save your edits.
How To Blur Texts in Photoshop
Photoshop allows you to blur text on your image to hide some information from viewers. All you need to do is follow the steps below:
Step 1. Import the image with the text that you want to blur.
Step 2. Select the Marquee tool.
Step 3. Draw a selection around the text you want to blur.
Step 4. Now, go to Filter and choose Blur. Select the Gaussian Blur option.
Step 5. The Gaussian Blur menu will pop up, showing a preview.
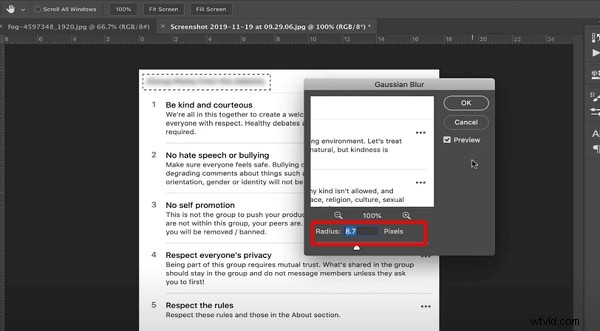
Step 6. Increase or decrease the blur effect in the Radius option.
Step 7. Click on File on the menu bar and select Save As to save your edited image with blurred text.
Part2. Best Alternative Way To Resize Videos With Wondershare
Do you want a simpler solution to blur the faces in your videos? No need to worry, as Wondershare Filmora brings an intuitive and easy-to-use interface that allows you to blur the faces with few clicks. It's one of the most reliable platforms that you can come across to edit and modify your videos. It also offers preset templates and an Instant Mode that can help you create a video from scratch efficiently. Also, it provides fast rendering speed so that you can see your final results instantly.
Get Started for FreeFor Win 7 or later (64-bit) Get Started for FreeFor macOS 10.14 or later
3 Methods To Blur Faces Using Filmora
There are three major and easy ways to blur faces in videos using a desktop app. These methods include using the AI face mosaic, the face-off effect, and motion tracking. In this section, you will discover how to blur people’s faces in videos using both methods.
How To blur faces using the AI Mosaic feature
AI Face Mosaic is a new feature available in Filmora version 14 and above. It helps users quickly apply mosaic coverings to sensitive individuals who should not appear on screen, especially in scenes with multiple people. Let's take a look at the steps to use this feature.
Step 1: Launch Filmora on your PC and go to "More" or select the three dots at the end of the editing options.
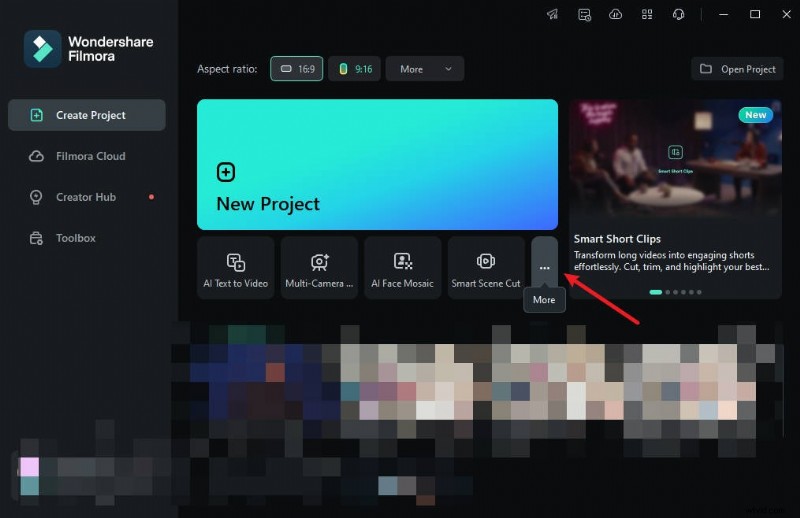
Step 2: Click on "AI Face Mosaic". Then, import your media for editing.

Step 3: Filmora will automatically analyze the video to apply the blurring effect to faces throughout the footage. Once the analysis is done, each face will have the mosaic effect.
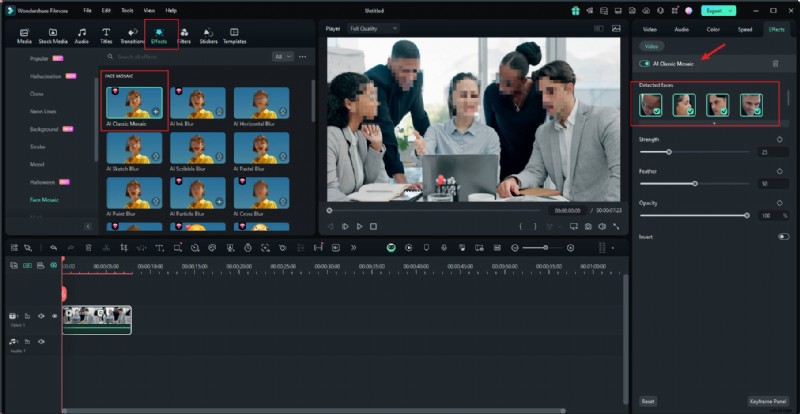
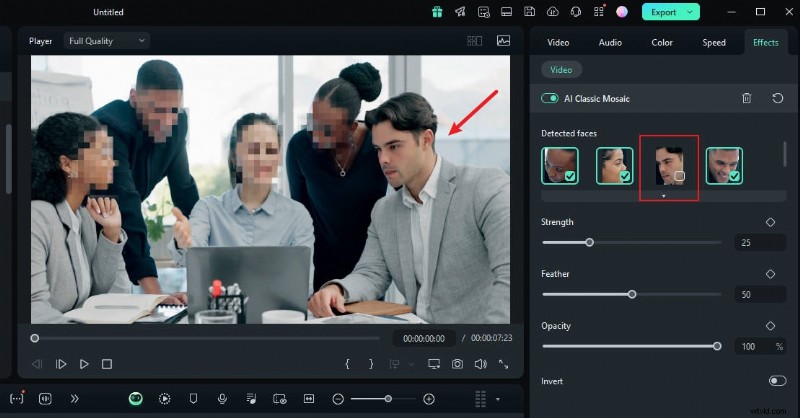
Step 4: To choose a face to remove the mosaic effect, deselect it from the right-hand panel.
Step 5: You can also use the grader to adjust the strength, feather, and opacity of the blur.
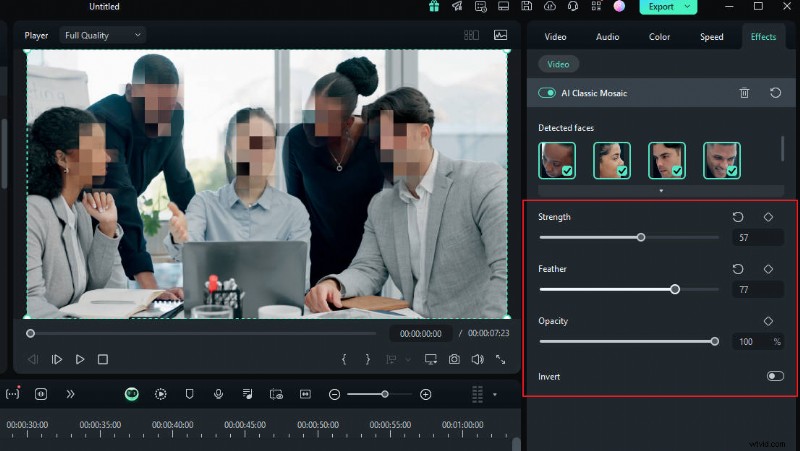
Step 6: You can also invert the mosaic by clicking "Invert". This makes everything else, except the faces, have the mosaic effect.

And that’s it! Once you’re done, preview your video and export it.
To Blur Faces With Filmora
- Blur faces in videos with extensive tools and dynamic interface.
- Motion tracking ensures moving faces stay blurred in every frame.
- AI face mosaic blurs crowds with a single click.
- Apply face-off effect to selectively obscure faces in your video edits.


How To Blur Faces Using the Face-off Effect
Another quick and easy way to blur faces in Filmora is by using effects from the editing suite. You only need to select the face blur effect to add a mosaic to a person's face. Here is how to blur someone’s face in a video using Face-off:
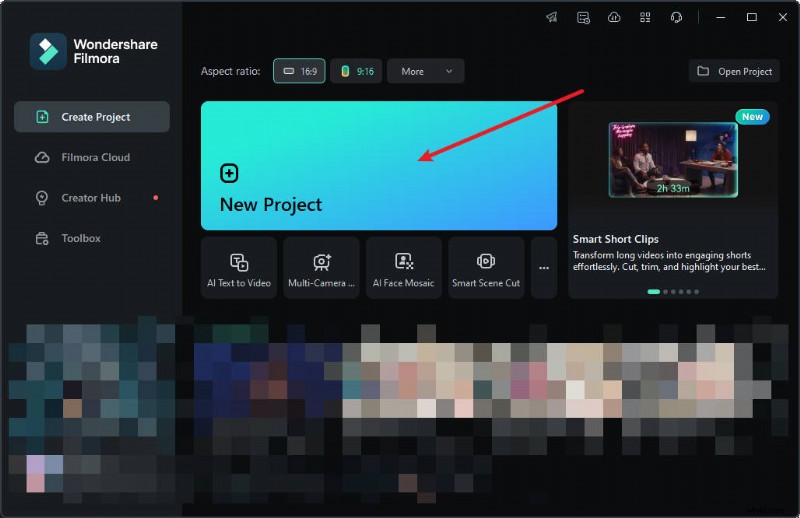
Step 1: Launch Filmora on your PC and click on "New Project".
Step 2: To import your media, drag and drop it into the editing suite or click "Import".

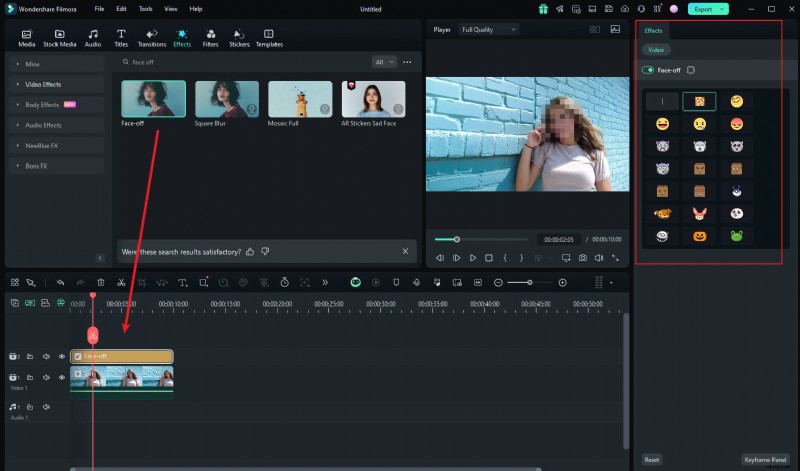
Step 3: Tap "Effects" from the main menu at the top of the suite.
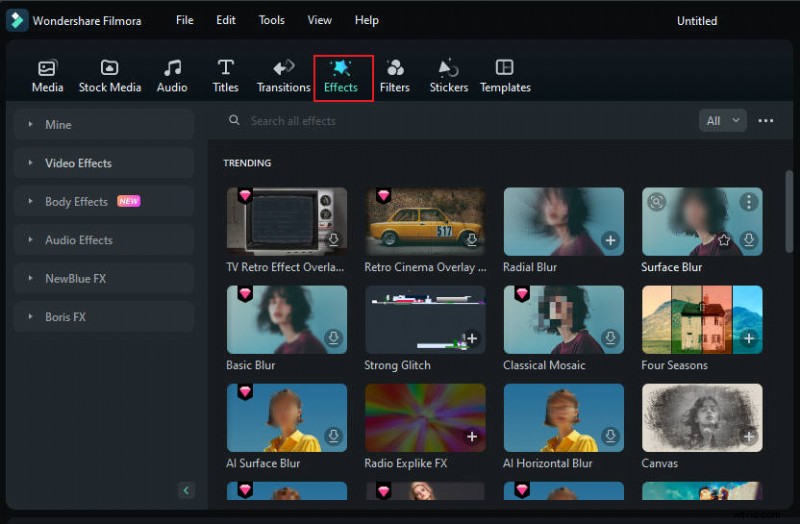
Step 4: If you don't see the Face-off effect on the first effects page, search "Face-off" in the search bar.
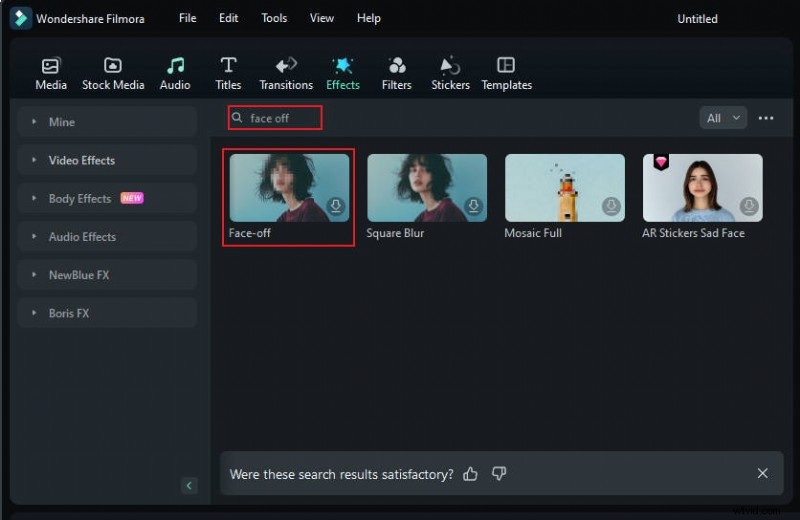
Step 5: Click on the "Face-off effect" to download it. Then, drag and drop it onto your media in the timeline. Next, preview the video to ensure the blur is in the right spot throughout it and export it.
Get Started for FreeFor Win 7 or later (64-bit) Get Started for FreeFor macOS 10.14 or later
How To Blur Faces Using the Motion Tracking
If you want to apply a mosaic to a moving person's face, the motion tracking feature in Filmora is your best choice. Let's take a look at how this feature can be used to mosaic a face.
Step1 Import the Video and Drag It to the Timeline
Once you are done launching Filmora, select "Create New Project". Afterward, import and drop the video into the timeline.

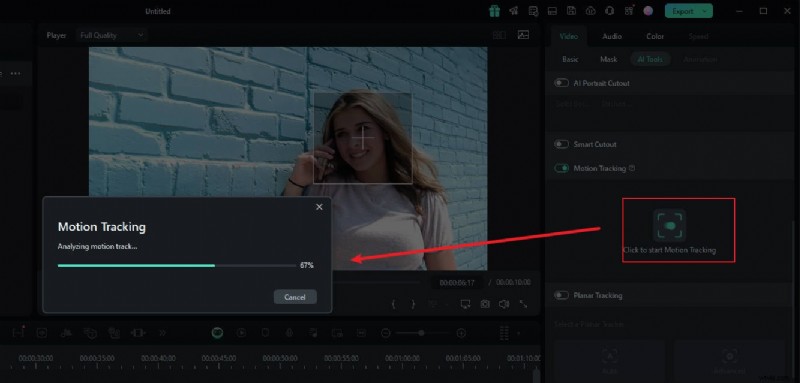
Step2 Adjust the Motion Tracking Space
Now place the play head at the start and proceed with the "Motion Tracking" tool, and adjust the motion tracking space from your preview window.

Step3 Start the Motion Tracking Process
Once done, hit the "Start Tracking" button. Within a few minutes, you will be able to finish this process.
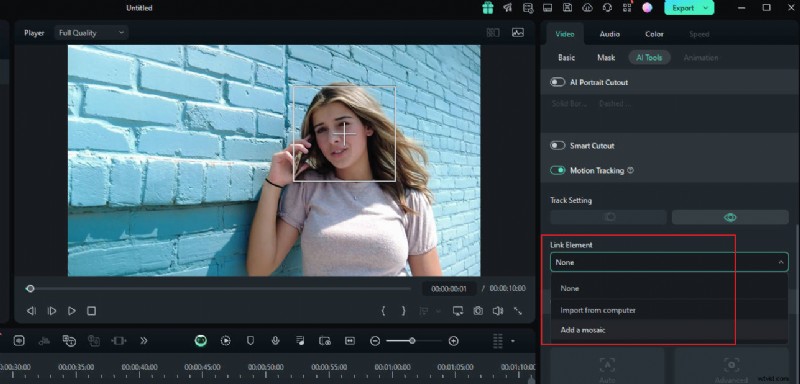
Step4 Customize the Blur Settings
Now, click the video on the timeline. In the pane on the right, under the "link element" option, you can select the overlay element you want, such as an image or mosaic.
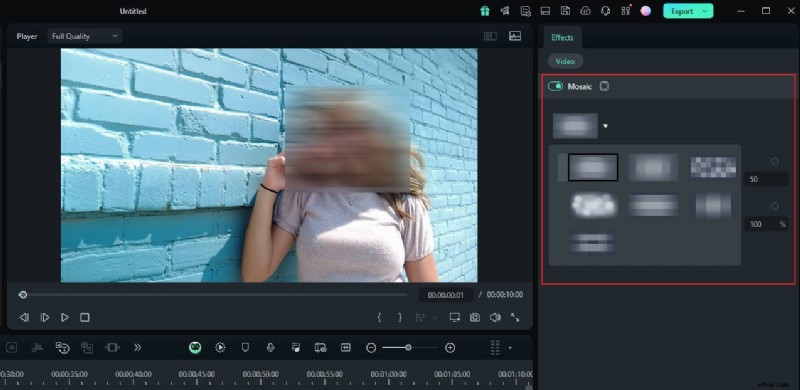
Step5 Choose Mosaic in Motion Tracking
If you choose the mosaic, a mosaic will appear over the person's face. Also, you can change the blur amount and blur opacity. Afterward, adjust the blurred space on your preview window. Once confirmed, you can export the video.
Bounus Part: How to Blur The Flat Surface in Videos
If you want to track planes in a video and apply overlays or blurring, Filmora can help you achieve that. Since Filmora version 14 and later, the Planar Tracking feature allows you to track planes in videos and apply stickers or blurring. Interested in exploring how this feature works? Let's check out the tutorial video below!
Conclusion
Now that you know how to blur faces in Photoshop, you can use it to draw focus to your photos and enhance emotions. This article also introduces three common ways to blur faces in Filmora. If you want to hide anyone's identity or information in a video, you can choose the software you prefer to practice with. However, Filmora is more recommended because its editing features are more beginner-friendly, and its AI functions can make your editing more efficient.
Get Started for FreeFor Win 7 or later (64-bit) Get Started for FreeFor macOS 10.14 or later