Merging video clips might sound simple, but in professional editing, it's essential for creating seamless, story-driven content. Whether you're dealing with breaks, retakes, or multiple angles, learning how to merge clips in DaVinci Resolve is a key skill.
In this guide, we'll walk you through the best ways to merge, combine, and join video clips in DaVinci Resolve—and show you an easier alternative using Wondershare Filmora.
DaVinci Resolve, developed by Blackmagic Design, is a powerful professional video editing tool. If you're ready to merge clips in DaVinci Resolve, here's a simple step-by-step guide.
Step 1
Download DaVinci Resolve
To download DaVinci Resolve, go to the official website and click on the "Free Download Now" button if you wish to use it for free.
Step 2
Import Clips on DaVinci Resolve Timeline
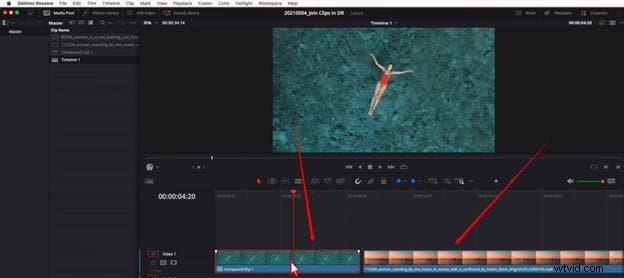
After launching DaVinci Resolve, import two or more video clips into your media pool and drag them onto the timeline.
Step 3
Slide Clips and Select
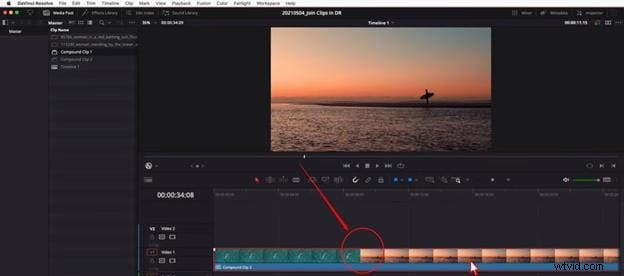
Drag the clips so they sit side by side with no gap in between. Use your mouse to select all the clips you want to merge.
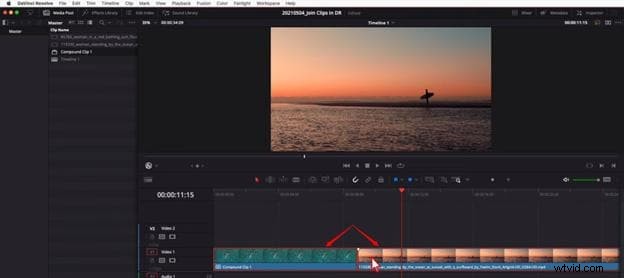
Make sure that all clips are on the same timeline.
Once you have selected all the clips, right-click anywhere on the selection and choose the "New Compound" option from the list of options.
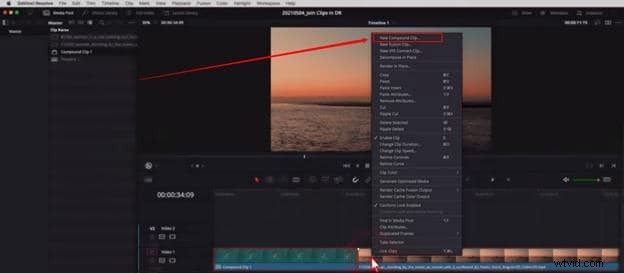
Then rename the clip and hit the "Create" button.
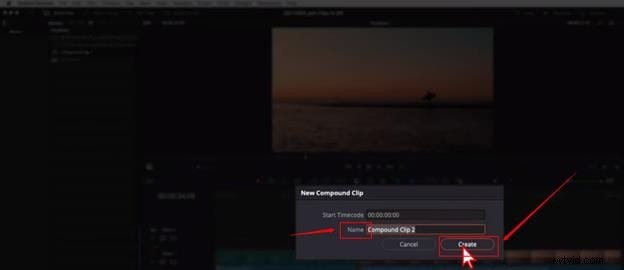
DaVinci Resolve will merge the clips within a blink of an eye.
As you've seen, merging clips in DaVinci Resolve involves just a few steps. However, depending on your editing needs and experience level, the overall process may feel more or less convenient.
Before we explore a simpler option, let's take a closer look at DaVinci Resolve merge clips performance—specifically how it handles merging multiple video files, how user-friendly the process is, and what formats are supported.
Pros & Cons
- Offers precise timeline control, ideal for fine-tuned merging
- Supports compound clips, which allow multiple clips to be treated as one
- High-quality rendering ensures no loss in video quality during merge
- Works well for merging clips in professional workflows, including multicam setups
- Requires multiple steps to merge (select ➝ right-click ➝ compound clip)
- Interface can be confusing for beginners just trying to merge simple clips
- No automatic merge tool like drag-and-drop; every action must be manual
- Needs a powerful system to handle the software smoothly—even for basic tasks
Compatibility
Available for Windows, macOS, and Linux
Price
- Free Version: Fully functional, supports up to 4K output, no trial limits or watermarks
- DaVinci Resolve Studio: One-time purchase of $295 (no subscription), includes advanced features like 8K editing, HDR grading, AI tools, motion blur, and multi-GPU acceleration
Part 2: Alternative Method: Merge Clips in Wondershare Filmora
If you find DaVinci Resolve a bit too complex for simple tasks like merging clips, Wondershare Filmora offers a much more user-friendly alternative. It's designed for users of all levels—from beginners to pros—with an intuitive interface and drag-and-drop functionality.
 Secure Download
Compared to DaVinci Resolve, merging clips in Filmora takes fewer steps and doesn't require technical knowledge. Let's walk through the simple process of combining videos in Filmora.
Step 1
Download and Open Filmora
Go to Filmora's official website and download the latest version for your MAC or Windows.
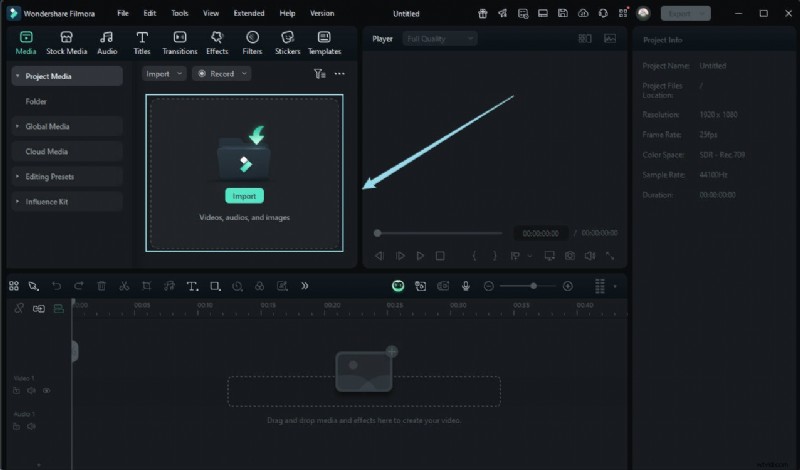
Run the setup and let the system complete the installation. Depending on the version, more or less, the software will look like this as you will open it on your system.
Step 2
Import Your Videos to Merge
Click on the "Import Media Files Here" button to choose the videos you want to merge.
For instance, here, you can see two different video clips on the timeline.

Step 3
Place Videos on the Same Timeline to Merge
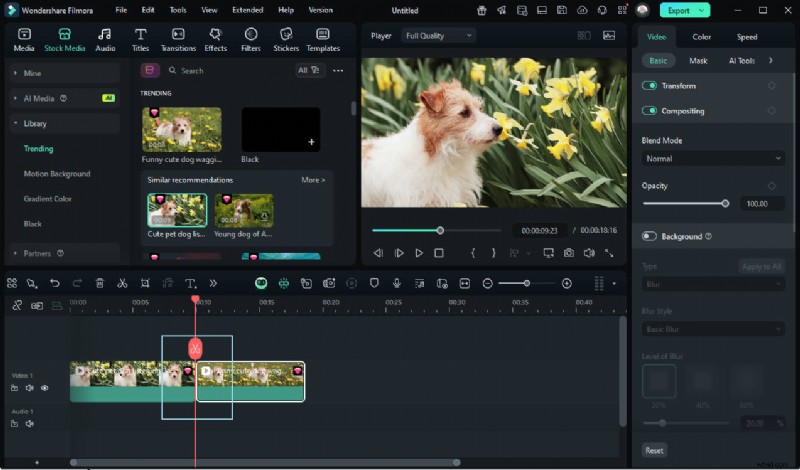
Now that you've imported your video files into Filmora, drag each clip onto the timeline in the order you want them to appear.
Use your mouse to move the clips so they're placed side by side without any gaps between them.
Make sure there's no black space between the clips, or it will appear as a blank transition in your final video.
Once your clips are lined up correctly, you're ready to move on to the final step: exporting your merged video.
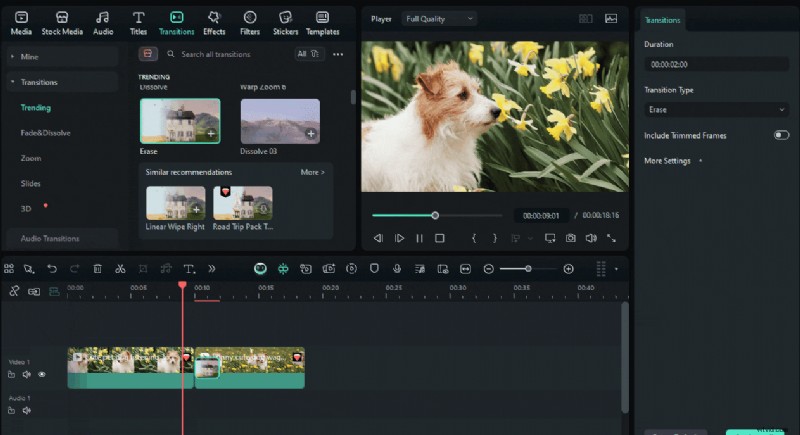
Optional:
To make the transitions between clips smoother, you can add a transition effect. Just go to the Transitions tab, choose a style you like, and drag it between the clips.
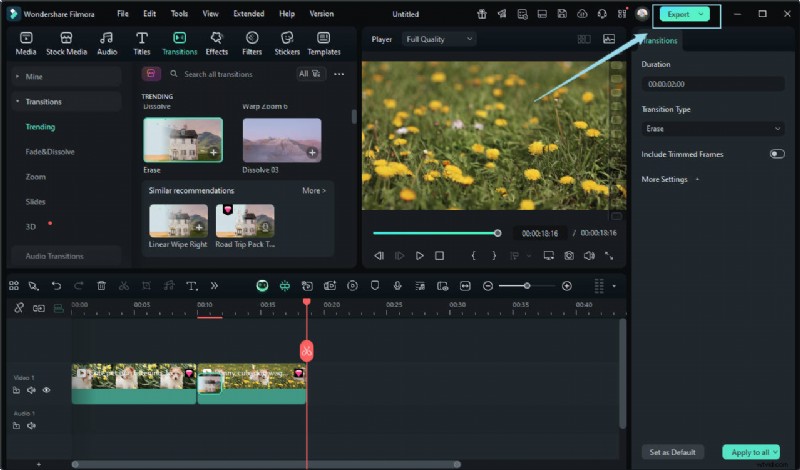
When you are done merging clips on the timeline, click on the "Export" button to save the combined video in your system.
You can merge several clips in just four steps without wasting your time looking around for options and losing the video quality.
Similarly, let's take a closer look at Filmora.
Pros & Cons
- Extremely easy to merge clips with drag-and-drop timeline
- Rich built-in transitions and animated effects for smooth scene changes
- Includes 2,000+ royalty-free assets (titles, stickers, overlays, music)
- Lightweight and runs smoothly on most devices, including mobile
- Some premium templates and effects require subscription or purchase
- May not offer the same precision tools as DaVinci Resolve for complex workflows
Compatibility
Available for Windows, macOS, iOS, and Android
Price
For more details, please visit the purchase page where various pricing plans are available.
Secure Download
Part 3: Comparison Table: Merge Clips & Features
To better understand which software is more suitable for merging clips, here's a side-by-side comparison of DaVinci Resolve and Filmora across a few essential criteria.
| Feature | DaVinci Resolve | Wondershare Filmora |
| Ease of Merging Clips | Requires multiple steps (select → right-click → Compound Clip) | Simple drag-and-drop onto timeline; minimal steps |
| Transition & Effects | Limited built-in transitions; more advanced effects require Fusion | 500+ transitions and 2,000+ templates ready to use |
| Asset Library | Supports OpenFX plugins and Resolve FX filters | Includes royalty-free music, overlays, titles, and stickers |
| System Requirements | High—requires modern GPU, RAM, and fast SSD for smooth performance | Moderate—runs well on average laptops or desktops |
| Compatibility | Available on Windows, macOS, Linux, and iPadOS | Available on Windows, macOS, iOS, and Android |
🟡Summary
- Choose DaVinci Resolve if you're a pro editor looking for precision and advanced workflow control. It excels in post-production depth, even for merging tasks.
- Go for Filmora if you prefer a faster, easier, and more intuitive way to merge clips—with creative templates and smooth export options.

Filmora
AI Video Editing App & Software
Best tool for making videos anywhere for all creators!
Automatically merge video files together without or with transitions.
Common Issues When Merging Clips in DaVinci Resolve
While DaVinci Resolve is a powerful editor, users often face some challenges when merging clips. Here are the most common issues and tips to overcome them:
- Clips must be on the same timeline: Make sure all clips are placed together before merging.
- Avoid gaps between clips: Slide clips tightly to prevent black frames in the output.
- Performance lag: If the software slows down, try closing other apps or use proxy files.
- Correct clip order: Arrange clips in the desired sequence before merging.
- Compound Clip can be undone: Use "Decompose in Place" to separate merged clips if needed.
- File format issues: Convert unsupported files to common formats like MP4 or MOV before merging.
Conclusion
If you are aware of using the software, you can quickly learn how to merge clips in DaVinci Resolve. Undoubtedly, this video editing tool is helpful for professionals, and that is why new users may find it a bit difficult when using it for the first time. Contrarily, Filmora is a friendly video editor, allowing all kinds of users to merge clips quickly.