Do you know what it takes to craft videos that keep viewers glued? The answer lies in meticulous editing. A polished video can elevate a simple moment into an unforgettable experience, leaving a lasting impression. One of the most captivating techniques in the editor’s toolbox is the tilt‑shift effect.
By combining precise cuts, dynamic transitions, and thoughtful effects, you can communicate complex ideas with clarity. Tilt‑shift adds a fresh perspective, sharpening a specific area while gently blurring the rest—creating a miniature, toy‑like illusion that can entertain and inspire.
In this article
- Part 1: How Video Editors Have Evolved Over Time
- Part 2: What the Tilt‑Shift Effect Really Is
- Part 3: Wondershare Filmora—The Beginner‑Friendly Editor
- Part 4: Crafting Tilt‑Shift in Adobe After Effects (Advanced)
- Conclusion
Wondershare Filmora

Part 1: How Video Editors Have Evolved Over Time
Modern editors are far more than simple cutting tools; they are powerful creative suites that streamline every step of production. Key improvements include:
1. Intuitive User Interface
Drag‑and‑drop timelines, contextual menus, and visual feedback make editing accessible to beginners while still offering depth for professionals.
2. Real‑Time Editing and Preview
Instant playback of edits eliminates time‑consuming rendering, accelerating the workflow and allowing on‑the‑fly adjustments.
3. Advanced Tools and Effects
High‑quality color grading, motion tracking, 3D layering, and sophisticated audio mixing empower creators to produce studio‑grade results.
4. High‑Resolution & Multiformat Support
Native 4K, 8K, and wide‑range codec compatibility ensure you can edit the latest footage without compromise.
5. Collaboration & Cloud Integration
Shared projects, version control, and cloud storage make team workflows seamless, regardless of location.
Part 2: What the Tilt‑Shift Effect Really Is
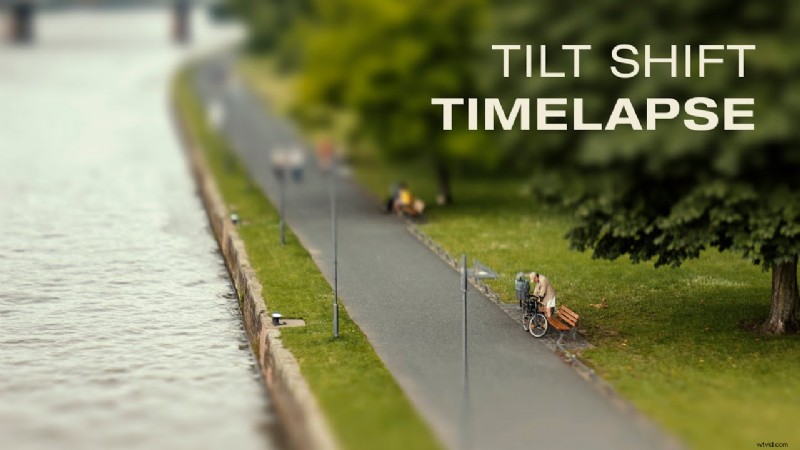
The tilt‑shift effect simulates a shallow depth of field, producing a miniature aesthetic by selectively blurring portions of a frame while keeping the focus area sharp. Originally achieved with a specialized lens in photography, it is now a staple in video editing for its playful, dreamlike quality.
Typical use cases include architectural shots, bustling cityscapes, music videos, and narrative scenes that benefit from a whimsical touch.
Part 3: Wondershare Filmora—The Beginner‑Friendly Editor
Filmora offers a straightforward path to adding tilt‑shift. Follow these concise steps:
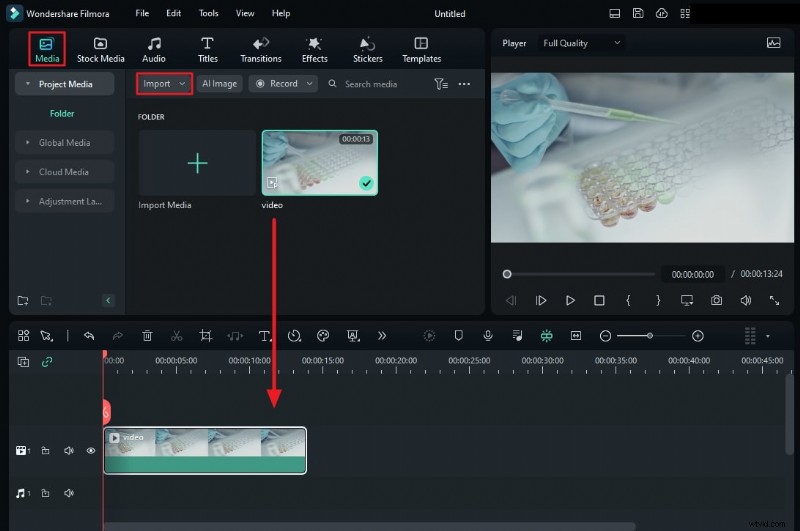
Step 1: Start a New Project
Open Filmora, create a new project, and import your clip. Drag the file onto the timeline.
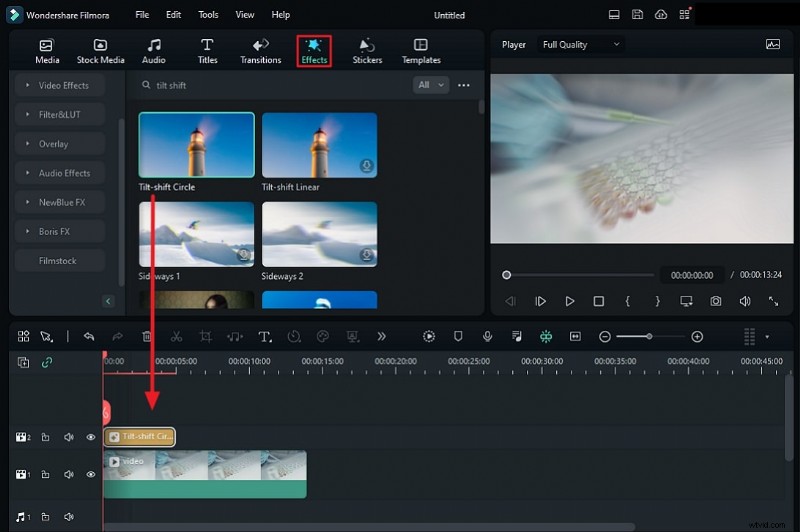
Step 2: Locate the Effect
Search for “Tilt‑Shift” in the Effects panel. Double‑click to preview and choose the style that suits your vision.
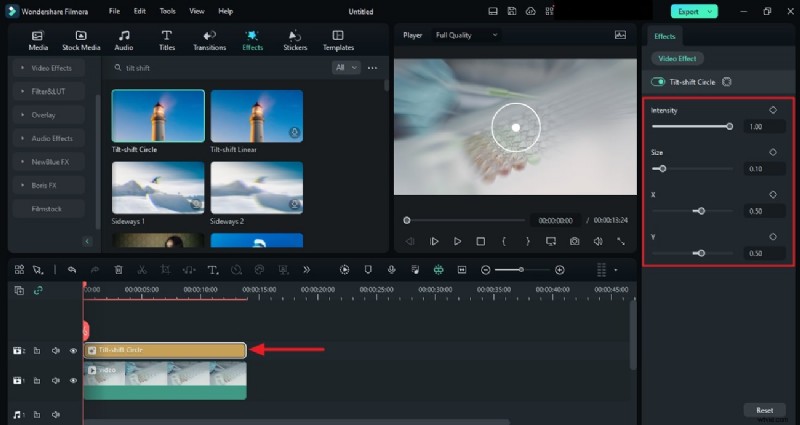
Step 3: Apply & Fine‑Tune
Drag the effect onto your clip, match the duration, and double‑click the effect layer to open the adjustment window. Modify Intensity, Size, and X/Y scales to position the focal zone. Save when satisfied.
Part 4: Crafting Tilt‑Shift in Adobe After Effects (Advanced)
For those seeking granular control, After Effects offers a robust workflow. Below is a step‑by‑step guide—note that it requires familiarity with layers and keyframes.
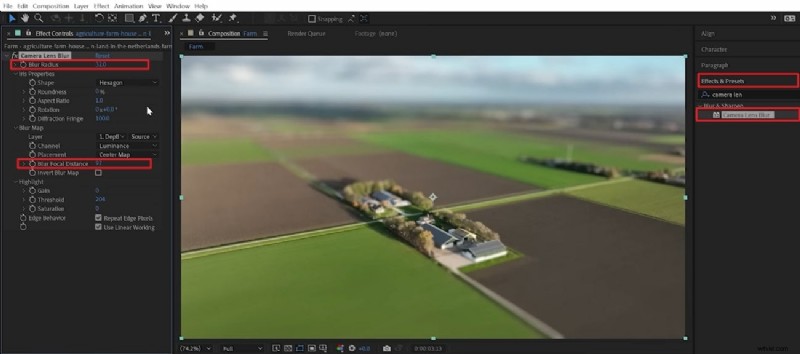
Step 1: Import & Apply Camera Lens Blur
Load your footage, then add the “Camera Lens Blur” effect. Increase Blur Radius and set the Blur Focal Distance to target the desired focus plane.
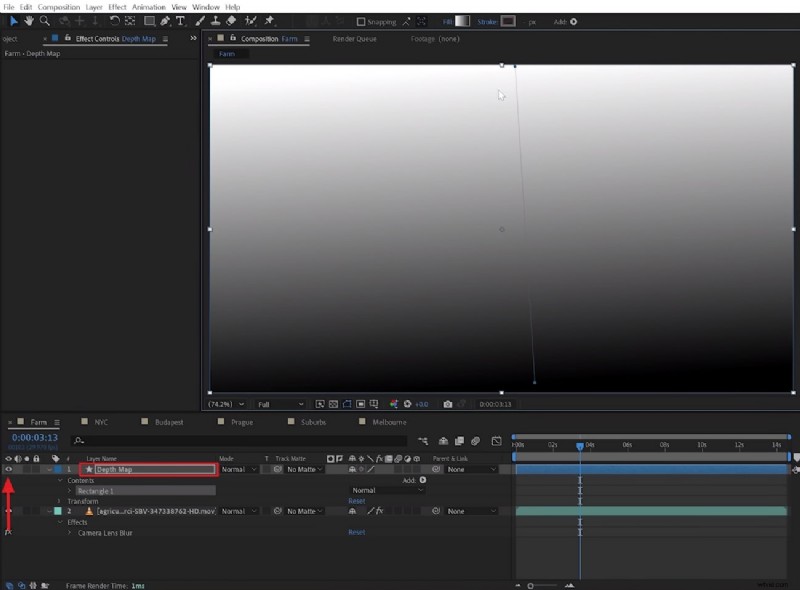
Step 2: Create a Depth Map
Unhide the Depth Map, use the Gradient Controls to align a linear gradient with the horizon, and shape the mask with the Pen Tool.
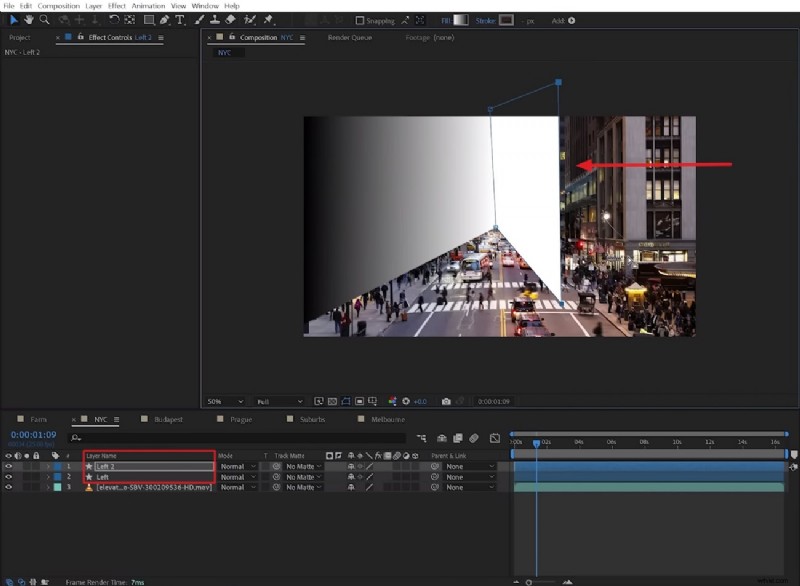
Step 3: Duplicate & Refine the Mask
Duplicate the shape across the frame, adjust anchor points, and rename layers for clarity. Position the preset beneath your footage and hide the layer to keep the timeline clean.
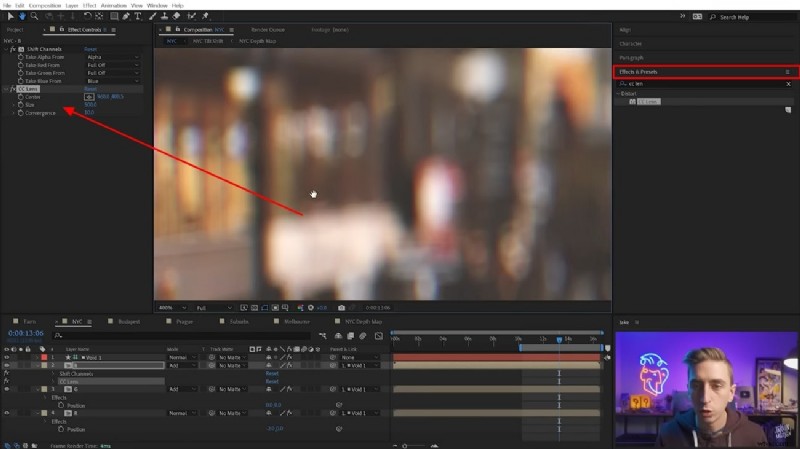
Step 4: Finalize the Blur Map
Assign the custom depth map to the Blur Map source in Camera Lens Blur. Tweak additional parameters for the desired depth of field.
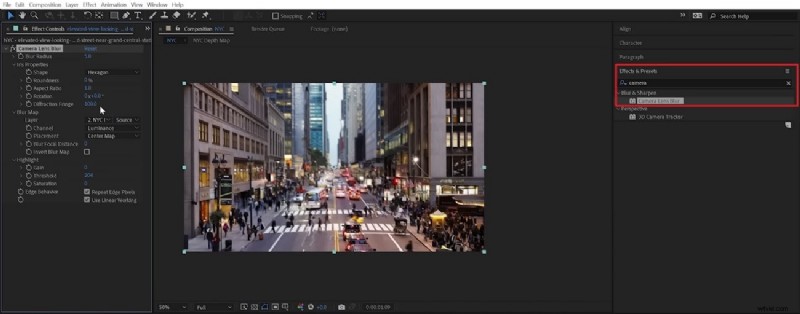
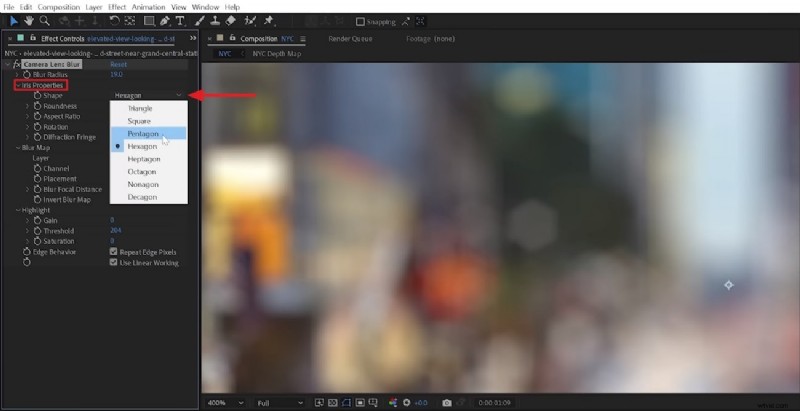
Step 5: Adjust Bokeh Shape (Optional)
Within the effect, modify the Iris Properties “Shape” to match your creative vision.
Step 6: Color Grade & Export
Add a color grading effect, choose a preset or create your own look, then render the final composition.
Conclusion
Elevating a video’s visual impact is as much an art as it is a technical skill. Tilt‑shift offers a distinctive, engaging look that can transform ordinary footage into something memorable. Whether you’re a beginner using Filmora or an advanced editor in After Effects, mastering this effect can set your work apart. Start experimenting today and watch your stories gain a fresh, miniature flair.