How to Perform a Magic Portal Effect
Elevate ordinary fight scenes with a dramatic portal transition. By following a few straightforward steps, you can add a cinematic, anime‑style flair that captivates viewers.
Tools Needed
Transcript
00:38 – Record Two Footage Sequences
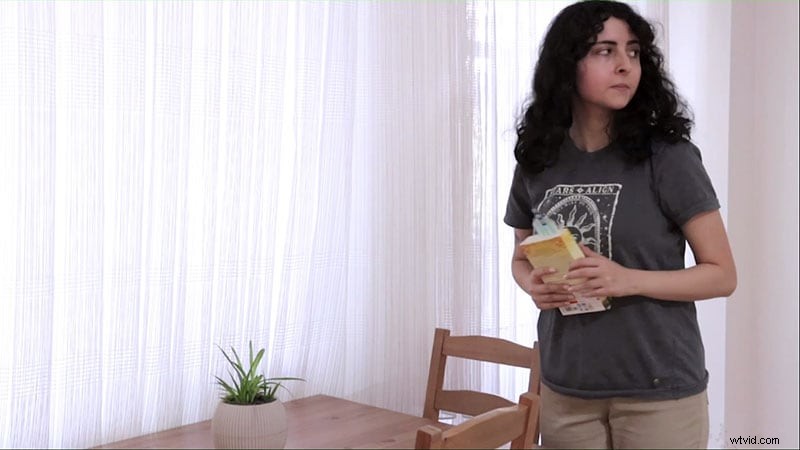
- Video 1: Capture a 10‑second empty set. Walk through the frame, act as if you’ve lost something, then execute a portal opening and jump toward the point of entrance.
- Video 2: Begin in a new location. Record another 10‑second empty shot, approach the corner, perform the jump, and reveal the sought object.
Ideally shoot in the afternoon using LED or artificial lighting to maintain consistent exposure.
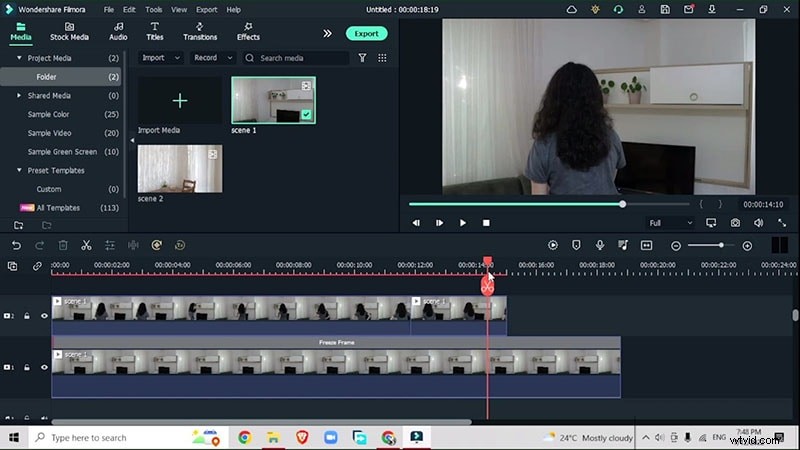
01:38 – Prepare the Shots
- Select the empty shot, right‑click to adjust speed, and insert a freeze frame. Extend the freeze frame duration as needed.
- Place the second clip above the first on the timeline and align the freeze frame to the jump moment.
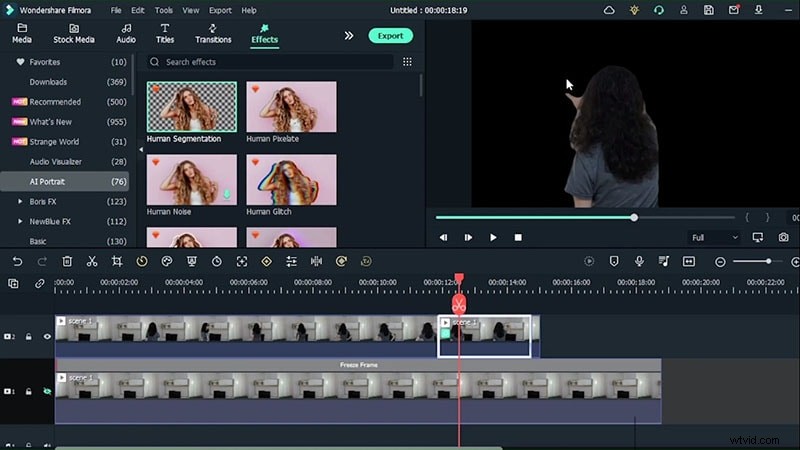
02:03 – Apply Human Segmentation
- Navigate to Effects > AI Portrait > Human Segmentation and apply it to the middle track. Hide the original layer to isolate the subject.
- Shift the second track upward to position the portal beneath the subject.
02:38 – Insert a Portal Element
- From Elements > Superhero, choose a cinematic portal effect and place it underneath the subject video.
- Synchronize the element’s onset with the subject’s hand motion. If the portal opens from a different side, double‑click the element and flip it horizontally.
- Fine‑tune scale and position to match the scene.
02:54 – Refine the Segmentation
- Increase the feathering slider in the segmentation settings for a smoother edge.
03:32 – Animate the Transition
- Track the portal’s movement from point A to point B. Add a freeze frame at the jump and align it with the portal.
- Animate the freeze frame’s size to mimic portal expansion.
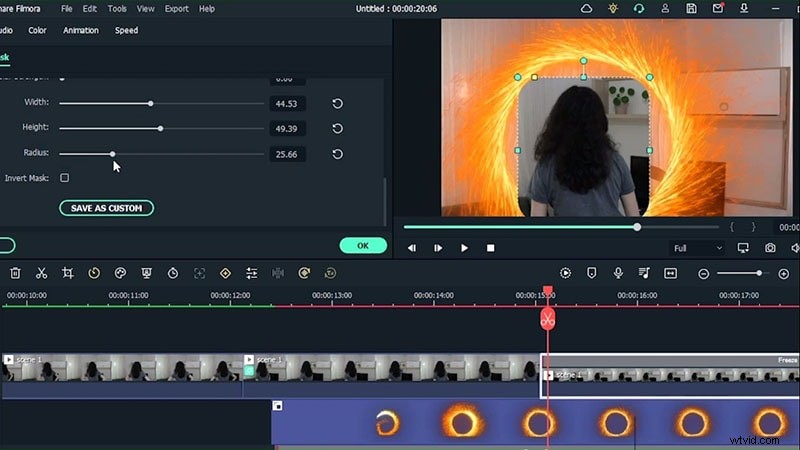
04:01 – Mask and Blur the Freeze Frame
- Create a circular mask around the freeze frame footage. Adjust the blur strength to match the portal’s edge.
- Keyframe the mask’s rotation and scale during the portal’s opening.
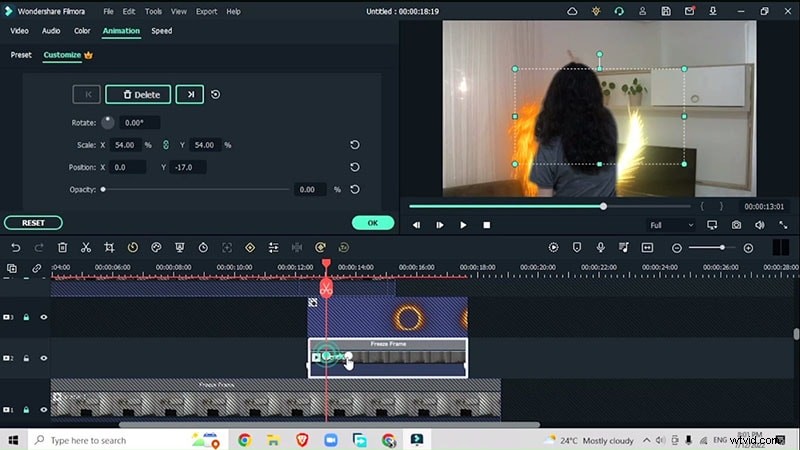
04:24 – Control Opacity
- Set a keyframe at full portal visibility, then fade out by reducing opacity to zero. Adjust scale X and Y for natural motion.
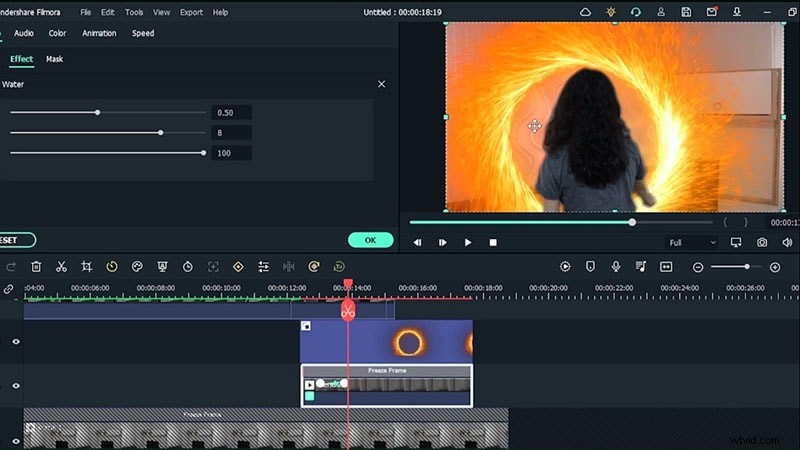
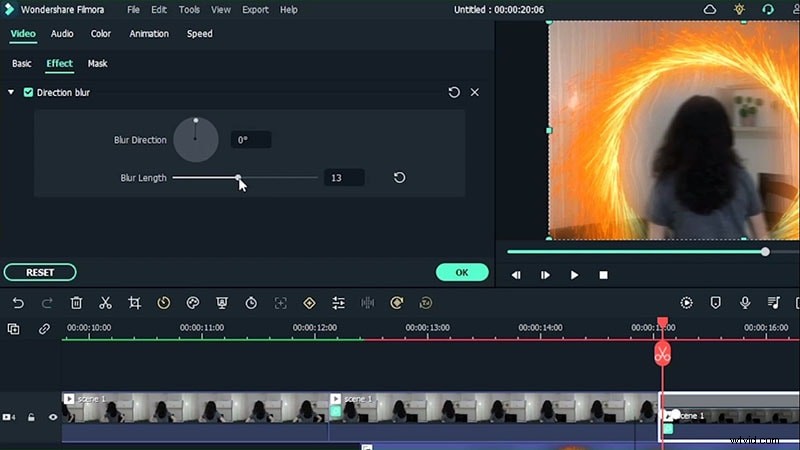
05:02 – Enhance with Water and Directional Blur
- Add the Water effect to the freeze‑frame clip. Use the intensity sliders for depth.
- Apply Directional Blur to simulate motion into the portal. Increase blur length and adjust direction.
06:00 – Animate Subject Entry
- Mask the subject with a rectangle. Increase radius and blur to blend with the portal.
- Keyframe scale down and slide the subject toward the portal’s center. Reduce opacity to create a fade‑in effect.
06:22 – Duplicate for the Second Scene
- Repeat the freeze‑frame, mask, blur, and animation steps for the second video.
- Use the human segmentation effect to reveal the portal from behind.
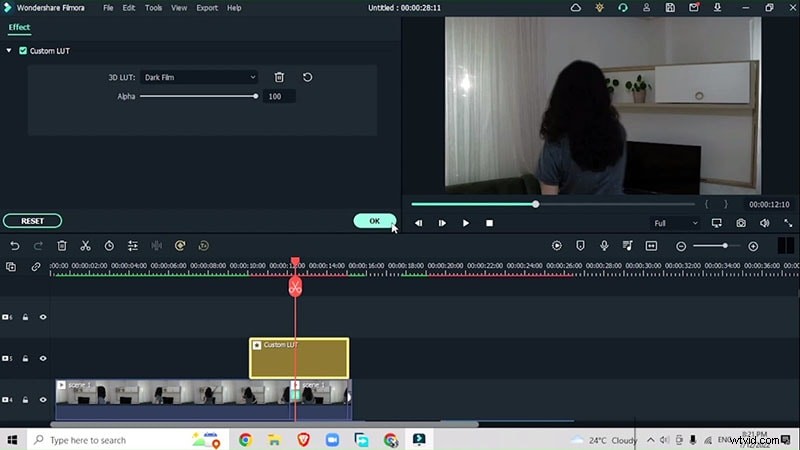
07:26 – Speed Ramping and Color Grading
- Speed ramp the portal to close more quickly, creating tension.
- Apply a LUT – Dark Film to unify color tones across the composition.
With these steps, your final edit will showcase a seamless, cinematic portal transition that elevates any video project.
How to Make Magic Portal Effects
Preparation
- Computer running Windows or macOS.
- Two video clips: one empty set, one with the subject.
- Filmora Video Editor (latest version).
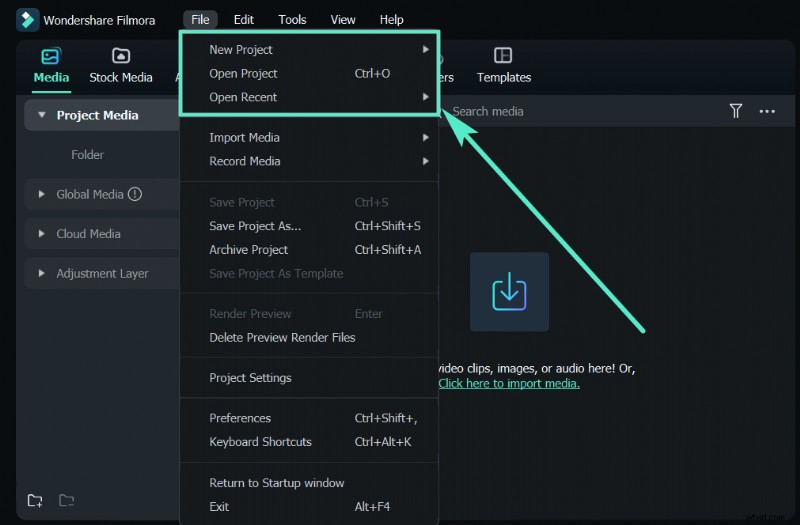
Step 1: Download and Install Filmora
Begin by installing the most recent Filmora release on your OS. Filmora supports both Windows and macOS.
Step 2: Record the Videos
Follow the recording guidelines described above: a 10‑second empty shot, a jump, and a portal reveal in both locations. Shoot in the afternoon with LED lighting for optimal exposure.
Step 3: Import the Videos
Drag both clips into Filmora’s timeline, stacking the empty shot below the action clip.
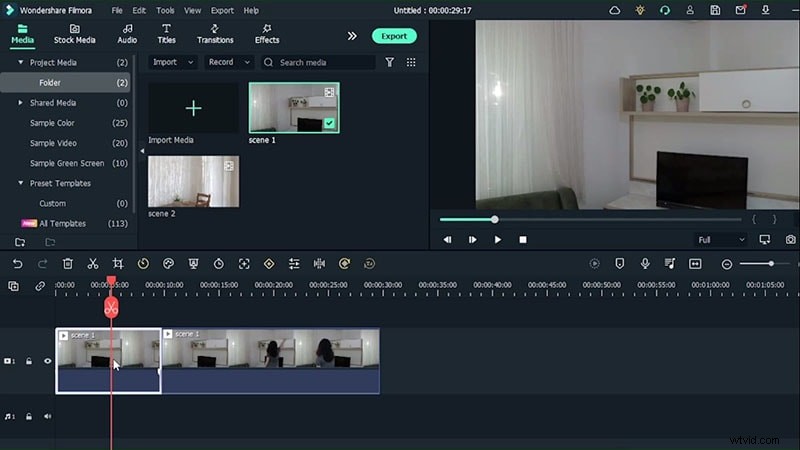
Step 4: Add Freeze Frames
Apply a freeze frame to the empty shot and adjust its duration. Place the second clip on the top track and split it at the jump point, positioning the freeze frame beneath.
Step 5: Apply Human Segmentation
Go to Effects > AI Portrait > Human Segmentation and apply it to the segment where the portal will appear. This isolates the subject from the background.
Step 6: Insert a Portal Element
From Elements > Superhero, choose a cinematic portal element and place it beneath the subject track. Match the hand motion and flip the element if necessary.

Step 7: Mask and Animate
Align the second clip below the element, add a freeze frame, and create a circular mask that follows the portal. Adjust blur and keyframe rotation and scale.
Step 8: Add Water and Directional Blur Effects
Apply the Water effect to the freeze frame and adjust intensity. Use a rectangle mask for the subject, then add Directional Blur to simulate motion.
Repeat these steps for the second video, adding human segmentation to view the portal from behind and adjusting speed ramping for a faster portal closure.
Step 9: Color Grading
Finalize with a LUT – Dark Film to unify color tones across the footage. Tweak intensity until the palette feels cohesive.
Export your project once the portal effect seamlessly integrates with the narrative.
Summary
Magic portal effects transform standard videos into immersive, engaging experiences. By leveraging Filmora’s AI tools, masking techniques, and color grading, you can craft a professional‑grade portal transition that captivates viewers and boosts engagement.