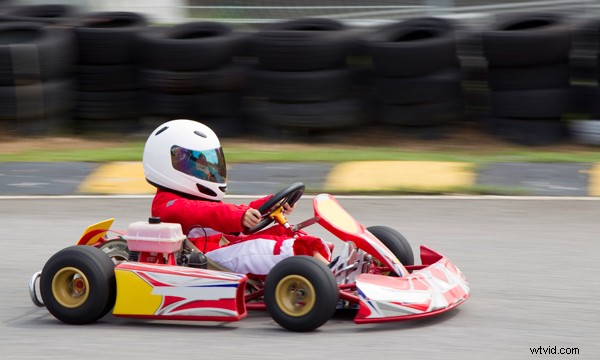
Did you ever wonder how professional photographers manage to capture a fast-moving subject with an amazing blurry background? There’s no magic trick to this, it’s just a really cool technique called panning which takes a little practice, but once you’ve cracked it, your photos will look more professional too! In this tutorial you’ll discover how to use the panning technique yourself, freezing fast moving subjects while getting a gorgeous, blurry background that helps your subject stand out much better.
What Is Panning?
Panning is a popular professional photography technique which involves tracking a moving subject with your camera before, during and after taking the photo.
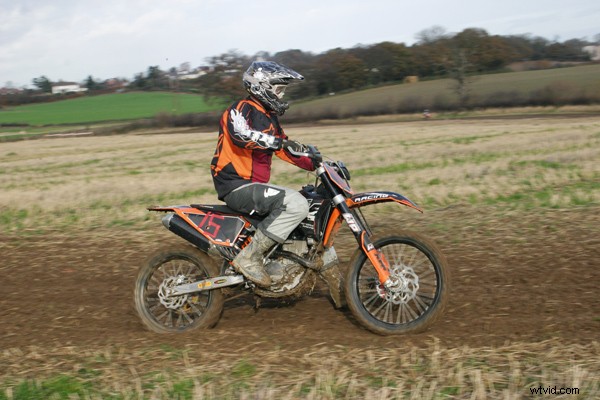
Any moving subject can be photographed using the panning technique, but the faster the subject is moving the easier it is to get a more blurry background.
Perfect subjects include most action sports, cyclists, skateboarders, kids or pets running around, moving traffic, trains or boats, and anything that’s moving in a continuous direction or trajectory.

To execute the technique perfectly, you match the movement of the camera with the motion of the moving subject. By keeping the camera moving, rather than stationary, the difference in motion between the subject and the camera is kept to a minimum, but the difference in motion between the camera and the background is maximised. This results in better subject sharpness, and increased background motion blur.
How To Pan: Step By Step
The panning technique is a lot like a golf swing. Even if you’ve never played golf, you would know that a golfer starts the swing with the golf club a long way behind the ball and finishes the swing with the club in front of where the ball was. The golfer doesn’t start or finish the swing where the ball was.
It’s the same with panning. You start panning well before the point where you want to photograph your subject, and you continue panning after you’ve pressed the shutter button.
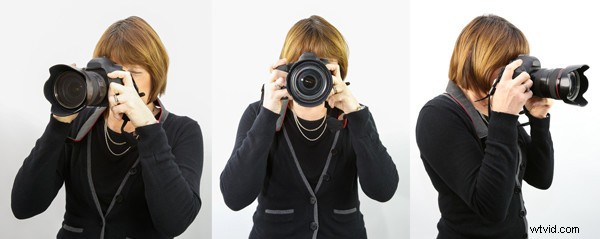
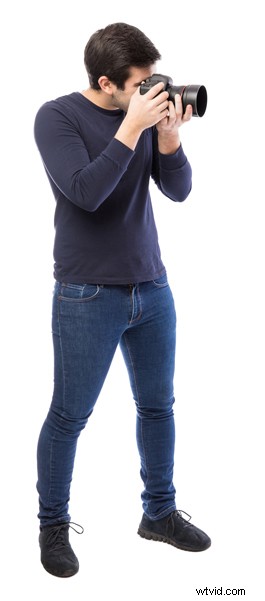
Another important aspect of the panning technique is a good, steady posture which supports your camera well, preventing it from bobbing up and down as you follow your subject. The man in the photo below has a good posture which would produce good results.
Let’s look at the exact steps you should take when panning, starting with choosing the right camera settings.
1. Frame Your Shot, Noting The Selected Focal Length Of Your Lens
Great panning shots depend on a good choice of shutter speed. What you’re after is a fast enough shutter speed to freeze the subject, but a slow enough shutter speed to blur the background.
In order to identify a good shutter speed, it’s important to know what focal distance you’ll be shooting at.
The best way to discover this is to point your camera at the point in the scene where you’d like to take the shot. Then, zoom in or out until you’re happy there’s enough room for your subject in the frame. Now, make a note of your lens’s focal length, e.g. 200mm.
2. Select Your Camera’s Continuous Shooting Mode
When panning, there’s no harm in capturing more than one shot. In fact, it’s a good idea. Also, there’s a danger with one-shot or single shooting mode that you’ll press the shutter too early, and have to press the shutter again, by which time it may be too late.
Choosing your camera’s continuous shooting mode means that even if you do press the shutter button too early, you can just keep the shutter pressed down and know you’re likely to get the shot.
3. Select Your Camera’s Continuous Auto-Focus Mode
Your choice of auto-focus mode is important too. Because your subject is moving, choose an auto-focus mode that will continuously re-focus on your constantly-moving subject.
On a Canon DSLR or Mirrorless camera look for AI-SERVO.
On a Nikon camera look for Continuous/AF-C.
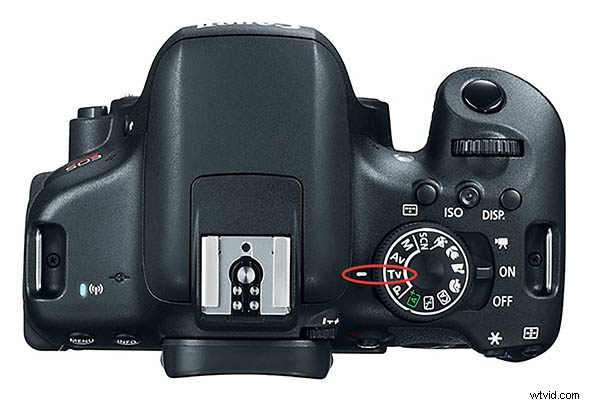
4. Select Your Camera’s Shutter Priority Mode
In order to specify the shutter speed you want to use, you must first select your camera’s Shutter Priority Mode.
On a Canon camera look for TV mode.
On most other brands of camera, look for S mode.

5. Choose A Shutter Speed Close To 1 / Focal Length
Remember you made a note of the focal length in step #1? Now you need to use this value to help you choose the shutter speed you’re going to use.
The shutter speed you should choose will be as close to 1 / focal length as possible. So, if your focal length from step #1 was 200mm, you’ll want to choose 1/250s.
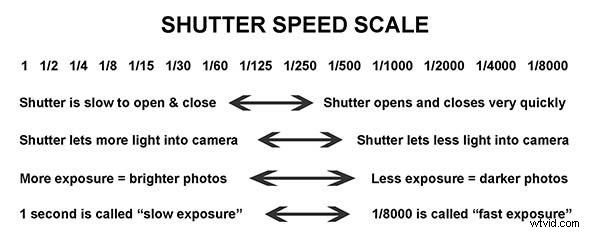
This shutter speed is a good starting point as it should be fast enough to freeze your subject, but slow enough to blur the background.
6. Stand With Your Legs A Shoulder’s Width Apart
Having a good stance when panning is very important. It helps you hold the camera steady and ensures a nice smooth panning motion.
Make sure your feet are pointing approximately towards where you think you’ll be pressing the shutter button.
Check that you have free movement of your upper body, so you’ll be able to follow the subject’s movement without your arms being obstructed.
7. Find Your Subject Through The Lens
Pick your subject up in the viewfinder well before it arrives where you intend to press the shutter button, and start following it.
8. Half-Press The Shutter Button
Again, well before your subject reaches the point where you want to take the photo, half-press the camera’s shutter button. This tells the camera to start focusing on the subject. Because you chose a continuous auto-focus mode earlier, the camera will continue to focus on the subject from now on.
9. Follow Your Subject’s Motion
Keep following your subject’s motion smoothly, in a horizontal position. If the subject is also moving vertically – e.g. jumping – ignore the vertical motion, just follow the horizontal motion.
10. Fully Press The Shutter Button
When your subject arrives at the position you want to take the photo, fully press the camera’s shutter button, but don’t stop the smooth horizontal panning motion. Keep the camera moving smoothly.
11. Stop Moving Your Camera
Now, just a second or two after you’ve taken the photo, or when you run out of room and can’t physically keep tracking the subject, you can stop the horizontal panning motion.
12. Check Your Results & Adjust Your Settings
Now that you’ve captured your first panning shot, check whether the subject is sufficiently sharp, and that the background is sufficiently blurred.
If the subject isn’t sharp enough, increase your shutter speed, and jump back to step #6.
If the background isn’t blurry enough, decrease your shutter speed, and jump back to step #6.
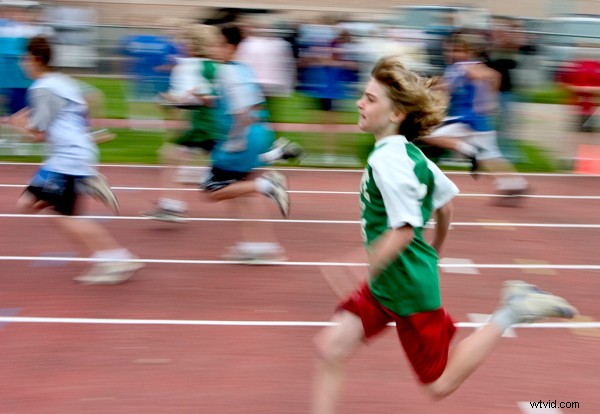
Finally, don’t be afraid to have parts of your fast-moving subject appear a little blurry. As the example below shows, this can emphasize the motion and speed in a visually powerful way.
To achieve this look, simply decrease your shutter speed until you get the result you want.
Summary
To recap this tutorial, panning is a photography technique which helps you capture your fast-moving subject by matching its movement, using a shutter speed which freezes the subject, but blurs the background, emphasizing the subject in the process.
As you’ve discovered, there are several distinct steps which help you get the right camera settings. These can seem daunting at first, but with practice, they’ll become second nature and you’ll be able to pay more attention to the panning technique itself, tracking your subject with a smooth, horizontal motion.