In this night photography guide we’ll go over the best night photography settings to elevate your photography.
Over the years of I have learned to love night photography. If you’re new to photography night photography can be difficult to learn.
Since there is less light for the camera to capture you’ll be tested to know your camera and settings. I have put together a list of night photography tips that will help improve your photography.
If you’re a visual learner you’ll see a video of my low-light photography tips below. I show you how to take pictures at night handheld or using a tripod.
Of course we’re going to go over step-by-step settings for night photography in this article so let’s hop into my best night photography tips:
- Night Photography Camera Settings
- 1. Use a Tripod or Support Your Camera on the Ground
- 2. Set Your Camera to Aperture Priority Mode
- 3. Manually Set your ISO between 100 and 1600
- 4. Set Your Aperture Low (f/2.8-f/5.6)
- 5. Set Your Shutter Delay to 2 Seconds
- Night Photography Gear
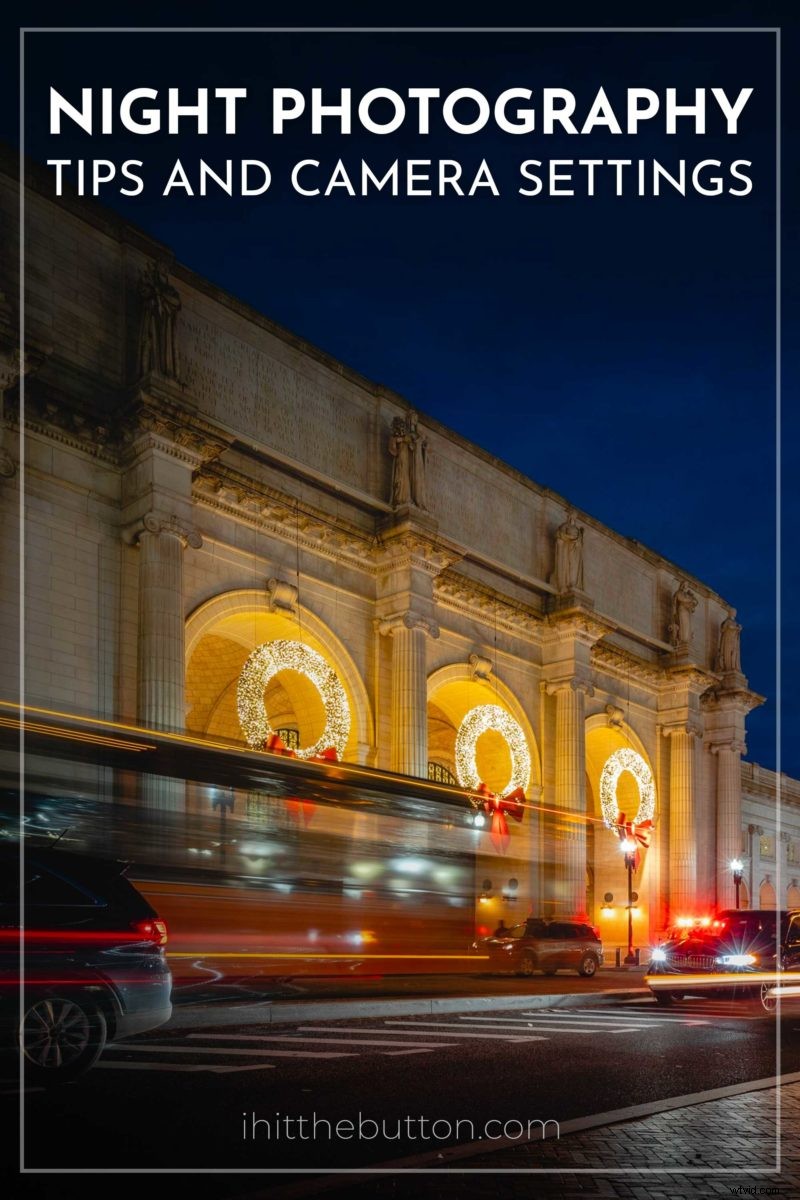
- Example of Night Photography with Settings
Night Photography Camera Settings
Here’s the step-by-step settings for night photography. Including using a tripod, camera settings, and tips.
1. Use a Tripod or Support Your Camera on the Ground
Using a tripod or finding somewhere to sit the camera securely is essential to crisp pictures at night. Your camera will be capturing an image for multiple seconds so you will need to keep the camera steady so holding the camera isn’t an option.
Luckily there are plenty of affordable tripod options that range in size and quality.
If you’re looking for a bigger tripod you can pick up a decent one on Amazon for around $50.
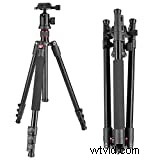 Neewer Alluminum Alloy 62"/158cm Camera Tripod with 360...
- Quick shoe leg locking, giving a more convenient leg handling
But if you don’t want to carry a large tripod I highly recommend the Manfrotto Pixi Evo 2. I usually have this on the side of my backpack and it barely takes up any room.
Sale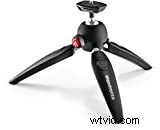 Manfrotto MTPIXIEVO-BK, PIXI EVO 2-Section Mini Tripod for...
- VERSATILE: You can use it with your entry-level DSLRS and devices up to 2.5Kg
Once you have mastered using a tripod you can look into more lightweight solutions like the MeFoto Globetrotter Carbon Fiber. Higher quality tripods typically are lighter and support larger cameras/lenses. If you are shooting with a large telephoto lens you should look into the maximum load weight of the tripod you’re thinking of purchasing.
If you don’t have a tripod you can always find a ledge to sit your camera on. I often just sit my wallet underneath my lens and sit the camera on the ground.
Additionally if you’re a Peak Design fan like me you can also check out the Peak Design Travel Tripod. It’s one of the smallest tripods you can get which makes it easy to put in a bag.
Now let’s get into what settings our camera needs to be for night photography.
2. Set Your Camera to Aperture Priority Mode
My favorite mode for night photography is aperture priority. Aperture Priority mode will lock your lens aperture to a specific f-stop. The label for Aperture Priority mode is different on brands but it’s usually (AV) on Canon or (A) on Sony and Nikon.
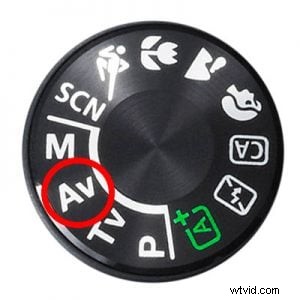
After learning how to use Aperture Priority you should switch to using full manual but I think this is a great way to learn the camera’s settings initially. This basically will lock your aperture to a specific f-stop and the camera will automatically figure out the rest of the settings.
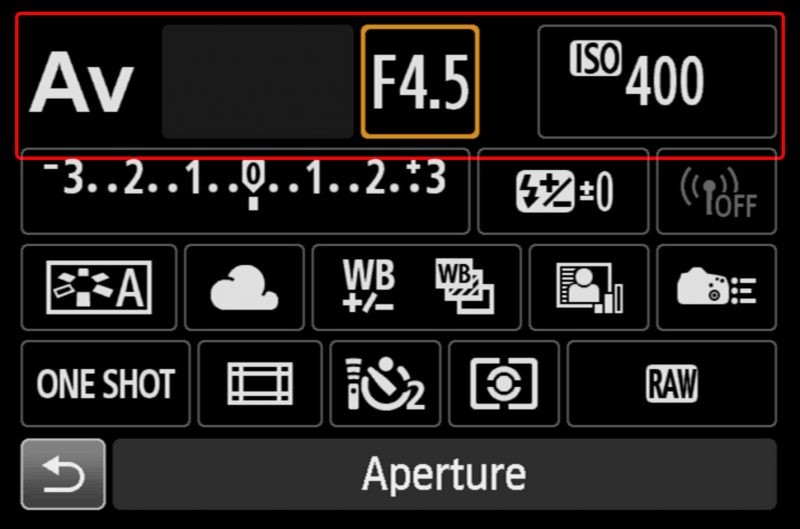
Next we’ll need to set our ISO manually in Aperture Priority to reduce noise.
3. Manually Set your ISO between 100 and 1600
Since you’re going to be using Aperture Priority mode your camera will automatically set the shutter speed and ISO. This won’t work for night photography since you want to get a clean noise-free image. To achieve this you’ll have to set your ISO manually. This is one of the most important camera settings for night photography since this will enable you to take sharp images at night.
You’ll want to set your ISO on the lower end to reduce grain. Anything between ISO 100-1600 will give you a crisp image while taking photos at night. All camera’s noise levels differ so if your photo is grainy you should lower the ISO.
Next we’ll need to set our camera’s aperture.
4. Set Your Aperture Low (f/2.8-f/5.6)
Aperture Priority mode lets you set your aperture to a specific f-stop. Going as low as your lens can go is a good idea, so if you have the kit lens it’ll be around f/3.5 but anything below f/5.6 will do fine.
The lower you put the f-stop the more light you will let in which is essential for night photography. Also note that the lower your f-stop is the shallower your depth of field will be. So if your photo comes out blurry make sure it’s correctly focused.
You can also play around with increasing your f-stop to f/8 to achieve sharper photos with a larger focal plane as well.
Your camera will automatically set the shutter speed once you have set your f-stop and ISO. If you slightly press down your shutter button your camera should show you the shutter speed it’ll use for the photo. This is how long the camera will open the shutter for.
Now we’ll want to reduce shake by adding a shutter delay before taking our photo.
5. Set Your Shutter Delay to 2 Seconds
You could buy a remote control to trigger your camera to reduce shake but I recommend just setting a 2 second timer. This adds a 2 second delay so your camera doesn’t shakes from when you hit the shutter release.
Additionally if your camera or lens has stabilization, it’s recommended to disable that as well. If you’re using a tripod with stabilization on your camera/lens it will add a slight movement.
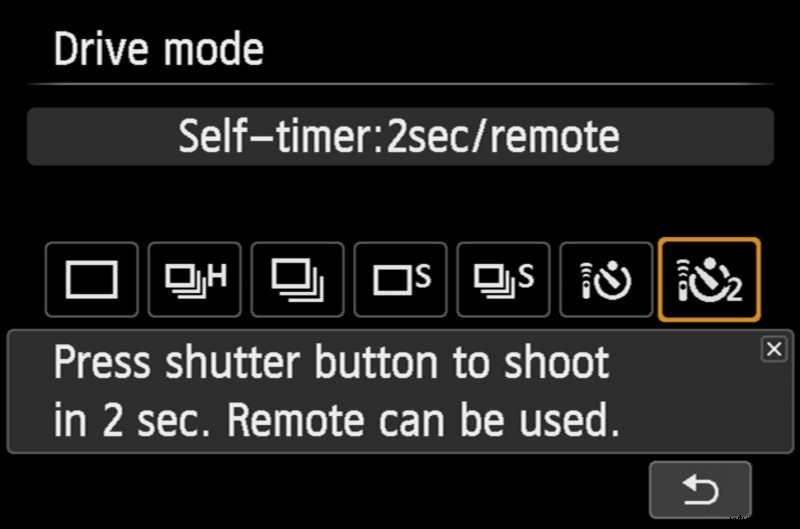
Using the 2 second delay is a convenient way to make sure your camera isn’t shaking without needing extra equipment like a remote.
 Pin
Pin
 Pin
Pin