In this video tutorial, find out everything you need to know to build a studio flat from the ground up for your next film or video project.
Building a studio flat to replicate a normal room or area in your house seems like a lot of work. And, it is. But, let’s take a second to consider what we’re getting into. Once you know how you want your scene to look, you can build a set to suit and decorate it however you’d like — relatively painlessly. So, let’s figure out how to build a set.
Buying the Right Supplies
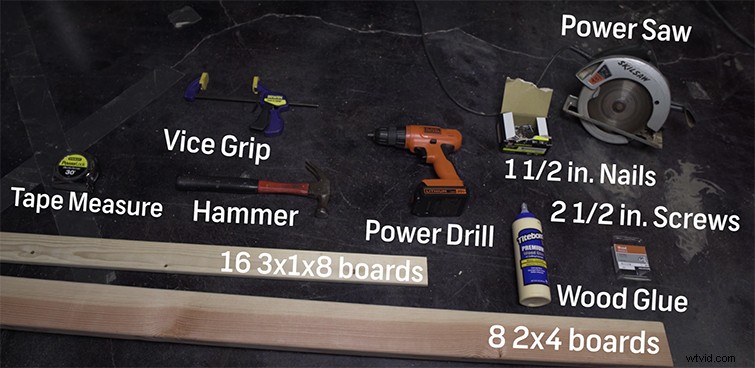
A basic rule of thumb for building studio flats: don’t limit yourself to one type of material. In the tutorial, Robbie uses a Masonite board that is 4×8 feet, which is meant to fit atop the frame he’s built out of eight-food boards. But you can replace that Masonite board with whatever your script calls for to get the look and texture you need.
Before you attach the Masonite, make sure you’ve connected a support slat in between two sides of your frame. A sturdy frame is the key to building a reliable flat that you can use again and again.
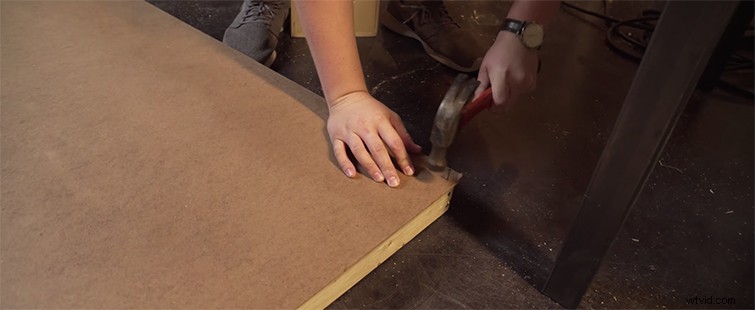
Now, to attach the Masonite to the frame, Robbie nails the Masonite board to the boards (you’ll paint over the nails later). But before he does, he applies wood glue to the frame to ensure that the Masonite is securely attached.
Building the Support
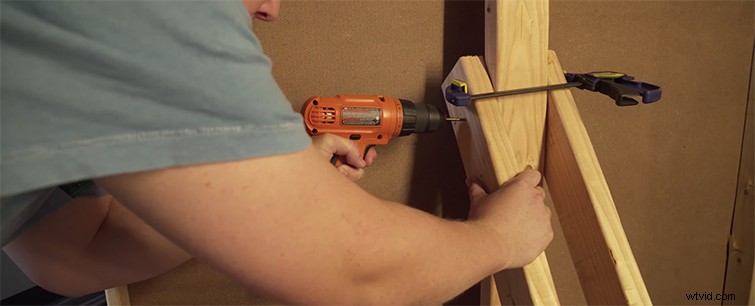
Once you’ve got the flat attached properly, add another support beam to the back of the entire flat. This new beam will be what houses the support stand.
This build is pretty simple. All you need to do is saw a 2×4 in half, creating two four-foot pieces of wood. Then saw each end at a 45-degree angle — this will provide a foot for the supports. Once you’ve done this, line up the boards with that long support beam you just added to the frame, drill even holes on each side, then screw the two legs onto the support beam. (Watch the video for a demonstration.) To ensure a tight hold, use the vice grips while you screw the beam in place. After you’ve got the two legs screwed in, take a 1×3 board and drill into the two legs to prevent them from moving or swaying.
From Script to Screen
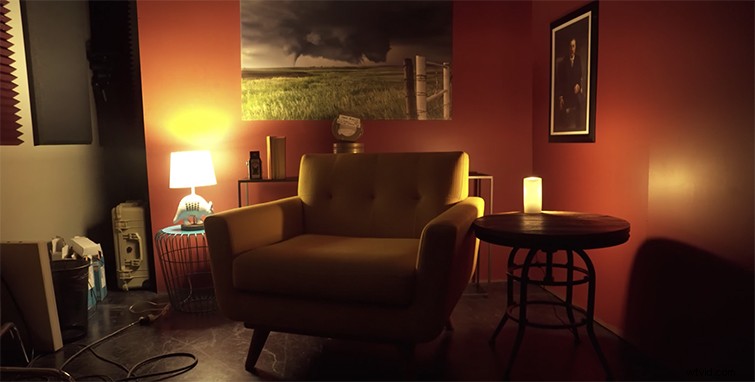
Now that you get the idea, make whatever you want. The Masonite boards used in the video are super cheap and a good resource because you can just paint over them. I recommend using flats because you should never have to use a location to “pass off” as someplace else if you can avoid it. Build a shoot-worthy scene, light it properly, and get the angles you want. The finished product will be worth it.