Negative fill is a simple solution to creating contrast in your images—and it doesn’t have to be expensive. Let’s take a look!
We don’t always need artificial lighting to create dynamic images, as we’re already orbiting a big old natural light, positioned about 150 million kilometers from us—the sun.
On a cloudy or overcast day, the sun gives us light through a huge diffuser. In these circumstances, we often don’t need to worry about changing light—and can work with this significant soft source in the sky. But usually, it’s quite flat.
Introducing Negative Fill
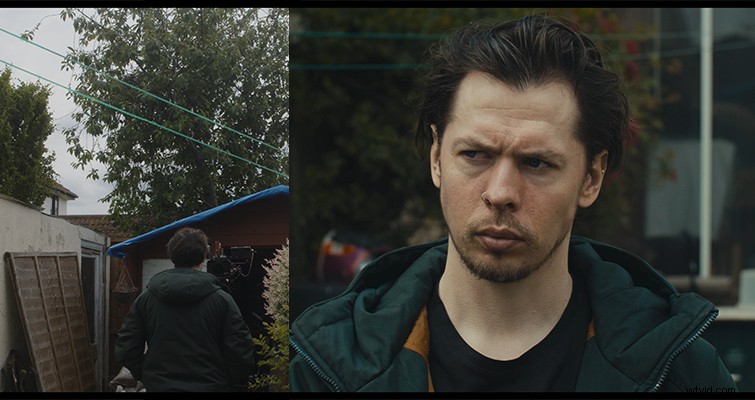
How do we tackle flat light? We introduce negative fill—dark material to cut light from the face, like the flag we used in the image above. Initially, we can see our subject lit from all angles by the cloudy sky above. This makes for a very flat, uncontrolled spread of light on his face. To solve this, we simply used what’s called a flag—this particular tool is known as a floppy. This means our flag can extend in size via an extra length of black material attached via velcro, and the angle of the light being blocked can be adjusted.
Since the light was mainly above us, the angled flag helped to ensure we were cutting light from the side and top, allowing us maximum control. It also gave us the ability to shape the light on the face, making for a darker look and a more three-dimensional one.
But flags and floppies can quickly add up costs, especially if we’re shooting on a micro or no-budget level—and that’s a lot of us! So what can we do to save some money?
Cutting Costs—and Light!
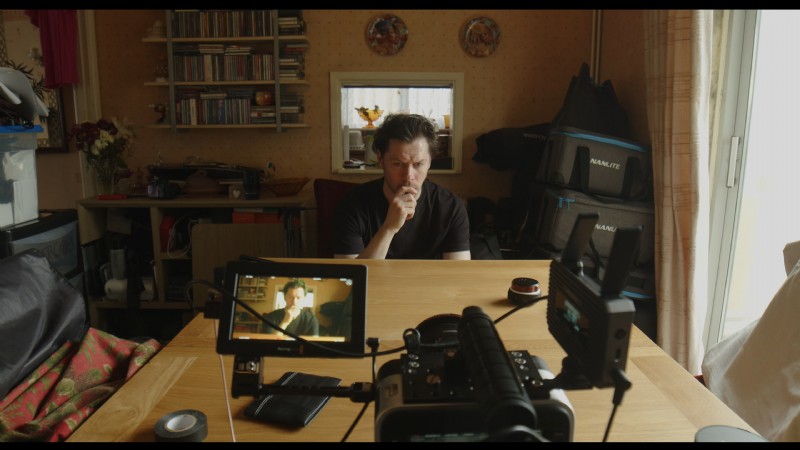
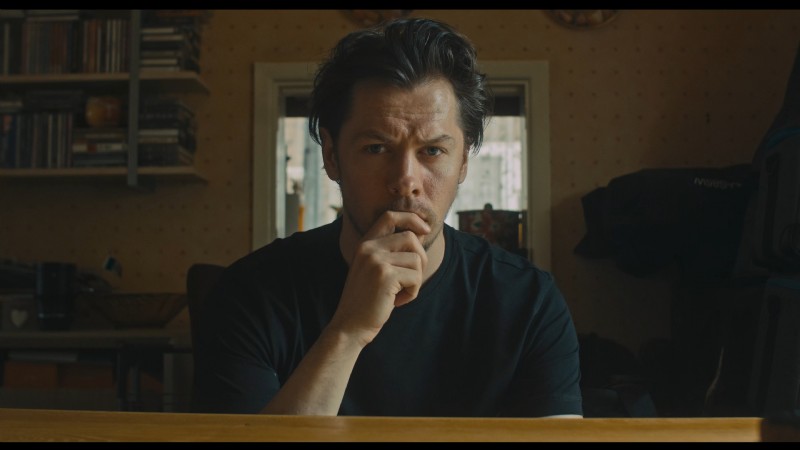
Here our subject was sitting at a table with a large window to his right. We have light bouncing all around the room from this large window, throwing a warmed-up bounce from the wallpaper back into the shadow side of his face and onto the back walls. So here’s a good situation for some negative fill!
But to cut enough light to stop it from hitting the front and walls, we’ll need a good few meters of the stuff. And our floppy already cost us $150—we don’t want to multiply that by six or seven!
So we clipped two lengths of dark material to two boom arms around the room and finished up this cove of negative fill with the floppy. The material is simply two black curtains—which we already had lying around—that you can find for about $18 at any big box store. It’s clipped to the boom arms using cheap plastic spring clamps, which can be bought in packs of six for around $6.
Look how little we’ve spent on blacking out such an ample space while effectively cutting down on the light spill around the room, keeping the shot dark, and utilizing a significant soft source with the window.
Sometimes Negative Fill is Very Subtle
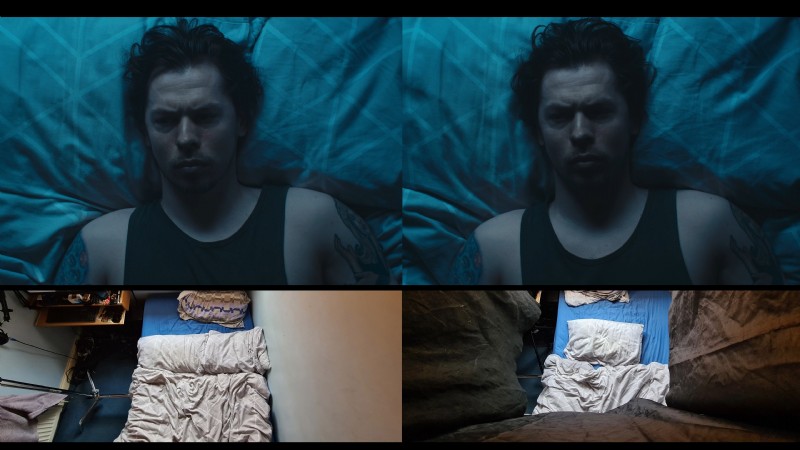
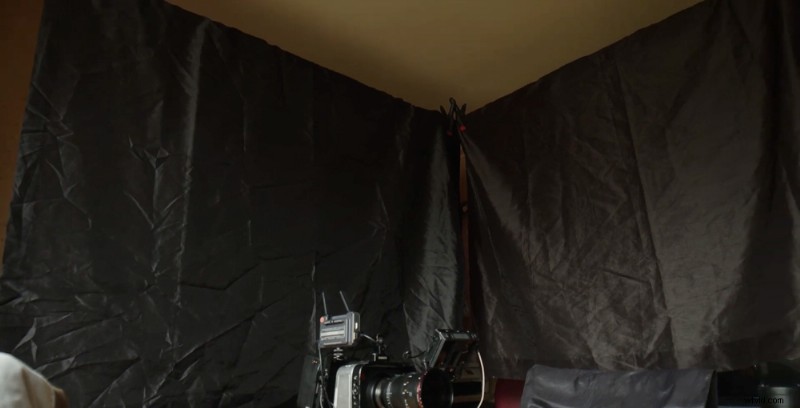
We also shot our subject lying on a bed in a small room, where we had already closed the blinds to direct the light onto the bed and prevent too much spill around the room. But to darken our shadows and increase our contrast a little further, we built a tent of black materials around our subject. This consisted of the two black curtains from earlier and some other black material we had lying around. It’s kind of irrelevant what type of material you use, as long as it blocks light.
The effect here is subtle, but having more precise control over your shadows is often crucial to the final look and feel of the image, as a subtle feeling can often be more impactful than an obvious one.
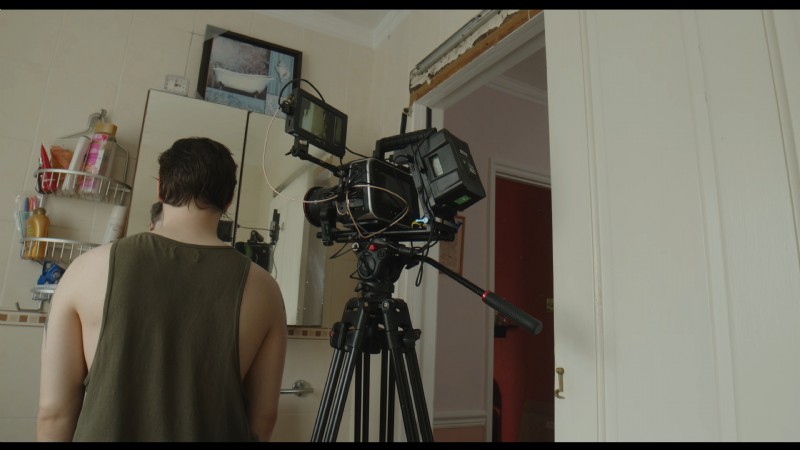
Achieving the Perfect Negative Fill for a Silhouette
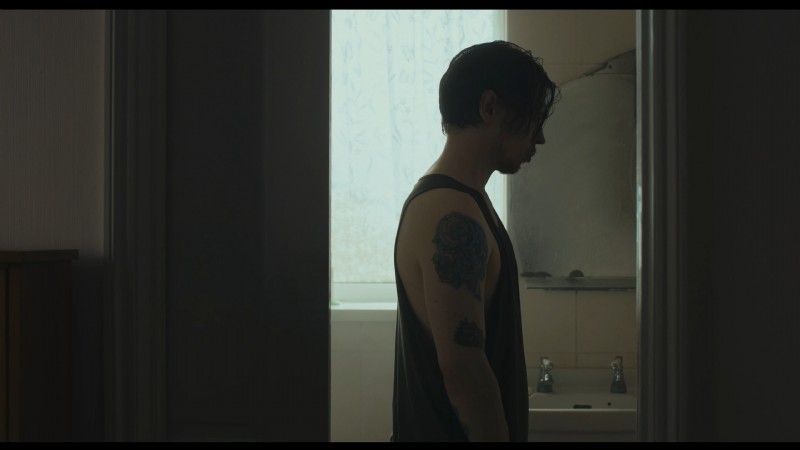
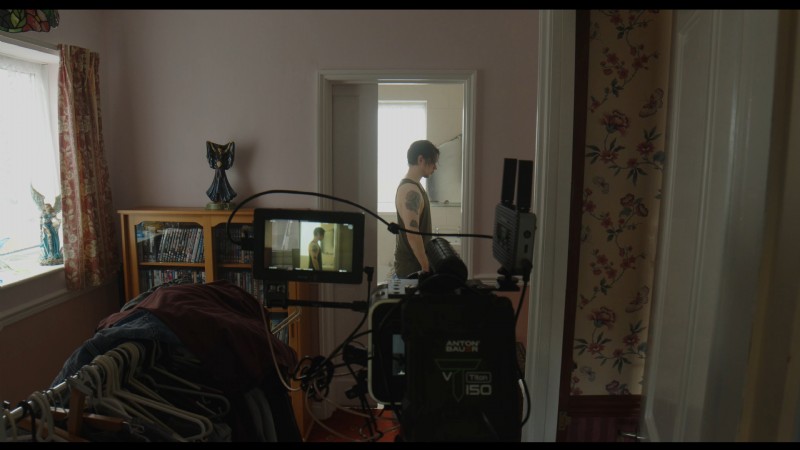
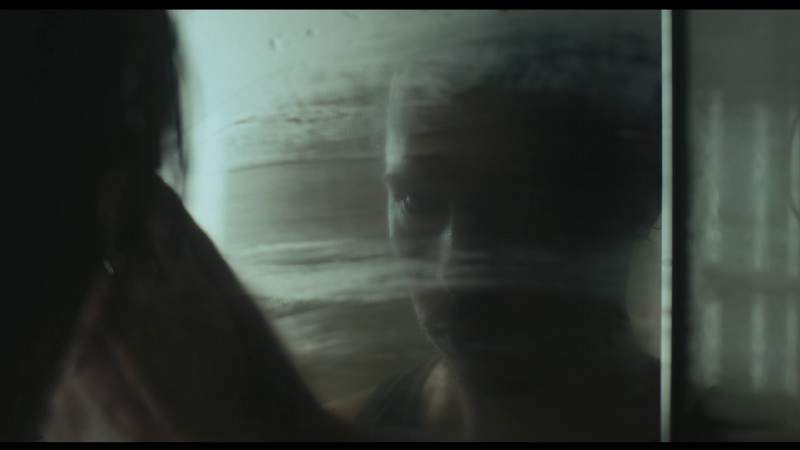
We wanted more of a silhouette of our subject standing in the bathroom doorway. But, since our key light from the window was bouncing off the lighter walls, and because we had light leaking into the room from the hallway, our shadows weren’t as dark as we would have liked.
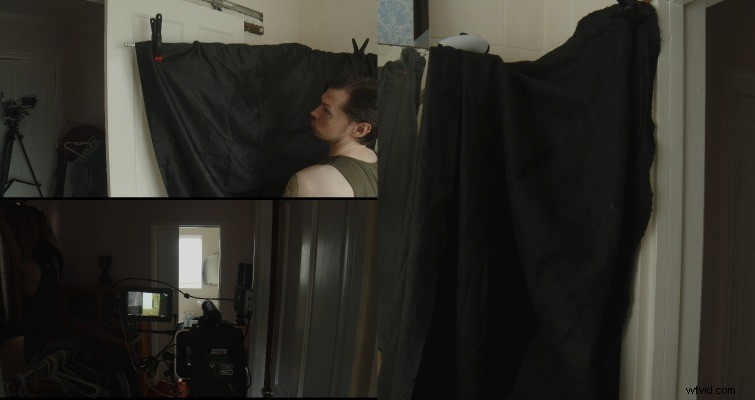
So we did what we could outside the room first—shutting the doors to restrict any spill coming from other rooms and closing the curtains to reduce the exposure on the hallway wall. Since the curtain was a lighter color, we placed our own darker curtain on top to ensure we were cutting as much light as we needed.
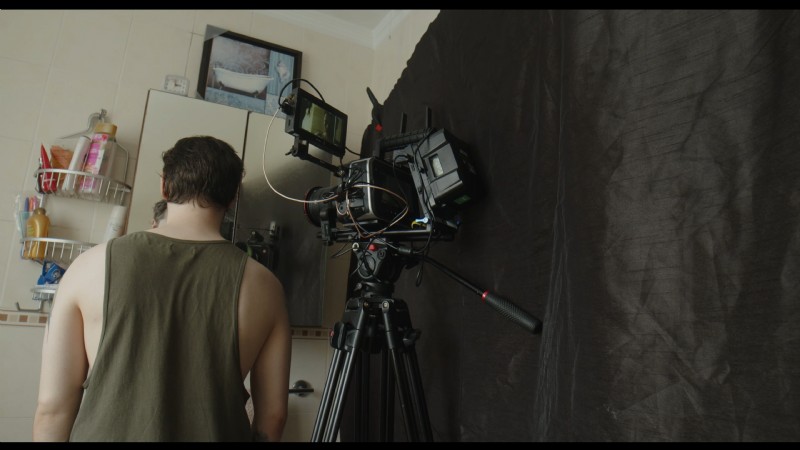
Inside the bathroom, we clipped another black curtain to a boom arm to cut down on the bounce from the bathroom walls. We also covered up another small section just off-camera to cover all bases and restrict as much light as possible.
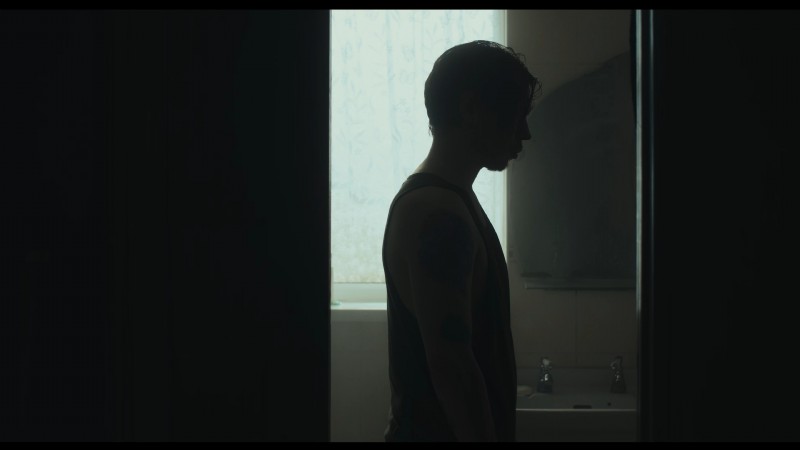
Simply by closing some doors and curtains and hanging some lengths of black material, we were able to cut down enough light bouncing around our location to keep our subject dark, yet the natural light out of the window bright—making for our moody silhouette, while also helping to shape the light on the back wall better, with no distractions in the mirror.
Using Negative Fill to Match Footage Within a Scene
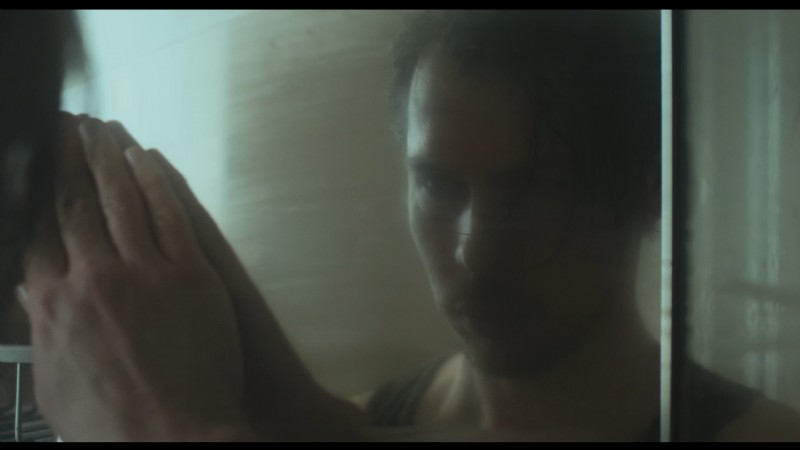
In our final image, the closeup of our subject in the mirror didn’t quite match the darkness of the previous silhouette shot.
So we simply hung another length of black material on a boom arm, covering one side of the bathroom and removing any light bouncing back onto the side of his face closest to the camera.
This provided our added contrast and mood and allowed us to match the previous shot.
Take a look at each image before and after we implemented our negative fill.

Shaping Light on the Cheap
Negative fill doesn’t have to be expensive. Flags and floppies can add up in costs, so one easy way to work with natural light and what you have is by simply clipping dark material to stands and boom arms (or however you can position it to block light safely). This will allow you to utilize already existing natural light and to create mood and depth in your images.
For more budget lighting techniques, visit these articles:
- Creating Horror Lighting with Just One Light
- Use These Inexpensive Hacks to Manipulate Your Video Lighting
- From Fire to LEDs: Types of Lighting for Your Film Set
- Without Additional Lighting, Should You Expose For The Highlights or Shadows In Digital Filmmaking?